PROJECT
Make a medal rack

Rob Brown

Find more Gifts / Crafts projects
If someone you love has a medal collection they’re proud of, they’ll surely love this special display rack.
My daughter, who plays soccer and takes part in cross-country running and Nordic ski races, has started to build up a small collection of participation and placing medals. She’s proud of her accomplishments, but the medals were sitting in a basket in her closet, out of sight. I did what any proud dad would do and built a medal rack so she could display her collection.
Make a medal rack
Keeping it simple
I didn’t want an overly ornate rack to take away from the medals, so I opted for a fairly simple design that would still showcase the medals. Two sides on either end of a shelf, along with a couple of metal rods to hang the medals from, was all that was needed. She liked the rich colour of black walnut, but just about any species will work.
The rods
Before making any sawdust, I needed to decide what material the rods would be made of. Lengths of wooden dowel rod would be easy to machine, but I was worried about strength. I didn’t want to use a 1″ diameter wooden dowel, as that’s not the refined look I was after. On the other hand, a 3/8″ diameter wooden dowel rod would flex too much. Thin dowel rod (around 3/8″ or less) tends to warp and may look unsightly as time goes on.
My solution was to go with an aluminum dowel rod. It contrasts nicely with the black walnut and provides a sleek look to this project. I bought a 48″ length before I started this project, so I knew what size holes to bore in the inner faces of the two sides. You could also go with a different material for the metal rod, possibly a narrow diameter copper pipe.
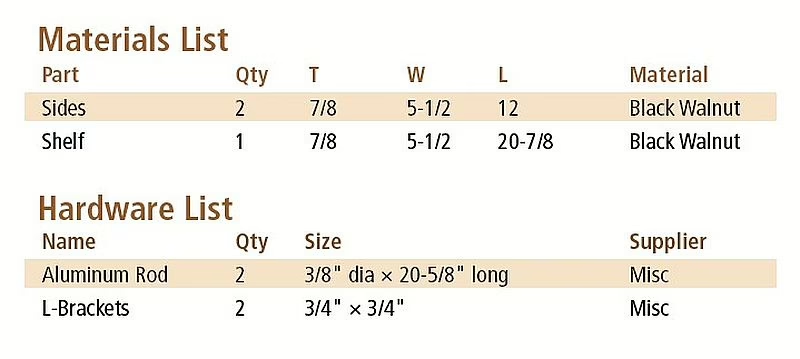
Break out and lay out
Break out the three parts and dress them to final thickness. For now, I kept the two sides in one long blank because that was going to make machining the joints a bit easier. Even though the two sides are only 12″ long each, I cut this blank about 4″ longer than I needed. Straighten one long edge of each part, then rip them to final width.
A butt joint, reinforced by dowels, would be strong enough for this project, as it’s never going to take much stress or abuse, but I liked the idea of having a visible joint. A sliding dovetail was what I went for. It’s a bit more involved to create, but it’s attractive and will provide more than enough strength.
Lay out the two sides on the blank. Mark the overall length of the two parts and the location of the shelf-to-side joints. The finished rack will have the sides extend above the 7/8″ thick shelf by 1-1/2″, so make sure to centre the joint 1-15/16″ away (1-1/2″ + 7/16″) from the upper ends of each side.
Sliding dovetail grooves
It’s always best to machine the groove of a sliding dovetail joint first, then machine the mating dovetail tenon to fit the groove.
A router and router bit work best when it removes only a small amount of material. For this joint, I used a dovetail router bit that was 5/8″ wide at the widest point, and set it to cut 3/8″ deep. That means the bit is being asked to remove all that material in one pass, as you can’t set a dovetail bit to only cut half the finished depth. In order to make this cut safer and smoother, I wanted to remove some of the waste before routing the finished dovetail groove. I would do this by machining a dado on my table saw.
First, I needed to know the exact outer profile the dovetail bit would leave, so I didn’t remove too much material. I set up the 5/8″ router bit in my router table and raised it to cut a 3/8″ deep dovetail groove. With a scrap workpiece clamped to my mitre gauge, I machined a dovetail groove into a piece of softwood. This gave me the exact locations of the sides of the dovetail groove. I could then transfer those surfaces to the workpiece and decide on the width and height of the dado I could machine into the workpieces to remove about half of the waste in each dovetail groove.
Once the dadoes were machined into the sides, I could then carefully locate and clamp the side blank to my mitre gauge, make the first pass, then adjust the location of the blank and make the pass in the second side. Ensure even, downward pressure on the workpieces as you machine the dovetail grooves.
Sliding dovetail tenons
In theory, you can keep the bit set to the same height to machine the tenon portions of these sliding dovetail joints. I, however, find that since there are some very slight inconsistencies with the flatness of my router table, leaving the bit at the same height means the tenons end up slightly too long. You may not have this problem. You can set up your router table fence and check the depth by machining a practice tenon on the end of the workpiece, if the workpiece is longer than needed. Another approach is to use a piece scrap that’s been machined to the exact same thickness as the shelf to set up the router table’s fence.
When machining sliding dovetails on relatively narrow workpieces (say, less that 8″ wide) I often clamp a piece of 1/4″ thick material on top of my router table’s surface. This provides me with a smooth surface to guide the end of the workpiece past the rotating bit.
With the 1/4″ board in place, I set up the fence so only a small portion of the dovetail bit protrudes from the face of the fence, then adjust the height. I first dial in the height of the bit, then start working on the location of the fence to give me a dovetail tenon that fits the mating dovetail groove.
The main risk with machining sliding dovetail tenons is making them slightly too narrow and ending up with a joint that’s loose. As long as your shelf blank is cut at least a few inches longer than needed, you can use the first dovetail tenon as practice and cut the tenon off if you machine it too small.
If this is your first time machining a sliding dovetail joint you can break out some extra scrap of the exact same thickness as the shelf to give you some material to dial in the position of the fence.
Square up one end of the shelf, then adjust the fence to sneak up on the final position, then machine the sliding dovetail tenon on one end of the shelf. Test fit the joint. You want a joint that doesn’t slide together too easily, though you don’t want the joint to be so tight you need a mallet to drive it home. If it’s too loose, trim the dovetail tenon off and start again. When I’ve made a mistake on a critical workpiece, and can’t cut the undersized tenon off, I’ve glued on a piece of veneer to one side of the dovetail tenon to give me a bit more material to re-machine.
Once you have the first one complete, it’s time to cut the shelf to final length and machine the joint on the other end. This is where you only have one shot. Though, having said that, in this case it’s not the end of the world if you have to trim about 1/2″ off the length of the shelf to re-machine the joint. This just means your medal rack will be narrower than mine.
Shape the sides
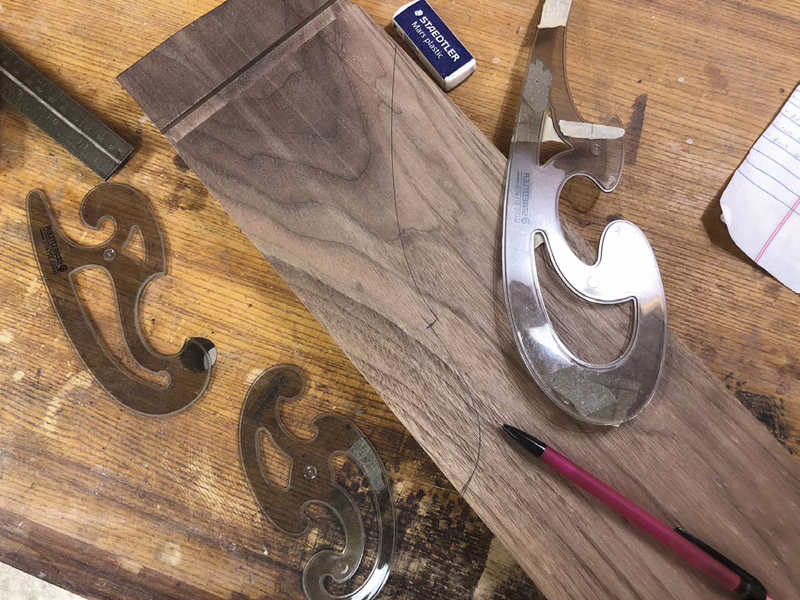
Mark the shape of the sides on the two workpieces, making sure to keep the sliding dovetail joints the correct distance from the upper ends of the sides. I used a pencil and French curve to mark up one side, cut it to size, then traced the second side using the first. Sand the edges smooth.
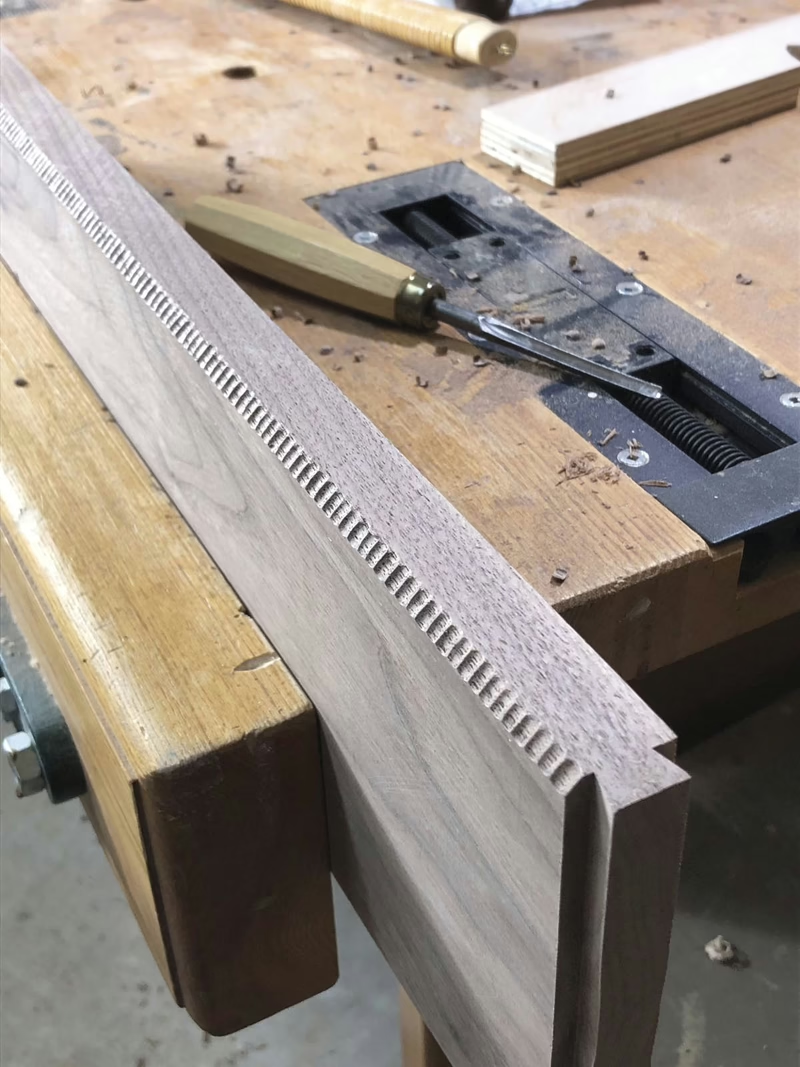
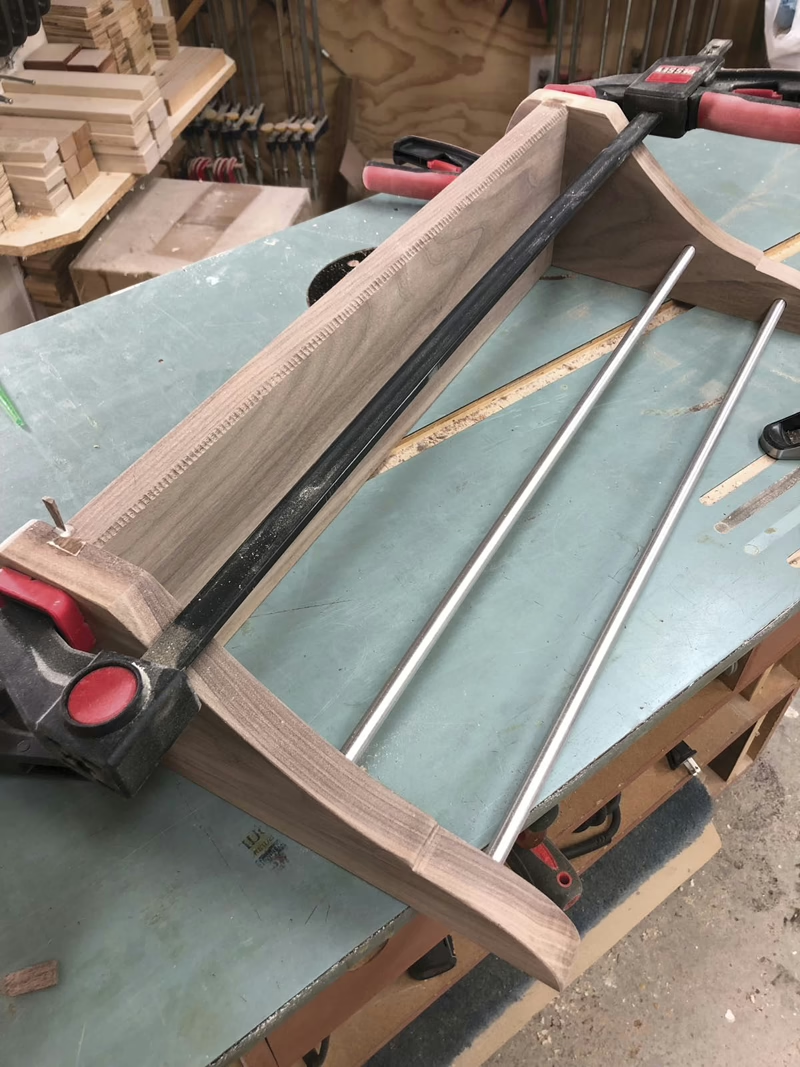
Texture the shelf
This part can be skipped if you’d like, but I find it adds a bit of spice to this small project. I used a small, sharp, carving gouge to add a series of small notches to the lower front corner of the shelf. There are many other approaches to texturing you could add here. Because you’ve already put some time into creating the shelf, complete with two well- fitting sliding dovetail joints, it’s probably smart to practice on some scrap before adding any texture to your project.
Work the rods
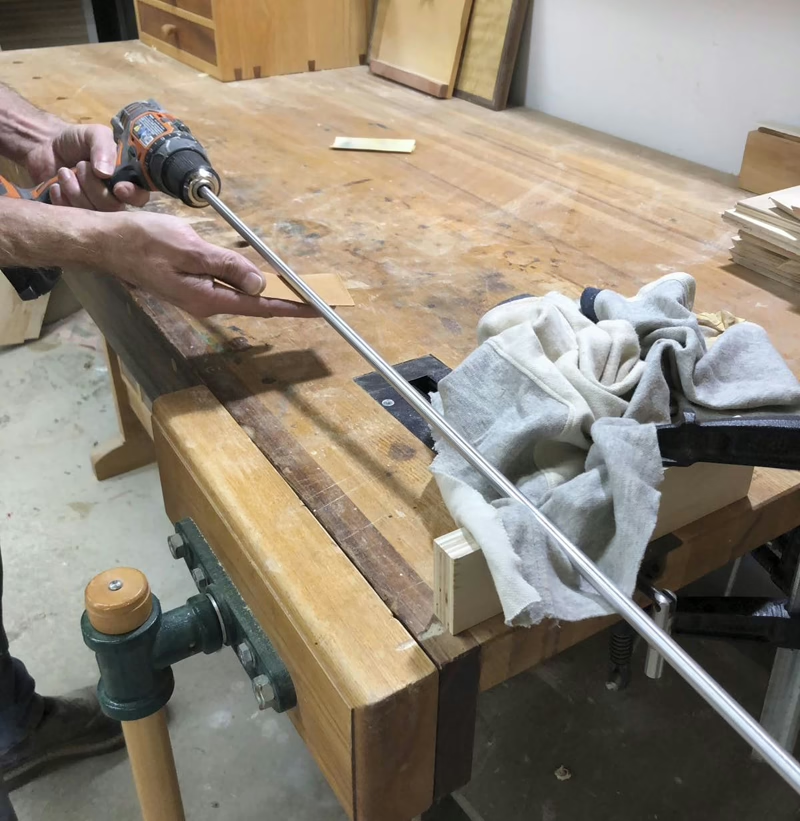
It’s time to turn your attention to the hanging rods. The finished surface of the rod I bought wasn’t beautiful and I wanted to make it a bit more attractive. I chucked the 48″ long rod in my drill and made a simple jig to hold the distant end of the rod while I rotated it in my drill. The jig was a piece of 3/4″ thick plywood, about 3″ × 8″ with a 1″ deep V-notch cut into it along the 8″ long edge. Once I put a piece of cloth in the V-notch the rod sat in the V-notch and didn’t move around or get scratched.
Turn the drill on and move progressing grits of sandpaper along the surface in an even manner. Stop whenever you like the look on the surface of the rod.
Drill holes
The rods will sit in a hole in each side. Locate and drill those holes now. It’s a good idea to drill a test hole in some scrap before committing to the real thing. The holes only need to be slightly over 1/4″ deep. Next, check to see exactly how long each rod needs to be. In theory, this should be the “between shoulders” measurement of the shelf plus 1/2″ to account for the depth of two holes. Cut your rod to that length, making sure to err on the short side, rather than the long side, of this number. Test fit the entire project, then sand all the wood parts and prep for assembly.
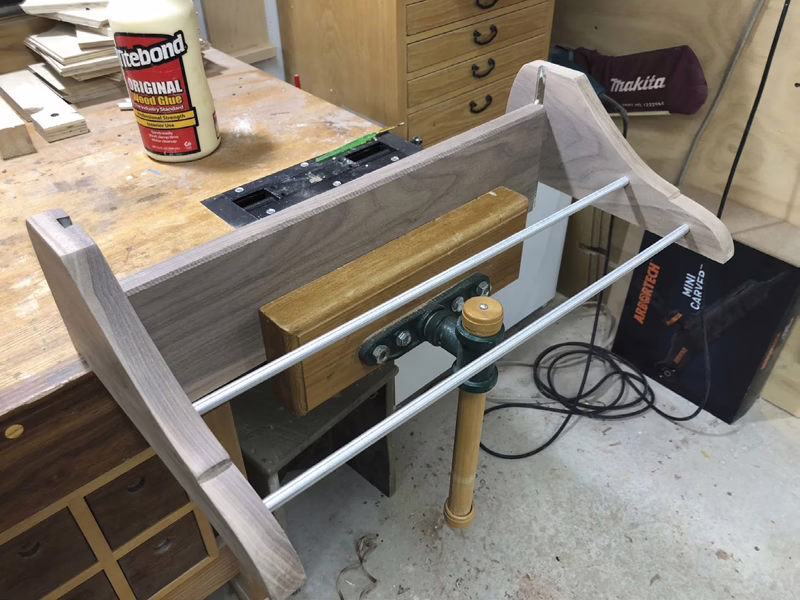
Assemble the rack
Gather all the materials you need to properly assemble the project, then start applying glue. I add a bit of glue to both the dovetail tenons and grooves. Too much glue will cause squeeze-out, and due to the strong nature of these sliding dovetail joints, I slightly err on the side of applying less glue, rather than more. If this had been a large cabinet that would see heavy use, my approach would likely be different.
If you’ve dry assembled the project already, you’ve realized both sliding dovetails have to come together at the same time, while both rods are in their respective holes. Adding the rods after the three wood parts are assembled isn’t possible. Working quickly, I applied glue to the parts, clamped the shelf in my vise, positioned the two rods in the holes and brought the sides into place. Once the dovetail joints were partially assembled, light mallet taps helped bring the sides into place evenly. Halfway through the process, I moved the assembly out of the vise and onto my bench so I could lightly and evenly drive the parts home.
Finish it off
There’s nothing wrong with applying a finish to the rods, though I wanted to apply an oil-based spray polyurethane to the black walnut, and didn’t want to add any sort of yellowing finish to the nice, bright aluminum rod. I taped off the rods, then applied a finish to the wood.
Hang it up
Once the finish has cured, and you’ve removed the tape from the rods, find some studs and use 3/4″ × 3/4″ L-brackets to fix the medal rack to the wall. I hung the rack fairly high, so the medals could dangle down. Because of this, the L-brackets were placed on the upper face of the shelf so they wouldn’t be seen.
The rest was up to my daughter, who hung her collection of medals and added a photo and trophy to the shelf.

Photos by Rob Brown
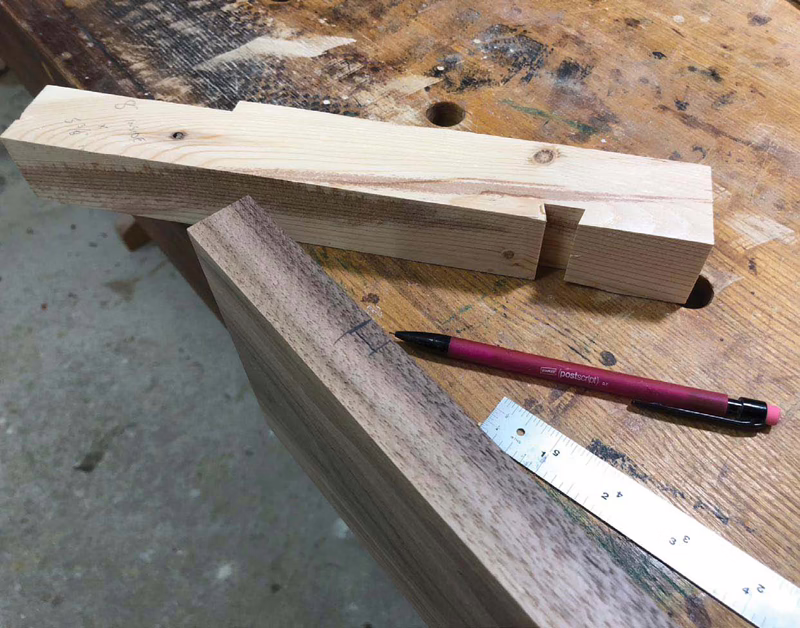
Check for Size
So you know how wide and deep to machine the dado, cut a sliding dovetail tenon into a piece of scrap softwood. The dado will just remove some of the waste so the process of routing the dovetail groove is safer and leaves a better cut.
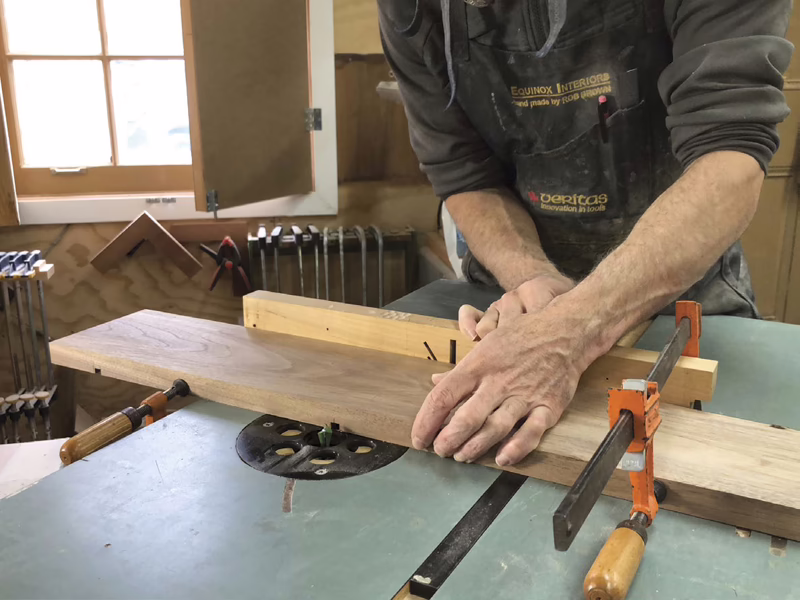
Machine Dovetail Grooves
While the two sides are still in one blank, Brown clamps the blank to his mitre gauge and makes the two passes, making sure to keep even downward pressure on the workpiece during the passes.
Even Support
Brown prefers to add a piece of 1/4" thick material over the throat area of the router, and adjust the height of the bit, to machine the sliding dovetail tenons. The piece of 1/4" thick material offers smooth and even support for the end of the workpiece to run over.
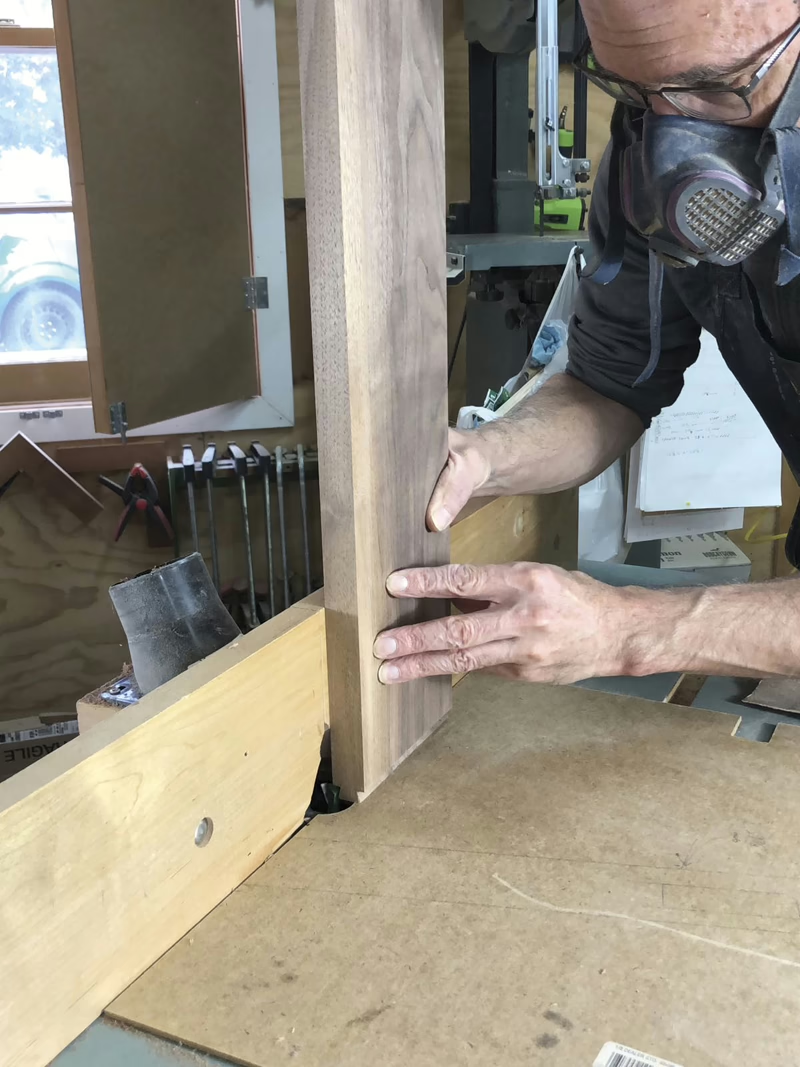
Lay Out the Curves
A French curve template will help you lay out even curves on the sides. Ensure the top of the side is an appropriate distance from the dovetail groove, though there’s some flexibility here.
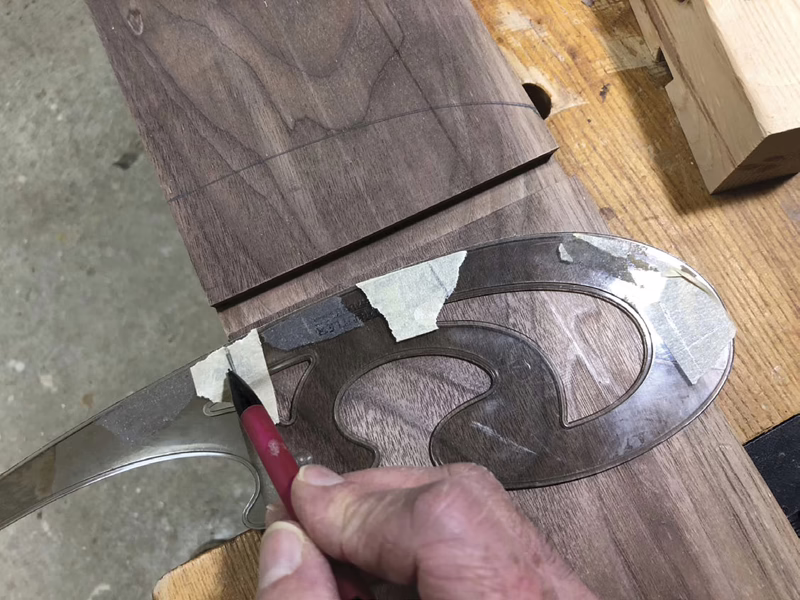
Leave Enough Room
The curved portion of the side that’s below the dovetail groove should leave you with enough material to locate the medal hanging rods. Once one side has been shaped, trace it onto the other side so both parts are even.
Add Some Spice
Texture can be added to the lower front edge of the shelf, although there’s nothing wrong with skipping this step.
Rotate the Rod
Brown chucked the rod in his drill, then used a support with a V-notch to keep the other end stable, before rotating the rod and sanding its face so it looked and felt smooth.
Cut It to Length
A hole in a piece of scrap the same diameter as the rod will help keep the rod stationary while you cut it to length.

Bring It All Together
Brown used his vise to hold the shelf steady so he could start assembling the sides onto the shelf. Once the sides were about halfway seated, Brown had to remove the shelf from his vise and just place the assembly on top of his bench to bring the parts fully together.
Cover Up Any Mistakes
If you do end up with a slight gap between any of the mating surfaces, a small wedge and some glue will take care of that.
Keep Them Unfinished
To ensure no finish got on the rods, Brown applied tape to the distant ends of the rods, then used newsprint to cover the rest of the rods. Brown preferred no finish on his rods, but there’s nothing wrong with applying a finish to your rods.
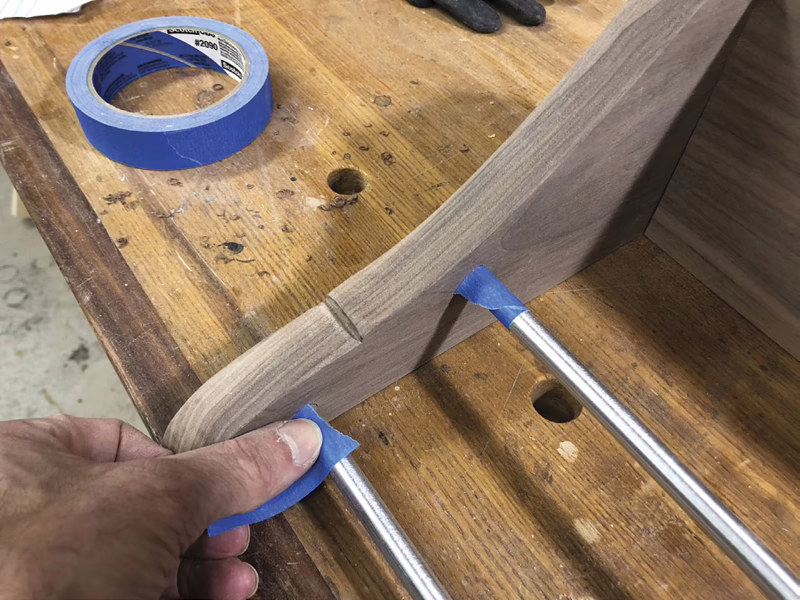
Illustration by Len Churchill