PROJECT
Garden Trellis

Rob Brown

Find more Outdoor projects
Spruce up your yard with this great looking and easy-to-build garden trellis.
I love wood, but I also enjoy using other materials whenever possible. They add contrast and texture, and often different materials add a functionality that wood cannot. In this case I chose to use copper pipe as it does add a lot of colour and practicality to this outdoor trellis. And over time the patina will develop, turning a deeper brown or even green, depending on how it was treated. You could easily use wooden dowel rods in place of the copper pipe.
Because the flowers will eventually cover most of the trellis, I decided to follow my high school shop teacher’s advice and “Keep It Simple Stupid”. Any curves would likely disappear under the foliage. As with any non-wood items you use for a project, make sure you have everything you’re going to use before you start. I found out the hard way that 1/2″ diameter pipe is actually 5/8″ outside diameter and 1/2″ inside diameter. I should have known better.
One of the nice things about this project is that the sizes are not critical. You can easily adjust the trellis to suit the materials you have on hand or the look you want. The cedar I used had been in my shop for years. It was dry. Take your time to dry any 2 x 4 lumber you buy from big box stores because it will be wet. With the two vertical pieces still together in one blank, cut them to length. I chose 56″ for the overall height. Cut the top on a 30˚ angle to help shed water and to add a touch of style.
Garden Trellis
Drill the Holes
I separated each of the nine copper sections by 6″. Lay out the location of the holes on the side of the 2 x 4 and mark them with crosshairs. Keep them equidistance from the top and bottom. Thankfully, accuracy isn’t critical here, since both vertical members will be drilled at the same time, and then ripped apart, to ensure consistency. After drilling a test hole in some scrap and checking the fit of the copper pipe, drill all the holes. I used a 5/8″ Forstner bit for this, as it gave me a perfect friction fit, but a spade bit or twist bit will work also. Since your drill press likely can’t drill the entire depth of the 2 x 4 just drill as deep as possible – the rest will be drilled once the two pieces are cut apart. Now rip the 2 x 4 in half on a table saw. Back at the drill press, finish the holes in the one vertical, making sure to use a flat bottom board and a slow plunge rate to reduce chipping. Lightly joint all the parts then plane the other two sides smooth, taking no more than 1/16″ from each face.
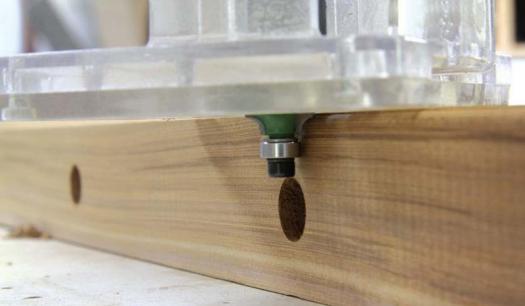
I used a 1/8″ diameter round-over bit to ease every corner. The exact size doesn’t matter, but you should keep an eye on the tracing bearing to make sure it doesn’t drop into the holes and create an uneven edge.
Attach a total of four 4″ long blocks to the back of the uprights in order to keep the trellis away from the fence it will be mounted on, giving the flower vines some room to work their way up the trellis. The blocks I used were 1-1/4″ square. Pre-drill two holes per block and fasten them with exterior screws and waterproof glue.
After sanding the two cedar sections, apply a finish. Usually I opt for a penetrating oil finish on outdoor products because they don’t peel, but this time I went with a spar varnish. Since there are only two small wood sections any maintenance will be on a smaller scale, if needed at all. I also like the look of a spar varnish. Three coats and the cedar was ready for the elements.
Using Copper Pipe
Since I needed nine pieces of pipe, I bought two sections of 12′ pipe. Each pipe was divided into five pieces – each about 28-3/4″ long. A hacksaw works well. Sand or file the ends, as they’ll be sharp. The inside of the pipe will need some TLC too.
There are many options for dealing with the colour of the copper. It can be left alone to turn a medium brownish red colour. It can also be lightly sanded then coated with a varnish or polyurethane if you want to keep the brighter sheen. If you’re looking for the green patina that’s associated with many rooftops, I’ve heard a number of things. A metal worker I talked with mentioned orange juice and tomato juice as two so-so options, but he said, strangely enough, that urine works best. I’ve also heard Miracle-Gro mixed with water then brushed on does the trick. What option you choose is completely up to you!
With the parts completed, start with one vertical cedar section and insert all the copper pipes about 5″. Then line up the other section of cedar with the pipes and insert each one-by-one into the appropriate hole. A mallet and block come in handy to evenly tap everything home. If the fit is on the loose side, you may want to drill a small hole through the wood into the pipe and hammer in a small copper nail. It will stop everything from moving and help keep the trellis together for years to come.
Photos by Rob Brown

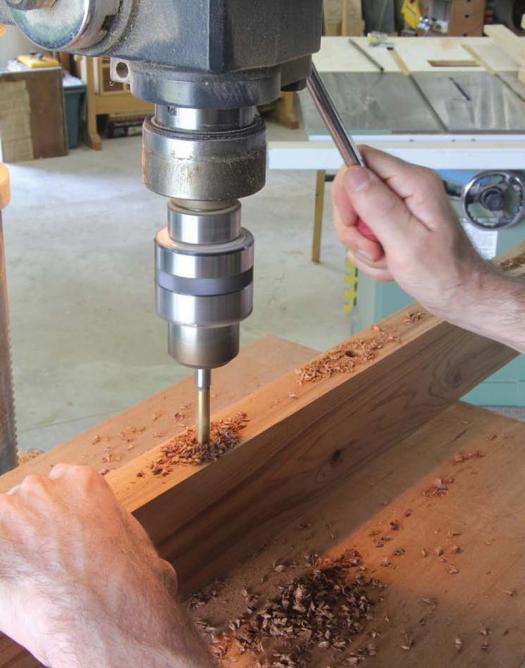
Mark then Drill the Holes
With a square and pencil, mark the location of the holes that will accept the copper pipe on the side of the 2 x 4. A drill press will keep the holes square and straight. Test the fit in some scrap wood before drilling all the holes.
Ease the Edges
A small diameter router bit installed in a trimmer or router will soften the edges. Be sure the bearing doesn’t dive into the holes and gouge the wood.
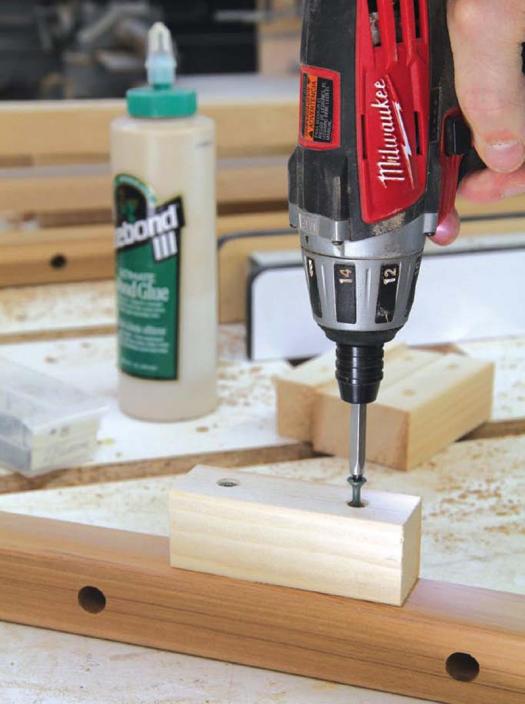
Attach a Hanger Block
Two small wood blocks can be glued and screwed to the back of each of the wooden vertical members. These blocks will give you something to screw into when hanging the trellis, as well as allow more space for the flowers between the fence and the trellis.