PROJECT
Garden Bench

Ryan Shervill

Find more Outdoor projects
Every garden needs a garden bench – a place to rest while absorbing the beauty of nature.
A handmade wooden bench will not only enhance your garden sitting experience, but serve to grace the garden area itself. I was able to make this bench out of a single board of yellow birch, as I have access to old growth lumber, cut 165 years ago. It’s an awesome experience to be able to work with such large pieces of such beautiful old growth wood.
To make this bench out of a single board you’ll need rough 8/4 stock about 18″ wide and 8′ long. If you don’t have large enough stock you can easily laminate smaller pieces together. While you can use almost any wood: teak, mahogany, redwood and western red cedar are all good choices.
Garden Bench
Prepare the Board
• Begin by milling your board. I used a straight edge and a circular saw to cut off one of the ‘live’ edges of this board. I then set the fence on the table saw, and with a ripping blade I trimmed off the other live edge leaving me with a straight edged plank to work with.
• Flatten and true the board. My piece was far too large for my jointer. While I flattened the board with hand planes and winding sticks, you could also do this with a sled for the planer, or using a carriage and router set-up. First I flattened one face of the board and then trued it up in the planer using light passes. You want to end up with a flat board that measures 1 ½” thick, with two clean faces.
• Once the board is trued, joint one edge, and then use the table saw to square the opposite edge.
• Lay out the parts for the bench. This is where careful consideration of your stock pays off. My board had sapwood (creamy white) wood for about 75% of its length. Then, because of how it was cut at the mill, it shows heartwood (reddish brown) for the last quarter or so. I decided to follow the grain of the board for the legs. You want to pick the nicest stock for the bench seat, and reserve the rest for the legs, breadboard ends, and stretchers.
Cut the Parts
• Before cutting any of the parts, trace them out on the board in pencil. Cut out the parts oversized and then trim them to their final measurements.
• The seat top (A) should measure 12 ½” x 44″, (which is small enough to run through a 13″ planer – if you have a smaller planer rip the boards in half, dress them, and then re-glue them together). The breadboard ends (B) should measure 1 ¼” x 4 ½” x 14 ½”.
• If you want to form a gentle curve in the breadboard ends as I did, now is the time. Mark your curve in pencil, band saw, and then sand up to your lines.
• Cut the stock for the legs (C). I made the legs with a gentle curve, though you can make them straight. If you use a curve, ensure that it ends within 7” of the top on the inside face to allow easy attachment of the stretchers.
• Cut the stock for the stretcher (D) and braces (E). When milling the stretcher ensure that the top edge is flat, as it will provide additional support for the seat.
Assemble the Top
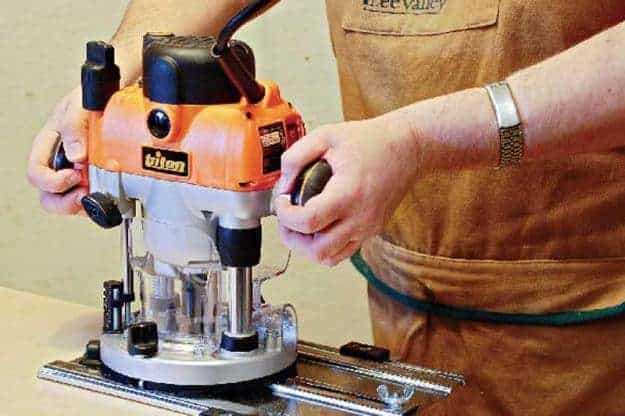
• The top needs to be flat, but still allow wood movement. The simple solution is to use breadboard ends. Breadboard ends are comprised of a narrow board placed at the end of a panel, and running perpendicular to the grain in the panel. They provide an easy way to make strong, stable joints. I used a hand held router spinning a ½” straight bit to mill a 12″ x 1″ deep slot into the ends of the main board.
• Using the table saw and a ½” stacked dado blade set, mill a matching groove in the breadboard ends.
• Notch the breadboard ends to allow fitting of the legs. Carefully lay out a 1 ¼” x 1 ½” notch on the inside corners, and cut it out with the band saw or handsaw.
• Cut a piece of ½” Baltic birch ply to fit into the groove and glue it into the end pieces, effectively forming a stable, strong spline.
Attach the Legs
• Cut a 1″ x 1 ¼” notch into the top of each leg.
• Apply glue into the notches of the legs, and clamp them in place on the breadboard ends.
• Once the glue has set, drill a ½” hole 1″ deep, and drive a 1 ¼” #8 wood screw through the leg and into the end. Apply some glue into the holes, and insert a ½” x 2 ¼” fluted dowel. Trim the ends of the dowels flush with the legs.
• Put a small amount of glue on the ends of the braces, and put them in position between the legs. Put a clamp across the bottom of the legs to hold the assembly in place, and drill two ½” holes completely through the leg and 1″ into the brace. Apply glue to a ½” x 2″ fluted dowel, and drive it into the hole. Use another piece of dowel with the flutes sanded off to countersink the glued dowel until it bottoms out in the hole. Then, using a tapered ½” plug cutter, cut plugs from a contrasting wood (I used bloodwood) and glue them into the holes.
Final Assembly
• Put a little glue on the breadboard tongue, applying it only to the center ⅓ of it’s length (to allow for wood movement) and slide the ends into place. Check that the legs are 90° to the bottom of the main board, clamp, and allow to dry.
• Test fit your stretcher between the two braces, and once satisfied with the fit, slide it into place and secure it using the same countersunk dowel approach outlined above. You can add some visual interest to the top by doing the same thing. I chose to use three dowels, but one would suffice. If you wish, you can eliminate this step completely and have a ‘clean’ top by securing the stretcher to the top with a #20 biscuit instead.
• Chuck a ¾” round over bit into a router, and round the front and rear edges of the seat, stopping approximately 2″ from each end.
• Using a sanding drum, round over the ends of the breadboards.
• Using a sanding drum shape a cove along the end-grain of the breadboard ends and across the top of the legs, extending about 1″ to 1 ½” along the edges of the seat.
• Complete rounding over the rest of the breadboard ends.
• Sand your bench to 180 grit, then apply the finish of your choice. I used polymerized tung oil as it is easy to apply, relatively durable, and brings out the character in figured woods. I applied five heavy coats over as many days, wiping off any excess with a clean rag. Allow the finish to fully cure, and then apply a coat of wax.
This bench looks great outside on the porch, in a sunny garden spot, or even in your living room.
Winding Sticks
When levelling a panel with a hand plane, a pair of winding sticks will help you determine when the panel is flat and true. Winding sticks are two pieces of narrow wood sticks whose edges are perfectly flat and square. The sticks are placed on either end of the panel that is to be levelled. You then look down across the tops of the sticks. If the panel is not level, the tops of the sticks will not be parallel. With judicious hand planing and constant re-checking with the winding sticks you’ll eventually turn the panel into a flat, level surface. It might sound like a lot of work, and it is. But it’s enjoyable work, and when completed gives you a level of satisfaction that you just can’t get from running the panel through a thickness planer. In an upcoming issue of the magazine we’ll show you how to use winding sticks to level a panel like a pro.
– CWM
SOURCES
Lumber
Winding Stick
Tung Oil
Photos by Winding Sticks Photos courtesy of Lee Valley
Illustration by Mike Del Rizzo