PROJECT
Easy build tool tote

Danny Proulx

Find more Shop projects projects
This toolbox tote is easy to build and makes home repairs much easier, because all your tools are close at hand at the work site.
When friends or family call on you for help, all you have to do is load up the tote and you’re on your way – no running back and forth for another handful of tools.
The tote has a bottom-mounted tray to ensure easy access to hand tools. Simply unlatch the draw catches and the hand tool tray is released from the main box. The bottom section holds small tools; the top holds levels, carpenter and combination squares, and any other tools or supplies necessary for the job at hand.
I used pine for this box, but just about any solid wood or sheet material will do. Hardwood will be more resistant to bumps and dents. Because plywood does not expand and contract much the joints can be glued to really add strength to the tote.
Easy build tool tote
Cut Sides and Ends
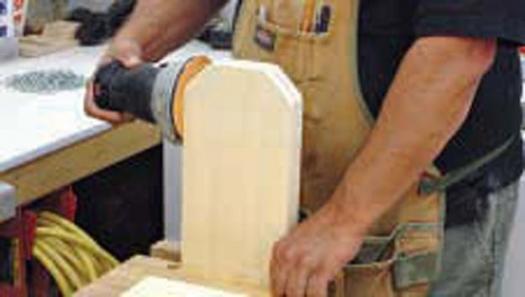
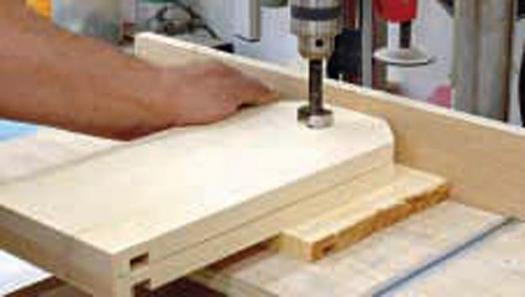
Cut the side (A) and end (B) panels to size. Cut 45º mitres on the tops of both ends, 1 1/2″ in from each side edge. Clamp the end panels together and ease the sharp corners with a sander.
Form Dados
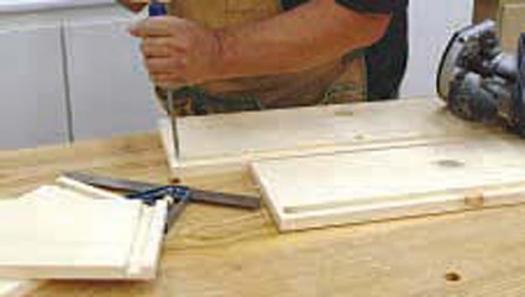
Cut a 3/4″ x 3/8″ deep dado 1/2″ above the bottom edge of each end and side panel. Stop the dadoes 3/8″ short of both ends. It is easiest to cut these with a table mounted router.
Drill Handle Holes
Clamp both panels together and drill 1 1/4″ diameter holes centered on each end panel, 2″ below the top edge. Use a piece of scrap lumber under the boards to prevent tear-out.
Assemble the Box
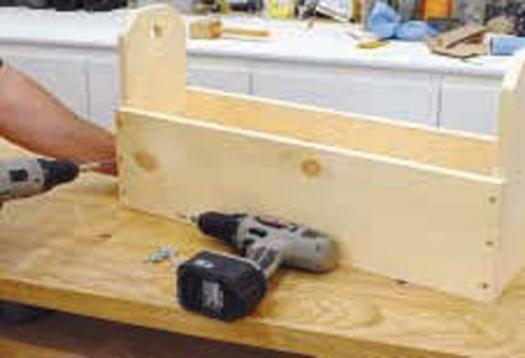
Install the bottom board (C) in the dadoes, but don’t use glue so it can expand and contract without cracking. Assemble the tote box and clamp tightly when all the parts are aligned. Counterbore screw holes using a 3/8″ bit, and secure with three 2″ screws.
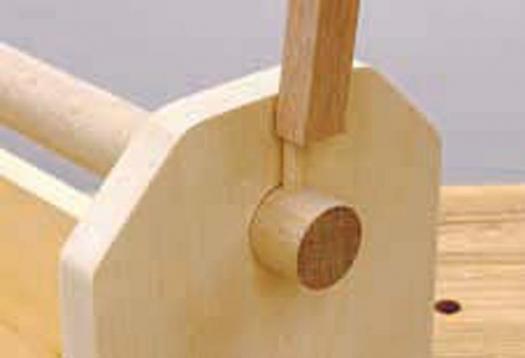
Install the Handle
Cut a 1 1/4″ hardwood dowel 30″ long for the handle (D). Drill two 5/16″ diameter holes through the rod, 3/4″ on center from each end.
Thread the dowel rod through the end boards and drive 2″ x 5/16″ dowel pins into the holes on the handle. Use a little glue on each dowel pin, being careful not to glue the dowel rod to the end boards.
Assemble the Tray
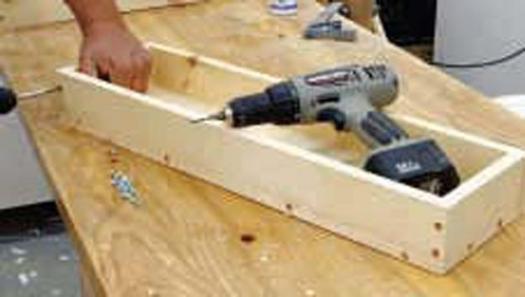
Cut two tray sides (E), two ends (F), and the bottom board (G) to size. Secure the sides and end boards to the bottom board. Use a little glue and 2″ screws in counter bored holes. Fill the holes with coloured wood plugs.
Install Alignment Strips
Cut two 1/2″ x 4″ pieces of plywood to form the alignment strips (H). Glue and nail the strips on each end board. These strips align the main box to the tray.
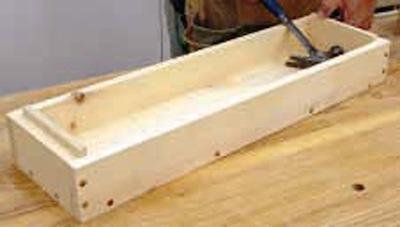
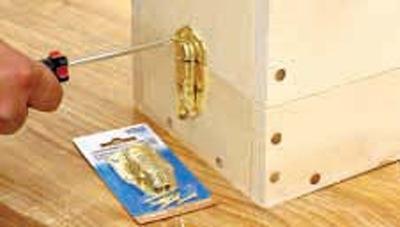
Install Catches
Install two draw catches, one on each end of the box, to secure the tray to the main box.
Align the tongue on the top section of each catch with the bottom edge of the tote box. If the tongues are below the bottom of the end panel, they may scratch the floor when the tray is removed. Finally, apply a finish to the box. I used three coats of polyurethane.
You may have specific tool carrying needs, so change the size to suit your requirements. If you carry a lot of hand tools, the upper section can be downsized and the tray built deeper. Wood pegs could be added to one side of the box to wrap extension cords that are often needed on the job. Divider slots could also be installed in the upper section to keep your tools separated. The options are endless with this great little carrying box.
Ease sharp corners with sander
Form dadoes
Drill handle holes
Assemble the box
Install the handle
Assemble the tray
Install alignment strips
Install catches
The tool tote
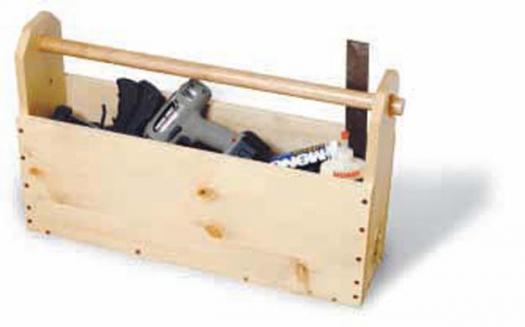
Illustration by Mike Del Rizzo