PROJECT
Craft a few display stands

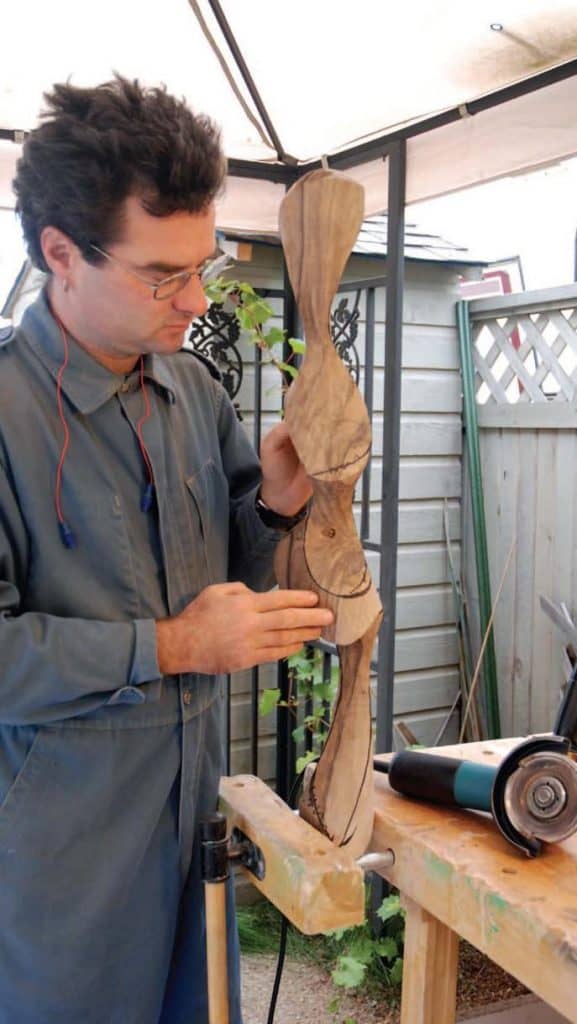
Mark Salusbury

Find more Gifts / Crafts projects
Treasured awards, memento plates, meaningful artwork or fine photography all deserve a special space to be seen and enjoyed.
Sure, you could hang your awards on a wall, but then they would just get lost in the background and passed by. Instead, a display stand cradles your treasures, and keeps them close by on a desk, dresser or shelf. A stand also makes rearranging or adding more items easy to do.
You could buy a plastic or wire stand, but they seldom do justice to the objects you want to make special. Here’s how to craft attractive display stands from the wood of your choice to add a rich dimension to your home or office.
Materials for each stand are simply five wooden parts and two 1/8″ diameter brass pins. Here, I’ve designed stands crafted of cherry wood, a mid-toned species. Of course, there’s great economy in making more than one once you’re in the groove, and the material cost is peanuts, so why not? I’ll outline how to make a pair of stands from one piece of rough stock measuring 1″ × 4″ × 30″ OR 2-1/4″ × 2-1/4″ × 30″, depending on available stock.
The nice thing about this design is if you want to support larger, smaller or deeper objects, it’s adaptable by simply widening the spine’s width to alter the footprint, and/or changing the height of the backs or length of the legs to suit treasures of any size.
Craft a few display stands
Start cutting
Begin crosscutting your stock 20″ from one end, then rip, plane and sand this blank into strips +1-3/8″ wide. These in turn get ripped, thicknessed and sanded to yield blanks 1-3/8″ wide × 5/16″ thick. Each of these can then be crosscut to final lengths of 10-1/2″ (back) and 7-3/8″ (leg). Uniform widths and thickness are quite important as you move onto the joinery next.
Create a rabbet at one end of each part precisely half the part’s thickness (5/32″) and 1-3/8″ deep, the exact width of the parts, aiming to create a half-lap joint between one back piece and one leg. I did this on my router table, though a table saw would also work.
Make four mirrored sets of backs and legs; two oriented left-to-right and the other two right-to-left.
Easy assembly
Glue each back/leg set together at the half-lap joint and clamp, making sure they’re perfectly square, removing any glue squeeze-out before it’s fully cured.
Some shaping
With the assemblies now paired to make two stands, and their inner edges flush, apply strips of masking tape midway along the inner face of the legs and backs to keep them aligned. Now sand the full outer length of the backs and bottom of the legs flush, unifying their planes squarely to their sides. Now that the pairs are matched overall, it’s time to introduce some shaping.
First, draw a 1/2″ radius at the top front of the backs, a 1/4″ radius at the top front of the legs, then from those marks draw a 22.5° angle rearward from the top radius and downward from the front of the legs. Remove the radius and angle waste just slightly outside the lines, then shape and sand to the markings, squarely across the pair of assemblies.
Drill some holes
Next, mark the site for inserting the brass pins, 5-1/2″ forward of where the backs join the legs, drawing a line squarely across both legs and locating each leg’s midpoint along that line. Held vertical at the drill press, bore the 1/8″ diameter × 1/2″ deep holes to receive the pins later.
As you’re making multiple stands, now’s the time to mark each pair on the rear edge of each back for reference before glue-up.
Rout some round overs
Remove the masking tape and rout a 1/8″ radius along the top leading edge and down the front of each assembly, leaving the bottom and back edges square.
Sand each assembly overall, ease all edges, then shift to the next step, making the spines.
Time for spines
Craft the spines by milling and sanding the remaining 10″ stock into two blanks with final dimensions of 9-3/4″ long × 1-3/4″ wide and 3/4″ thick. Lay out a 1″ radius across what you want to be the top front of each spine, then shape and sand it squarely across the blanks.
Fit the table saw with a zero-clearance throat plate and an auxiliary fence clamped to the main fence and tight to the table. Using an appropriate push device (I use a foam rubber tiler’s grout float), rip 22.5° angled chamfers along both long edges of each blank, leaving the front face the full 1-3/4″ wide. The safety measures should also yield a quality surface right off the blade so sanding the chamfers next to a uniform final surface is easy.
Install a 1/8″ winged slotting cutter stacked on an arbor in your router table. A table-mounted featherboard can help keep the workpiece pressed into the fence, but if it’s too tight it will force the workpiece upwards due to the angles cut into the spine. With the chamfer of the spine facing down and the front corner of the spine snug to the base of the fence, rout slots 1/8″ up from the chamfered edges, parallel to the chamfers, and 3/8″ deep. A slow to medium router RPM works well here. Flip the spine end-over-end and repeat with the other chamfer. I use a tiler’s rubber grout float, modified for this application, to advance each spine past the cutter.
After measuring the thickness of each back/leg assembly, raise the router bit a smidgen and test the fit. Repeat until you have a snug fit between each assembly and its slot. Sand each back/leg if needed to perfect a fit.
Bring them together
With each spine face-up on the bench, and keeping in mind the mirror image back/leg assembly you created earlier, run a bead of glue deep within the central 8″ of each slot. Next, align the three components precisely flush along their bottom edges and press in each back/leg assembly until fully seated. Tape each assembly firmly until the glue sets.
As the glue cures, fashion the 1″ long bronze pins. Cut, round-over and burnish both ends of each pin. Before applying the finish, tap each pin into the 1/8″ holes bored earlier.
Lastly, do any detailing before applying your finish of choice. I used three coats of Danish oil in these examples.
Now all that’s left is to display your treasured objects, supported elegantly yet unobtrusively.
Photos by Mark Salusbury
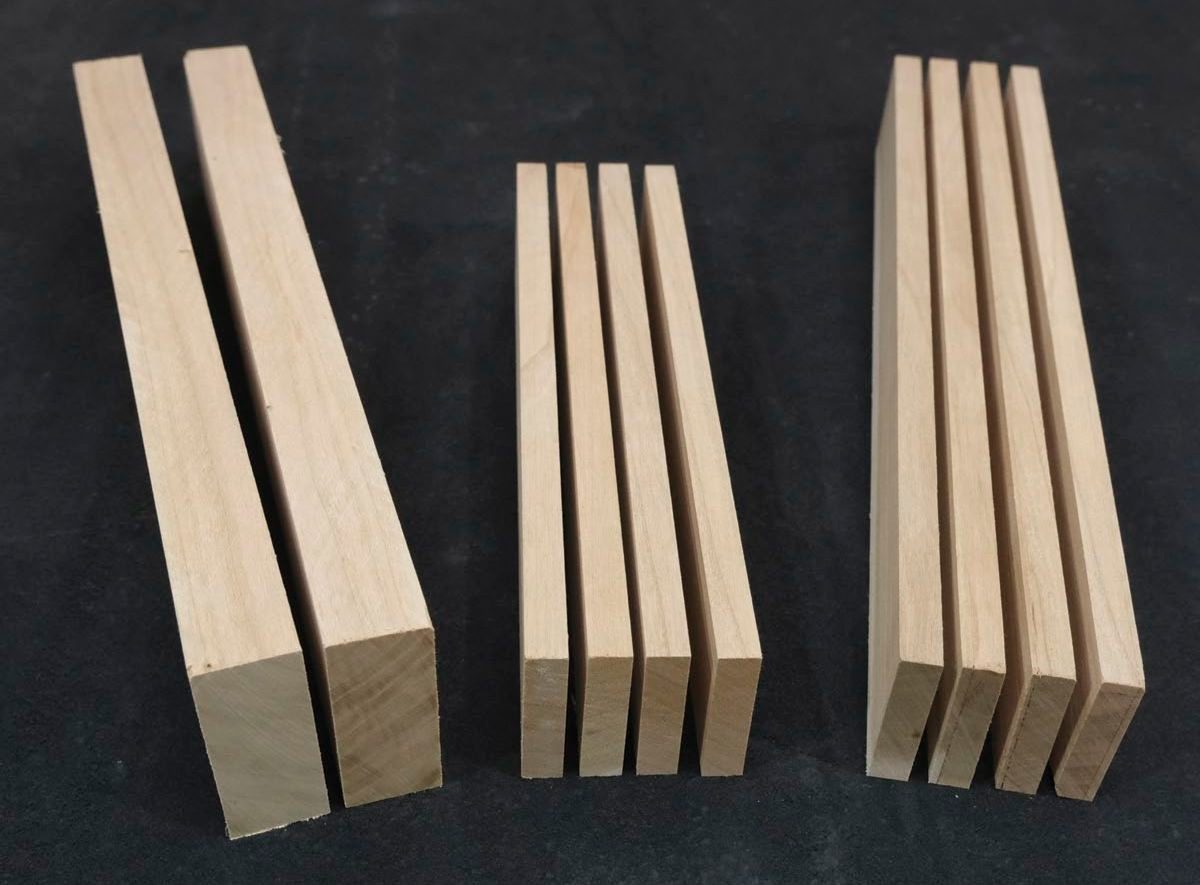
Make Multiples
Here, Salusbury has machined enough parts for two stands. One stand is great, but it’s really not much more work to create multiple stands at the same time.
Half-Lap Joints
A half-lap joint is a simple, strong way to join the two frame parts together. Salusbury made this joint on a router table, though a table saw is also a good option.
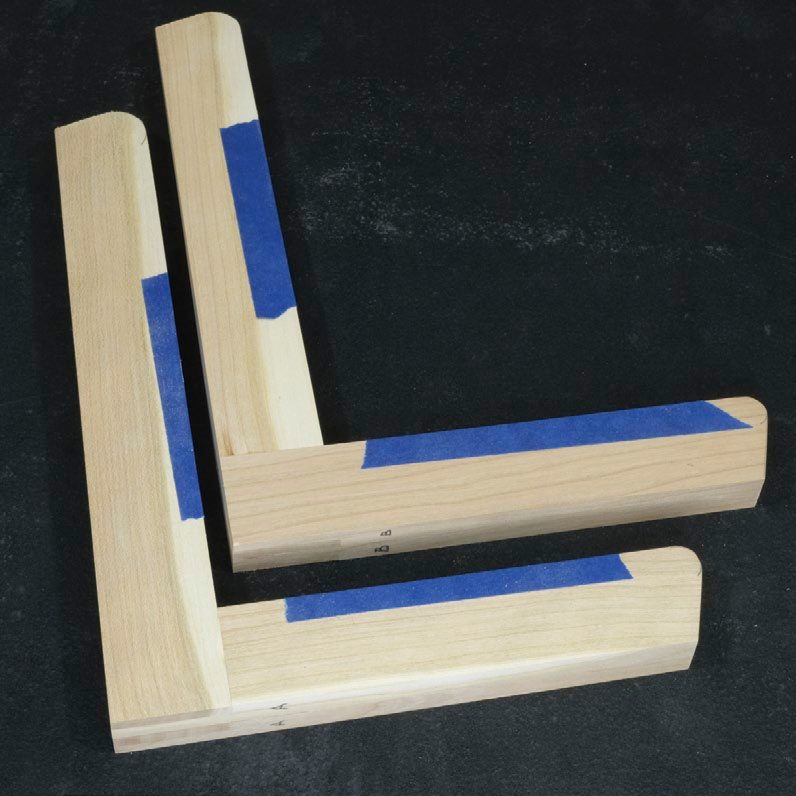
Align Them
When the back and leg parts are brought together, Salusbury likes to tape the assemblies together so he can sand and even the rear and lower edges.
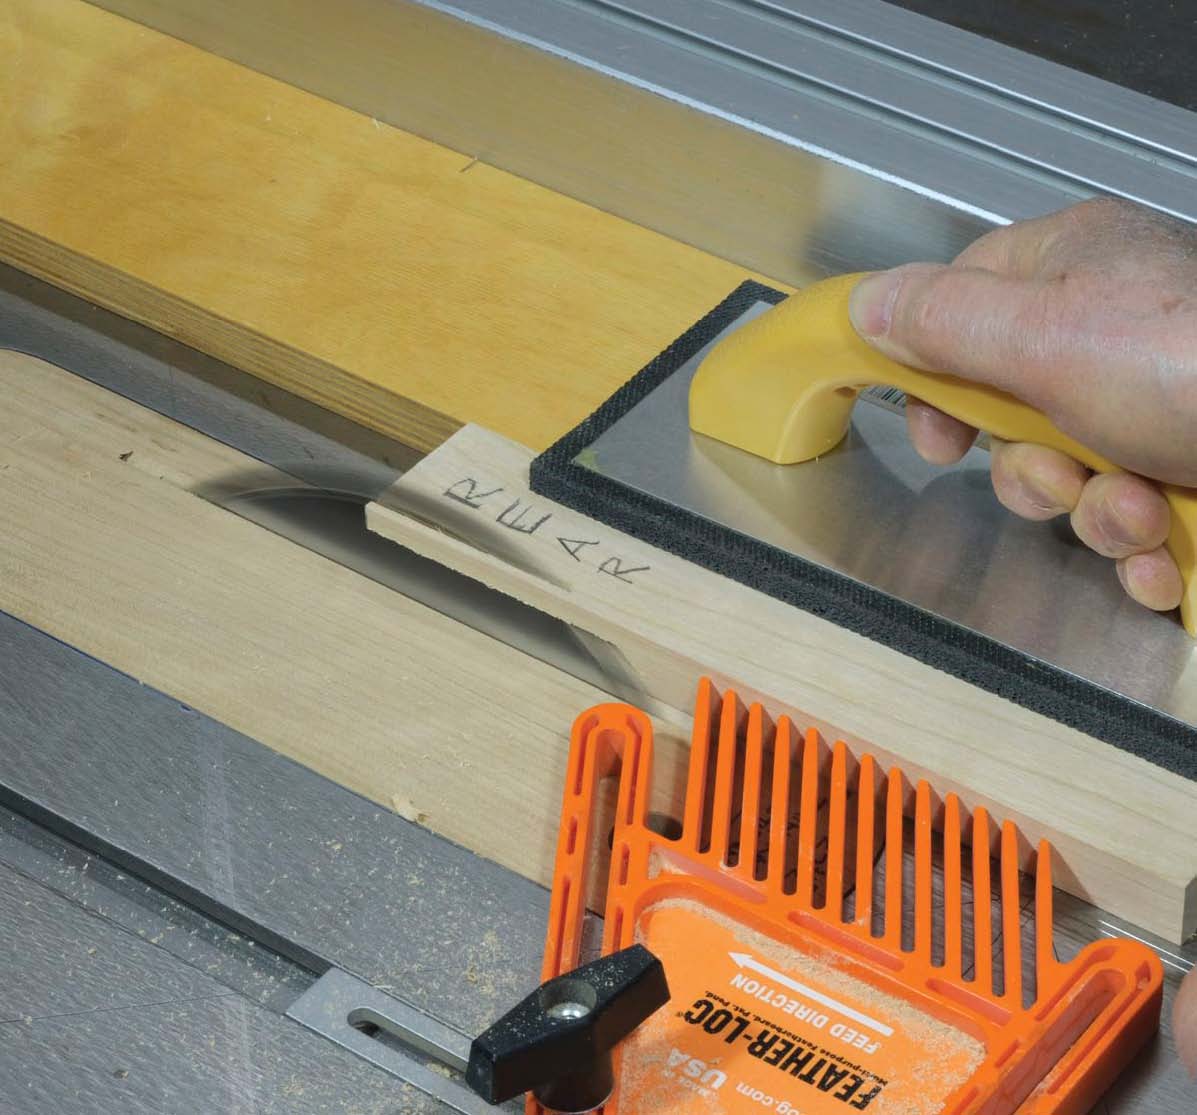
An Easy Chamfer
With the blade set to 22.5°, Salusbury rips chamfers into both sides of the spines. With the blade set to 22.5°, Salusbury rips chamfers into both sides of the spines.
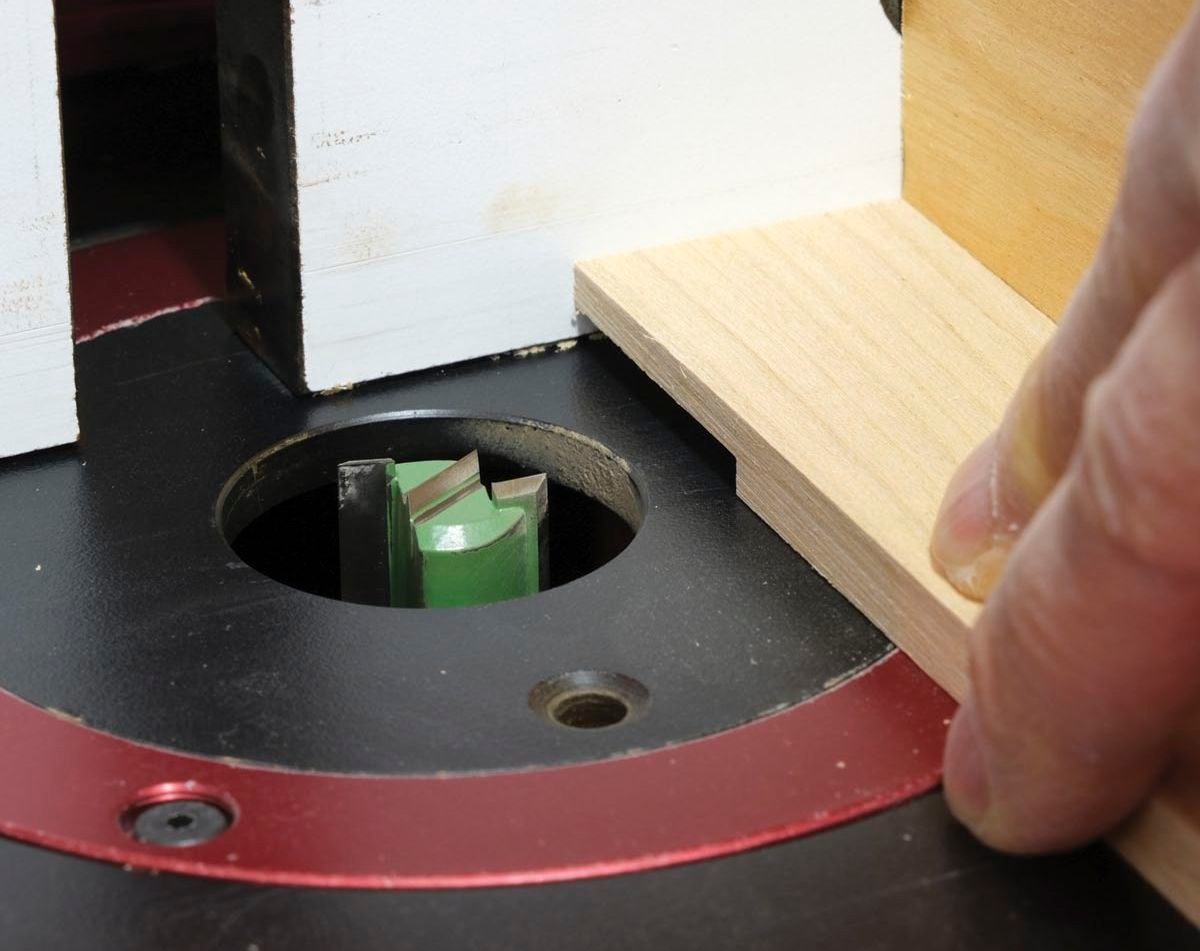
Rout the Grooves
A router table, equipped with a winged cutter, will machine the groove to accept the backs. Salusbury uses two 1/16" wide cutters stacked on top of each other, rather than one 1/8" wide cutter, because the work is spread between more teeth, and hence more cuts, but this isn’t mandatory.

Illustration by Len Churchill