PROJECT
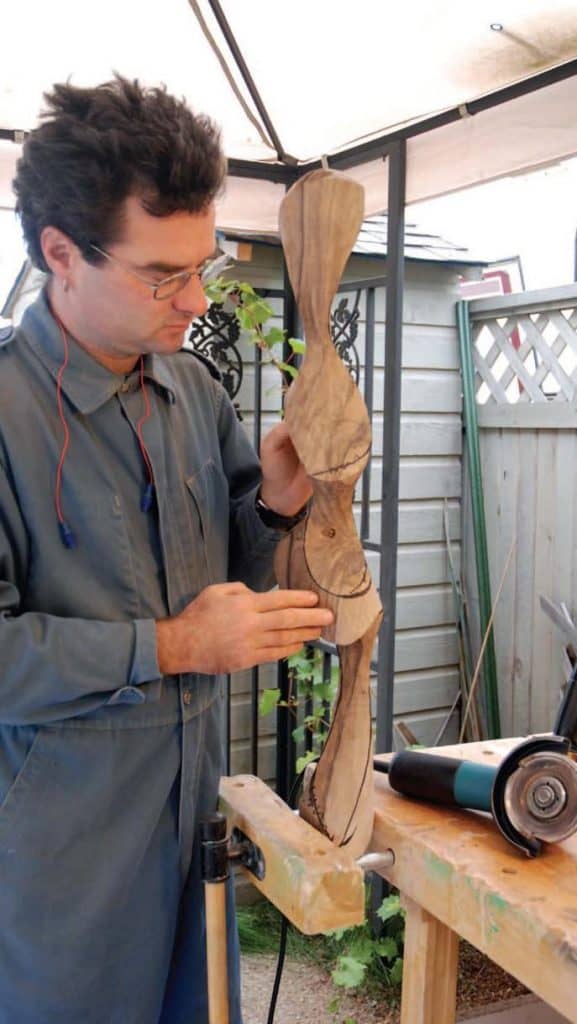
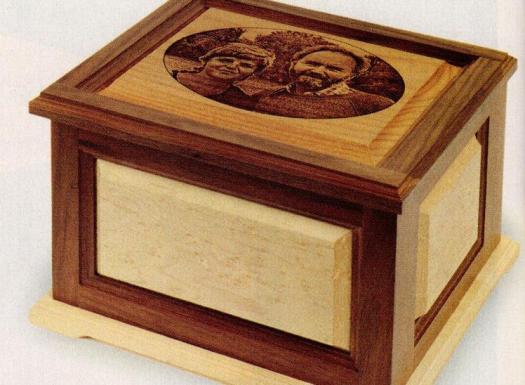
Companion cremation urn

Mack Cameron

Find more Gifts / Crafts projects
This urn consists of three parts: the lid, the container, and the base. For the lid with the laser engraving on page 16, I chose walnut and red alder. Red alder is an ideal wood for laser engraving. The container consists of walnut and birds-eye maple. The base is maple.
The idea for this project was generated over a year ago by a question posed on a woodworking forum “Does anyone have plans for a Cremation Urn?” A search on the Internet came up with any number of establishments selling urns, but there were very few woodworking plans available. It sounded like an easy enough project, but a couple of areas first required investigation.
- Were there any government regulations with respect to cremation urn?
- Would the urn contain the ashes of one person or two people?
- What should be the displacement, in cubic inches, of the container?
- Would the urn be buried in the ground or stored in a crypt? If in a crypt, what are the inside dimensions of the crypt?
Discussions with a funeral director in my town revealed there are no government regulations regarding cremation urns. The urn that I planned to construct would contain the remains of two individuals, and it would be stored in a crypt, which measured 12″ x 12″ x 12″. The overall dimensions of the crypt are critical, and may differ between cemeteries.
The displacement of the container I designed is 472.5 cu. in., sufficient to receive the cremated remains of two people, and small enough to easily fit into the crypt.
This urn consists of three parts: the lid, the container, and the base. For the lid with the laser engraving on page 16, I chose walnut and red alder. Red alder is an ideal wood for laser engraving. The container consists of walnut and birds-eye maple. The base is maple.
Of course, you can choose any single species or combination of contrasting woods. The urn on this page has curly maple and walnut for the lid and silver birch and walnut for the container.
Companion cremation urn
Making the Lid
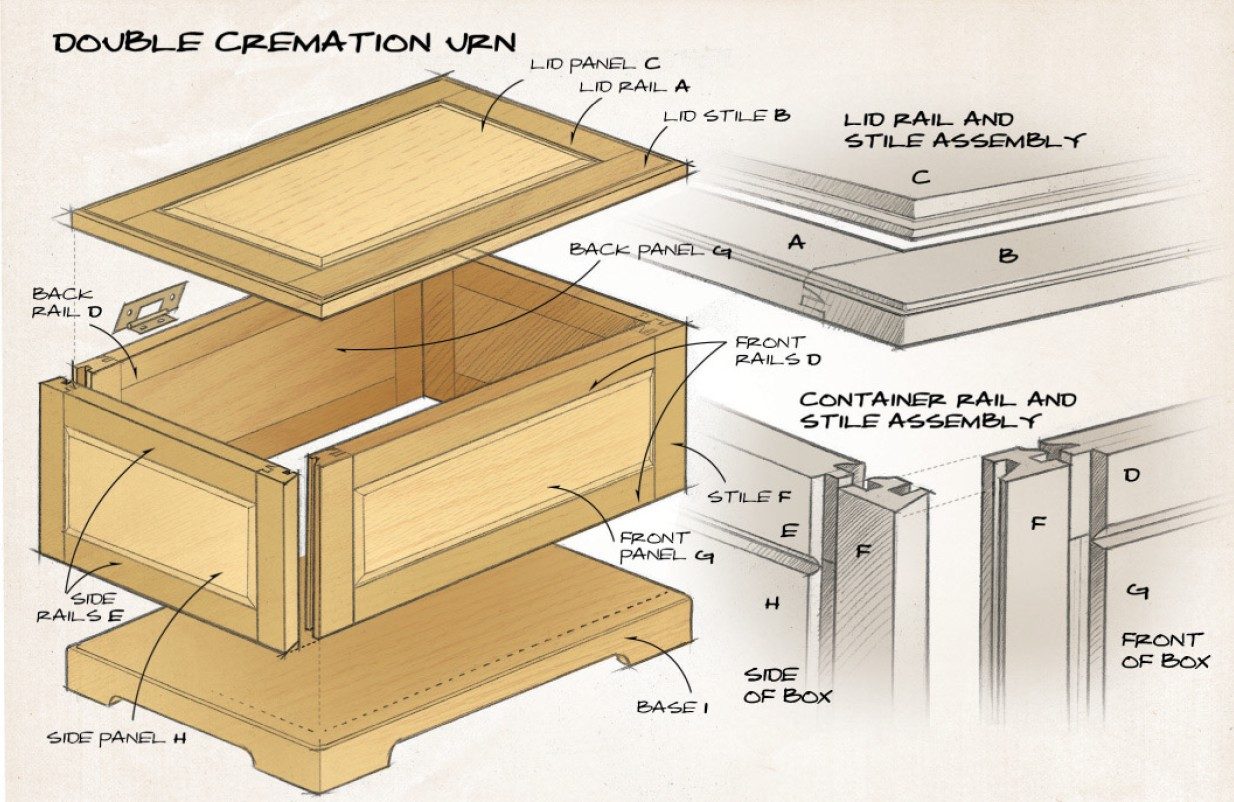
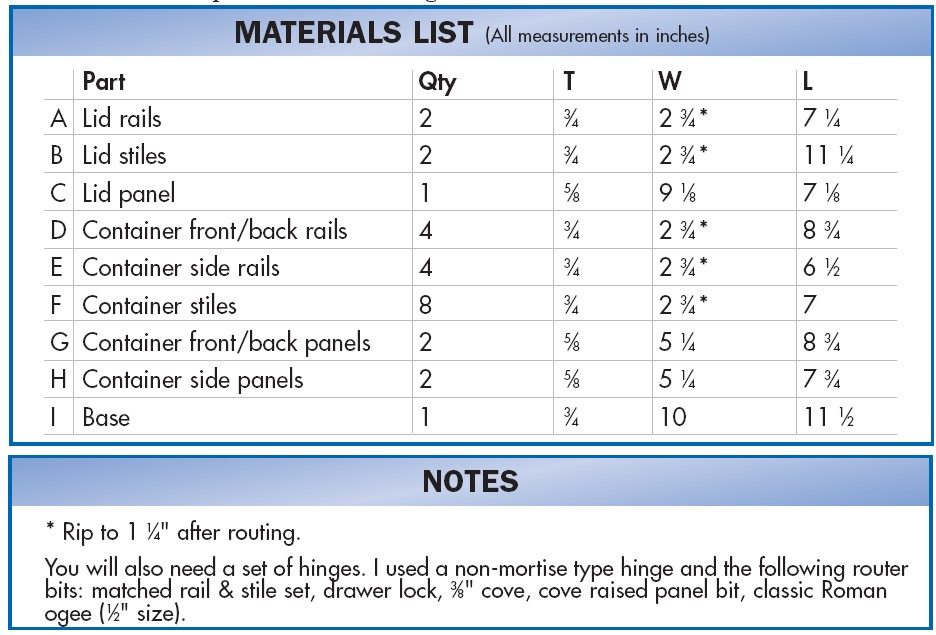
The lid is constructed of rails (A) and stiles (B) with a raised panel insert (C). On a typical raised panel, stiles are the vertical components, while rails are the horizontal components. This lid is rotated such that the stiles run horizontally rather than vertically, and the rails run vertically rather than horizontally. Placing them in this manner ensures no unsightly end-grain is facing the front of the urn. Mill your stock over-width, and then rip it to finished width after you have routed the decorative profile. The laser engraving was completed on the red alder panel, by a local engraver, prior to glueing up the lid assembly. (Note: Check your local yellow pages or search the Internet for a local engraver.)
- Cut your stock to dimension.
- Rout stile ends with the coping bit.
- Rout the matching profile using the sticking bit on edges of rails and stiles.
- Cut the rails and stiles to final width.
- Glue up sufficient stock for the raised panel.
- Using a small cove raised panel bit in your router table, rout the edges of the lid panel so it fits snugly within the groove created by the bit.
- Finish sand all the parts.
- Dry assemble the rails and stiles, insert the panel and ensure all parts fit precisely.
- Glue up the lid assembly.
- Rout a decorative edge of your choice around the top.
Making the Container
The container is constructed in essentially the same manner as the lid. The main difference is that the rails are now in their normal positions (ie. inside the stiles), consequently the ends of the rails are routed first using the coping bit. When you have glued up the four separate panel assemblies, set up the small drawer lock bit to join the side panels to the front and back panels. When routing these edges, ensure that the front and back panels will overlap the end panels.
To simplify the glue-up of the container, I first glued and clamped the front and back panels to one end panel, ensuring that all corners were square. The profile of the small drawer lock bit ensures this is a simple operation. Once the glue has sufficiently cured, the remaining end panel can be fitted, glued and clamped.
Making the Base
The base (I) is comprised of a glued-up panel, routed with a decorative edge that matches the lid.
- Glue up sufficient stock for the panel.
- After the glue has dried, cut the base to final dimensions.
- Rout the matching decorative edge of the lid to the top edges of the base.
- To lighten the massiveness of the base, and give the appearance the urn is resting on small feet, rout a 3/8″ cove on the four edges of the base. Start and end the 3/8″ cove 1-1/2″ from each corner.
- Finish sand the base.
- I used 1/8″ dowels to fasten the container to the base. You may choose to secure with screws through the base. The lid is attached to the container utilizing non-mortise hinges.
Finishing
Apply a finish of your choice to the urn prior to assembling the components. This urn has been finished with five coats of semi-gloss lacquer.
Lid detail
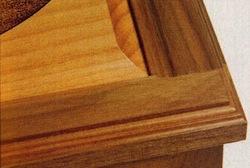
Lid detail
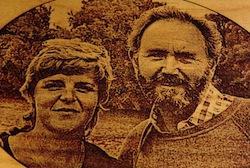
Urn with laser engraving
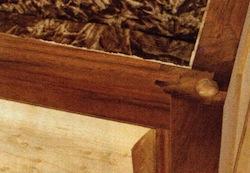
Corner assembly detail
Non-mortise hinges

Illustration by Mike Del Rizzo