PROJECT
Build a cedar planter bench

Robert Zakarian

Find more Chairs and benches projects
This planter bench will offer a seat to anyone who needs it and add colour to the area with some flowers.
We needed a small bench near the pool, and I thought adding flower planters at either end of the bench would not only support the bench seat but add colour to the area. This design also didn’t take up too much space. The planters measure 15″ tall by 14″ wide, and the bench measures 48″ long by 10-1/2″ wide. The entire project measures 76″ long by 14″ wide.
I bought two medium-sized pots before starting this project, and designed the planter bench so the rims of the pots could be supported by the upper rails on each planter. However, you could also purchase a square pot that could sit directly on the ground in the middle of each planter box. Depending on the size of the pots you use, you may have to adjust the size of the planter boxes to contain your purchased pots.
Build a cedar planter bench
Wood selection
The wood I used for this project was solid cedar. This planter bench was built with a mix of 2×4s and 1×6s, all 8′ long. Cedar is a soft wood with an attractive, warm colour. It also stands up to the elements very well. It’s not cheap, but for a project of this size it’s not too bad. Cedar weathers to a beautiful greyish colour if you don’t finish it, but also accepts an exterior finish nicely if you don’t like the natural grey color. For this project I used natural oil to keep cedar’s original reddish colour.
Traditional construction
To make the legs, rip the 2×4s down the center, then cut them to length. You will need eight legs 15″ long and 16 rails 12-3/8″ long. Note that 2×4s are sold with a 1/8″ round over on all sides. I dressed the parts down an extra 1/8″ to ensure I had square legs and rails.
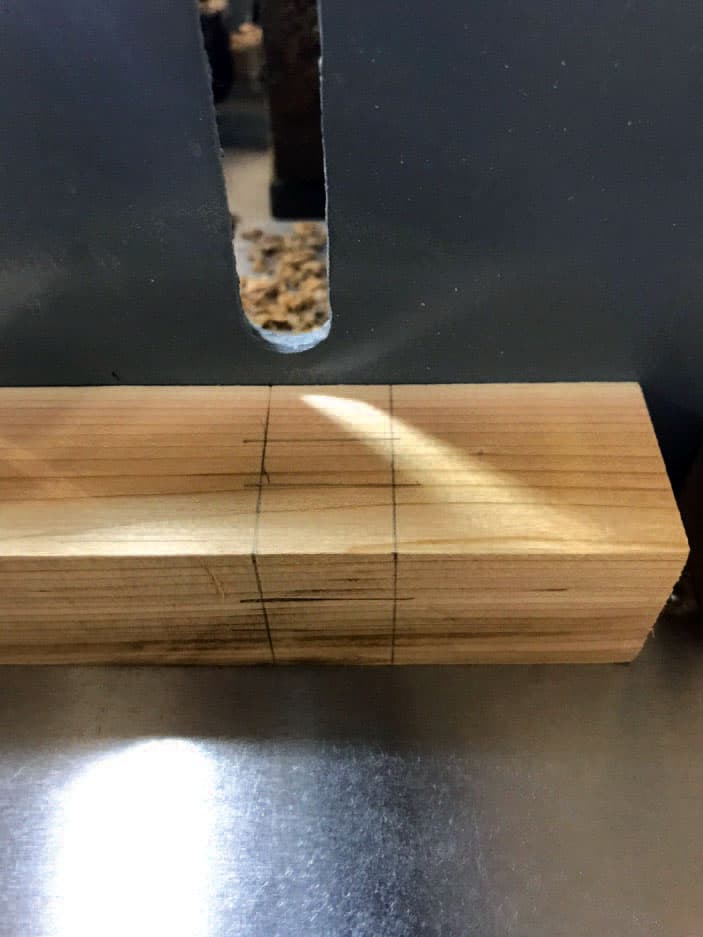
Cutting the mortises
Each stile will require two mortises on two of its faces. I cut the mortises with hand tools, but there are lots of other options. You can also adjust the dimensions of the tenons according to the tools you have.
The rails should be 1-1/4″ away from the upper and lower ends of the stiles. To do this, measure 1-1/2″ in from both ends of the stile. This is one edge of the mortise. From there, mark your 3/4″ wide by 1/2″ thick mortise. Cut the mortises 9/16″ deep, which is just shy of half the depth of the stile.
You could also offset your mortises towards the outside of the stile, as this might make it easier to avoid blowing out the material where the two mortises almost meet near the center of the stiles, not to mention allow you to make the tenons longer and stronger. If you do this, just make sure to offset your tenons so the rails mate nicely with the stiles. Repeat this step for all stiles, then cut the mortises, being careful not to blow out the area between the mortises.
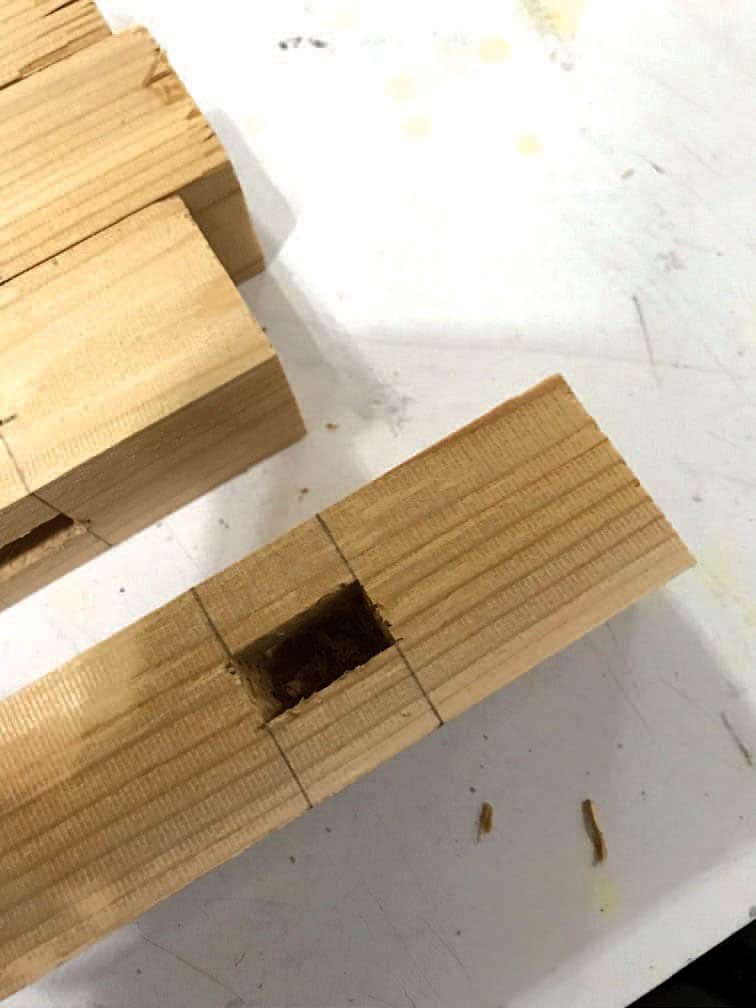
Add tenons to the rails
To cut the tenons on the rails, install dado blades in your table saw and make a test cut with a scrap piece. Use a mitre gauge to keep the workpiece perpendicular to the rip fence. This is one of the few times when using the mitre gauge and the rip fence at the same time is acceptable. Dry-fit the test piece in the mortise of one of the stiles done in the previous step. Adjust dado height accordingly to achieve a proper fit. Next, cut the tenons for all your rails.
Next, use your test piece to set up the dado blade to machine the tenons to 3/4″ wide and run the parts across the blade to form the final tenons.
Cut grooves
The grooves to accept the panels are 3/8″ deep and 1/4″ wide. Set up a router table with a 1/4″ straight bit, adjust the fence to locate the grooves in the center of the stiles, then add stops to keep the cut between the edges of the mortises. Doing this in a couple of passes, with the first pass only 1/4″ deep, is safer and will produce a better finished cut.
Making the panels
Make the panels from 1×6s. As per my calculation, the area between the bottom of each groove is 10-7/8″ in height and 12-1/8″ in width, but it’s best to check the dimensions on your workpieces just in case they differ.
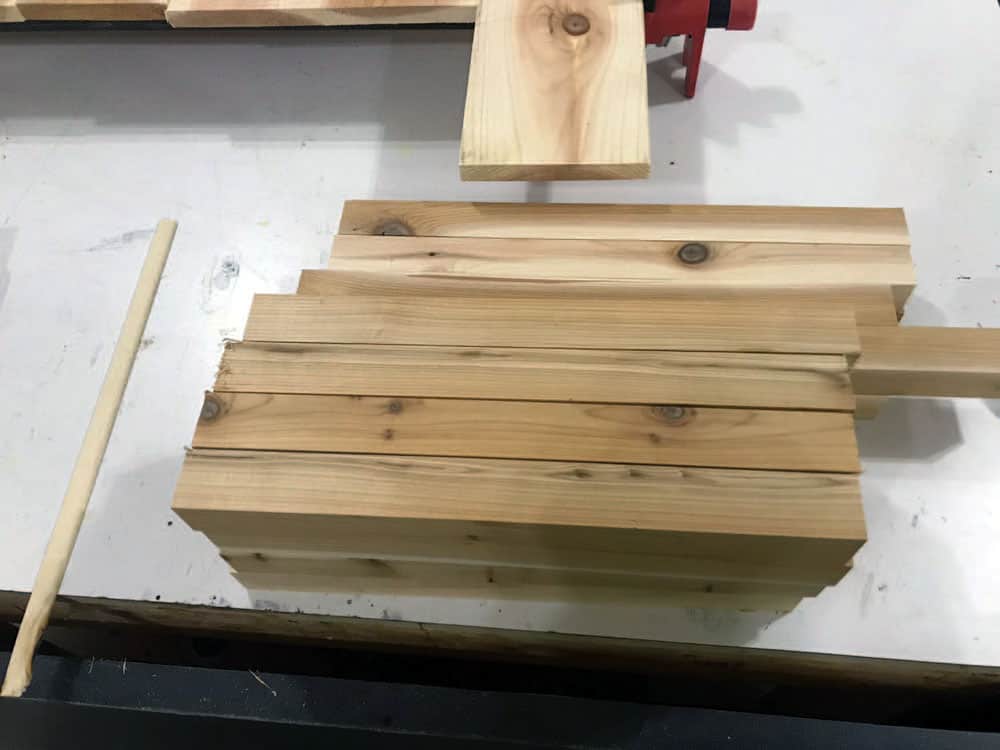
To make the workpieces manageable, I cut the 1×6s in half at 48″ long, then ran them through the table saw to cut off the round overs on both edges. Glue them together, paying close attention to alternate the annual rings. This will help stabilize the wood during expansion and contraction. Once the glue has cured, run the plank through the planer to a final thickness of 3/4″. Cut the panel to the final width and length.
Raised panels
To profile the raised panel, I used the Freud three-piece raised panel bit set. The kit contains a rail and stile profiler as well as the raised panel cutter. For this project I only used the raised panel cutter. There are many different raised panel cutters on the market that can be purchased separately if a set isn’t required. Set up the router table, then run the panels through to shape the panel. Multiple passes will leave you with a cleaner cut. If done properly, you’ll end up with a taper of 1/4″ at the end of the profile.
At this stage it’s important to pre-assemble the planter to ensure all parts fit well and are square with each other.
Assembly
Pre-sand all the inner parts of the planter, then assemble the parts using waterproof Titebond III glue. Do not glue the panel in the groove, as this will prevent expansion and contraction as the weather changes.
Bench
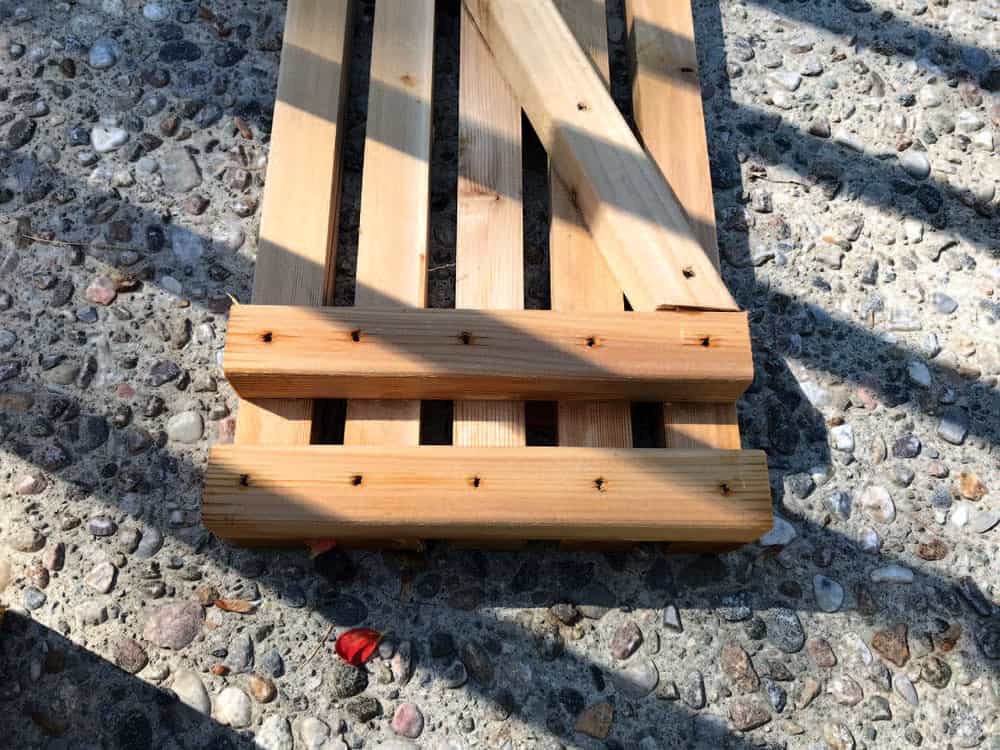
The final step is to fabricate the bench top. Cut the main bench slats to 48″ long, then rip them to 1-1/4″ wide. Lay them out on a flat bench separated by 3/4″ wide spacers. Clamping them together will ensure they remain square and even with each other while attaching the other parts to the underside of the bench assembly. Cut and install the five cross braces, ensuring the gap between the two at either end of the bench assembly will accept the upper rail on the planters. Finally, cut and assemble the two angled braces.
Finishing
Sand all parts with 120 grit sandpaper. Finish the wood with a finish of your choice. I used Behr Premium waterproofing stain and sealer. Applying a film finish like an exterior spar varnish looks great, but may need more maintenance down the road. A penetrating oil won’t flake off and will likely not need much maintenance in the future.
Position the planters and install the bench top. A few screws in either end will keep the bench assembly secure. If you want to bring it inside for the winter, removing a few screws is all that’s required.
Photos by Robert Zakarian
Rails and Stiles
The rails and stiles are cut from 2×4s, then dressed to final dimensions.
Proper Layout
Laying out the mortises will help keep track of the parts, and ensure the mortises are cut in the correct location and size.
A Few Options
Zakarian used hand tools to cut the mortises in his planters, but a router is also a common option.
Cross Pieces
The five bench cross pieces get screwed to the underside of the bench top assembly. The outer two pieces will go on either side of one of the upper rails in the planters when the planter bench is fully assembled. The angled braces get screwed in place after the five bench cross pieces get installed.
Alternating Rings
By alternating the end grain growth ring patterns you can keep the panels a bit flatter. The seasonal changes in humidity cause wood to expand and contract parallel to their growth rings and cause the wood to curve.

Dry Assembly
A critical stage in the build, dry assembly will let you test how all the parts fit together before you apply glue. If there are any problems they can be dealt with before final assembly.
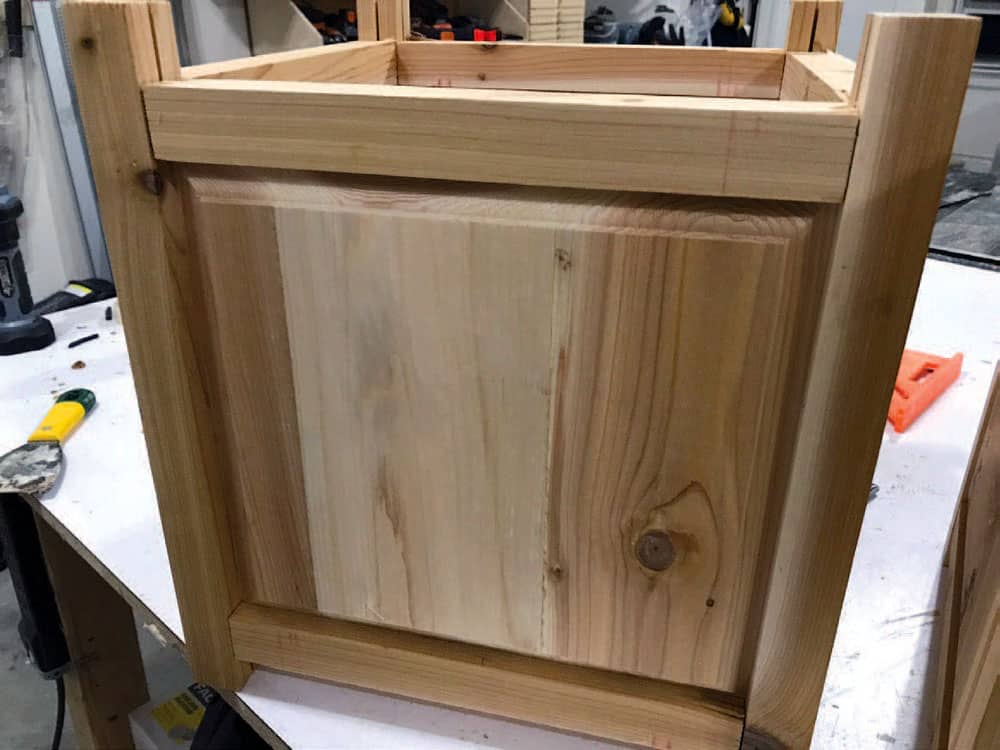
Illustration by Len Churchill


Really 2 out of 5 difficulty when mortise and tenon work is involved? Who comes up with these ratings? Pocket screw joinery is 2out of 5, mortice and tenon joinery is 4 out of 5 or higher.
Hi Ron: Our editor, in consultation with the author of the article, set the difficulty rating. We know it’s somewhat subjective (though based on Rob’s 25 year+ as a furniture builder), but we do the best we can to give readers some sense of the skill level required to make the project.