FROM ROB'S BENCH
How’d you do that?

Rob Brown

Blog for November 6, 2025
About six weeks ago I wrote a column titled "Catching Up." It was about a few personal projects on my to-do list that I was lucky enough to be able to check off.
One of the topics was about removing some shavings from the drawers of my new desk so they would open and close with ease. I photographed one of the drawers sitting on my front step, where the shavings could fall where they may and not mess up our home. One of our readers asked how I made the drawers, so I thought I’d cover that here.
Doug posted, “I have a question about your desk. I love the drawer fronts and would love to do something like that.”
(You can read “Catching Up” here).
Many parts to this topic
I’m pretty sure Doug was mainly asking about the textured drawer fronts and integral pulls on each drawer, though I’ll very briefly cover some other aspects, too. I used pinned rabbet joints to secure the fronts and backs to the sides. Once the glue on the rabbet joints was dry, I bored 1/8″ diameter holes through the sides, into the fronts and backs, then added a bit of glue to the holes and pins before tapping 1/8″ diameter bamboo skewers into the holes and snipping them off with strong scissors. It’s a very fast and fairly strong approach to making a drawer. As an aside, I keep a few different diameters of bamboo skewers around for doing this sort of a thing. You can find them in bags of 100 or more at your grocery store. They look even better with walnut or cherry, as there’s more colour contrast then.
But wait
I might be getting ahead of myself, as at this point in the build I had already added the texture to the drawer fronts and shaped the pulls, so I’ll go back and cover those more interesting points now.
As with a lot of the projects I make for myself, I don’t often know what sort of design details I’m going to include in a project when I set out to create them. This was no different. I knew the overall dimensions of the work surface and drawer cavities but didn’t know what I was going to do for the drawer fronts. Flat drawer fronts are obviously an option, but that’s boring. And considering this desk was for myself, I wanted to experiment a bit. I’m a big fan of texture, so deciding to include that aspect was easy, but the pulls were my main focus during this build. I didn’t want pulls that protruded from the face of the drawers, so I knew they had to be integrated into the drawers somehow. Also, since this desk was for me, it was not earning me any money, so I could only spend so long on it.
I considered a bunch of options, but many were too cumbersome, time consuming or ugly. My final decision was to create an elliptical-shaped hollow, provide a way to offer a bit of a finger grasp, then cover the rear plane of the drawer front with a thin piece of wood so you couldn’t see into the drawer box.
I started by machining the rabbets on the backs of the drawer fronts. I covered the tedious process of designing these drawer fronts in another column, so I won’t go into details here. Once the rabbets were machined, I laid out the location of the elliptical pulls. These drawers were each in pairs, so each ellipse spanned the fronts of two mating drawer fronts.
Keep in mind, the smaller two drawer fronts were still in one blank, as were the two larger drawer fronts. I would split each blank into two pairs of separate fronts after they were textured.
I then added a shallow V-groove around the perimeter of each of the elliptical pull openings. This acted as a transition between the actual pull opening and the texture that would cover the vast majority of the drawer fronts. Next, I removed some material from the perimeter of each mating pair of drawer fronts. This allowed me to give some shape to the fronts, leaving a more three-dimensional look.
Texture
At this point I reached for one of my carving gouges and started adding texture to the fronts. Fairly even texture, but not so perfect it looks like a machine made it, was what I was aiming for. Imperfections aren’t a problem.
The pulls
Although I practiced this on some scrap before reaching for the real fronts, it’s always a bit nerve-wracking doing a new technique on workpieces you’ve already sunk a fair bit of time into.
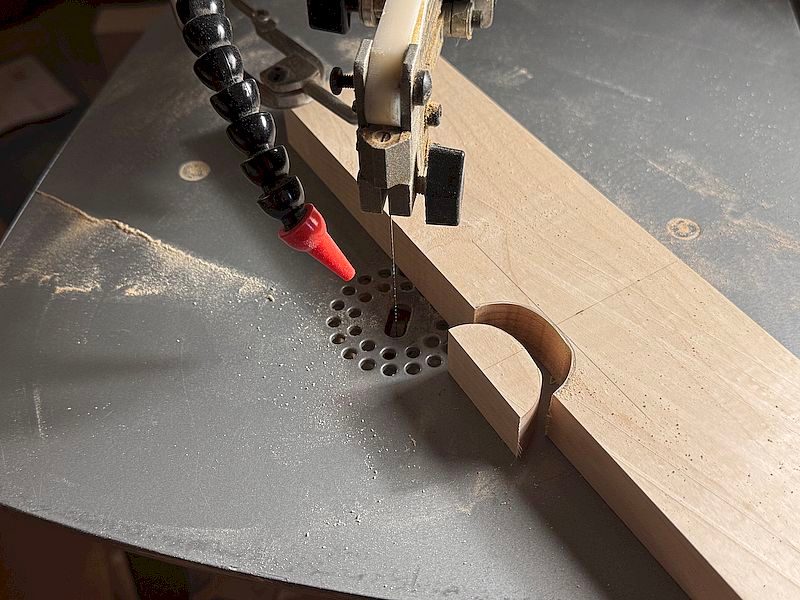
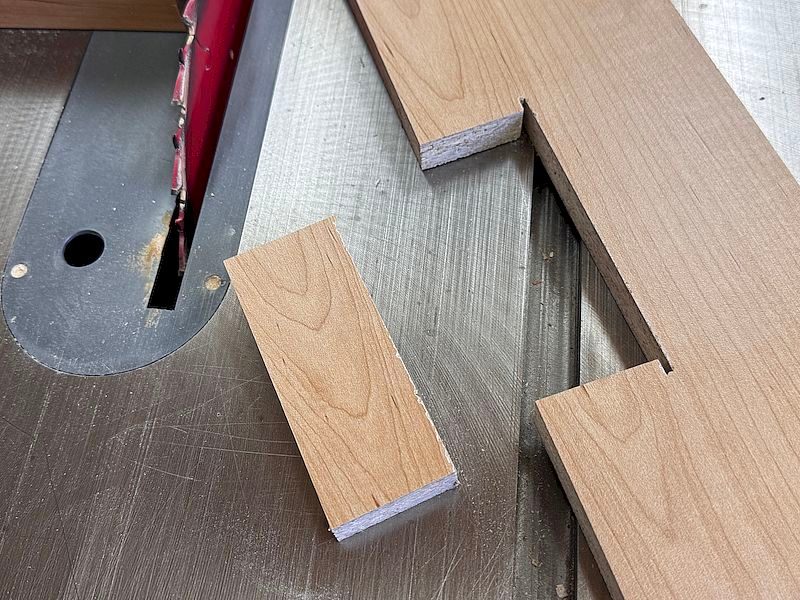
First, I ripped the two blanks in half, leaving me with a total of four drawer fronts. Next, I used my scroll saw to remove the elliptical-shaped material from where the cavities would be, then sanded that rough edge smooth.
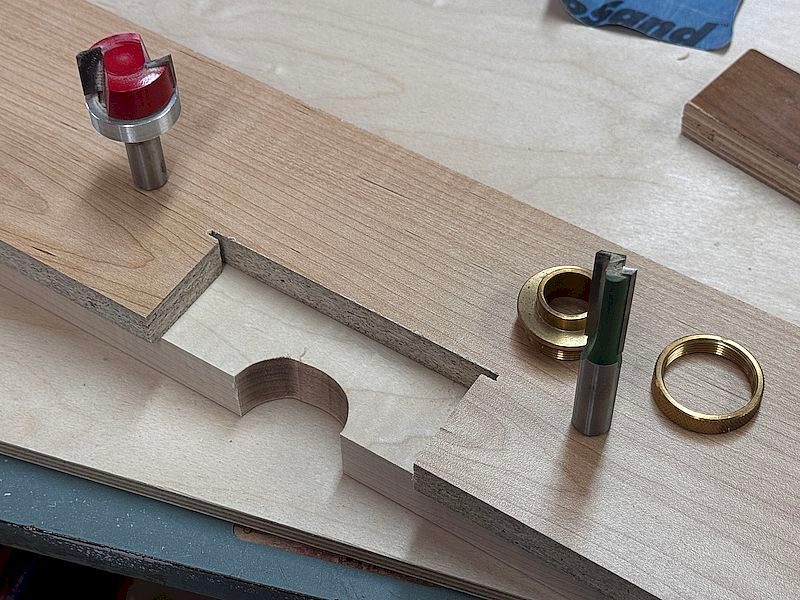
In order to allow my fingers to grasp the drawer front and pull it forward, I had to remove some of the material immediately behind each half ellipse. I did this with a cove router bit. Making multiple passes, lowering the bit slightly each time, I was able to rout a cove into the rear face of the drawer fronts and minimize tear-out.
No peeking
The last step was to inset a thin layer of wood into the rear face of the drawer fronts, immediately behind the elliptical openings. This was so you couldn’t see into the drawers. I made a very simple router tracing jig to help me here. I made a plunge cut about 2″ away from the edge of a piece of scrap, then made two crosscuts with the piece of scrap sitting vertically against my mitre gauge to remove a rectangular piece of material. The exact size of opening doesn’t matter, as long as it will leave you with a notch in the rear of the drawer fronts wider than the elliptical openings are.
I clamped that simple jig to the backs of the drawer fronts, chucked a pattern tracing bit in my router, set the depth and made the cut. If you don’t have a pattern tracing bit shallow enough to work in this situation, there’s nothing wrong with using a template guide fixed to your router’s base and a straight bit to accomplish the same task.
Finally, it was time to cut four strips of maple to inset into the notches on the backs of the four drawer fronts. I didn’t take too much care fitting these pieces perfectly. I rounded two corners so they could fit into the rounded notch, sanded the visible face of each of the pieces, then glued them in place and planed them flush on both the rear face of the drawer front and the edge.
That's all folks.
All that was left was for me to add a finish, fit the drawers to their openings, refit them after a few months, then refit them again after a few more months. Simple, eh!
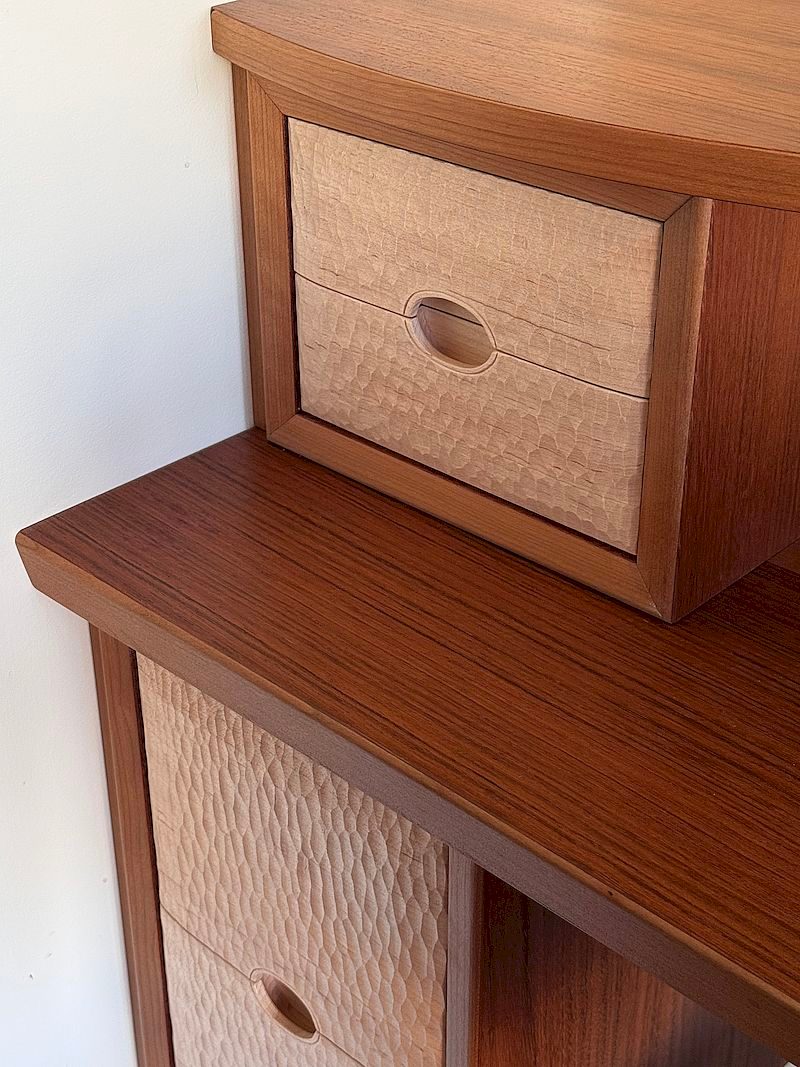
The Finished Drawers
This is the upper and lower set of drawers that make up part of my desk.
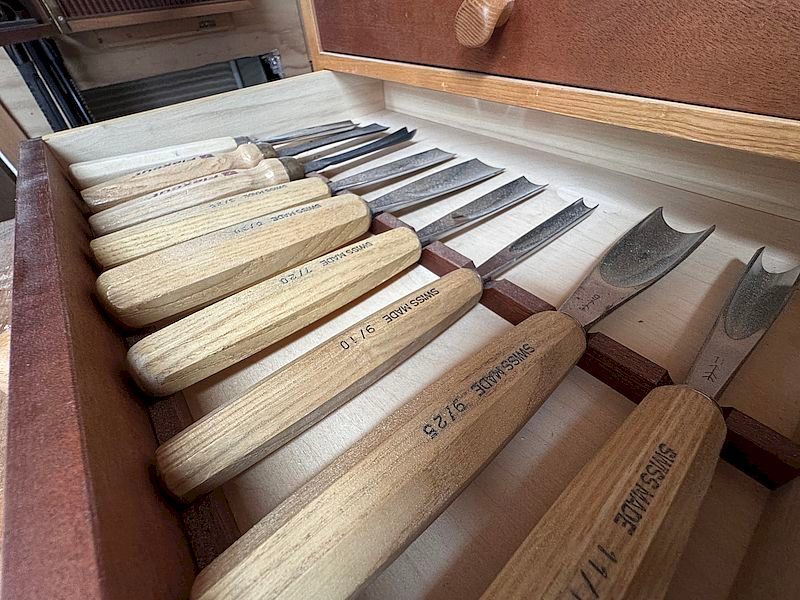
Carving Gouges
One of the most fun ways to add texture to wood is with sharp carving gouges. Here's part of my collection.
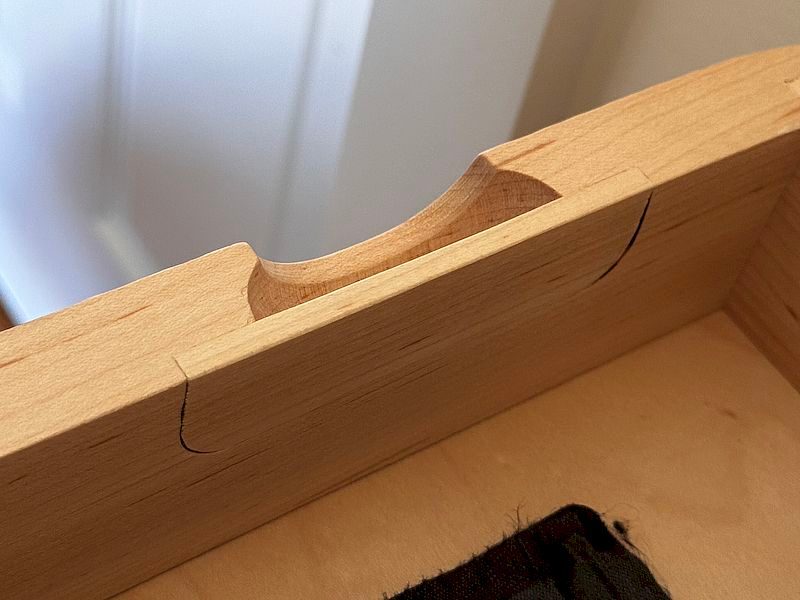
Elliptical Cutouts
When I made my drawer fronts their faces would have been textured by now and there would have been a shallow V-groove separating the elliptical cavity and the texture. But this is just the mock-up I did yesterday so I could share a photograph with you about how I made the elliptical pulls.
Cove Router Bit
A cove router bit removes material directly behind the elliptical cavity, so a couple fingers can get some purchase on the drawer front and slide it out.

Simple Router Jig
This simple jig will help guide the router while machining the recess for the thin wood strip that goes behind the elliptical opening, so you can't see into the drawer box.
Rout a Cavity
There are a couple ways to set up your router in order to use this jig. I used the red pattern tracing bit to create the shallow cavity to house the thin strip of wood, though you could just as easily have used a template guide and a straight bit. I'm pretty sure I also had to add a 1/2" spacer between the back of the drawer front and the jig, so the bearing on the jig would still follow the large notch in the jig, even though the cut in the drawer front was set to about 1/8" deep.
From the Inside
You can see the thin strip of wood on the inside of the drawer. If I knew anyone would ever lay eyes on this, I would have taken more care to fit the thin insert to the cavity