FROM ROB'S BENCH
Design frustration

Rob Brown

Blog for May 22, 2025
I made myself a nice little writing desk a few weeks ago.
For the most part, I used the K.I.S.S. (keep it simple, stupid) approach. A 42″ x 16″ writing surface, a small box containing a pair of larger drawers below the writing surface, a smaller box containing two smaller drawers above the surface and a curved top above the upper writing surface. A few weeks in, everything was working nicely. Designing the overall concept of the project was easy, but sorting out the drawer front details was a challenge.
For the main writing surface, top and drawer boxes, I veneered the cores after I applied solid headers to them. Nice and simple. I could (should?) have just continued on with this approach, but a quote from a famous furniture making teacher kept coming to mind. I think it was Tage Frid (though it may have been the late Jere Osgood, who was an American studio furniture maker for decades), who said something to the effect of “a flat surface is just a wasted opportunity.” The drawer fronts I was about to make were just that; a flat surface that was arguably a boring, wasted opportunity.
I kept flopping between “just keep it simple” and “why not add a nice little detail?” as the project was about two-thirds complete. Enough was enough. I grabbed my carving gouge and set to work texturing the drawer front blanks. At this point, each pair of drawer fronts were still together. I’d rip each drawer front from the blank later. I laid out the elliptical handles in the centre of each blank, then carved shallow, even texture into both blanks.
That was better, but…
That looked a lot better. A textured surface trumps a flat surface almost always. But there was still something a bit bland about the result. Time to quit for the day anyways, so I brought the two drawer front blanks home with me to think about them. Sadly, nothing came to mind overnight, so back to the shop they travelled. After taking care of a few other tasks, I still had no good ideas for the drawer fronts. I did a few more things, puttered a bit more, hemmed and hawed again, but still nothing. I left them for another day. They were far from awful, but they just didn’t grab me the way I wanted them to.
The next day I was getting a bit frustrated with the situation. This “simple little project” for myself was starting to take more time than I wanted, not to mention making me angry. Not a great mindset for a designer. Again, I had other stuff to work on, so the pair of blanks just sat on my bench, taunting me all day.
Another day went by. I told myself today was the day I was going to wrap up construction of this desk, as this was starting to get silly. Things just seemed too rigid and angular to me. The writing surface, the drawer boxes and the drawers were all rectilinear. Even though the drawer handles would be small ellipses, and the fronts were covered in beautiful texture, everything was also too squarish.
Then it hit me. Rather than texture the flat drawer fronts, how would it look if I pillowed the faces of the drawer fronts, so their edges gently curved inwards as they approached their edges. Even though the texture would get cut into, I set up the table saw’s rip fence, angled the blade and made four cuts on the first blank. Not enough of an angle, so I adjusted things and recut the blank. Looked good. Next, it was back to my bench to refine the angle I had just cut into a curve with a block plane. Next, I grabbed my carving gouges and added texture to the freshly worked surfaces. It only took a few minutes for it to start looking much better. I had found my answer, so I continued with the other drawer front blank.
Onwards!
After the texturing was complete, I ripped the drawer fronts to width, then added the handle detail, along with machining a rabbet and gluing in a thin piece of maple into the rear faces of the drawer fronts so the handle cutouts wouldn’t extend all the way through the fronts. The rest of the drawer parts were already machined to size, so it was just a matter of assembling things, fitting the drawers and applying a finish. A few days later I was at home installing everything. Not long after that I was opening and closing the drawers just because I enjoyed them so much.
Design is always tough
Making a piece is usually fairly easy. It’s the design that always takes so much time and energy. These drawer fronts were no different. I’m glad I opted to add a bit of pizzazz to the drawer fronts, as I think they complement the rest of the desk nicely. But it’s not always easy to see that when you’re only halfway through a project. Taking the easy road is just that: easy. It’s sometimes the road that’s needed, but certainly not always. The trick is to know when to take one fork in the road versus the other. I don’t pretend to get this right all the time, but thankfully, I think I lucked out this time.
All Done
The finished desk, with the maddening (yet satisfying) drawer fronts.
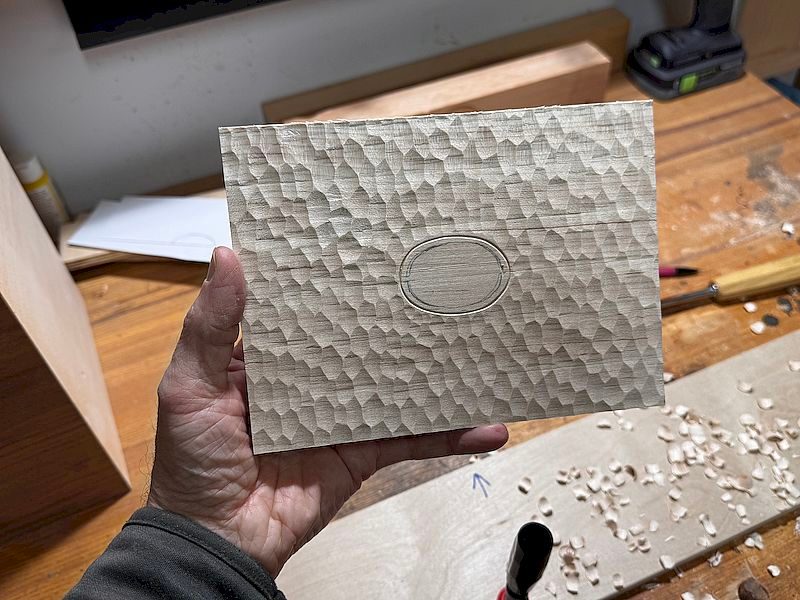
Looking…Fine
This drawer front blank, with the penciled-in handle area, looks fine. Maybe even good. But I just didn't love it.
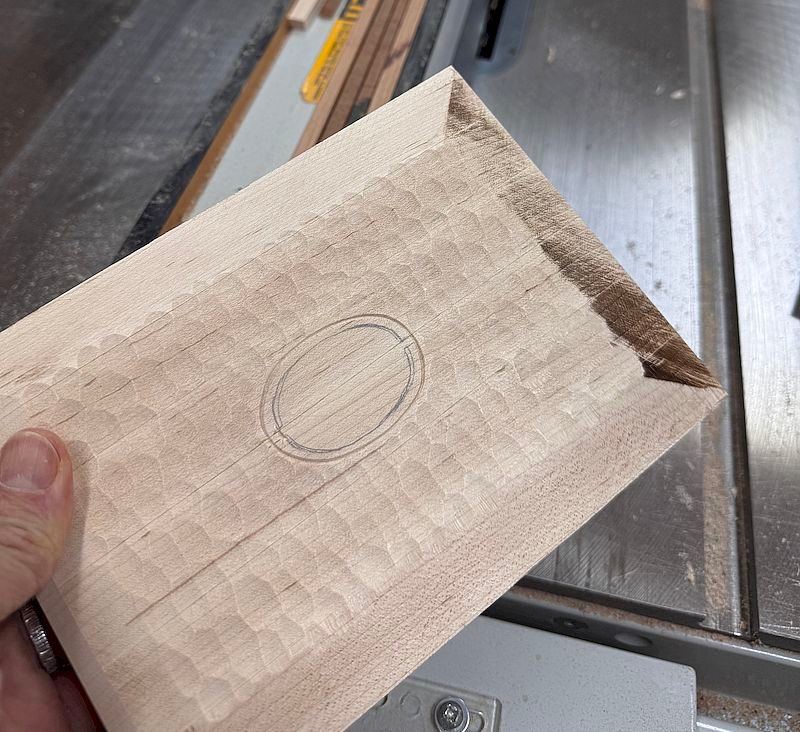
Get It Close
With the blade tilted and the rip fence set up, I was able to cut an angle into the four edges of each blank.
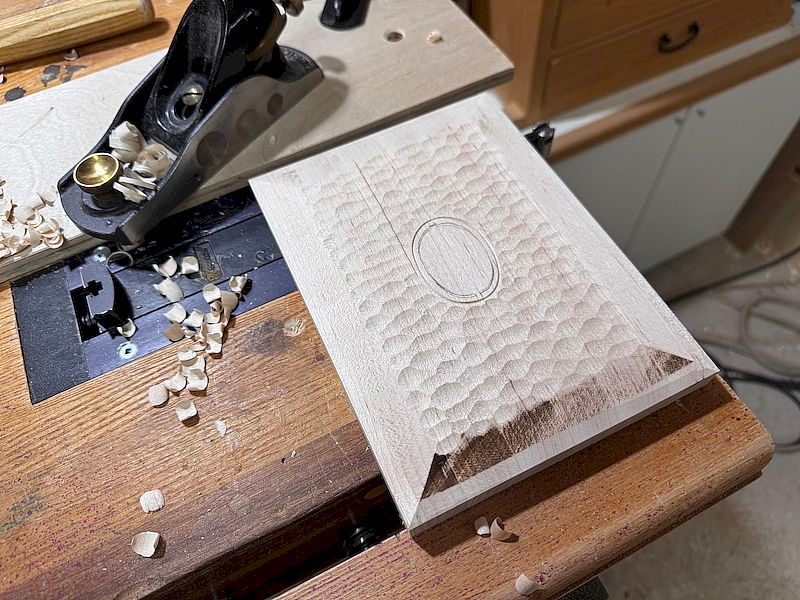
Further Refinement
A block plane was all it took to further refine the shape of the newly cut angled surfaces so I could get to my carving gouges.
My Favourite Part
Here's a closeup of the drawer front and handle details.


Thank you for actually tagging Time to the efforts of design.
Many of my students lose sight of the clock when estimating production periods and are pushed into the panic zone when designs are incomplete.
I love your work and generosity on this site.
The bevel/curvature on the sides is really fantastic and reminds me of the edges of the (very) large rocks installed in our recent landscaping project. The faces are faceted yet the corners are not rigidly cornered. There is an organic progression and natural way the facets emerge from the edge. Can never take woodworking for granite. 😉 Pun intended.