FROM ROB'S BENCH
Carving texture into veneer

Rob Brown

Blog for March 9, 2023
Two weeks ago I wrote about how some frost on my windshield reminded me of a coffee table I made a number of years ago.
I got a couple of emails about the photos I posted, asking for more details about my approach. Both readers were wondering if I had any other images of creating this sort of look, and what techniques I used.
The piece I shared is the only finished piece I’ve ever made that involves carving through veneer to show other veneers or solids underneath, but I did make a few sample panels with this sort of technique. On one panel I glued up three layers of veneer on top of a piece of Baltic birch plywood, then carved through them with a wide gouge. The gentle slope of the gouge allows the viewer to see all the different colours of veneer and creates a bit of a shimmer when viewed from different angles, sort of like curly figure in wood.
The other sample has wenge veneer glued on top of solid maple. The contrast was very strong once the sample was carved. When I made that sample, I was trying to come up with an approach to adorning a hall table that was inspired by water. The carved grooves were shaped to mimic flowing and swirling water. However, I didn’t end up using this approach on the table.
As you can imagine, varying the species, number of layers, depth of carving and pattern you carve would create a pretty much endless variety of looks.
Let’s see the whole table!
Another reader of last week’s column asked to see the whole “frost” coffee table. Although I made it a number of years ago, I haven’t shown it to many people yet. I’ve been slowly creating a series of pieces, all with a similar theme, and one day hope to show these pieces as part of a gallery show. I’ll admit it’s a bit of a “pie in the sky” idea, but if I don’t try, I’ll never know. I’ve had a lot of fun building the pieces, and am also nearing the end of the construction process. Now the hard part: finding a gallery that would be interested in showing some of these pieces. Thankfully I’m a patient guy, as I have a feeling these arrangements don’t happen overnight.
Carving technique
I also got a comment from Ralph asking how the curved sections were cut. The commenter mentioned how straight lines are easier to carve, and how they thought the curves would pose problems. A sharp carving tool goes a long way towards creating smooth curves when carving, though a bit of practice also helps.
Also in the comments section, Barry asked how I didn’t make any mistakes during the carving process. They were being very presumptuous, though who am I to correct someone who thinks my textured carvings are perfect? The truth is I planned out most of these lines by lightly drawing them with a pencil onto the surface of the piece. I used a paper template and some carbon paper to help out. I didn’t draw all of the lines to be carved, just the main structure of the pattern. At that point I was able to see if anything seemed lopsided or out of place and adjust it before grabbing the carving tools. Once the main structure of the pattern was created, I was able to go back and fill in the finer details that bring the piece to life.
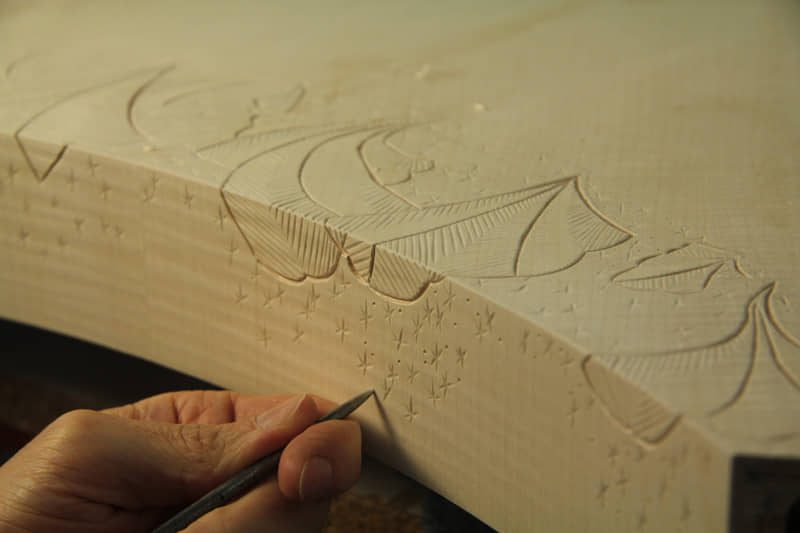
Almost Done
This shot was taken when I was nearing the completion of the carving portion of the coffee table. Adding dimples with an awl helped fill out the pattern and give it a bit more depth.
Alternating Tones
Going from the upper surface downward, there’s a medium-toned wood (I can’t remember what species) over maple or mahogany over a Baltic birch plywood core. The alternating tones help create a strong look.
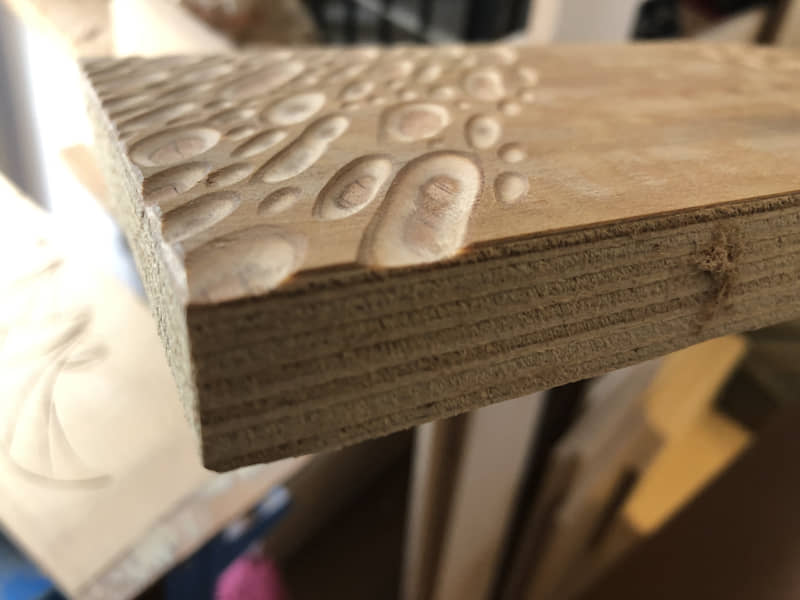
Different Vantage Point
This angle shows the depth and width of the carved grooves a bit better. It also shows the different layers pressed onto the plywood core.
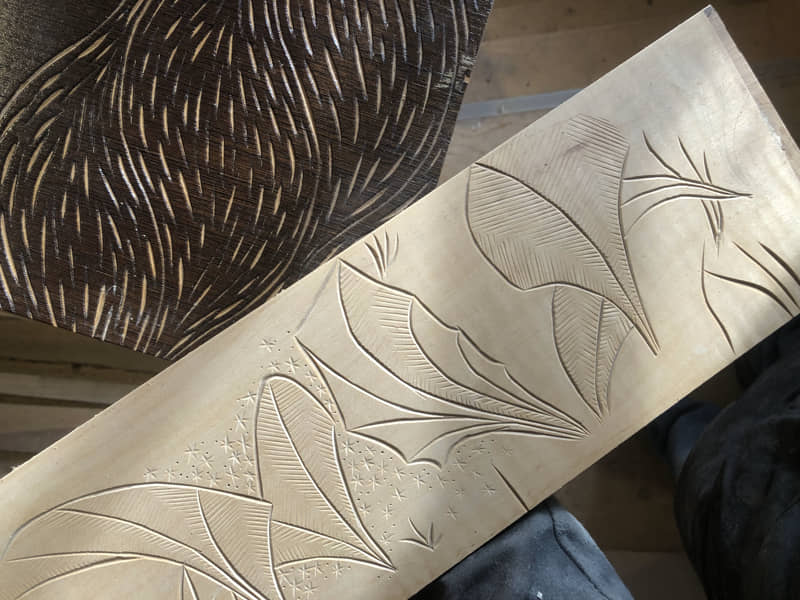
I Never Did Use It
In the lower right of this photo is the sample I shared last week. The upper left corner shows the wenge over maple sample I never ended up incorporating into a piece of furniture. Maybe one day I’ll revisit this approach.
Get Up Close
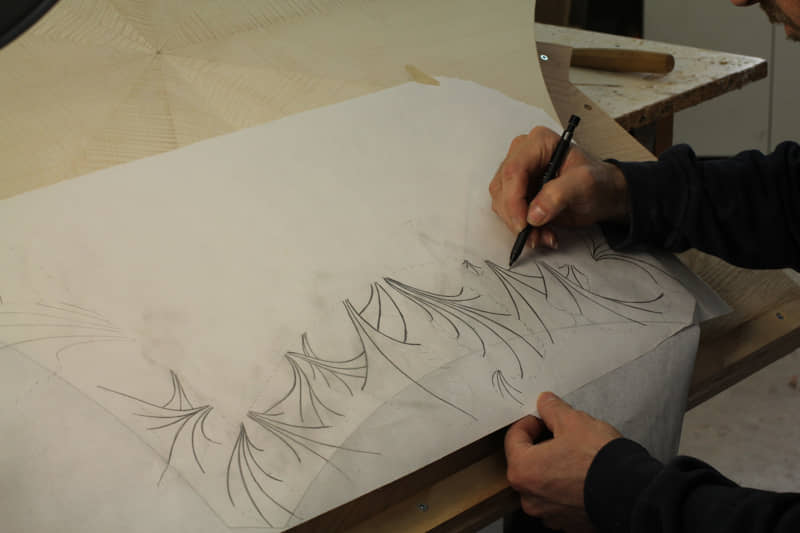
After taking some photos of the frost on the window, I zoomed in tight and started transferring some of the lines and shapes to a piece of paper.
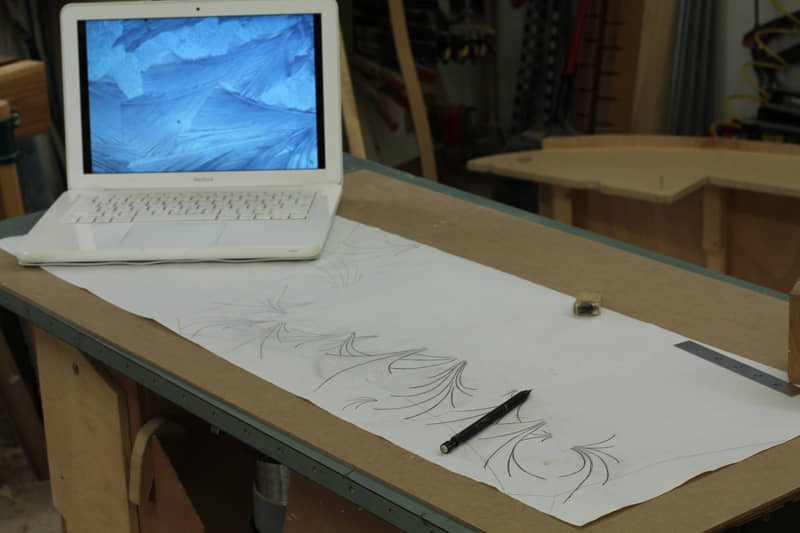
Transfer Time
Once the overall pattern was drawn on the large piece of paper I was able to tape it in position on the table and use carbon paper to help transfer the pattern to the table. It’s a six-sided top, and I made sure to adjust the pattern just enough on all six sides so it would all look different.
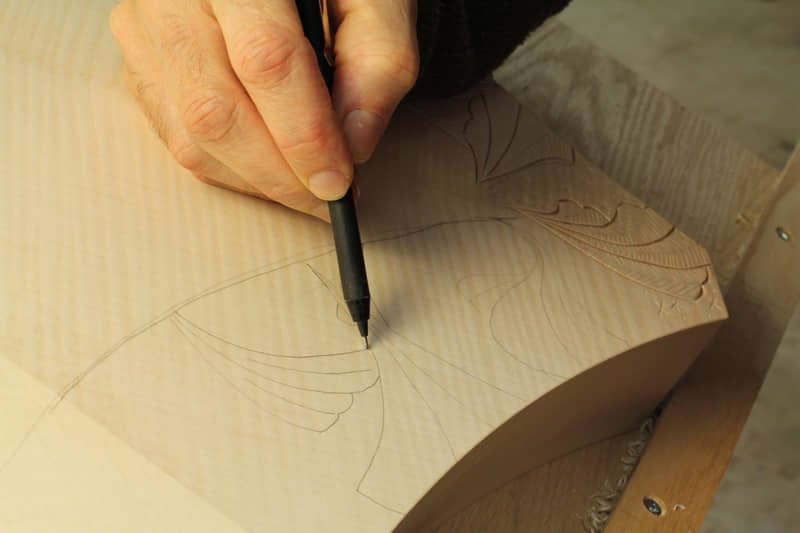
Darken the Lines
Once the paper was removed and the light carbon paper lines were on the table, I darkened them with a pencil.
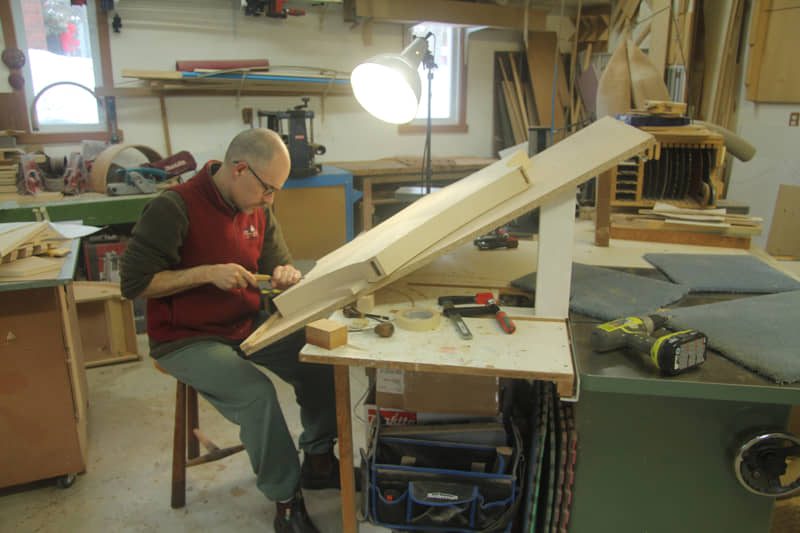
Consider Comfort
I propped up the table’s surface so it would be easier on my neck and back to work on. Please disregard the comfy sweatpants.


Hi, Rob. Can you provide an image or two of the wood carving tools you use (as opposed to ‘texturing tools’)? Would they be the same as wood turning??
Hi Ralph. Yes, I always push the blade. That’s just me though. I guess if one became proficient enough at turning the tool around to pull it towards them they might be able to reduce the need to get up and cut from the other side of the piece. Really, I’ve honestly never had a problem with creating both straight and curved grooves in wood. Practice is always important, as is a sharp tool, but adding a curve isn’t too bad at all. A lot of the skill involves knowing how high to hold the back of the handle, as that will change the geometry of the cutting edge when it is cutting. Practice will help with this though.
Hi, Rob. A little late in replying (me) but regardless thanks for responding to a previous comment. Yup, sharp tools always good. I’m also thinking it also takes a special, patient skill and careful, consistent pressure on the carving tool to guide the tool carefully into the planned curves so the tool doesn’t “jump” forward. I’m assuming you carefully ‘push’ the sharp blade forward? Do you ever ‘pull’ the blade? Wonder if it makes a difference to carving control?
I always loved working with wood. To me it’s like working with life in and of itself. You changes have only enhanced that.
Interesting that you’re using strong oblique lighting as you work to better see the depth and texture you’re creating. Very nice design and execution; I’m sure the overall piece will be stunning!