TIPS & HOW TO
Mill-it-yourself handrail

Steve Maxwell

Simple tools and techniques for routing this traditional architectural feature will make it too simple not to try.
Great as it is to build cabinets, tables and shelves, woodworking skills offer more than this. Your workshop know-how can also be used to create valuable, wood-related, built-in features for your home – features that add beauty and elegance in ways that would otherwise cost big bucks. Stairway hand railings are a case in point. Few woodworkers realize how simple it is to make spectacular shop-milled railings in traditional profiles using ordinary workshop skills and a router. You don’t even need a shaper. If you’ve got a need for hand railing, milling it yourself might just be the most satisfying – and cheapest – way to get what you need while making the most of your woodworking skills.
Milling a handrail involves preparing blanks, adjusting router bit height, routing finger grooves, routing a bottom profile and routing a top profile. Don’t worry if all this is new to you. You’ll feel like a pro in no time.
Prepare Railing Blanks
Traditional handrail profiles require wooden blanks that typically measure somewhat less than 3″ x 3″ in cross section. The exact size depends on the router bits you choose, but regardless of the profile, aim to begin with rough blanks that are at least ¼” wider and thicker than required. This allows room for jointing, planing and sawing to create square corners, flat surfaces and an accurate final size. You’ve got to have accurate blanks if you expect precise handrails that are easy to install. It’s unlikely you’ll find lumber thick enough to make a full size handrail without lamination, but that’s okay. Gluing together a couple of layers of wood goes a long way to prevent warping and cracking of the finished railing.
Start by sawing your wood to rough width. I cut both 1″ and 2″ thick pieces of ash to 3 ¼” wide for the railing featured here. Joint one face of each piece, then an adjoining edge before dry-fitting parts together. If the joints don’t look tight, run the troublesome piece of wood over the jointer again. As you work, prepare enough wood for an extra length of hand railing or two. Besides giving you another shot at installing the railing correctly if you mess up, an extra railing blank also gives you something to work on as you’re tweaking router bit height later on.
I find it best if you arrange the 2″ thick material on top of the handrail profile, with the thinner wood underneath. This locates the joint line somewhere around the bottom of the finger groove, where it’ll be virtually invisible if you’ve created a gap-free glue line. When it comes time to apply glue, don’t just squirt out squiggly beads of the stuff. There are two reasons why you need to do better.
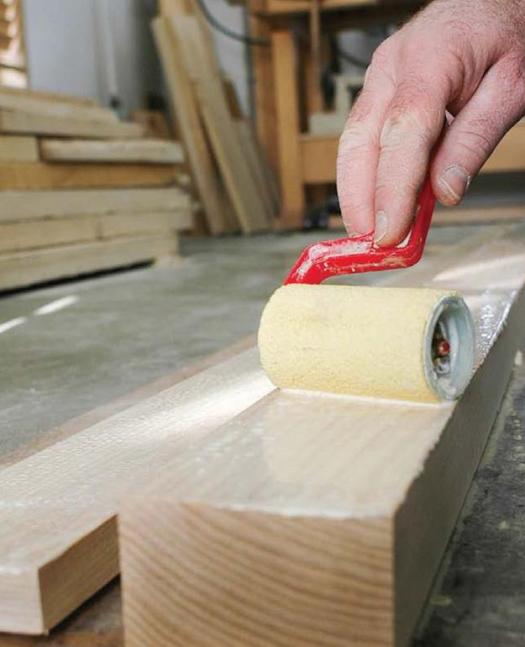
Besides the fact that you need an absolutely reliable glue joint with no dry areas, beads of glue can actually hold large joints like this apart, even under clamping pressure. That’s why I use a small roller to apply a thin but even coat of glue on both halves of each railing blank. Just pour a line of glue onto one board directly from the jug, and then spread it around with the roller. It’s fast and easy.
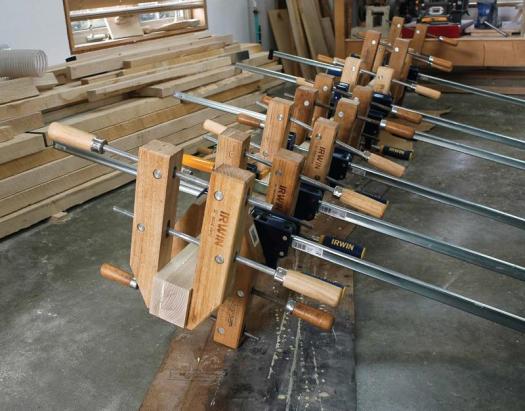
When it comes time to clamp up the railing sandwich, I find wooden hand screws work best. Apply clamps to the ends of each pair of blanks and then use clamps if necessary to align bowed parts in the middle before adding more clamps across the entire length of the blank. Let the assembly sit for one full day before removing clamps and heading back to the jointer. Gluing operations have probably introduced some kind of bow or twist to the wood, and now’s the time to correct this.
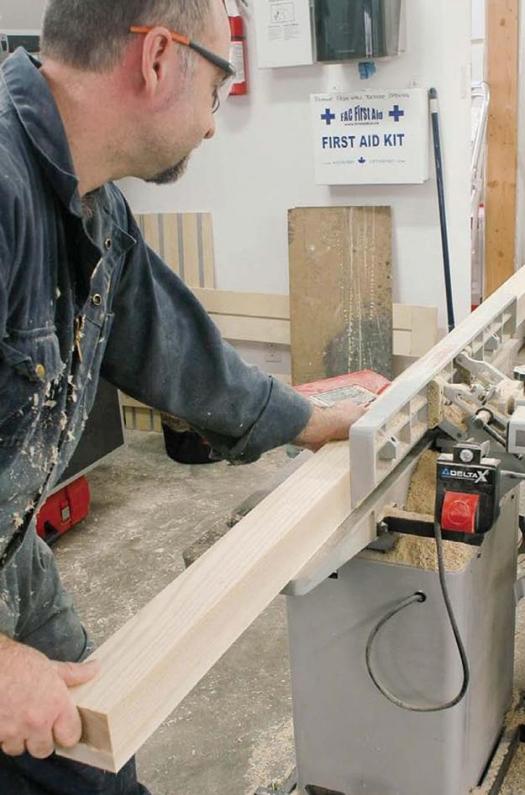
Joint one face, then an adjoining edge, before ripping the blank to width on your table saw and planing to final thickness. It’s essential that the completed blank have absolutely square corners and be of a consistent size along the entire length. Take all the time you need to get machine settings correct beforehand. I find a steel engineer’s square an essential tool for tweaking the position of jointer and table saw fences so they’re perfectly square.
Tweaking Router Bit Height
Most handrail profiles are made with two main router bits that create adjoining profiles, one mills a curved recess to accommodate fingertips, and another makes the rounded, top edge of the railing in two passes – one on each side. A third bit (usually a 45º chamfer or ½” radius round-over bit) performs the more minor role of easing the bottom corner of the hand rail.
It’s one thing to have the router bits you need to create a handrail, but you still need to exercise a certain amount of creativity. Adjusting router bit height is the reason why. Depending on how far the bits stick out beyond the router base, you can create substantially different handrail profiles.
Start by taking your best guess of where you’d like the top profile and finger grooves to be located on the blank. Adjust router bit height accordingly. You may also need to reduce the width or thickness of the blanks a little using your thickness planer.
Take short, trial passes along one end of the extra handrail blank you prepared. If you’ve got a couple of routers in your shop, put one bit in each. This way once you’ve homed in on ideal router bit height you won’t have to remove the bit for any reason to complete other operations. I used a 2 ¼ HP router to mill finger grooves in the handrail you see here. The same size router could be used to rout the top profile, though I opted to use a 3 ¼ HP model.
Routing the Railing
Clamp your railing to the workbench, bottom side up; with the finger grooves arranged one on each side. Next, run a chamfer or round over profile, also along the bottom edge of the railing. Next you’ll need to flip the blank over and rout the top profile, but before you do — a word of caution.
Routing the first round-over pass accurately will be easy because the top of the railing is still flat and able to support the router. Routing the second pass is riskier. That’s because the router will have a tendency to rock back and forth because it doesn’t have much of a flat surface on which to rest. If you’re concerned, sidestep the wobbly router problem by placing a second hand rail blank (or previously completed handrail) on the far side of the blank you’re working on. Place the second rail close enough to the first that it provides an additional support surface for the router as you push it along. It’s especially important to prevent your router from rocking since any unwanted movement translates into a wavy handrail surface. If you do run into a bit of trouble, don’t panic. It’s surprising how much waviness you can smooth out using a piece of 60 grit sandpaper wrapped around your fingers. Finish up with 80, 120 and 180 grit sandpaper and you’re ready for installation and finishing.
Milling your own handrail looks difficult to the rest of the world, but if you’re a woodworker, it’s just another one of those amazing things you get to do in the shop.
Steve has posted a video on his website to accompany this article. Visit stevemaxwell.ca and click on ‘Steve’s Videos’ to view the video clip.
Photos credit: Steve Maxwell
Many clamps
Don't be afraid of using too many clamps for this glue-up…in this case more is better.
Apply the glue
Using a roller will ensure that every inch of the surface gets covered with glue.
Joint the blank
When working with such long blanks on the jointer, ensure that you keep the work against the fence the whole time.
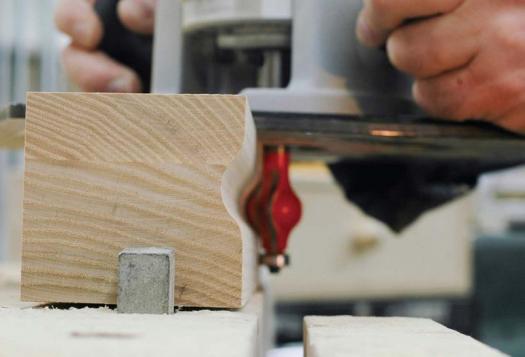
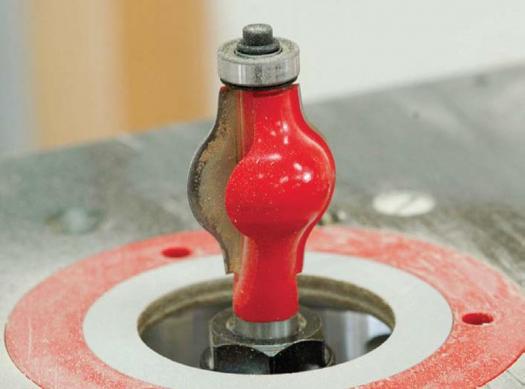
Finger groove
You can test various router bit heights to achieve different looks.
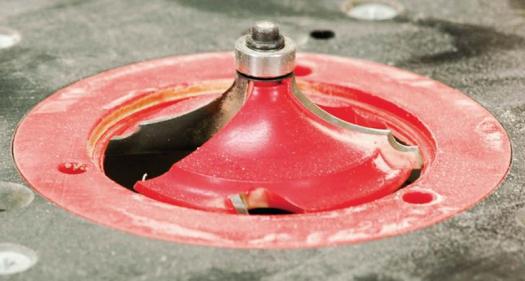
Routing the top profile
This bit will give the rail its decorative appearance.

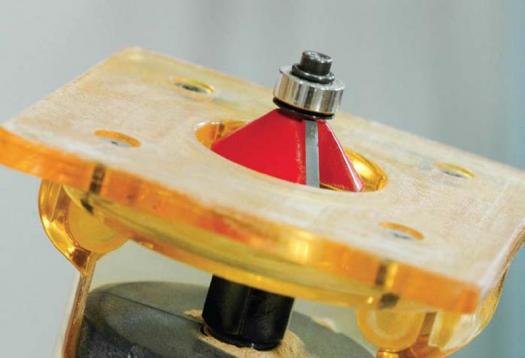
Ease the underside
This step can be done with a chamfer bit or a ½" round-over bit for slightly different esthetics.


I never thought about making my own handrails. My wife is after me to replace our house’s handrails
This was a great article.