TIPS & HOW TO
Meteor Cabinet

Rob Brown

The contrasting colour of the stones and the carved texture around them add a lot to this otherwise unadorned cabinet. This is a playful way to explore the shapes and materials in the world around us.
A customer requested two similar cabinets to house and display jewellery. The overall dimensions and functionality had to be the exact same, but the ornamentation was left open for me to play around with. This article covers what I did with the first cabinet, and in next issue I’ll detail the second cabinet.
Essentially, my only area for ‘playing around’ was on the exterior surface of the cabinet’s four sides. Though I love wood, I’ve always been drawn to other materials as well. I picked up a lot of small stones over the years as I hiked our country’s great trails, and had these worn, smooth stones just waiting for the perfect job. After bouncing around a bunch of ideas, I settled on a random pattern of stones that vaguely resembled meteors hitting the earth’s surface.
Stone Inlay
After playing around with the infinite possibilities for positioning the group of stones, I found one I liked and penciled in its location on the cabinet’s surface. The stones are inlayed into the surface about 3/8″, while the stones themselves were about 5/8″ thick. The first step was to trace the first stone onto a sheet of 1/8″ hardboard precisely 1/16″ outside the edge of the stone. I had to offset the line because I was going to use a 5/8″ dia. template guide and a 1/2″ dia. router bit to create the cavity for the stone. Offsetting the initial stone pattern 1/16″ to the outside would, in theory, create a cavity the perfect size for the stone. In practice, it wasn’t so easy. I used double-sided tape to help hold the stone in place for tracing. I then viewed the stone from directly above while I ran a mechanical pencil along the edge of the stone and drew a line 1/16″ away from its edge. I removed the waste with a coping saw and smooth the edge with some sandpaper. When in doubt, remove less material than you think, as you will perfect the fit later. I then set up my plunge router with a 5/8″ dia. x 1/2″ template guide and a 1/2″ dia. x 1-1/2″ long straight bit.
Before cutting into the cabinet I checked the template on some scrap wood. To rout the cavity I placed a piece of 1/2″ thick Baltic birch plywood, with an oversized clearance hole in its center, under the pattern in the hardboard and clamped the pair to a scrap piece of flat 2×6. The 1/2″ plywood ensured the template guide on the router had enough clearance from the workpiece. After a test fit, the hole in the hardboard template had to be adjusted to fine-tune the routed cavity. Once the fit in the scrap wood was perfect it was onto the cabinet to nervously rout the first cavity. This process was repeated until all the stones had a final resting place.
The stone on the corner of the cabinet took a bit more work to get right. First working on a piece of scrap, I laid out the shape then started removing wood with a saw, chisel and some carving gouges. Once I was confident about the final look, I transferred some of those dimensions to the cabinet and set to work fitting the corner stone. Patience paid off as I eventually snuck up on a good fit.
Add some texture
To add a visual similar to what a real meteor would leave in the ground, I thought some carved texture would be appropriate around the perimeter of the stones. I used a power grinder equipped with an Arbortech blade, but a steady hand was imperative. If you don’t have power carving equipment, or the confidence and experience to make these fine marks, you could use a sharp carving gouge and work from the inside of the cavity towards the outside. A slightly random approach keeps the look more natural.
Epoxy is the answer
After applying a finish to the cabinet (I didn’t want a finish on the stones as it would yellow them), I roughed up the bottom of each stone with sandpaper and a file to ensure it had enough tooth for a strong bond. To secure the stones in their cavities I used epoxy. Its great gap filling properties, long open time and ability to stick to almost anything makes it the easy choice. I mixed up the epoxy and placed just enough of it into the cavity so when the stone was inserted the cavity would fill of epoxy, yet not squeeze out, becoming visible. It’s an exact science. Though I didn’t get it perfect, I went by feel and was pleased with the results.
After applying a finish to the cabinet (I didn’t want a finish on the stones as it would yellow them), I roughed up the bottom of each stone with sandpaper and a file to ensure it had enough tooth for a strong bond. To secure the stones in their cavities I used epoxy. Its great gap filling properties, long open time and ability to stick to almost anything makes it the easy choice. I mixed up the epoxy and placed just enough of it into the cavity so when the stone was inserted the cavity would fill of epoxy, yet not squeeze out, becoming visible. It’s an exact science. Though I didn’t get it perfect, I went by feel and was pleased with the results.
Photos credit: Rob Brown
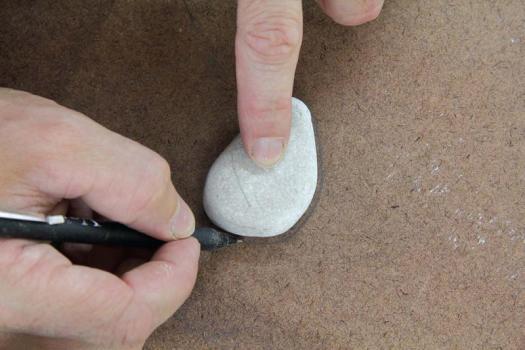
Trace the Profile
Trace the shape of the stone on the hardboard so the pencil line is offset 1/16" to the outside of the stone’s edge. When in doubt, leave a bit more material on the hardboard because more material can be removed later in order to enlarge the cavity.
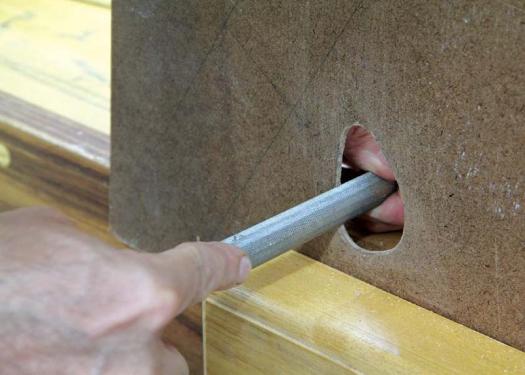
Adjust the Fit
Once you’ve tested the initial hole on a piece of scrap, fine-tune the hardboard template to perfect the hole.
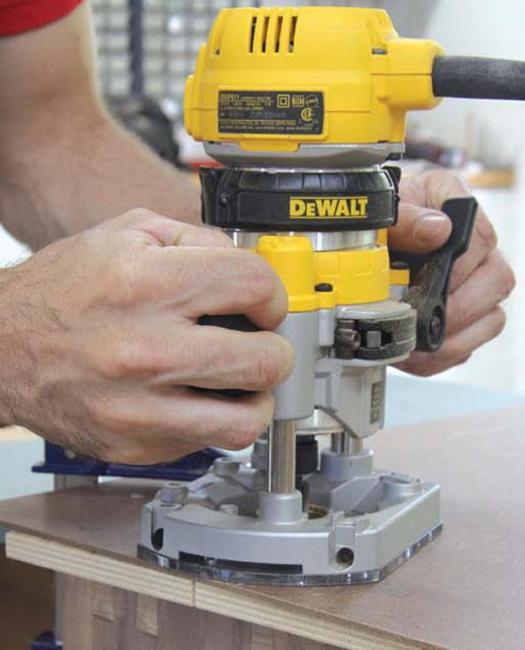
Create the Cavity
With an accurate template you can start on the real cavity. Notice the piece of 1/2" ply between the hardboard template and the cabinet. This is to allow enough clearance room between the template guide and the workpiece.
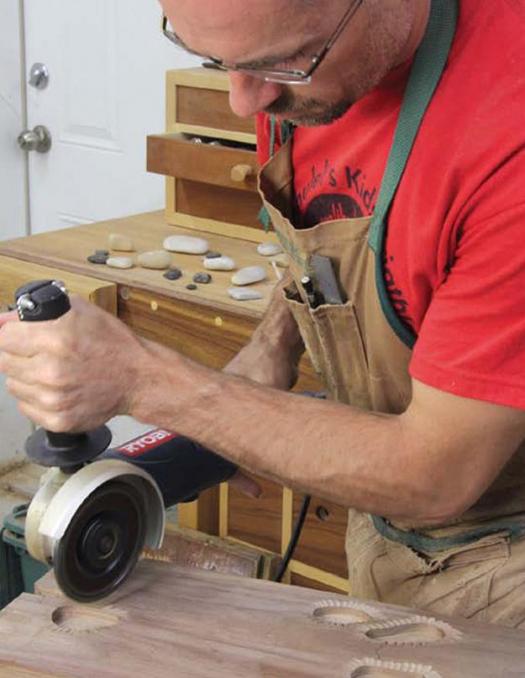
Steady as She Goes
I used a power grinder with a cutting attachment to create the texture around each stone. I was extremely careful to have a light, gentle touch. A sharp carving gouge would also work well.
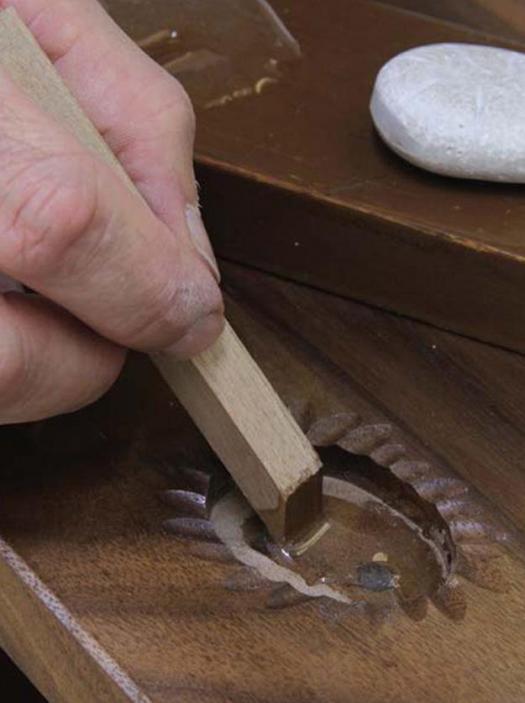
Install the Stones
Once the cavities were complete and a finish was applied, I used slow-setting epoxy to fix the stones in place. I first roughed up the underside of the stones to ensure they had enough tooth for a long-lasting joint.
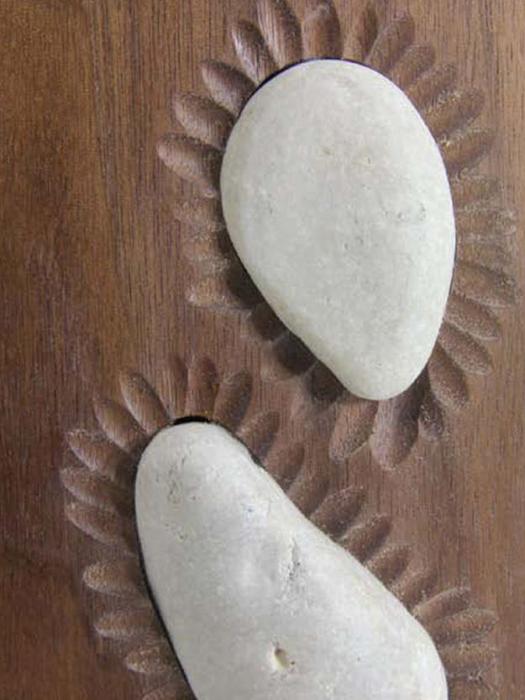
A Strong Focal Point
The installed stones, with accompanying textured perimeter. Contrasting colours and textures add a strong, and unique, visual to this otherwise simple cabinet.