TIPS & HOW TO
Hammer Small Shop Tips

Rob Brown

Contest Entries: A special thanks to Hammer for sponsoring Canadian Woodworking & Home Improvement’s ‘Small Shop Solutions’ contest. Hammer machinery has proven to be an ideal solution for many small shops across Canada. Here is a sampling of the small shop tips that our readers sent us to enter our recent contest.
Use paper towel or newspaper under project glue-ups for easy clean-up. This is especially important if you’re using equipment surfaces for glue tables.
Brian Kohlman
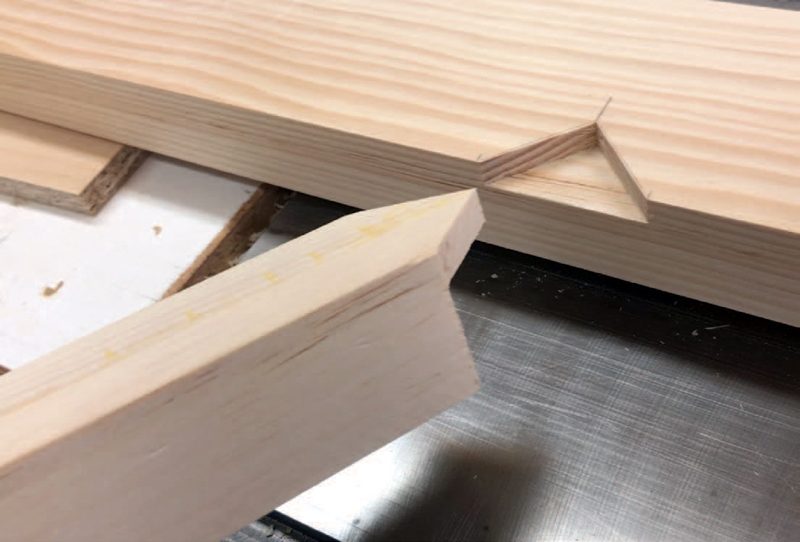
To stop excess glue from ruining a finish, first dry-assemble the joints then put tape across the joint and cut the tape along the wood joint with a sharp blade. Separate the pieces of wood, apply the glue, and clamp them together again. The glue will ooze onto the tape, not the wood. Peel off the tape before the glue dries.
Dan Duce
It seems that I often get into a situation where there just isn’t enough light shining where I need it. I bought a clip-on LED light that I can move around the shop easily to shine light in places where the normal lighting isn’t bright enough.
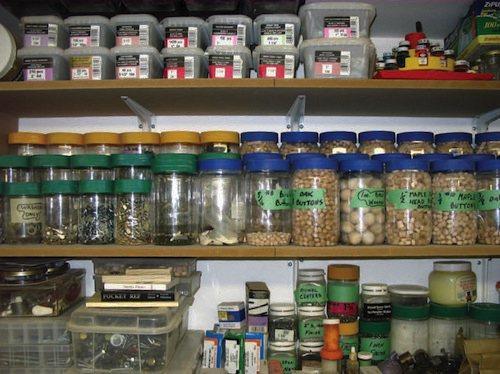
Kevin Violette
Reuse peanut butter and other miscellaneous jars for hardware and other small items. I buy chunky, smooth, or extra-creamy peanut butter depending on what colour lid I need to sort my stuff, but you could use tape to colour-code jars.
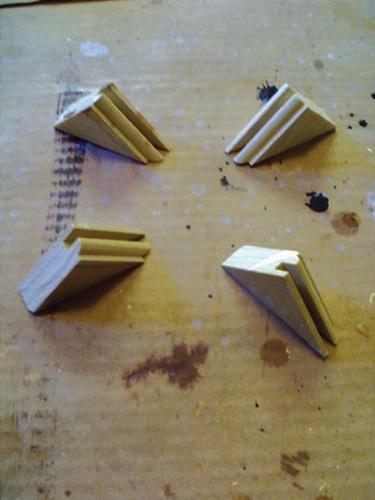
Ed Mazzocca
Why buy paint pyramids when you can use wood scraps to make them? I’ve created pyramids by using scraps from mitred door corners, but you can use any scraps to do this.
Art Mulder
A small fan in the window can really help to clear the air. Dust collection is important, but you sometimes need to exhaust fumes outside and bring in the fresh air, and an exhaust fan is a big help.
Dan Duce
Get a shop coat or apron with pockets and wear it. It’s amazing how much time you will save by having simple things you use all the time in your pocket. Just having a tape measure, pencil, and small square constantly handy saves me a crazy amount of time.
Daniel Espejo
My tools and truck share space in the garage, so everything is on wheels. To mark where everything goes (so I don’t have to re-level legs on out-feed tables, for example), I snap chalk lines on the concrete floor and spray over them with a can of varnish. I can sweep the floor, drive over it, and clean it and the marks are still there.
Dwayne Joyce
I use an old toothbrush to spread glue before joining two pieces together. It spreads the glue out and ensures the surfaces are covered properly.
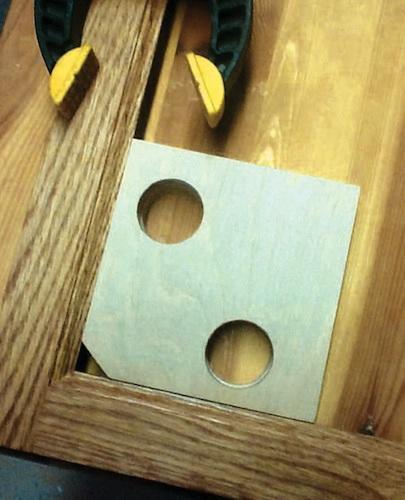
Bob Perez
I use scrap pieces of Baltic birch that are cut square and have a couple of holes drilled to accept clamps. I use these to help keep cabinets or frames square during glue-up.
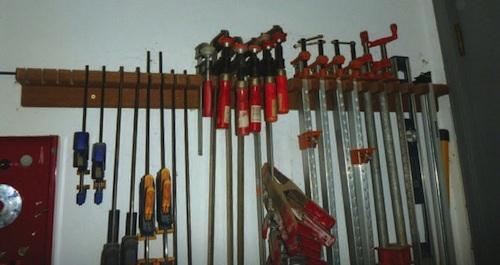
Glenn McBride
I cut slots in an extra piece of composite deck board to match the shapes of all my clamps, and a few other tools. Now every one of them has its own spot and overall it takes up very little space.
Andrew Glitherow
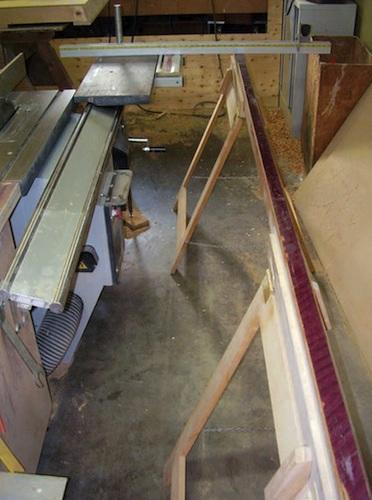
I have come up with a lightweight and collapsible support frame to enable me to cut 4×8 sheets. The fixture consists of two folding sawhorses and a removable horizontal support bar that sits on top of the horses. The horizontal bar is laminated to reduce friction. The horizontal bar is cradled in a slot supported on four 1/4″ bolts. The bolts are held in place by T-nuts, which allow the level of the bar to be adjusted to the same height as the machine’s surface. I also use it when running large items through my shaper.
Kevin Dube
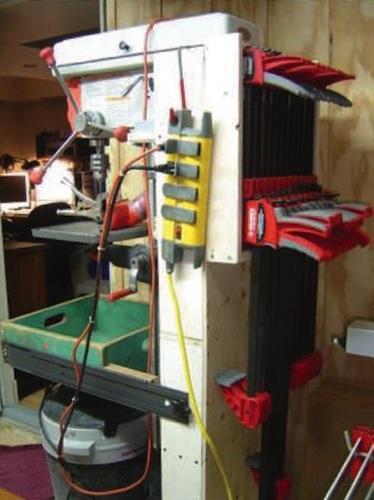
My useable wall space was growing thin, but I needed somewhere to store some small clamps. I devised a simple storage rack to fasten to the back of my drill press storage cabinet, but it could have been placed on almost any machine.
Kathryn Garven
When I’m at the big box stores, I pick up a couple of laminate samples. They are about 2-1/2″ x 4″ and are handy for tasks such as spreading or scraping glue or can be used as shims.
Charles Mak
Parallel clamps can be used as bench vises. They can be used to hold a board or workpiece that is too tall or too wide for a vise. For a very wide board, use two clamps; for a tall one, one clamp will do. If you have only one vise on the bench and need an extra one for another job at the same time, this is a simple solution.
There were 5 runners up for the Grand Prize, and we'd like to share their tips with you
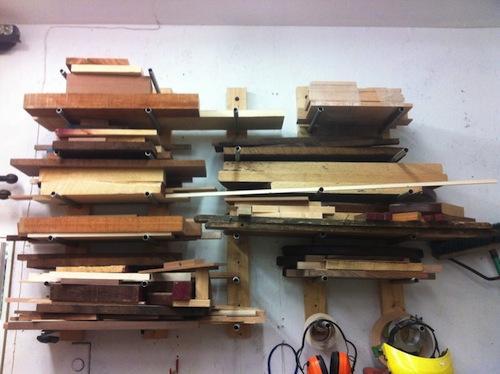
Small Lumber Storage Peter Froh, Regina, SK
I got this idea from the many large lumber rack ideas that are on the web. I thought, why not make a system for my cutoffs? It saves on floor space and is customizable and modular. If you end up needing more room, just put up more 2x4s and buy more conduit. I find it useful in that I can create custom spaces for the off cuts as needed. As well, it was cheap and easy. I carefully drilled the holes in each 2×4 so that they have the same spacing. I made sure to mount the 2×4 material so the holes line up and then I stuck some conduit in the holes as needed.
Portable Work Shop Kamil Czuba, Newmarket, ON
I have a single-car garage, so setting up a shop is just not possible. To combat the space restriction, I build a custom shop on my driveway when I plan on doing any woodworking. Mobile bases are the key here. It takes 15 minutes to wheel everything out and set up my shop. Don’t let space restrictions keep you from enjoying your hobby. I say hobby, because this applies more to hobby woodworkers. The ones in the business generally have a beautiful full shop.
Learn to live with a little clutter Dan Duce, Fall River, NS
When you’re deep in cutting pieces or getting ready for assembly, you might have a lot of little tools in use ñ clamps, pencils, squares, tape measures, and the like. If you don’t finish the steps you are working on and have to take a break, resist the temptation to put everything away; odds are you will need all of the tools that you laid out. If you have the option of leaving them in place, you will find that you get back in the groove of what you were doing when you left them there. Also, you won’t waste time putting them away and then getting them out again to put back where they were in the first place.
Safety Gear at the Ready Matthew Cole, Toronto, ON
Shuffling tools around when trying to get a quick cut done often leads to misplacing my basic safely gear (hearing and eye protection). To avoid the temptation to skip them, I keep a set hanging at the power supply location.
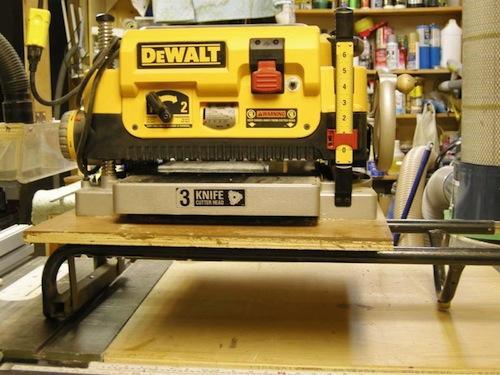
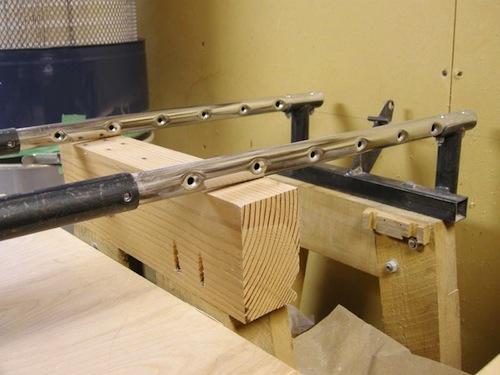
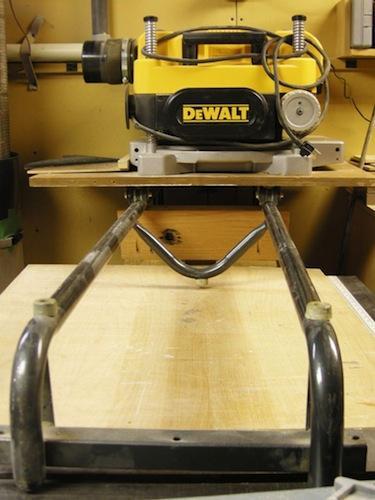
Sliding Planer Means No Lifting Don Ryall, St. John’s, NFLD
I have, as do most small shop woodworkers, a portable thickness planer; portable meaning I am able to move it around the shop. However, I find that it’s still a heavy object to be lugging around. One day my wife convinced me that the storage room needed to be cleaned out of all the junk I never use any more. Most of it was moved from one corner of the room to the other. However, there was an old rowing machine that sat there for many years, unused. I decided it was time for it to go. I started to put it together, to see if it was in working condition before I gave it away. As I slid the seat along the rails, it ran nice and smooth and I got this idea.
I took off the footrests and the rowing arms. I then mounted it at the end of my table saw. I used a stand that I used once for another project and shimmed it to the right height and then slid the rails onto the base, which already had an adjustable slot for pins. I then cut a piece of 3/4″ birch plywood and installed the runners from the sliding seat off the rowing machine. It works great, just take a second to set up, and best of all, no more lifting.
Photos credit: Tipsters Lead Photo by Hammer


Probably not new, but here are a couple of tips>
I have started to finish some of my parts before assembly. That way glue squeeze out is easy to wipe off and does not affect the application of finish. To have a clean surface that glue will adhere to I cover those areas with blue tape. As least with hard wax oil finish like Osmo, the finish does not go through the tape or seep under it. I am left with an unfinished wood to unfinished wood surface for my glue up.
While the tips aren’t new Gerard, they are well worth repeating. Trying to remove glue after it’s cured is a lot harder than removing it beforehand. Thanks for the reminder!