PROJECT
Two stylish salt cellars

Rob Brown

Find more Gifts / Crafts projects
Up your cooking game with a handmade salt cellar. Here are two designs to choose from.
All chefs and serious amateur cooks store their salt in salt cellars. They’re not only for storing different types of salt, but they allow you to tangibly feel how much salt you’re adding to a recipe. Salt shakers dispense different amounts of salt with each shake, so grabbing a pinch of salt with your fingers is more accurate. And you don’t want to experience the frustration of having a shaker lid come off over a simmering pot of food. Also, many quality salts come in large flake form and don’t fit through the holes in most salt shakers.
Although I describe how I made two different salt cellars in this article, I hope you use this more as a starting point for designing your own salt cellar. Typically, a salt cellar has one or two cavities that hold a bit less than a cup of salt. The cavities shouldn’t be too narrow or deep, as the user won’t easily be able to get their fingers into them to pick up a pinch salt.
The first cellar I’ll explain is made from a single piece of wood, while the second is laminated from a few pieces and includes contrasting tops and bases.
A lid to keep contaminants out is important. Purchased salt cellars often have a lid that pivots open, but that’s not how I designed these two. Although I’ve never used one with a rotating lid, I imagine an outstretched lid might catch on something (most likely my hand or sleeve) as I cook, knocking the cellar over. I also see the thin lid surrounding the area where it’s attached to the pivot point as a structural weak point, as short grain is easily broken. Both of the lids on my two versions lift on and off, but how you make yours is up to you.
Two stylish salt cellars
Salt cellar #1
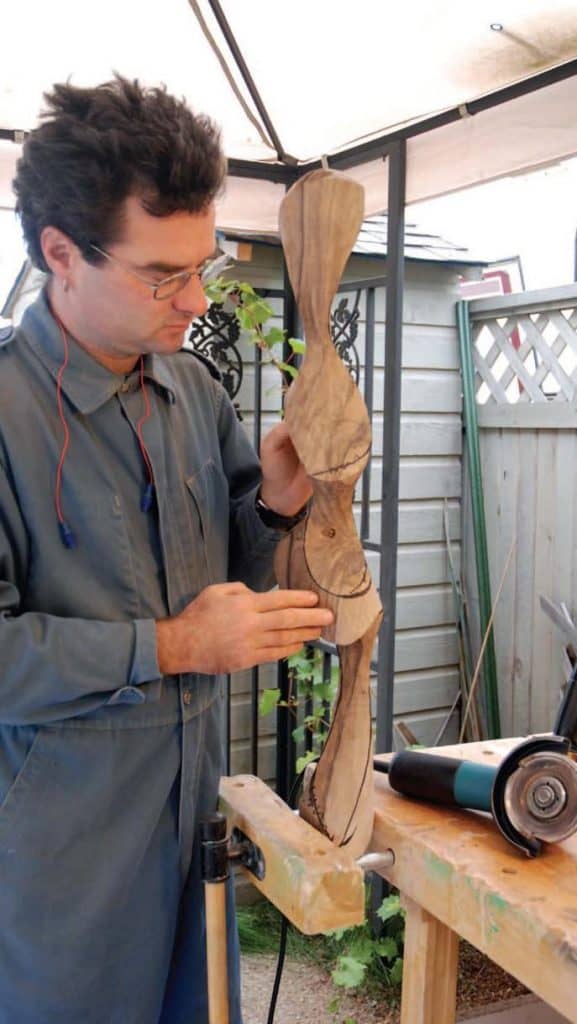
In a recent storm, a huge willow tree in a park near our home was blown over. When the arborists arrived to remove it, I asked them for a few pieces of it, which they were happy to give me. The pieces have been drying ever since, and one smaller piece was perfect for this project. The wood had sentimental value and its colour and natural shape were beautiful.
From a single piece of wood
I cut a 3″ wide × 3″ high × 12″ long blank from the chunk of wood and dressed it square. I wasn’t too concerned with the exact size. I left it 12″ long because it would be easier and safer to machine. My approach for this cellar was to slice off the bottom and top and cut through the larger middle section, leaving two cavities, then reattach the bottom and make the top. This would leave the grain and colour consistent across the piece. The width of the blank at this stage would be essentially the finished width of the salt cellar. The height would be reduced by a pair of saw kerfs. The box would be cut to finished length later, so I didn’t worry about that. The final size of this salt cellar was 2-1/4″ wide × 2-1/2″ high × 8″ long.
I took a few minutes to hit the top live edge surface with a wire brush chucked into my drill. This removed any dirt and remaining bark. Sanding this surface would only degrade it.
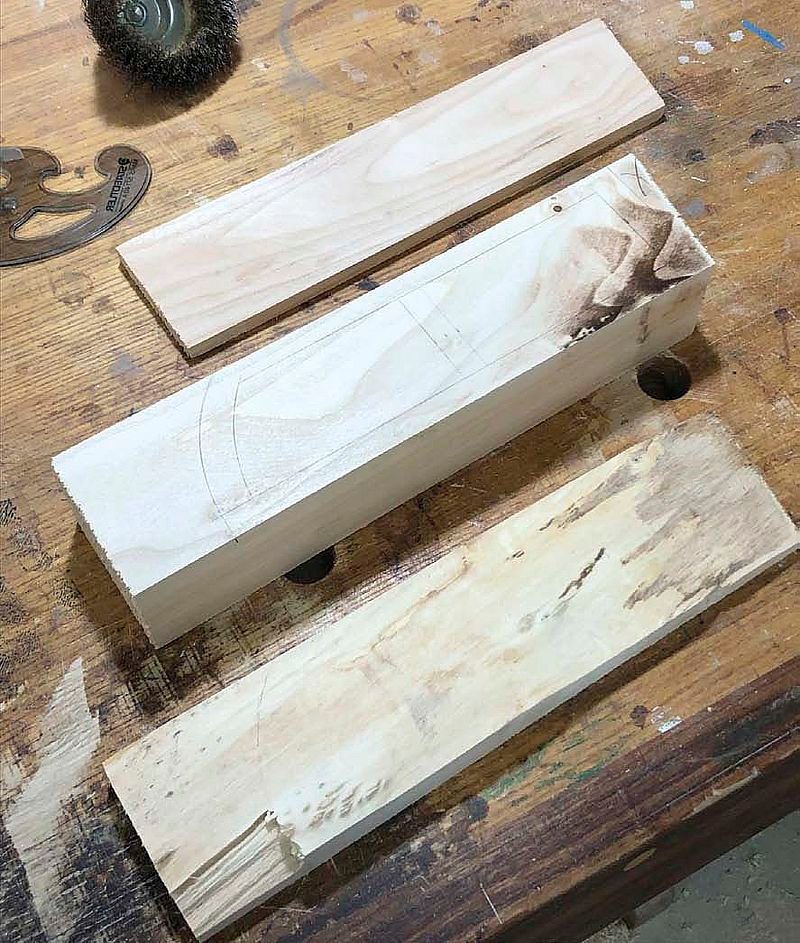
My table saw blade cuts high enough to slice off both the bottom and top, though this step could also be done on a bandsaw. With the 1/4″ thick bottom removed I then ripped the 1-5/8″ high middle section from the top. The top surface was a live edge, so I couldn’t run that surface against the rip fence. Though it varied, the top ended up being about 3/8″ thick.
Lay out and create the cavities
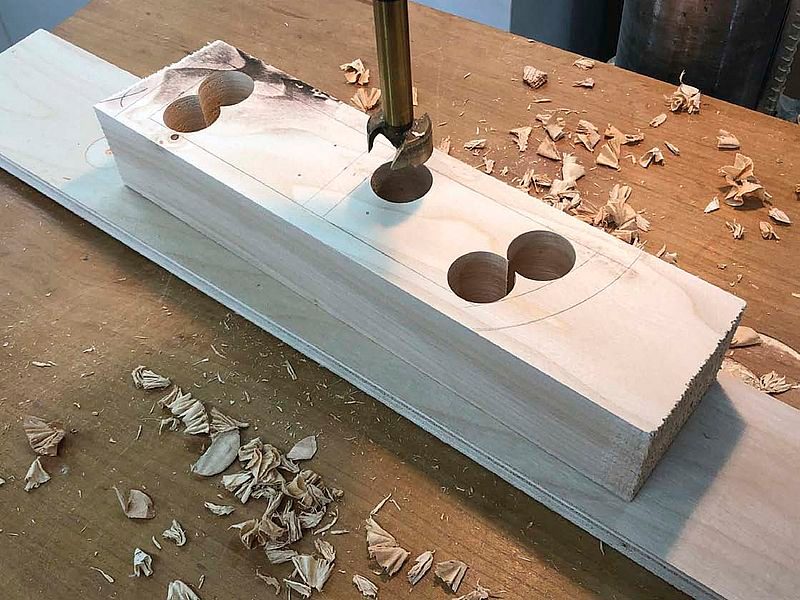
The natural features on the top dictated how the middle section would be laid out. There were a few small textured features on the top that I wanted to keep, but I needed to remove a split section just beyond those. After experimenting with the layout for the final outer shape of the salt cellar, and how I wanted to split up the two cavities, I was off to the drill press. I used a 5/8″ Forstner bit to bore holes through the middle section at each of the eight corners.
At my scroll saw I removed the waste from both of the cavities, trying to leave as flat and clean a surface as possible. Some filing and sanding smoothed the contours on the inner faces.
Shape the lid inserts
In order to ensure the top would positively locate itself on top of the box I needed to create two small inserts that would be glued to the underside of the lid. These would protrude slightly into the cavities. I broke out a piece of willow, dressed it to 3/16″ thick, turned the box upside down on top of this piece and traced the two cavities onto it. I then cut the inserts out and sanded their edges so they fit nicely into the two cavities. They only needed to fit into the upper 3/16″ of the cavity, so that’s all I concerned myself with. Since the bottom wasn’t installed yet, this process was easy. I also eased the lower edges of the inserts so they would more easily fit into the cavities once they were glued to the underside of the lid.
Glue on the inserts
I aligned the lid with the main section of the box by using some clamps. The clamps would keep the lid and box aligned while gluing the inserts onto the underside of the lid. I applied a small amount of glue to the upper face of the inserts and positioned them in place. If your cavities are slightly too small to allow the inserts to drop down to come into contact with the lid, you’ll have to position the inserts approximately where they will be glued to the lid before you use the clamps to align the lid with the box.
I used the offcuts from the cavities to allow me to apply clamping pressure to press the inserts onto the underside of the lid. Because the top surface of the lid wasn’t flat I used thick fabric between the lid and two cauls so the clamps wouldn’t damage the lid. Once the clamps were gently tightened, I set it aside to dry.
Add the bottom
Once the lid was dry, I used a similar approach to align and glue the bottom to the main section of the box. Once glue was added to the underside of the main section, I brought the bottom into position and added clamps to align the parts. Additional clamps and cauls were used to apply pressure to the bottom.
Final shape and sanding
With the bottom glued in place, and the lid positioned on top of the box, I was ready to cut the box to its final shape. I double checked that the shape would still work with the position and size of the cavities, then used the bandsaw to trim the ends. Some sanding would flush up and smooth all the faces except for the live edge surface on the lid.
At this stage I realized the lid bowed a bit. It sat on the box at both ends but the centre of the lid hovered off the box by about 1/16″. I sanded the upper surface of the main box until the fit of the lid was even. I know it will likely move over the seasons, but it’s good to start off with the lid fitting nicely, especially if it’s a gift.
Finish salt cellar #1
Once the sharp corners and edges were eased it was time for a finish. I chose not to finish the inner surface of the cavities, but I wanted a bit of protection on the outer surfaces. I wiped on a few coats of shellac followed by two thin coats of an oil finish for some protection against water.
Salt cellar #2
The first step was to dress a length of lumber large enough to give me three layers to laminate into the main section of this second salt cellar. I used maple for the base of this salt cellar and mahogany for the lids. Using one board ensures the grain and colour will remain as even as possible throughout the box. The overall finished dimensions of this salt cellar were 2-3/4″ wide × 2-3/4″ high × 6″ long. The holes I bored were 2-3/8″ in diameter. This left 3/16″ of material on either side of the hole; not huge, but certainly enough to create a strong salt cellar. The exact dimensions aren’t critical. I’d start by checking if you have a large drill bit to bore the two cavities, then size the rest of the cellar around that dimension.
I used cauls to ensure the three layers were as aligned with each other as possible, and used clamps to apply slight inward force while the glue dried.
Bore two holes
A bit of math gave me the centre points for drilling the two holes for the salt cavities. I slowly drilled the holes the full depth of the workpiece. This process took a few minutes per hole, as there was a lot of material to remove.
The bottoms
I could have glued a thin piece of wood to the underside of the maple laminations, but I didn’t want to break up the visual simplicity of the three even layers on the outside of the cellar. Instead, I routed a small rabbet into the inner edge of the two cavities and shaped a pair of mahogany disks to be glued in place.
To machine the small rabbet, I swapped out the standard 1/2″ diameter bearing on the end of my flush trim router bit with a smaller bearing and routed the two rabbets.
Once I flipped the box right side up I was able to trace the two openings onto a piece of mahogany that was ever so slightly thicker than the rabbets were high. This was so when I glued the bottoms in place cauls could be used to easily apply pressure on the undersides of the bottoms. Next, I cut and shaped the bottoms to fit into the round rabbet. I sanded the inner faces of the cavities, as well as the upper faces of the bottoms, before gluing the mahogany disks in place for good.
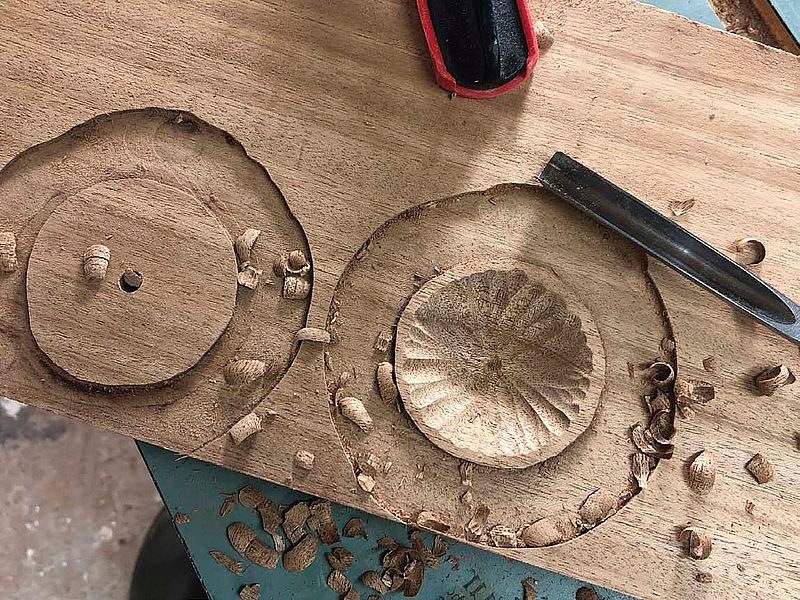
Top things off
Making the two lids was the trickiest part of the second cellar. I opted to freehand rout the lip on the underside of each lid so the lid would fit onto the cavity positively. I drew two circles slightly larger than the cavity openings onto some mahogany, chucked a straight bit into my router, set the depth of cut to about 1/8″ and freehanded the router around the circle.
With the two lips roughed in, I bored a 1/4″ diameter hole about 3/8″ into the centre of the lids on their undersides. This gave me a guide to carve to as I removed material from the underside of both lids. Removing wood from the undersides of each lid is optional. I liked the idea of the user removing the lid from one cavity of salt and being able to place that lid on top of the other lid, so that’s why I carved out some material from the underside of each lid. As an added bonus, I think the carved surface under each lid is quite attractive.
Next, I added a larger circle to these two lids and rough cut them out on the bandsaw. I had to use a gently curved carving gouge to fit the lip under each top to the cavity. A chisel would also work.
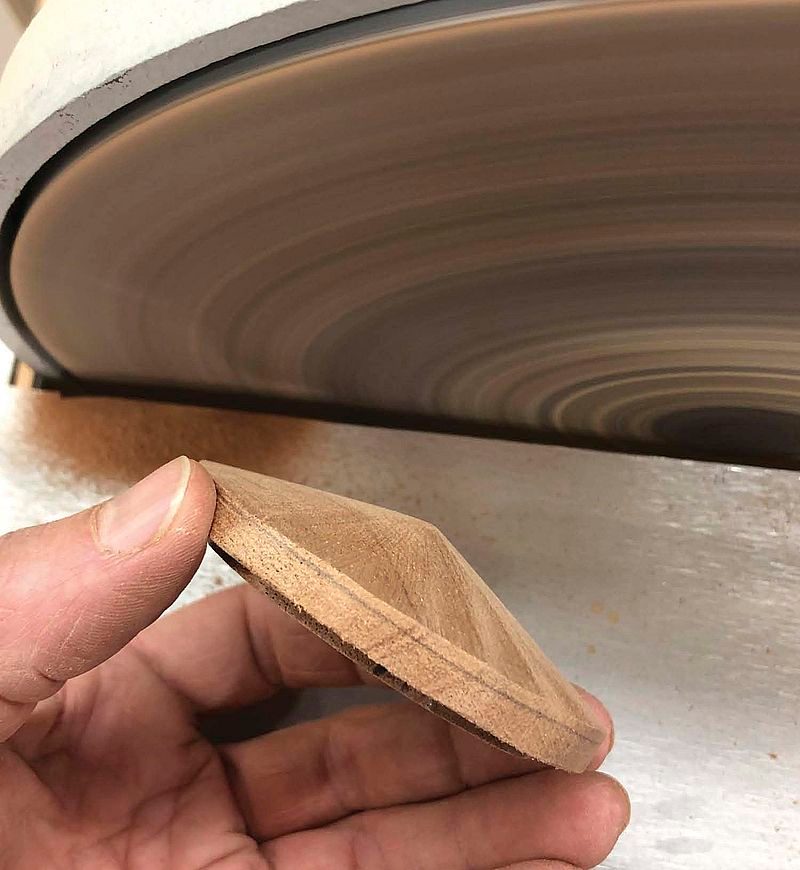
With a loose friction fit, I was able to further shape each lid. I added a pencil line to the edges of the lids to give me something to work towards while shaping. I was going for a slightly domed top, which I accomplished on my disk sander.
As I got closer to the finished shape, I put the lid back in the cavity and added a pencil line on the top of the lid. I did this by pressing one finger against the side of the box while holding the pencil so it overlapped the lid slightly. I then rotated the lid and drew a circular line around the lid. This gave me an even line with which to shape the outer edge of the lids.
My initial thought was to add texture to the top surface of the lids, too, but I liked the smooth look I was left with.
Shape the box
At this stage I was able to plane the bottoms flush with the underside. The outer edges of the box were next, and they were taken care of on my table saw. I only removed about 1/16″ of material from both sides. It would also be okay to sand the faces smooth.
The curves on the two ends were marked, then cut and sanded smooth. The centre point of the lids was used as a centre point for the end arcs, which left an even reveal between the lids and the ends of the box.
Apply a finish
Some hand sanding faired the domed lid and prepared everything for a finish. Similar to my first salt cellar, I applied a few light coats of shellac for colour, then added a couple light coats of wiping oil for protection.
Photos by Rob Brown
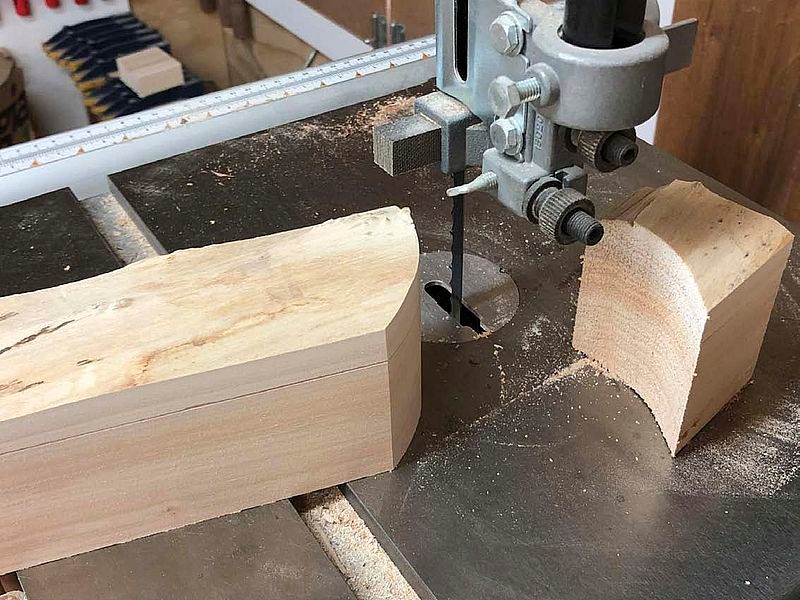
All Separate
The bottom and top have been ripped away from the middle section of the first salt cellar. Notice the chipped portion of the top at the very bottom of this photo. This is the section of the top Brown didn’t want to include in the finished project.
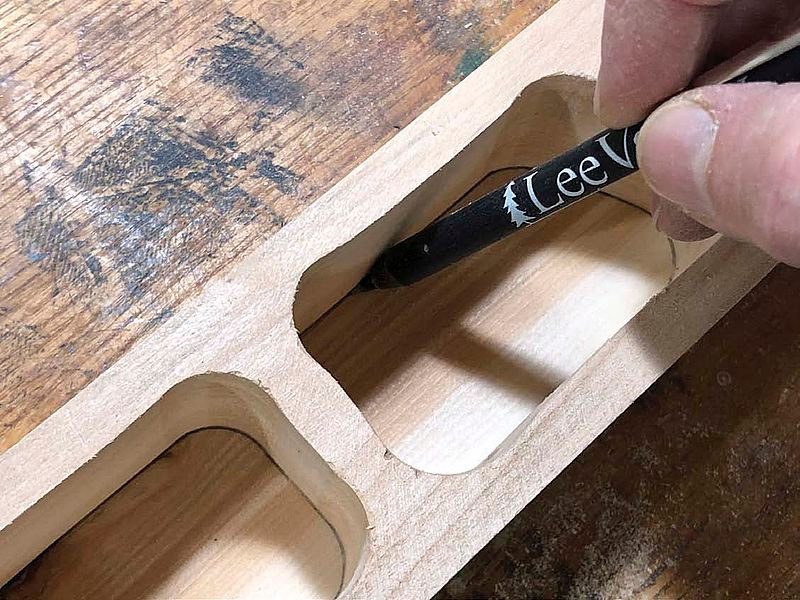
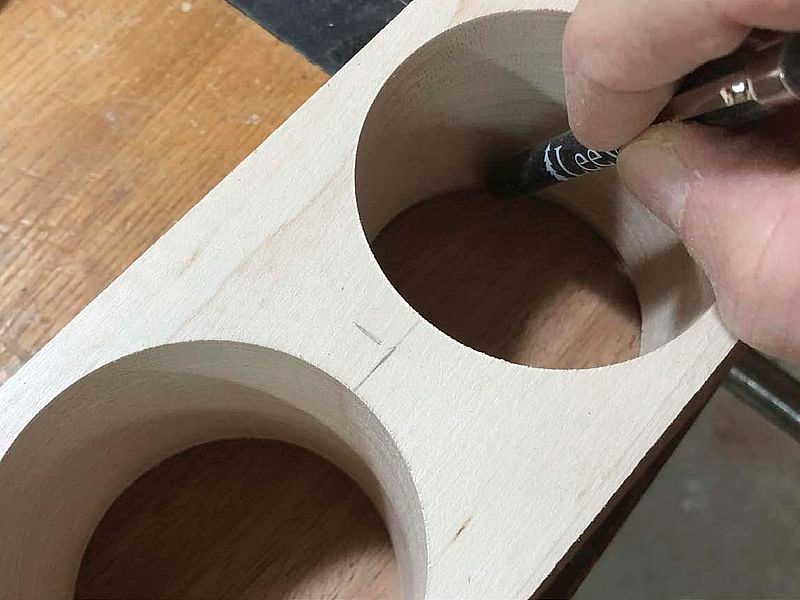
Basic Layout
After the walls and divider were drawn on the middle section of the salt cellar, Brown marked the centre locations of the holes that would shape the cavities.

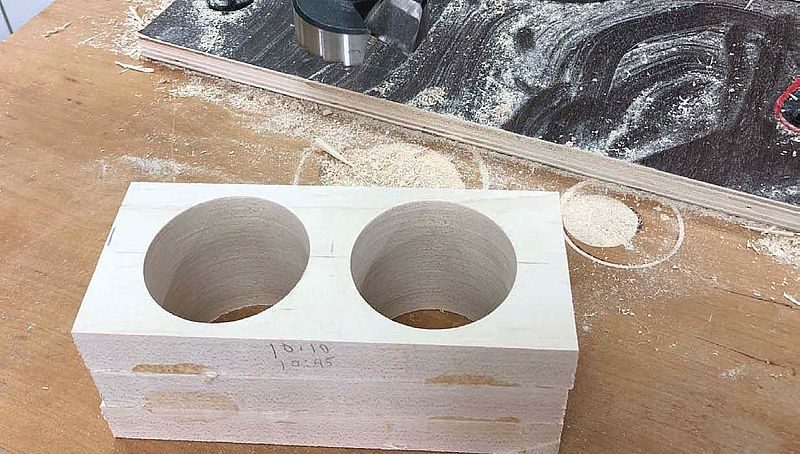
Define the Inner Corners
A drill press will ensure the holes are parallel to the edges of the box.
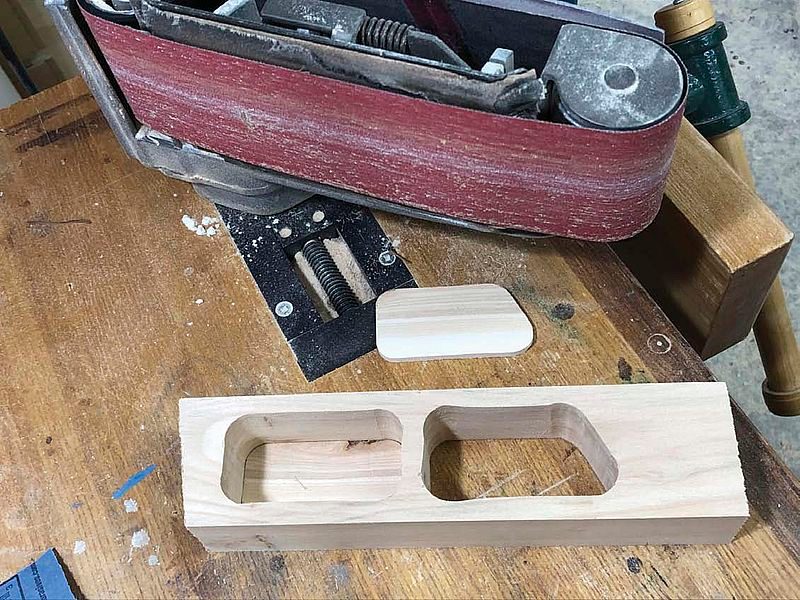
Smooth Things Out
A variety of tools will assist in creating flat, smooth inner cavity walls.

Trace the Lid Inserts
With the box upside down on top of the insert material, Brown traces their shapes onto the workpiece.
Shape the Inserts
Brown shapes each insert so it fits into the cavity nicely. Perfection isn’t necessary, but the fit shouldn’t be sloppy otherwise the fit of the finished lid will be loose.
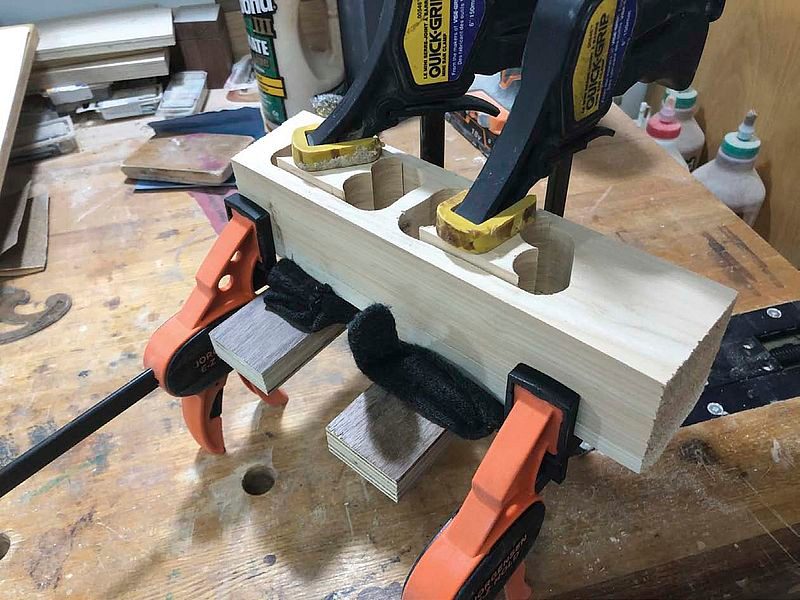
Use the Offcuts
Brown uses the two pieces of waste he removed from the cavities as cauls to help clamp the inserts to the underside of the lid.
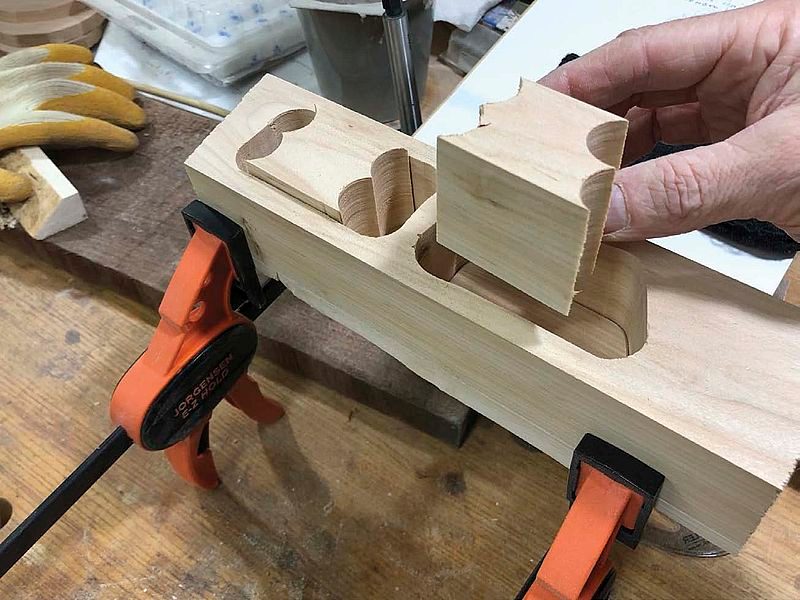
Glue the Inserts
Here, Brown glues the inserts to the underside of the lid. Cauls and black fabric protect the top surface of the live edge lid.
Finished Shape
The bandsaw will take care of trimming the assembled salt cellar to length.
Keep Things Aligned
Cauls and clamps will help keep the layers aligned while clamping up the main section of this salt cellar.

Some Math
Brown used a 2-3/8" diameter bit to create the cavities, but you could use a different size bit. Just make sure the walls of the box aren’t too thin once the holes are bored.
Tiny Round Rabbets
A flush trim router bit equipped with a smaller bearing will leave you with a small rabbet.

Trace and Cut
Trace the shape onto the bottom material, then cut it out and shape it to fit the rabbet.
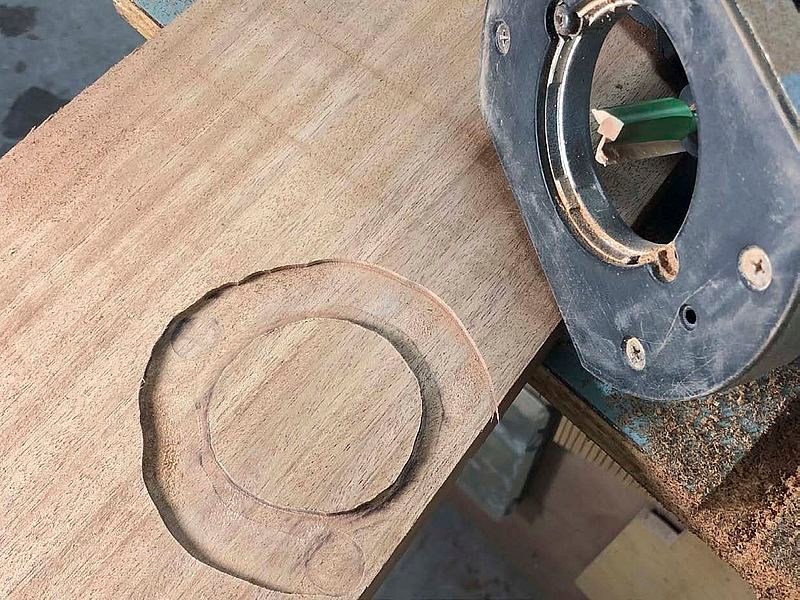
Rout a Lip
Here, Brown routs a lip into the underside of each of the lids. He leaves a small amount of waste on the workpiece, as he can fine-tune the fit with a sharp chisel or carving gouge later.
Drill, Then Carve
By drilling a hole in the centre of the underside of each lid Brown can use the hole as a depth guide while he carves.
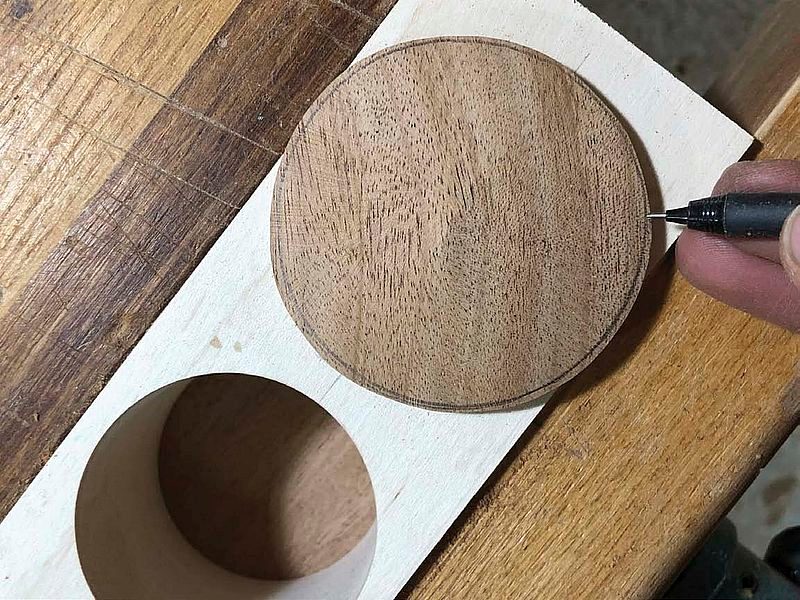
Final Diameter
With the lid in the cavity, Brown rotates the lid with one hand and adds a pencil mark with the other hand to define the outer diameter of the lid. He then shapes each lid to the line.
Shape the Lids
Sanders and hand tools can be used to shape the lids. Here, Brown uses a disk sander to dome the upper surface of the lids. Notice the pencil line on the side of the lid; it guides Brown as he shapes. If you use a machine sander to shape the lid, be careful; a small lid is hard to hold and you don’t want to sand off your fingertips.