PROJECT
Turn a Christmas ornament

Bob Hamilton

Find more Woodturning projects
Christmas ornaments are fun projects that can be as easy or difficult as you choose to make them. Whatever style you make, be sure to make many…not only for gifts, but to practice the correct technique.
In this article I will share the method I use to make a hollow globe style ornament. I tend to prefer a sort of flattened onion shape for the globe with a long, thin icicle pendant, but you can make ornaments in any shape or style that appeals to you.
Turn a Christmas ornament
First, the globe
I used hard maple for the globe. It didn’t display any figure or distinctive grain so I decided to add a walnut accent to dress it up a bit. The piece I used happened to be already roughed out round. I made an index mark along the length of the piece and cut about 1-1/4″ off one end. I had a spindle blank of black walnut about 3″ square so I cut a 1/8″ long slice off the end of it as well.
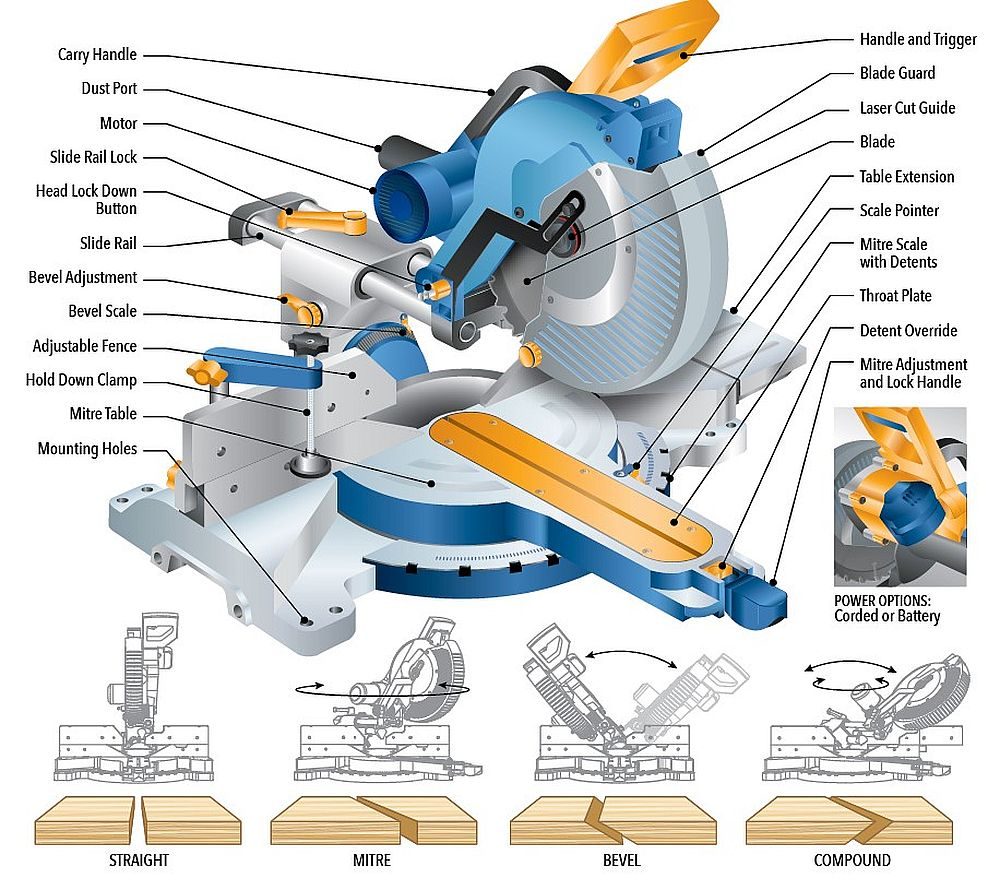
My mitre saw makes a pretty smooth cross-cut, but I wanted to be sure the face was flat and square to the edge. I clamped a piece of 80-grit sandpaper to a piece of melamine on my lathe bed and took a few light passes on the mating ends of the maple cylinders to improve the surface for gluing. I also bored a 1″ hole in the center of the walnut square so the clamping pressure would be directed to the perimeter. This is an end-grain-to-end-grain butt joint so it needs all the help it can get. I applied glue to all the mating surfaces and clamped the piece overnight.
Hollow the globe
With the glue dry, I mounted the blank in my four-jaw chuck and turned it down to a cylinder.
I used a 1/2″ spindle gouge to turn a shape I liked. I left plenty of material on the waste block side for support when I hollowed the globe. I then used a 3/8″ drill bit mounted in the tailstock to bore a hole all the way through the blank. In order to make hollowing easier, I used a spindle gouge to open up the hole a bit in the top of the ornament. I also used the spindle gouge to remove as much of the waste inside the globe as I could reach. The only reason for hollowing the globe is to reduce its weight, so if you don’t have any hollowing tools you may choose to leave it as is, then go ahead and sand and finish this portion of the ornament. My preference is to hollow the globe to a reasonably uniform wall thickness of 1/8″ to 3/16″. I use a bent hollowing tool to carry out that operation.
Once you have the globe hollowed to your satisfaction you can sand and finish as much of the outside as you have access to. I used a friction polish called Shellawax Cream for an easy and quick gloss finish. My last step before parting the globe off was to take a very light scraping cut with the wing of a spindle gouge on the sides of the top hole. This exposes a clean and fresh wood surface. Often the sides of the hole get nicked up a bit from inadvertent contact while inserting or withdrawing a hollowing tool and some of the friction polish usually gets pushed into the hole. The sides of this hole will be a glue surface so I didn’t want any finish on there.
I parted off the globe from the waste block and turned a stub tenon in the face of the waste block to use as a friction drive to let me clean up the bottom of the ornament. I recessed the face of the waste block around the base of the stub tenon so that when the globe was pushed on to the tenon the top surface of the ornament was making contact with the rim of the recess. This provided a much broader support for the globe to resist side pressure when I cleaned up, sanded and finished the bottom surface. The fit of the tenon into the hole in the top of the ornament needs to be quite tight because that friction is what is driving the globe for the subsequent operations, but if it is too tight the ornament might split as you try to force it on. Unfortunately, the only way to learn how tight is too tight is through experience, which means splitting a few ornaments along the way. Even when you think you have learned you will still split the odd one. I know I still do.
I mounted the globe between the friction drive and a cone center in the tailstock for the clean-up cuts on the bottom curve. Once the cutting operations were complete the tailstock was removed to allow access for sanding and finishing the bottom. After the finish had been applied, I used the 3/8″ drill bit that I originally used to bore the globe to ream the hole and remove any finish that might be there. That completed the ornament globe.
Second, the pendant
I made the hanger piece and the icicle pendant from a piece of contrasting wood, in this case black walnut, to match the accent ring. The stock needed to be large enough in section to cover the top hole and overlap a little bit. If you want to turn it long and thin then it must be very straight-grained. I used a length of 1×1″ walnut. I mounted it between centers and turned it down to a cylinder. I then made a tenon on the end to grip in my chuck.
I mounted the piece for the pendant into my four-jaw chuck, using the tail center for support. I shaped a long 3/8″ tenon on the tailstock end and undercut the shoulder so it would seat nicely against the curved bottom surface of the globe. I also made a few cuts to start the shaping of the flange that will be against the bottom of the ornament, since this will be very close to the face of the chuck when I turn it around and access will be difficult. I then turned the piece around and gripped the 3/8″ tenon in the chuck to start shaping the pendant.
I started out with tailstock support while I tapered the piece. I then moved the tailstock out of the way and turned a short section right at the end down to about 1/8″ diameter. I used a small detail skew to form a tiny ball right on the end. Then I just turned a long taper as thin as I dared, finishing at the base of the ball. The upper elements were turned last after the taper was complete. The pendant was sanded and finished using the same friction polish I used for the globe. I then shifted the flange forward, away from the chuck jaws, to allow me to part the tenon to length. That completed the pendant.
Third, the hanger
The hanger piece was turned much the same way as the pendant, with a long tenon and undercut shoulder to fit the hole in the top of the globe, and then some initial shaping, before reversing it into the chuck for final shaping, sanding and finishing. I used a small drill bit held in a pin vise to bore the pilot hole for the screw eye. Again, I shifted the piece forward in the chuck to allow parting the tenon to length. The screw eye (Lee Valley #00S56.41) is then screwed into the hole.
Assembly
When gluing the pieces together I tried to avoid any squeeze out to the outside of the ornament. I applied medium-viscosity cyanoacrylate glue to the sides of the hole so that the tenon pushed any excess to the inside and then held the globe upright so the excess glue would flow back around the tenon and set up. These are not high-stress joints so I felt that this is adequate. Ornaments can be made to suit whatever size your stock will allow. This one is a bit on the large size, compared to ornaments I typically make. They are usually made from 2″ square stock. With different species, stock sizes and finishes, the variations are endless.
Photos by Bob Hamilton
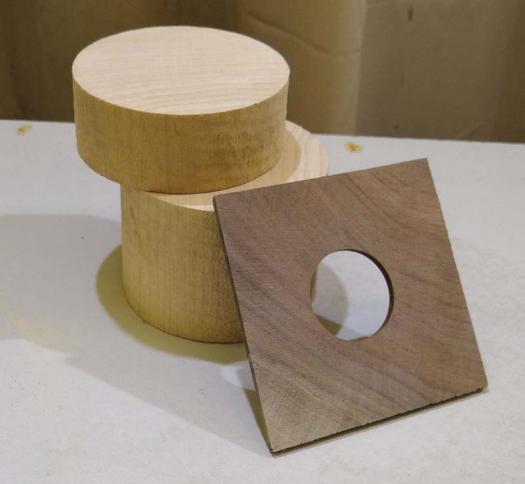
Ready for Glue
Hamilton removes the middle section of the decorative walnut piece in order to ensure pressure is applied to the outer edge. When the globe is hollowed out, the glue line will remain as strong as possible.
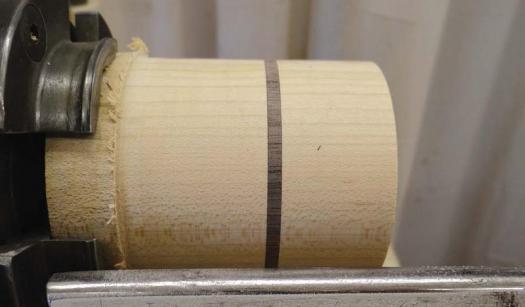
Turned Round
The globe is turned round, and is ready for shaping. Leave plenty of material on the waste side to make shaping easier.
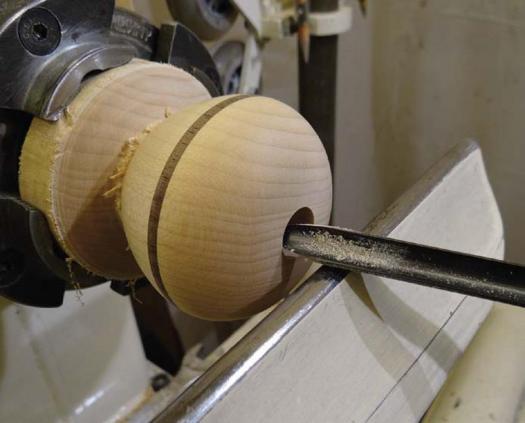
Hollow the Globe
Once the outer surface of the globe is shaped, and a hole has been bored in the center, hollow out the globe to reduce its weight.
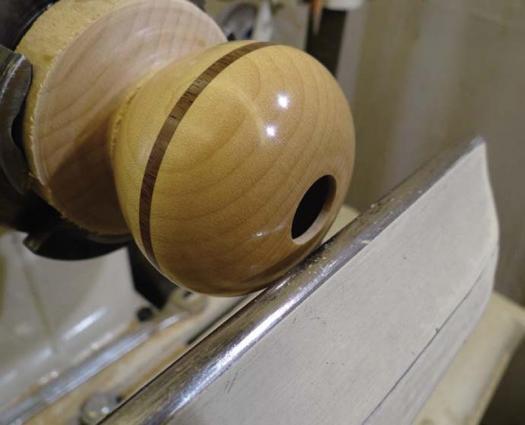
Start Applying a Finish
With the globes hollowed out you can start to apply a finish to the outer surface of the globe.
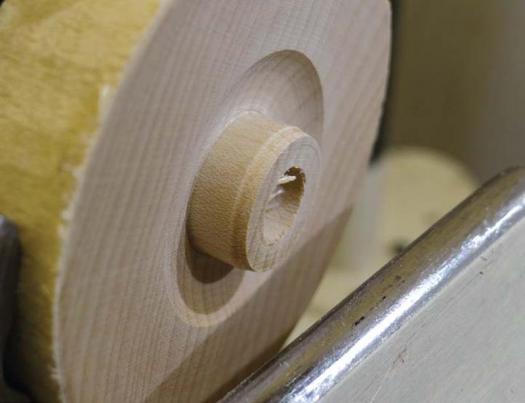
Friction Tenon
Turn a small tenon in the waste block, and use a friction fit to install the parted globe so you can turn its other side.
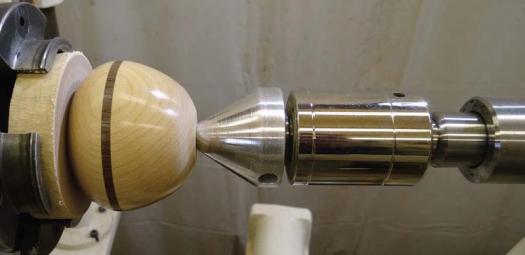
Friction Fit
With the globe pressed onto the small tenon, use a cone center in the tailstock to turn the rest of the globe.
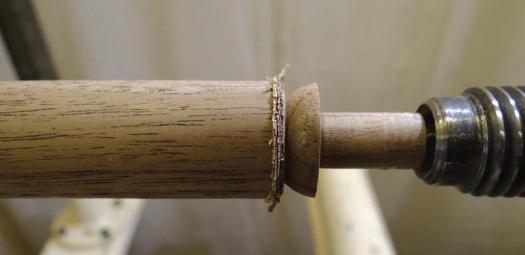
Start the Pendant
With the pendant blank mounted in a chuck, and the tail stock brought in to assist, turn a tenon and start to shape the outer flange.
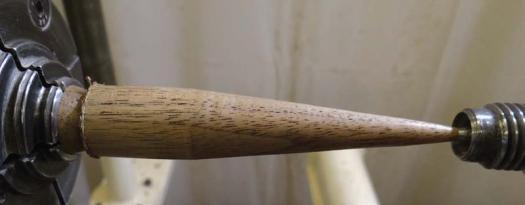
An Even Taper
Using the tailstock for support, Hamilton tapered the pendant.
Tiny Tenon
After moving the tailstock out of the way turn a small tenon, about 1/8" in diameter, so you can focus on the tiny ball at the very bottom of the pendant.

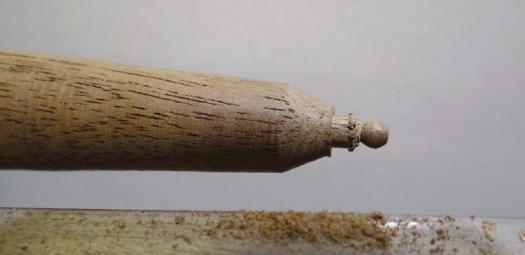
Turn the Ball
Using a small detail skew turn as small a ball as you can, then create the taper on the rest of the lower section of the pendant.
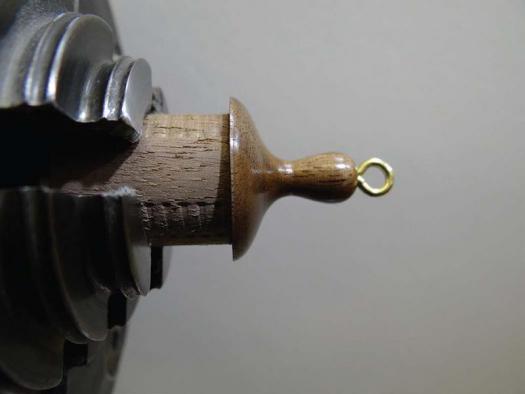
The Hanger
Once the hanger is shaped and finished, drill a hole and install the screw eye. It’s now ready to be parted and adhered to the globe.