PROJECT
Sundial

Cynthia White

Find more Gifts / Crafts projects
This project will not only be a great conversation starter, it will also help keep you on time.
Sundials have existed since about 3500 BC. There are several different types, and this easy weekend project is for a (Northern Hemisphere) horizontal sundial.
I chose to make an octagon, although you could use any outer shape as long as you use a circle for laying out your clock face. You can make it any size, but keep in mind the clock face is easier to read (and probably more accurate) if it’s bigger. My octagon is 22″ across at its widest point. You may need to laminate more than one board together to achieve that width, but I happened to find a piece of Mahogany that width at my local wood supply store so I grabbed it. I want to warn the novices here that working with a 22″ wide piece of wood is awkward at best. I used a circular saw to cut it to shape.
You will need one other piece of wood for the “gnomon” or “shadow caster”, the piece that sticks up off the board for indicating the time. I chose a contrasting wood, purpleheart. Some of the woods generally recommended as being resistant to weather and bugs besides mahogany and purpleheart are white oak, cedar, teak, yew, cypress, walnut, and redwood.
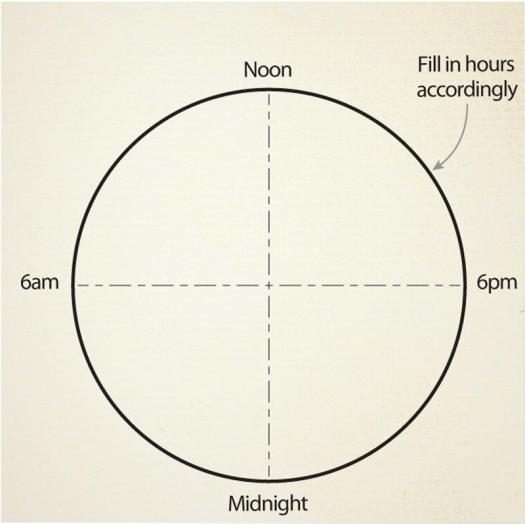
Once you have your circle and have drawn noon, 6 a.m. and 6 p.m., the equation for finding the other hour points on your circle is tan ∂ = sin (whatever your latitude is) tan (15°× t) where t = the number of hours before or after noon and theta (∂) is the angle of a given hour and the noon hour. And if you don’t want to bother with that (I didn’t), there are several places on the Internet where all you do is plug in your latitude and click and voila, all the calculations are done for you (anycalculator.com/horizontalsundial.htm). Note that the hour points on your circle will not be equally spaced apart. I drew my hour points and drilled some small pilot holes for each hour before I sanded.
Next make your gnomon. The only thing required for the gnomon is that it must project from the board at the angle of your latitude.* (You can incline the horizontal sundial if you like, as long as you compensate with the angle of the gnomon. For example, instead of using a 50° angle on my gnomon, as my latitude is 49-3/4°, I used 40° and am inclining the Sundial 10° so I don’t have any pooling water on it during the rainy season. A future weekend project will be a rain dial.) And make it as narrow as you comfortably can. I didn’t want to make my gnomon less than 5/8″ for fear of it disintegrating outside. I recommend you make the gnomon project between half and three-quarters of the radius of the circle in order to project a shadow close to the hour point, but there is no rule. You can also make the gnomon as fancy or simple as you like as long as the top of the projection is straight and flat, and the bottom doesn’t project past the tip.
My gnomon is a triangle and attaches to the base with a small stub mortise and tenon on the underside. For the novices, cutting a small mortise by hand is nerve-wracking, so my advice is make sure your chisels are razor sharp, and go slowly. I put a little trim around the base of the gnomon for looks, stability, and to hide my mortise misadventures. You could also run a router equipped with a straight bit along a straight edge.
The mahogany was a breeze to work with but that purpleheart is evil. It machines okay with the table saw, but was difficult to sand (it felt like polishing marble) and hard to work with hand tools. If you get a burn mark on it, good luck getting it off. For cutting the tenon, I tried four different handsaws before I finally had success with a small Japanese pull saw. I broke three – yes, three – drill bits while drilling pilot holes for decorative finishing nails.
Your sundial needs numbers; you could certainly carve them, or make them with a scroll saw. I don’t have either of those tools (yet), so I got a local sign business to cut 1-1/2″ vinyl numbers for me, which adhere well to raw wood – provided it’s sanded very smooth and doesn’t have a severely open grain. Use whatever strikes your fancy for marking the hours. You can also indicate lines on the sundial from the center point to each hour.
Place the sundial in a sunny location directed at “True North”. This is not “Magnetic North” on your compass. To find True North, place a vertical stick in the ground in the sun and mark where the tip of the shadow is. Wait 15 minutes and mark where the tip of the shadow is now. With another stick, draw a line between those two points. Make a perpendicular line from that line in the direction of the projected shadow. That’s True North.
If drawn and placed carefully, the sundial is amazingly accurate and you will have a great conversation piece for your garden. However, the sundial shows you apparent solar time (the time given by the true sun in the sky). That’s not exactly the same as the time on your watch or standard time. In order for it to match your watch time, the sundial has to be corrected for longitude, equation of time (EOT) and daylight savings time. It’s too long to go into here, but if anyone wants to know more, then email me.
I decided to leave my sundial unfinished and let it weather outside. If I do finish it at a later date, I intend to use a System Three epoxy resin (bar top coating) finish.
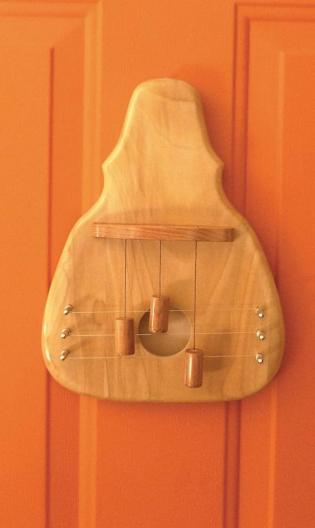
Sundial
Photos by Cynthia White
Simple Circle
A wooden ruler, or even a strip of scrap wood, is great for marking the circle. Temporarily fasten it to the center of the sundial and drill a hole at the correct radius.
How to Draw an Octagon
Draw a circle, then draw a horizontal line across the circle through the center point. Draw another line perpendicular to the first line, again going through the center point. Add two more lines, each one between the two perpendicular lines. Now just draw a straight line between each two adjacent endpoints on the circle.
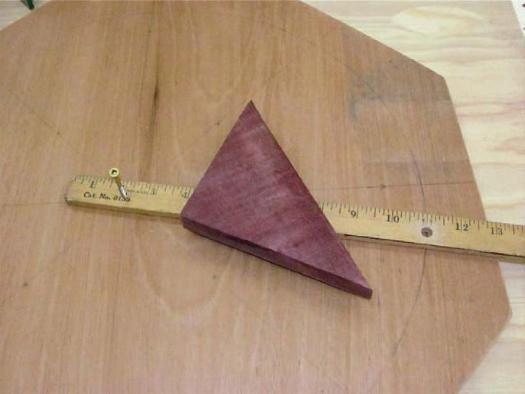
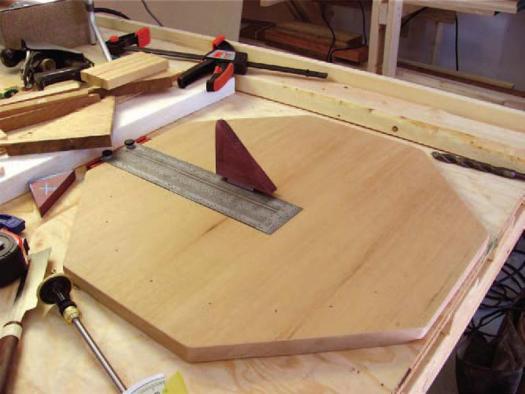
Lay Out the Mortise
Use your layout tools to position the mortise. You can cut the mortise by hand or use a straightedge and router. You could also simply screw the gnomon on from the underside.
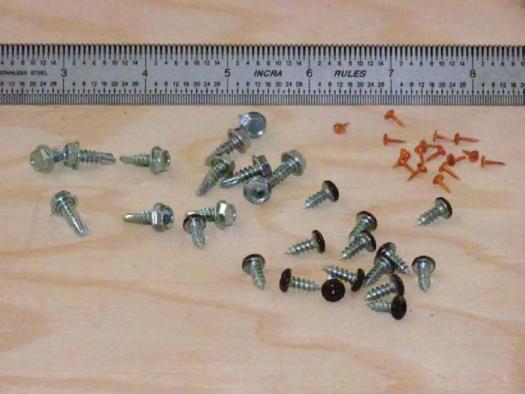
Hours
A selection of tacks and screws were used to indicate hours on the sundial.