PROJECT
Design and build a wall unit

Rob Brown

Find more Home Improvement projects
Wall units are complex projects, but with the right approach, and a good idea of the final fit and function in mind, they’re not beyond most intermediate level woodworkers. Learn these wall unit basics, so you can design and build one of your own.
There are many approaches to designing, constructing and installing a wall unit. I’ve built many of them, but this style seems to occupy that sweet spot between simplicity, flexibility and good looks. I’m not saying it’s easy to build, but compared to other wall units it’s relatively straightforward and can be adapted to most situations.
I’m going to cover my approach in a very general way, as your needs will surely not align with the situations pictured here. You can take the same basic steps and adapt them for your room, to create a functional and beautiful wall unit for your home.
Design and build a wall unit
Function
When it comes time get into the specifics, the first thing I discuss with my clients is what they want the wall unit to store or display, and how the design will affect the function. Books are housed nicely on simple, yet strong, shelves. Art, especially larger sculptures, need slightly different requirements – some taller areas, as well as proper lighting. Home entertainment often gets worked into a wall unit, and that creates a need for deeper cabinets that may be covered with doors that allow remote controls to function. Your wall unit might have different requirements altogether, so ensure you account for everything, and consider how to design a structure to best serve your needs.
Some other considerations, like doors vs. open shelves, simple vs. ornate, whether the unit extends to the ceiling or stops short, as well as many other fine points, are all things to be worked out before deciding design specifics. Look at design books, search the internet and, if you’re at all unsure, hire a designer to visit with you and give you some ideas. The overall design of a large wall unit is crucial. Without a good design, countless hours of labour, high-quality craftsmanship and exotic materials are often wasted.
Anatomy of a wall unit
Upper cabinets will have full-width tops, as the tops will easily be seen by anyone in the room. Lower cabinets will receive a front and back stringer (3″-wide strips the same length as the cabinet bottom) in place of a full-width top, to reduce material usage, as they’ll never be seen. All cabinets have backs. There are also pieces of wood on the front face of a wall unit. Their main function is to cover cabinet joints. The vertical trim pieces are attached to one cabinet gable, and overlap the mating gable once installed, covering any joints. Ensure these vertical pieces overlap both gables by at least 1/4″, as cabinets in wall units don’t always go together seamlessly.
Another function of some of these trim pieces is decoration. Fluted columns are just one way to jazz up a wall unit. Where a wall unit meets the wall on either the left or right side, I attach a piece of wood the height of the cabinet to the outer side of the cabinet, flush with the front of the cabinet. I then secure a filler strip of about the same size to the wall, positioned so that when the cabinet gets fixed in place the two pieces will overlap, and nobody will be able to see past them. This approach also offers some flexibility in terms of exact positioning of the cabinets during installation. To support a wall unit I generally attach adjustable plastic feet to the underside of the lower cabinets, set back a certain distance from the front of the cabinets. Once installed and levelled, the toe kick gets attached directly to the adjustable legs with special clips.
I rarely run a wall unit all the way to the ceiling, but it happens from time to time. If there’s to be open space between the wall unit and the ceiling I make the crown mouldings in separate assemblies that can be placed on top of the completed wall unit and screwed in place. This is the easiest approach. If the crown moulding is to run all the way to the ceiling, ensure there is some sort of flat fascia on the front of the cabinets to fix the crown moulding to. I leave the cabinets a few inches away from the ceiling, and then add the crown to the front of the wall unit, butted up against the ceiling. Often the crown has to be scribed to fit nicely.
Start designing
The first step is measuring exact dimensions on the jobsite. Then work out overall dimensions with computer software, in order to ensure the contents will fit inside the finished cabinets, the cabinets will fit into the room and the visual proportions will look nice. A full-sized layout might be the best option for you if you don’t have access to design software, or if you are comfortable with a drafting table. You don’t need to draw the entire wall unit; just a few of the cross-sections will do. A side view will sort out cabinet depths and heights, while a top view will ensure the widths of the cabinets will house their future contents, and the overall width of the wall unit will fit between walls and work with the existing infrastructure.
When I’m designing I start with the front faces of the wall unit. This usually consists of columns, solid edging, filler pieces, scribes; you don’t often see the front edges of the actual cabinets in a wall unit. At this stage, one of the biggest considerations is to ensure the vertical lines left by doors, columns and other prominent visual pieces line up as best as possible. Spacers positioned between cabinets can assist with keeping lines in the final design continuous from top to bottom and side to side. Once you have the dimensions and locations of these pieces determined you can add in the cabinets behind the facing pieces. The only time you really need to concern yourself with the exact dimensions of the cabinets themselves while designing, is when you need to ensure a specific object – like a television, or stereo system – fits nicely into the cabinet.
A story pole also comes in very handy for designing the dimensions of cabinets. Use a narrow – generally less than 5″-wide – strip of material at least as long as the wall unit’s overall height, and mark the dimensions of the main parts on it. Start with the floor at the bottom, and the ceiling at the top, then add lines for the toe kick, lower cabinets, upper cabinets, shelving, crown moulding, etc.
Next, make another story pole for the overall width of the wall unit, adding in walls, cabinet gables, fillers, columns and any other details that will need to be accommodated for, as far as width is concerned. These story poles will allow you to ensure the wall unit you’re building will fit in the intended area, and that the contents will fit inside the cabinets when installation is complete. I use a story pole extensively to size all cabinets while in the shop, as I can take measurements directly from it.
Keep in mind the size of the cabinets you’re going to be making. If you make a 96″ × 96″ wall of cabinets in one piece you will have trouble bringing it through any door you come across. Making large wall units in multiple cabinets is easier for many reasons.
Material
Plywood is strong and light, but it warps more than most other sheet materials. Veneer-covered particle board is generally cheaper and flatter. Solid wood works great for trim pieces, as it’s strong, can be machined to virtually any dimension and can accept details like routed edges, fluted columns, etc. Veneer isn’t as durable as solid wood, but it works great for cabinets. Making a wall unit entirely from solid wood is extremely expensive and labour intensive. Iron-on edge tape can be used to cover many, if not all, visible raw edges.
With a design finalized, you can plan for the material to be purchased. Make a list of all the parts, including size and quantity of each part, and assign letters for each like part. I usually draw a series of rectangles on a blank page to signify many 4’x8′ sheets of material, then start dividing up the rectangles with pencil lines. Each time I assign a part on my pencil sketch I add a letter that corresponds to the part, so once I’m breaking out material I can transfer those letters directly to the workpiece.
If your shop isn’t set up to process full sheets of material you can have it broken down at many of the big box stores or lumber yards. Have your cutlist with you and make sure it’s simple to follow. Don’t expect perfectly dimensioned cuts, or endless patience from the person helping you, so keep it simple.
Start making cabinets
With all the material in my shop, I start breaking out the main cabinet parts first. I generally don’t bother with shelves and other parts yet, unless they have to be cut from sheets I’m already handling. Even then, I only cut them to rough size. As I’m cutting the parts I make sure to mark all the parts with chalk, in order to keep the parts organized.
Working from a cut list, I cut the main cabinet parts to size, machine rabbets in the gables to receive the bottoms, stringers, tops and backs, then cut the tops, bottoms and stringers to length, before I start assembling the cabinets. I leave the backs off for now, as the cabinets are easier to deal with. I find that one day of machining and assembling usually rewards me with all the cabinets needed for a wall unit, but experience tells me that the job has barely begun.
I use simple plywood templates to assist me with shelf pin holes. Make sure to not drill through gables if they’re seen from the outside.
Horizontal surfaces
If there are any flat surfaces that need to be built I set my sights on those now. Generally I cut a piece of sheet stock to size, then add a solid wood header to any edges that will be seen. A routed profile can be added to the solid. When they’re included in the design, these surfaces are often secured directly on top of the lower cabinets, and then the upper cabinets are set on top of the surface. The visible edges of these surfaces will have to be scribed to a wall for a nice, tight fit, so leaving them oversized is a good idea. Running a rabbet on the underside of these edges will also make for easier material removal on the jobsite.
Spacers
There are times when you want to leave some space between cabinets to run wires, for visual effect or for a variety of other reasons. Pieces of scrap sheet stock can be cut to size and glued directly to the outsides of cabinet gables. Often these pieces can be glued flush with the front edge of a cabinet, so when solid wood columns and trim are glued to these edges there will be more support for them.
Solid wood trim
Columns, solid headers, crown and any other trim that will help lend a finished look to the wall unit are to be considered at this time. There are, once again, many ways to accomplish this step, but my way will work well in most straightforward situations. There are times when some ingenuity is needed, but those challenges will have to be dealt with depending on the situation.
I tend to start with the vertical pieces – mainly the columns that cover the front edges of the gables on the upper cabinets. Lower cabinets often have doors covering their edges, but if that’s not the case, those edges will need a similar treatment. Once the vertical pieces are machined to size, any flutes, panels or other details can be added to them. There’s also nothing wrong with leaving them completely unadorned.
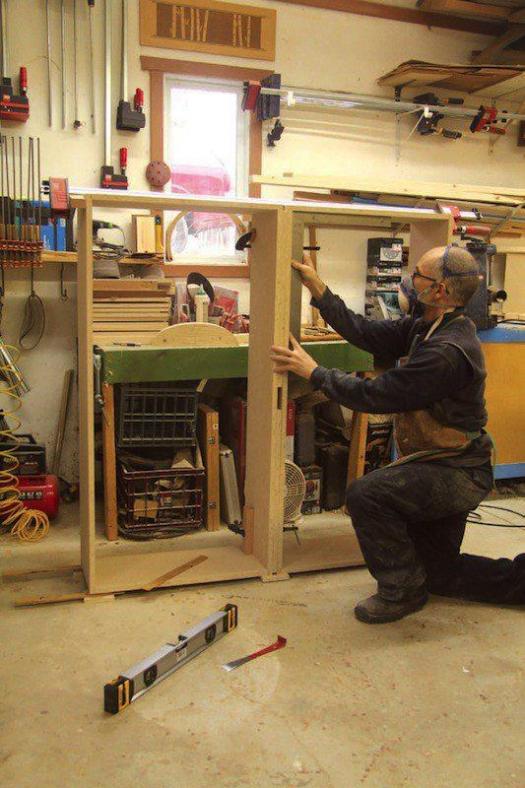
These vertical pieces are then glued to the front edges of the cabinet gables. To do this, it’s best to have the cabinets all positioned next to each other on the floor, so they’re square. It might even be simpler to position, level, and secure the lower cabinets to each other first, then add any horizontal surfaces, followed by the upper cabinets. They should be levelled with wood blocks or shims, then screwed to each other, as if installed. At this point you can apply glue to one gable, and a spacer if there’s one there, and clamp the piece of trim in place. Whether the trim piece ends flush with the bottom or top of the cabinet depends on your design, but I usually keep them flush. One trick to ensure mating cabinets don’t get glued together is to heavily ease the edge of the gable that will not have the trim piece fixed to it, before positioning and screwing the cabinets together. Any squeeze-out will dry without gluing the cabinets together. If the piece of trim overlaps a horizontal member (a cabinet bottom or top), it’s a good idea to add glue to that area as well, as the solid trim will just strengthen the joint.
With the cabinets still screwed together you can add the horizontal pieces of trim between the just-glued vertical pieces. For some areas it’s just as appropriate to use iron-on edging to cover some of these edges. It all depends on the design. When machining these horizontal pieces keep in mind that it’s much easier to make them about 1/8″ thinner than the vertical pieces they’ll butt up against, as this approach is much easier than trying to create flush joints.
The perimeter
Crown moulding, scribes for against walls and toe-kicks or baseboards can now be addressed. Start at the walls, then move to the top and bottom of the wall unit. In order to have some flexibility during the installation process, I use a two-piece system to mate the sides of the wall unit with any adjoining walls. The first piece involves a length of trim equal to the height of the cabinet I’m dealing with, that’s attached to the side of the cabinet. The second piece is screwed to the wall with drywall anchors. The piece attached to the wall is set back from the cabinet piece so that there’s a gap between the two pieces; this gives a finished look and is quite easy to do. This approach works on both upper and lower cabinets.
Next comes the kick plate. Pieces get cut and attached directly to the adjustable feet with the help of small clips that come with the feet.
I make the crown moulding as a separate assembly that’s eventually placed on top of the installed cabinets, and screwed in place. A cut-off from the sheet material makes a solid foundation for the moulding. Depending on the design I sometimes make my own crown, but it’s faster and easier to use stock trim. Leave a bit of extra length if the piece will butt up against a wall, so it can be cut to exact size during installation.
Backs
All the backs are now cut to size. Some people install the backs now, but I find finishing backs and cabinets before installing them is easier in the long run. If you want to install the backs now, just ensure the cabinets are square, so when you reassemble the row of cabinets they will fit together, along with all the trim and doors.
Doors and shelves
Doors can be made in one of many ways. Create the doors as you normally would, then drill them for hinges and install them. Shelves are now cut to size, then either iron-on or solid edging is applied to their front edges.
Applying a finish
With the construction complete, ensure all the surfaces are sanded and ready for a finish. Similar to furniture, what type of finish you select is dependent on many factors. I generally try to spray wall units, as it’s a lot faster and easier than brushing or wiping. Challenges when finishing large units are exactly what you’d expect: not enough shop space and too much dust. Organize and clean your shop before applying a finish. I use a simple finishing rack to hold flat panels and pieces. Screwing scrap wood to the undersides of all the cabinets will allow you to drag them around while you’re finishing, without damaging them.
If you’re applying a stain I would suggest having one medium-sized finishing panel to look at as you progress. This ensures you’re not trending darker or lighter as you stain all the different parts.
Installation
I start with positioning the base cabinets, then locating where the wall scribes should go and screwing them in place. I then cut any electrical access holes in the base cabinets, fix the cabinets to the studs so they’re level, scribe and secure any horizontal surfaces, then start placing the upper cabinets in place. The upper wall scribes are screwed to the wall, and the cabinets are fixed to the studs. If any lighting or electrical wires need to be dealt with, now is the time. In theory, this all goes quite swimmingly, but in reality, lots of accurate scribing, positioning and measuring is necessary. Take the time required to get it right, and you’ll thank yourself down the road. Any combination of shims, spacers and miscellaneous cuts can be used to ensure the wall unit fits nicely.
The crown moulding can now be trimmed and fixed to the upper cabinets, and any shelves, doors, toe kicks and other pieces can be installed. Caulk can hide small gaps between scribes and walls.
Photos by Rob Brown
Tell the Story
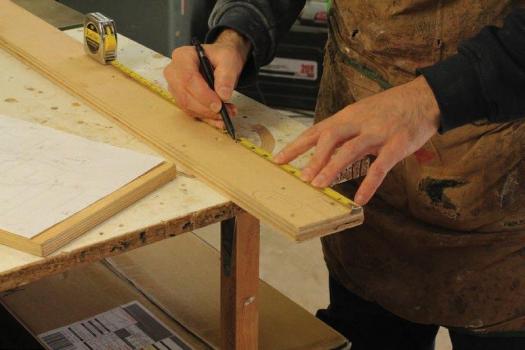
Once the design has been finalized, a story pole will help you visualize any crucial dimensions. A few of them, showing different profiles, angles and views, can made for reference during construction.
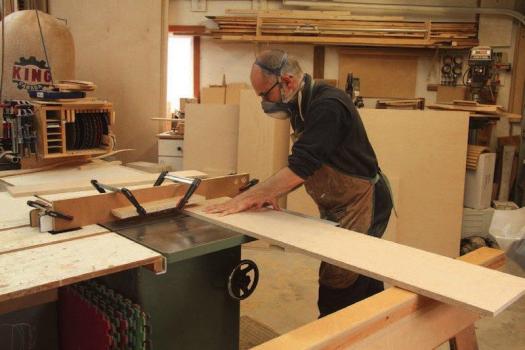
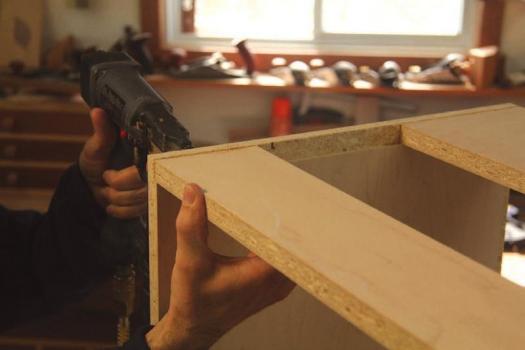
Simple Joinery
Rabbets form the majority of the joints when building cabinets. A support stand will assist you when machining rabbets on long stock.
Simple Stringers
Rather than waste material on full-depth tops in lower cabinets, cut narrow strips, called stringers, that can be installed. This will reduce waste.
Shelf Holes
A simple jig, with holes drilled in it, gets clamped to the cabinets and will assist with locating shelf pin holes.
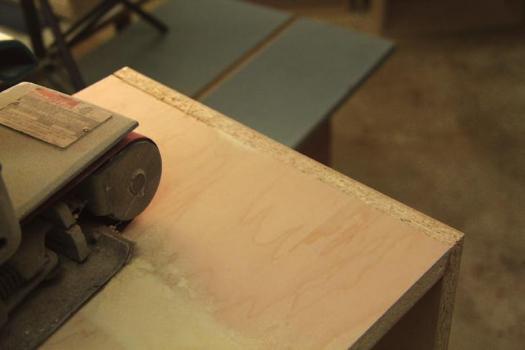
Flush Joints
The bottoms and tops of cabinets need to be sanded flush, or mating cabinets may not fit together accurately.
Solid Headers
Once the horizontal surfaces have been cut to size, machine and attach solid wood headers on the visible edges. Routed profiles can be machined into these headers.
Simple Spacers
Offcuts can be cut to length and glued to the sides of cabinets where necessary. These spacers will ensure cabinets are positioned accurately, and allow mating cabinets to be screwed together securely. Brown often positions the front space flush with the front edge of the cabinet so it will add support for any vertical solid wood members that will be attached later.
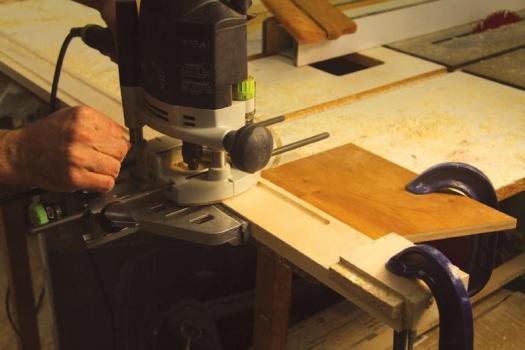
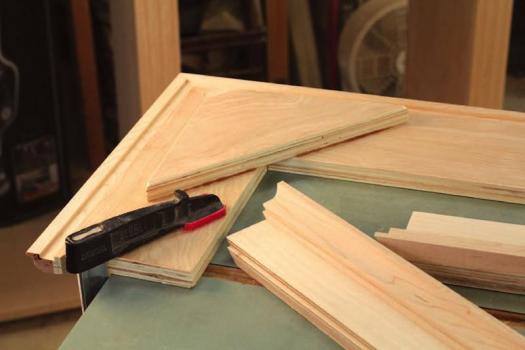
Getting Fancy
A router and edge guide works wonders if fluted columns are part of your design. A simple shop-made L-bracket (lower right corner of this photo) can be made and clamped to the workpiece, to limit the travel of the router during the cut and ensure the flutes end at the same point.
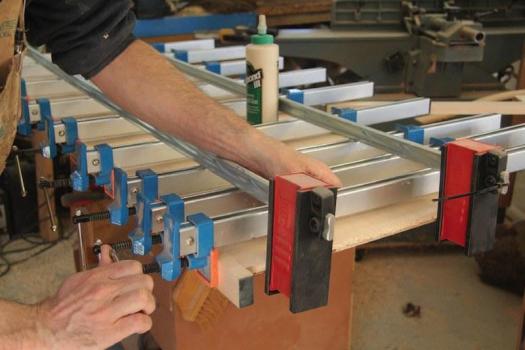
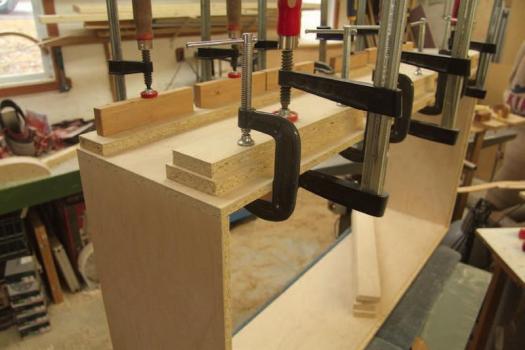
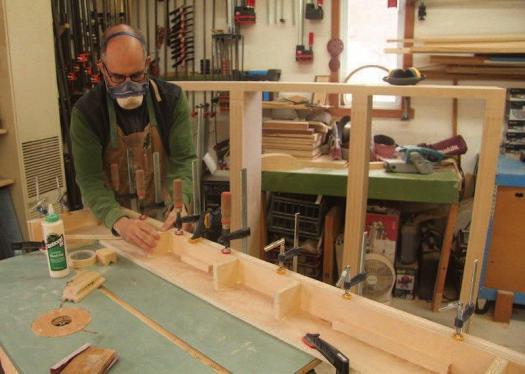
Line Them Up
Brown likes to level the cabinets and temporarily screw them to each other, so he can machine and attach some of the solid wood trim pieces.
Attach a Filler
Where a cabinet meets a wall Brown glues and screws on a filler strip flush with the front edge of the cabinet. Another piece, that eventually gets attached to the wall, fits in behind this piece and finishes off the look nicely.
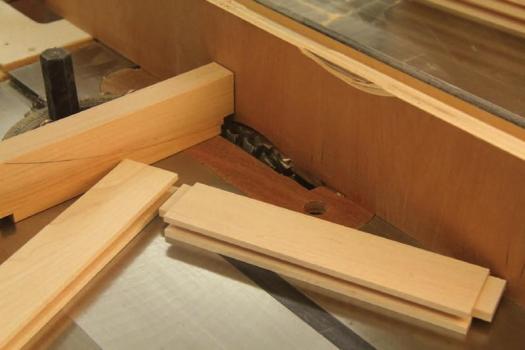
Separate Crown
After joining two pieces of plywood with a mitre joint, Brown attached the remainder of the moulding in a groove. The triangular piece is glued in place and adds strength to the mitre joint.
Right-Angle Blocking
To complete the crown assembly, Brown adds square support blocks behind the face of the crown. This assembly will be positioned on top of the wall unit and screwed in place.
Strong Doors
Solid wood door frames are joined with stub tenons. Panels will be glued into the grooves in the sides of the frame pieces, creating a strong door.
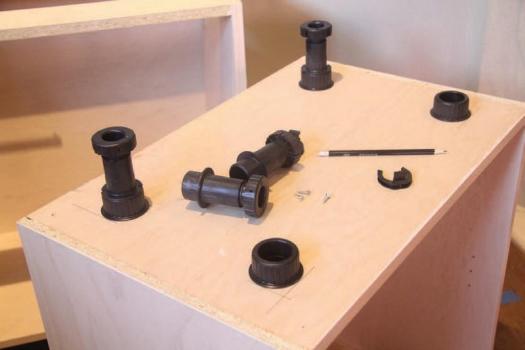
Adjustable Feet
Easy to find and use, adjustable feet like these make installation much easier. Set them back from the visible edges of the cabinets at a consistent distance, so a toe kick can be installed directly to the legs with the small clips pictured near the pencil in this photo.
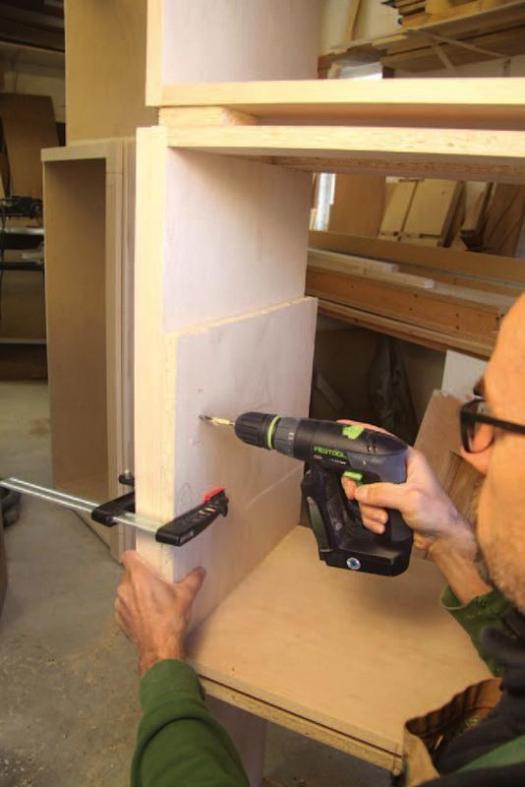
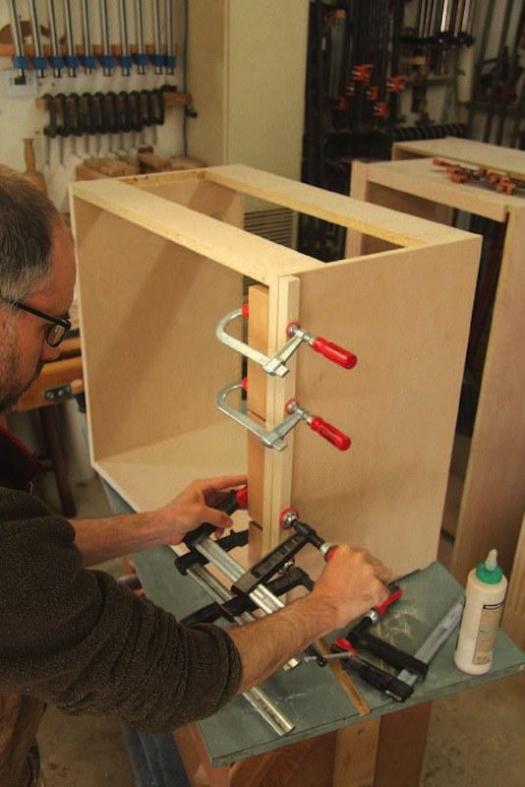
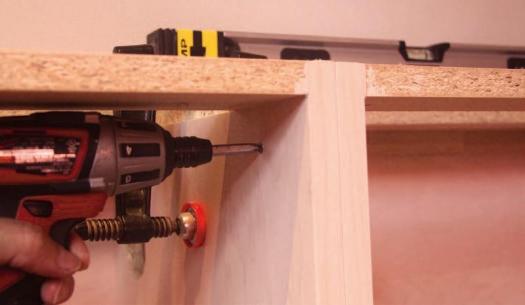
Bring Them Together
Brown uses 1-1/4" × #8 screws to secure the cabinets together. If placed properly, in both the base and upper cabinets, the screws will almost never be seen. They’re also very easy to use.
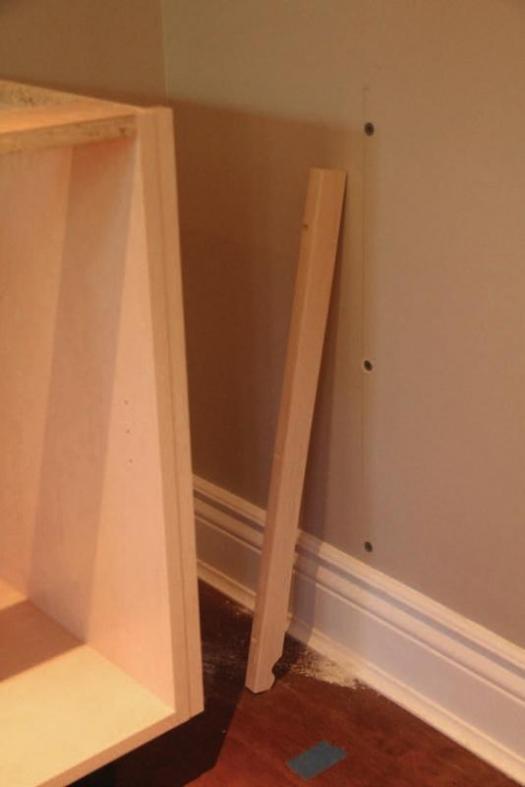
Wall Scribe and Filler
Once it’s been coped to fit against the baseboard, and drilled to work with the drywall anchors, this simple strip of wood will fit behind the cleat on the side of the wall cabinet and create a finished look where the cabinets meet the walls.
Cap Things Off
Once the crown moulding assembly has been cut and fit, Brown drives screws up through the tops of the upper cabinets. He’s careful to position the screws behind the horizontal and vertical members, in order to hide them from view.
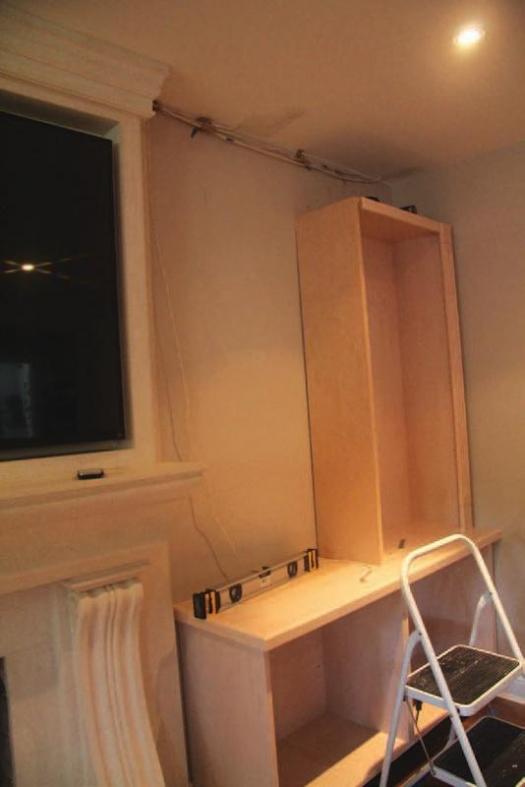
Work Your Way Up
With the base cabinets installed, and a counter top surface on top of them, Brown starts installing the upper cabinets to the wall studs. The same filler and scribe detail he used to mate the base cabinets to the wall will be used with the uppers as well.
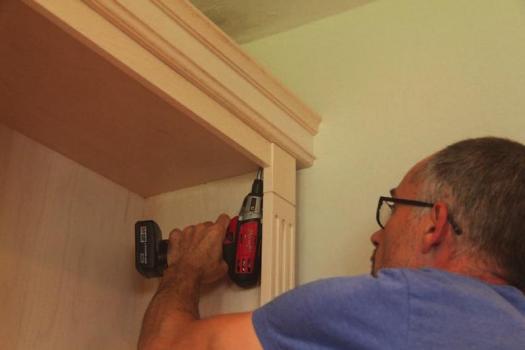
Illustration by Len Churchill