PROJECT
Build a backyard play structure

Lisa Chemerika

Find more Outdoor projects
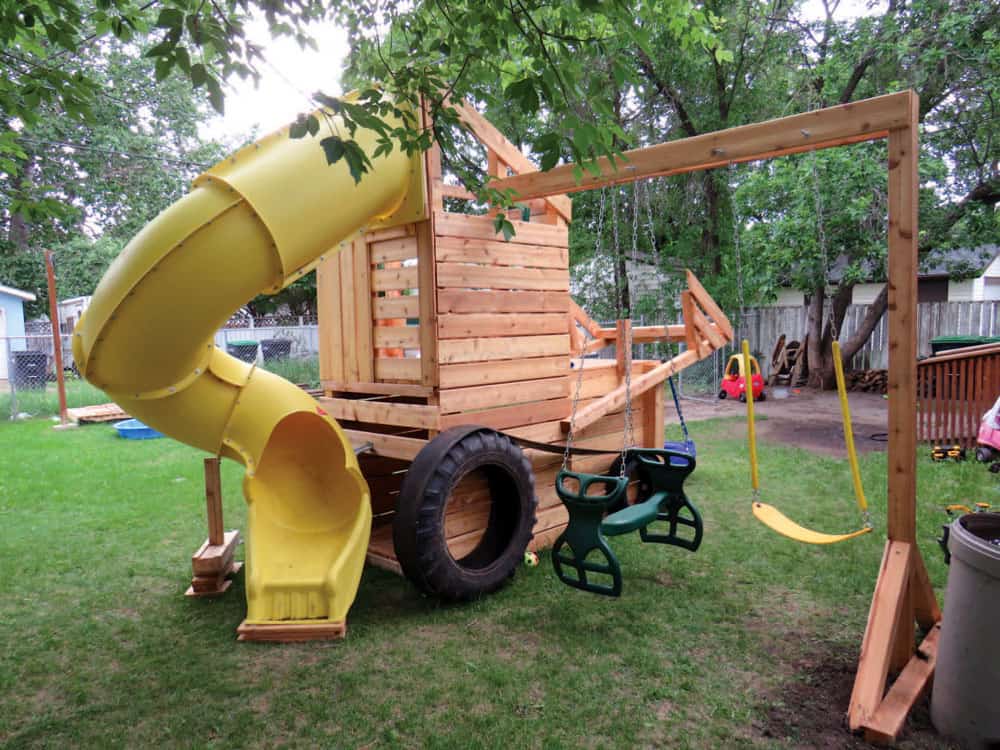
Nothing says fun for kids like a swing, slide, ladder and fort crossed with a wooden bulldozer.
My daughter, Jill, has a home day care. When it’s warm outside, the kids she cares for always want to get outside more, so we talked about a play structure for her backyard. The children in her care are mostly preschoolers, so safety for these toddlers was foremost in our minds. But we also wanted the older children to be able to have good creative and active fun, too. We essentially wanted a bit of everything in this play structure.
There are CSA standards for playground equipment, but these standards don’t apply to private, residential (in-home) playgrounds. Having said that, we still wanted to keep the play structure as safe as possible. We thought of anything a child could possible do to hurt themselves badly and tried to make the design protect against that sort of injury. It took some brainstorming, and some reconsidering as the project went on, but I think the end result was well worth it.
I won’t go over all of the specific measurements I used to build this play structure, as anyone who builds this will likely have to customize it to their yard and needs. Coming up with a fun design for kids is half of the fun when taking on a project like this.
Build a backyard play structure
Materials
I chose cedar so that there would be no treated lumber for little ones to chew on, and no finish required. I used 13 4×4×8 posts, about 12 2×4×8s and 48 deck boards. For the design I came up with, it turned out that two of those posts should have been 10′ long.
Design time
This was the first big mother/daughter build for us, so we wanted expert advice. We went to Jill’s little experts for their ideas on the perfect play structure.
Here’s what they asked for. First on their list was a spiral slide. I thought the idea of a covered slide was very good for the littlest ones. Enough clearance under it so a paddle pool could be installed under the slide end for a hot day. After that, it was lots of climbing, lots of switches, lots of levers and lots of lights.
“And it should look like a bulldozer,” a little one said, matter-of-factly. What? I had to do a little rethinking on how that would work.
The first thing we did was acquire the slide, swings and all of the other bits and pieces of equipment we wanted to use. This is no different than the cardinal rule of woodworking, which clearly states the builder should have all the necessary hardware before making even one tiny piece of sawdust.
I found out after I started the play structure that a 7′ slide needs 118″ to the top of the opening. I should have read the installation instructions before I started building. This oversight resulted in the design opportunity for the back of the roof to be 10′ tall to accommodate the 7′ slide.
The slide sat for a while before we put it together, and it was very time consuming and difficult to get the holes to line up. I’m not sure if it warped in the sun or if they really are just that frustrating to put together. Also, there are supports for the slide that need to be incorporated into your design. Keep all these things in mind when you build your play structure.
Start at the base
I started by laying landscape fabric on the ground under the frame. I don’t know if this will actually help keep the grass from growing through the bottom, but I thought it couldn’t hurt. I put a piece of cedar 2″×10″ cut to 10″ long under each post to stop it from sinking into the ground.
The main frame is a 4’×8′ footprint, framed with 2×4s, so I had surfaces to screw on the boards for the bottom deck and the sides. I didn’t have a firm plan on where the openings would be. With this style of build, they could be added just about anywhere.
Generally speaking, I used 4×4 posts for the corner and intermediate uprights, then connected those uprights together with 2×4s at 4′ and 8′ off the ground. As I mentioned, the two 4×4 corner posts that the slide secures to should have been 10′ tall, so I made some additions after the fact. I screwed these joints together with long exterior screws.
With the main structure in place, I added sides and deck, all with deck boards. Openings, to allow kids to move in and out of the play structure, were left where appropriate. Railings and other devices to keep kids from falling off the higher sections of the play structure were also critical. That was taken care of next, if there were any areas that weren’t safe.
There’s always room for growth
I didn’t want the 4×4 hydraulic arms and the bucket to be too high in the air because I knew kids would climb them and possibly fall off. It seemed like a good place to hang the tire from for the toddlers. I didn’t put boards across the upper portion of the bucket, as that would have allowed them to climb about 4′ above the tire. We all know how that would have ended. I could always add deck boards down the road, along with a railing and extra supports at the end of the 4×4 posts that hold up the tire swing. As your kids grow, your play structure may have to grow, too.
Swings
The boards the swings hang from were attached to the post in the cab of the dozer, and extend to a post running into the ground. I sank the end post into the ground, and used gravel and concrete to fix it in place. Because there’s a dynamic movement associated with swings, I added a few additional angled pieces to help keep the end post stationary. These pieces of posts were left over from other cuts. The swings hang from bolts through the two top boards. Nuts on the bolts keep the chains in place.
A roof
I considered a tarp for the roof, but in the end I still had more fence boards so I used them instead. That gave me a place to install more lights. The steep roof might prevent kids from crawling up there 10′ off the ground…I hope.
Additional bits and pieces
We were able to get some tires from a tire shop free of charge, and used small blocks of wood inside the tire to fasten the tires to the sides. We used scrap boards on the inside for extra backing for the screws. We got some used belting from a hay bailer to run between the tires for tracks. The belting was screwed to the tires as tightly as we could pull it. I didn’t put cleats on the tracks. It would have looked great but I didn’t think the wooden cleats would stand up to play and I didn’t want cleats with screws sticking out of them on the ground.
The smoke stacks are also pieces of scrap cedar posts. We painted them black so you would know what they were supposed to be. I trolled the bargain bins at Princess Auto for lights, reflectors and accessories. The kids love lights and levers and anything else you can think of.
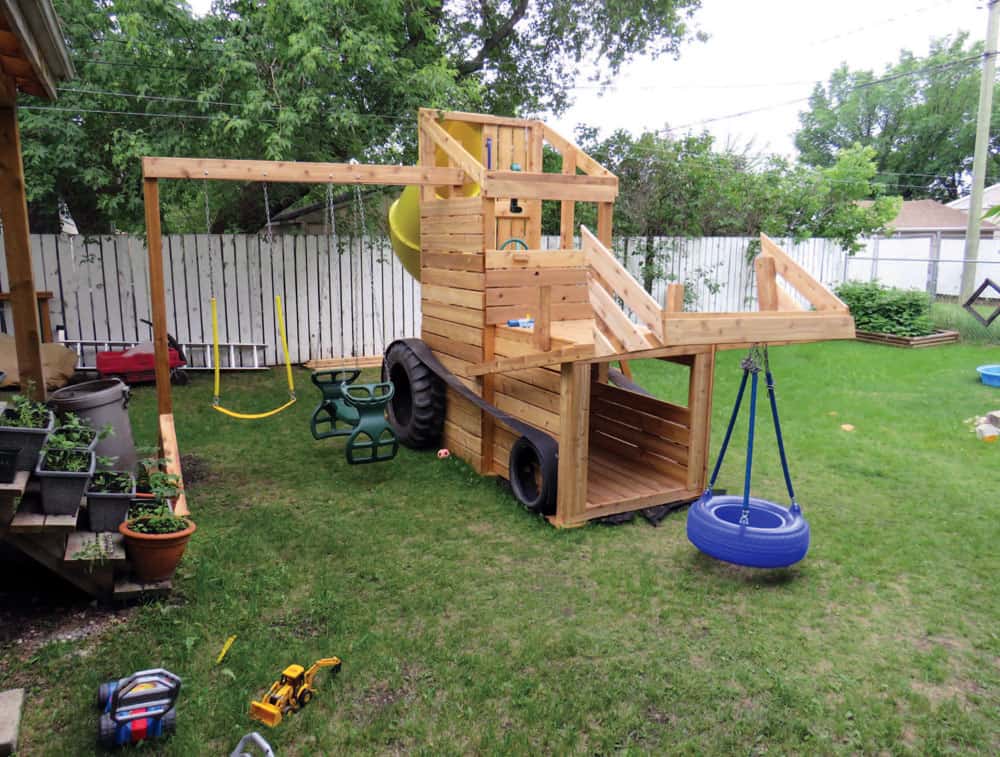
In the end, there is a spiral slide, a tire swing, a tic-tac-toe game, a regular swing, a glider swing, a ladder for the slide, a ladder to get into the cab, a periscope and a telescope. I’m sure there will be additions and changes as time goes on once we see what they like and use. I got all the kids involved in sanding the rough edges so they could help with the build and make it their own. So far, the littles are having a blast!
After seeing this play structure in use for over a year my only piece of added advice would be to build it stronger than you think you need to. Kids play hard and do things that adults likely wouldn’t. I’ve had to reinforce the large tractor tires, as they just about pulled them off the play structure. I’ve also had to do the odd bit of maintenance to shore up a few pieces because kids go all out when playing on something like this. When in doubt, make it extra strong. One other thing I would have done slightly differently is to raise the lowest level up an extra 4″ to 6″. This would have kept that level a bit farther from the moisture of the ground and increase airflow.
I also went back to add a few extra handrails in a few locations where the kids seemed to need an extra hand-hold. This was mainly where ladders transitioned to other walking surfaces.
The only question that remains is who will have more fun? Your kids playing on this, or you designing and building it with them?
Photos by Lisa Chemerika
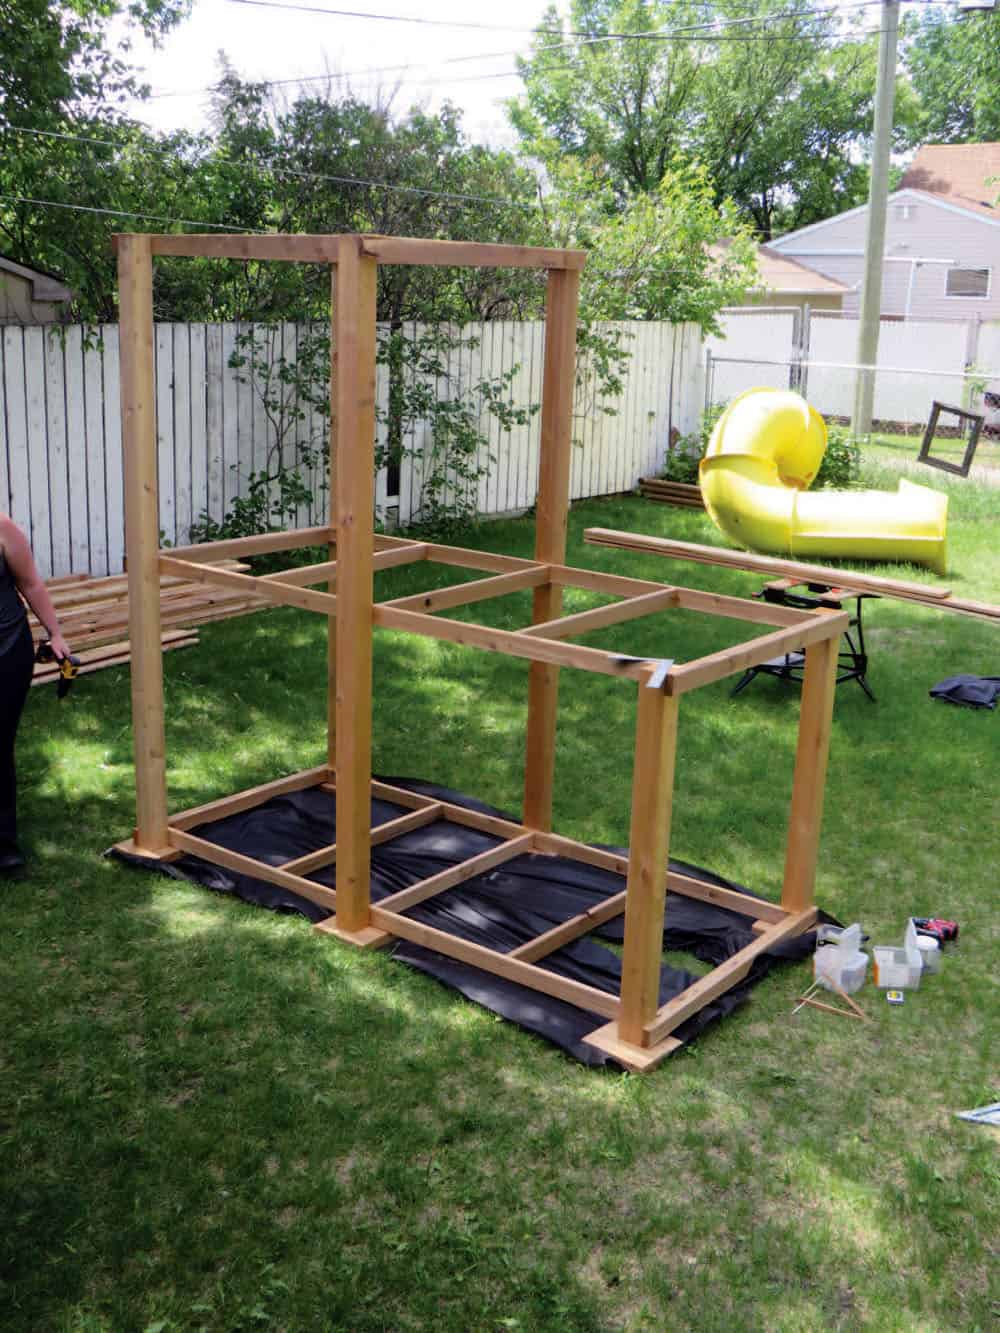
Start Towards the Outside
Chemerika started with the 4' × 8' perimeter and fixed the corners in place with 4×4 posts. Adding intermediate 4 × 4s and a few more structural components, and the basic shape started to be visible.
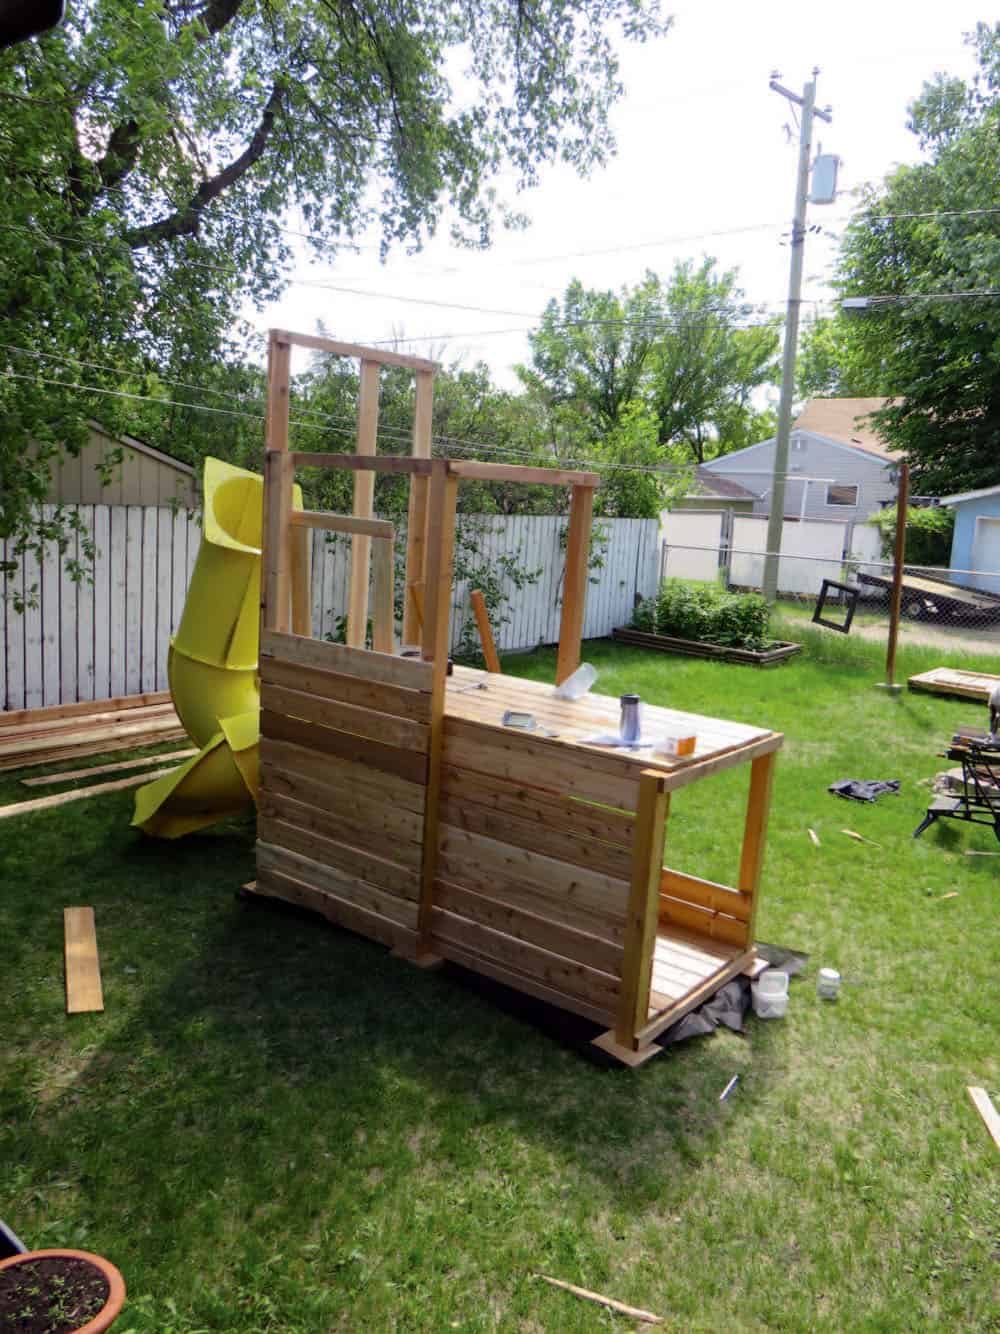
Fill It In
Deck boards were next. They were added for siding as well as any horizontal walking surfaces.
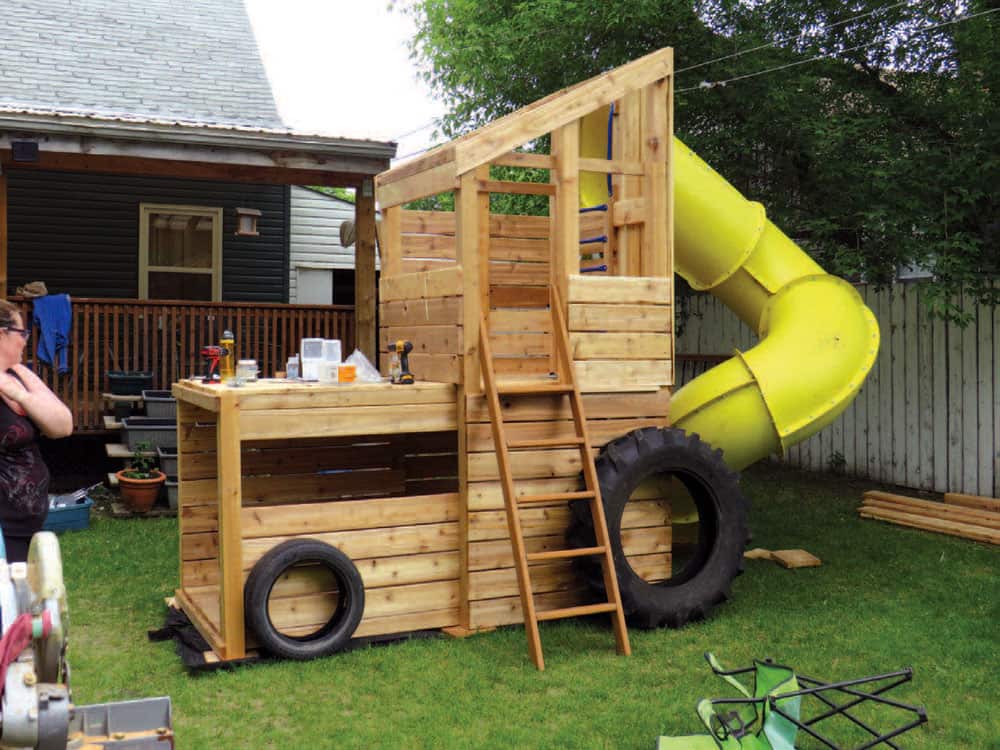
Add a Slide
The focal point of a play structure, the slide will see a lot of use in its lifetime.

Don’t Skimp
Cool details, like these tires Chemerika got for free from a local tire shop, go a long way to adding intrigue and character to a play structure. Bonus points for finding large tractor tires like these.
Blowin’ in the Wind
Swings are a kid favourite. Make sure they’re strong enough to withstand the dynamic forces that will act upon them, and they’ll provide years of fun.
Quality Add-Ons
Purpose-built parts, like these ladder bars, make the build easier and the play structure fun to
play in.

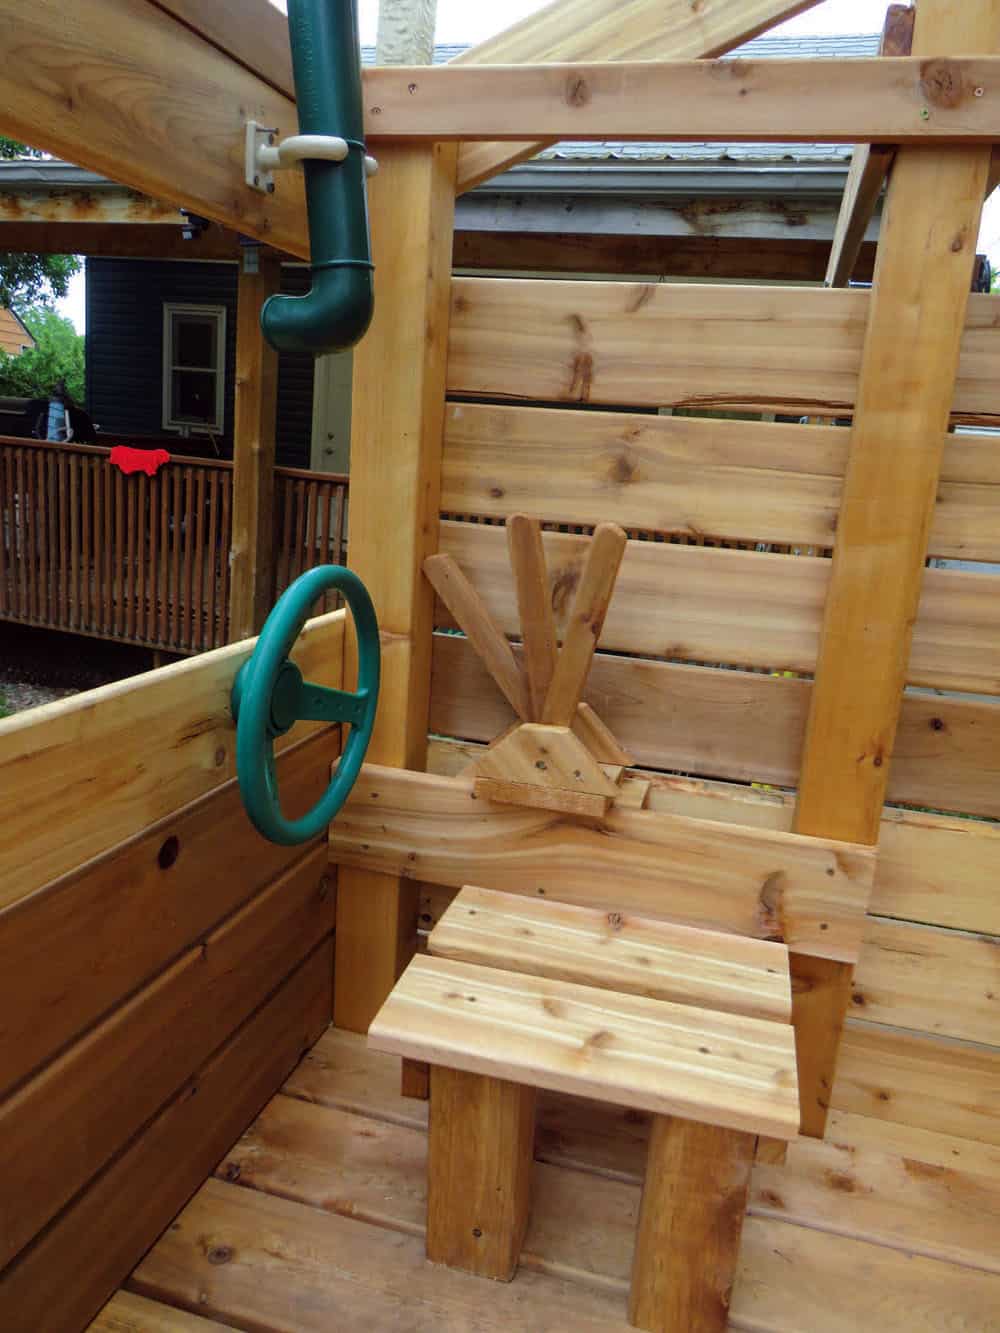
Get to Work
Kids love imaginative play, and what would any kid rather operate than a bulldozer? An operator’s seat, complete with a steering wheel and operational levers, will get loads of use.
The completed play structure