FROM ROB'S BENCH
Glue: it just ruins your life

Rob Brown

Blog for March 27, 2025
My daughter’s boyfriend had a birthday the other day, and she wanted to make something for him.
In fact, she told me my workshop was like a secret weapon when it comes to gift giving, which put a smile on my face. She can now make birthday and Christmas presents, saving her money. If that wasn’t enough, her gifts will also be unique and extra special, because she made them. I told her she was a smart girl for realizing this, and that woodworkers across the world are very aware of this special power we all possess.
What to make?
There are lots of options when it comes to woodworking gifts, but she liked the idea of a picture frame. She could print out a recent photo of the two of them and showcase it in a nicely made frame.
Overall, things went smoothly. She wanted to do as much as possible herself, though wasn’t ready to do some of the more dangerous operations. We didn’t have a ton of time for this, as the big day was fast approaching and we had to account for some glue to dry. She’s like me, waiting until the last minute to start gifts in the shop. I didn’t make her break out any lumber, because that’s on the loud and scary side of things. Once we had a length of black cherry about 36″ long, we talked about the joints needed to bring the four frame members together. Mitres are fairly easy to machine, quick to assemble and also offered the option of adding a few pegs across the joint to reinforce it with contrasting wood.
I was lucky enough to have a frame I made last Christmas with us so I could show her the parts, their joints, the rabbet to let in the glass and photo, as well as the simple hardware to keep the glass and photo in place. We talked about the details as we went.
I cut a rabbet in the back edge of the length, then we got to work on the mitres. We used my mitre sled to cut the joints, taking full advantage of some stops to ensure the opposing parts were exactly the same length. She was able to take care of most of that. Then, there was some sanding along with masking tape to bring the parts together for good. This was the end of our first session.
Some foreshadowing…
As we were gluing up the four frame members, we must have gotten a little bit of glue on our fingers when we handled one of the frame pieces. You likely have a good idea of how I know that now, after the fact, but more on this a bit later.
Day 2
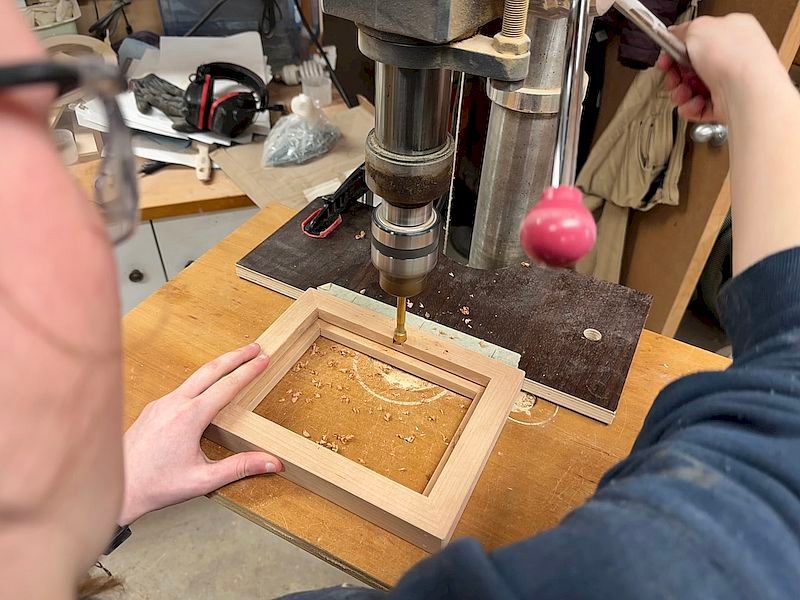
By now, the mitre joints were nice and dry, so we removed the tape and talked about the pegs we were going to add across the joints. We both agreed that 1/4″ diameter was too large, 1/8″ diameter was just right. We marked the location of the pegs to keep them looking even, then set up the drill press to bore holes. Holes complete, we used glue and a finger to cover the pegs with a bit of adhesive and added a tiny bit into each hole before tapping them home and roughly trimming them with a set of snips. This was a short session, and we left the project to dry for a day.
Day 3
Next, we used a Japanese flush trim handsaw to trim the pegs flush before drilling the holes to accept the hardware that would hold the glass, photo and backer board in place. We then used a block plane to ease some outer edges and a sanding block to further smooth the surfaces and prep everything for a few coats of finish.
A quick coat, then home
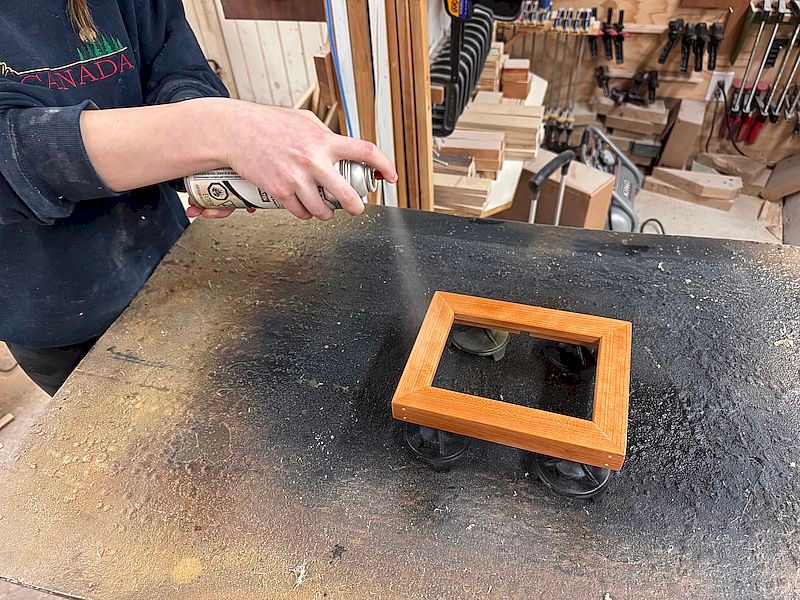
Dinner was approaching, so we just applied a quick coat of spray lacquer to the frame. As we were admiring the finish, my daughter said, “What’s that?” and pointed to a small blotch on the inner edge of one of the frame pieces. Looking closer, I said, “Oh, that looks like it’s a bit of glue.” I reassured her we could fix that the next day. A bit of sanding and it would be gone. She wasn’t so sure.
As we drove away she asked about that blotch again. “Do you think it will really look fine, once we fix it tomorrow?” she asked. I told her she wouldn’t even know it was there and that this was a fairly common woodworking problem when dealing with glue. She quietly said sarcastically, “Glue: it just ruins your life.” I laughed, and let her know that millions of woodworkers worldwide all understand how she feels. Like her dad, she has a dry sense of humour.
Day 4
The day before the big day we were able to sand out the glue-infected area and add another couple of coats of fast-drying lacquer. While it dried, we grabbed the glass from the local supplier, along with a quick snack (no good job can be completed without a snack) and installed the photo. I even had some paper to loosely wrap the frame and bubble wrap to protect it, not to mention the perfect box for the frame.
The project turned out great and some solid father-daughter time was had. The fact that it happened in the shop made it even better.
On another note, here are the answers from last week’s micro mystery challenge.
1. Robertson driver bit
2. Veritas hand plane
3. Cutting edge of carving gouge
4. Ferrule from an awl
5. Tape measure hook
6. Bessey K-Body clamp head
7. #2 Robertson screw head
8. Trigger lock on a Festool router
9. The grippy base of a GRR-Ripper push block
10. Router bit cutting edge and bearing
11. Back of piece of 80 grit sandpaper
12. Router template guide with locking collar
13. Jointer blades
14. Set position on a miter saw
15. Bubble in a level
Sand to Perfection
Sanding is an important step in the process.
Bore for Hardware
Holes bored in the rear face of the frame will accept the clips that hold the photo, glass and backer panel in the frame.
Bring Out the Grain
The first coat of finish always does a great job at bringing out the grain. Unfortunately, it also brings out any errant glue splotches, as we quickly found out.
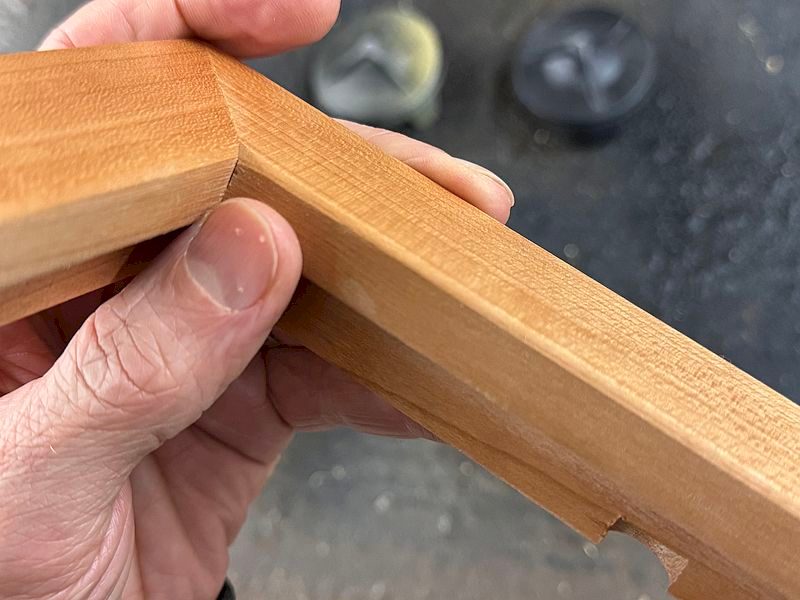
The Culprit
It may look small, but to a teenage girl who’s making a birthday gift for her boyfriend, this is what nightmares are made of. We got it sorted out though. The gift was delivered on time and was loved.


As a fellow father, this article is both inspiring and super fun to read. Thanks so much for sharing this Rob!
Hi Erik. Yes, we put a single pin in the other side of each joint.
I see the dual pins on the corners of the long side(s). Did you also add single pins on corners of the short sides which would pass through the middle of the dual pins? Or is that too risky on small joints?
Hi Ian. Yes, the pegs are certainly functional, as well as decorative. I didn’t mean to imply otherwise. The contrasting wood species adds a nice touch too, I think.
Looks Great. The Pins are not just decorative, the potentially also have some joint holding capacity. I’ve never seen this used until now. I have seen flat pegs used the centre of the joints though.