FROM ROB'S BENCH
Fancy joints

Rob Brown

Blog for December 1, 2021
I think adding intricate joinery to pieces of furniture, mainly to challenge ourselves in the shop, but also to add visual interest is a fun approach to working wood.
Intricate joints can can even be a conversation starter with friends and family. To be clear, I don’t think every piece of furniture should be littered with busy, visually overpowering exposed joinery, but once in a while a carefully selected joint can add a serious focal point to a piece.
I came across a video that provides a good example of the sort of joint I was thinking about. As Tamar Hannah (3x3custom.com) points out, she doesn’t really know what to call it, and neither do I. I’d guess it’s Asian in origin, or at least close to a traditional joint an Asian carpenter or woodworker would be familiar with. Each of the three pieces has a pair of tenons, and the spacing is such that the carefully cut parts fit together snugly, forming a solid junction.
I enjoyed the first part of the video, where Tamar goes through the process of figuring out how the joint works. She found a photo online by Peter Seeland, then visually dissected the joint and figured out how it could be reproduced. Once she had her approach sorted, she got to work in her shop to make it.
One of the funnier parts of the video happened as soon as glue was applied to the finished joint. Murphy’s Law of woodworking states that as soon as glue is a spread on any woodworking joint, things happen. Usually bad things. In this case, Tamar forgot how the joint fit together. The three parts are very similar and can play tricks on the mind, especially with the added pressure of the glue stopwatch ticking loudly. She figured it out in time, assembled the joint and everything turned out well. Who thought woodworking videos could be so suspenseful?!
The resulting joint could easily be showcased on a mantle or bookshelf, as I find it looks great. After all, I’d take a cool wood joint over an antique vase any day.
Down the rabbit hole
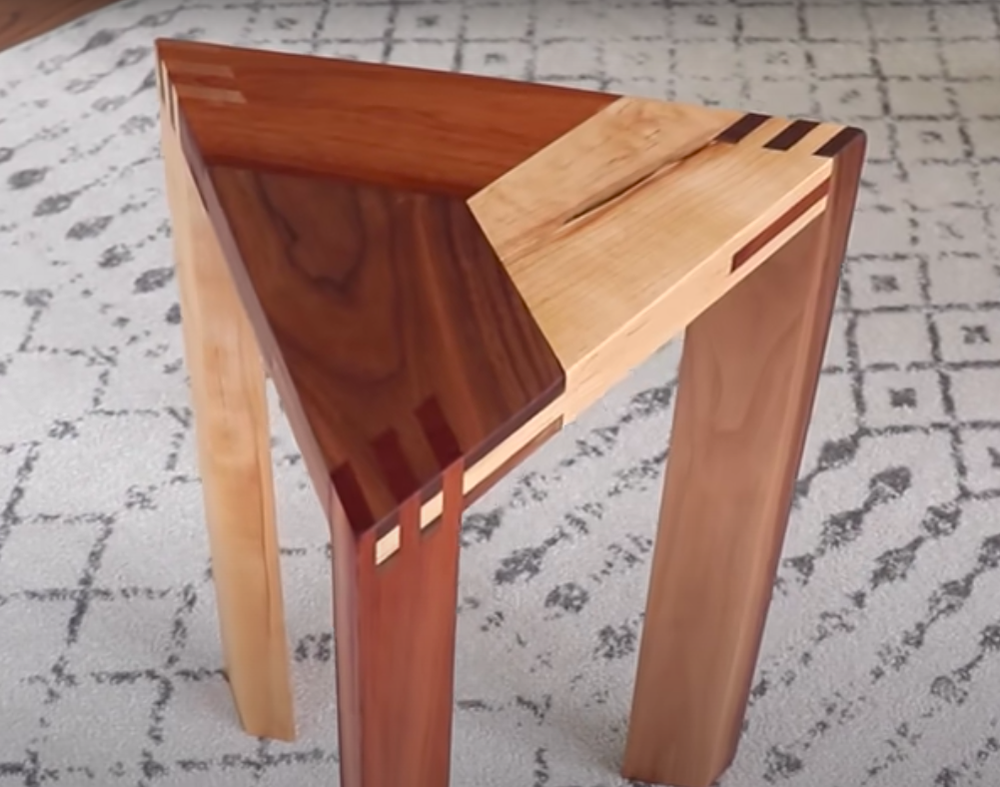
As one does, I checked out more of Tamar’s videos while on her YouTube channel. Probably because unique joinery was on my mind, another one of her videos (https://www.youtube.com/watch?v=4R7oC0rKBJQ) caught my eye. At its most basic, it’s a triangular side table made of six pieces; three pieces form a top, while three legs support that top. The complexity comes from the joinery that secures the legs to the top, though the way Tamar makes the top is also interesting.
Tamar took a fairly standard finger joint and electrified it. Angles, contrasting species and an overall different approach make this table stand out. Even if it’s not your cup of tea, it’s hard to argue with the fact that it’s eye-catching.
Aside from the knowledge of how these joints are machined and assembled, there are a lot of tips to be learned from this video. Saving your cutoffs, jigs for tricky cuts, surprises when working with angles (and how she deals with these hiccups), improving less-than-perfect joints and the sheer joy of applying that first coat of finish are just the tip of the iceberg when it comes to learning to work wood by watching a woodworking video.
After watching only a few of Tamar’s videos, I found her honest, unpolished approach refreshing. Mistakes are included, and power tool accidents are recorded and discussed (I winced watching miter saw kickback in slow motion, but thankfully Tamar didn’t get hurt), and the general tone is conversational.
Share some of your favourite joints with me. Send me an email with a few photos of a joint you made and I’ll share them via social media and in future blog posts. They don’t have to be world-class feats of engineering and woodworking skills. If you’re proud of a joint, send it over. And please don’t be a good Canadian — brag a little!
The Inspiration
This joint, posted on Instagram by Peter Seeland, was what inspired Tamar Hannah to make one for herself. And there are a lot of other examples only a click away for you to take inspiration from, too.
Dissect the Joint
Tamar Hannah spent some time imaging how the joint was made in order to figure out how she could do it. She covers this in the video.

Murphy’s Law
Adding glue to a wood joint signals to the woodworking gods that it’s time for the phone to ring, a bird to fly into the shop or a clamp to vanish into thin air. In this case, Tamar’s memory of how this complex joint went together temporarily disappeared.
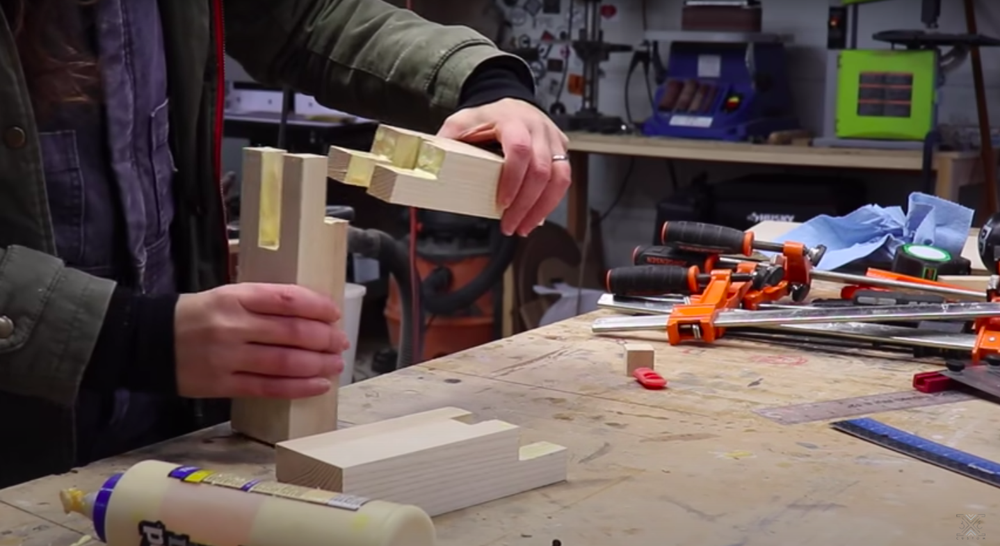
Simple, Yet Complex
How complex can it be to join six pieces to form a side table? Tamar Hannah might have found the answer.
A Dash of Everything
A mix of hand tools and power tools were used to cut the joinery for this triangular table. Here, an offcut was used to guide a chisel at the correct angle.

Legs
At this point the three legs were almost complete. Ripping them to width, on an angle, was the final step.


Hello, can you please email some pdf pictures and steps used in construction of “Fancy Joints”. I’m urgently needing it please…
Thanks, regards,
Peter
The post is about a joint made by Tamar Hannah not by Rob Brown. You will need to contact her if you wish to obtain more information about the joinery she used: 3x3custom.com.
This an amazing work of art !! I sat trying to figure out how this was done, still thinking.