FROM ROB'S BENCH
Almost there

Rob Brown

Blog for January 30, 2025
Sadly, I'm still not quite done this little table. I still remember saying it will take "no time at all" to build, as I told my wife I was excited to start this project.
That was well over two weeks ago. Small projects usually move along quicker than large ones, though once you start adding intricate details and straying from an overall rectilinear shape, progress really does slow down quickly.
Moving on
As I mentioned last week, I added texture to the aprons, then had to put the project on hold for a day or so in order to wrap a few other things up. I cut and drilled some custom steel brackets to hold the top on, then let them into the tops of the aprons. They were cut from 3/4″ wide flat stock, and overlapped one side of the apron by about 3/4″. A hole was bored into the overhanging portion of each bracket which could accept a bolt, which would thread into a metal fastener that was embedded in the underside of the top. It worked like magic and was a nice touch.
Taking my time with the top
Since the top was triangular-shaped, it was naturally a little slow-going. But I also decided to add a curve to each of the three sides of the top. On top of that, I wanted to veneer the top, so bent-laminated headers needed to be first made, then attached to the edges, before they were flushed. At this point the top could be veneered. Each glue-up needs to dry, which creates a project that seems to move as slow as a glacier. Such is life.
Once the top was laminated with its bent, solid wood headers, I started the process of making the notches in the top so the legs could protrude through it. I made the mistake of gluing the legs to the apron assembly earlier than I should have. With it all glued up, I didn’t have the exact shape of the apron to easily work with. Not to worry, as I made a template the exact shape of the apron and moved on from there. Fitting the three notches was a surprisingly tedious task, involving a scroll saw, chisels, files (both round and flat) and some sandpaper, but all and all it finished up quite nicely.
It took me about three days to fully sort the top out, then I decided to do something fancy; in my opinion, a bit more texture was needed. The top offered up a blank canvas, so that’s where I focused my attention. Really, this sort of approach to the top was in the back of my mind since well before I started this table, but I just hadn’t had to decide whether to add it or not until now.
Groovy
It’s amazing how a small detail like a V-groove can look quite nice when it’s there are many of them and they’re arranged in a pleasing pattern. That’s the approach I took. First some sketches, followed by some consultation with my wife and the design was set. I used carbon paper to transfer the pattern to the top, then set out to add the V-grooves. It was a lot of fun, though my back didn’t enjoy being hunched over the workpiece for an hour or so.
The V-grooves were added earlier today, so I haven’t had a chance to put together a proper video of the process yet. By next week I’ll have something for you all to see. Sadly, I forgot to take a photo of the built table before I left the shop today. Right now the table has its first coat of finish on it and I’ll be adding an additional coat each day, for the next few days. Thankfully, the process of adding a coat of finish only takes about five minutes. That might just be the easiest part of the whole project.
A Small Mistake
Here, the first leg is being glued to the apron assembly. In hindsight, I should have cut the notches to accept each leg before gluing the legs on, but I made due. Hindsight is usually 20/20.
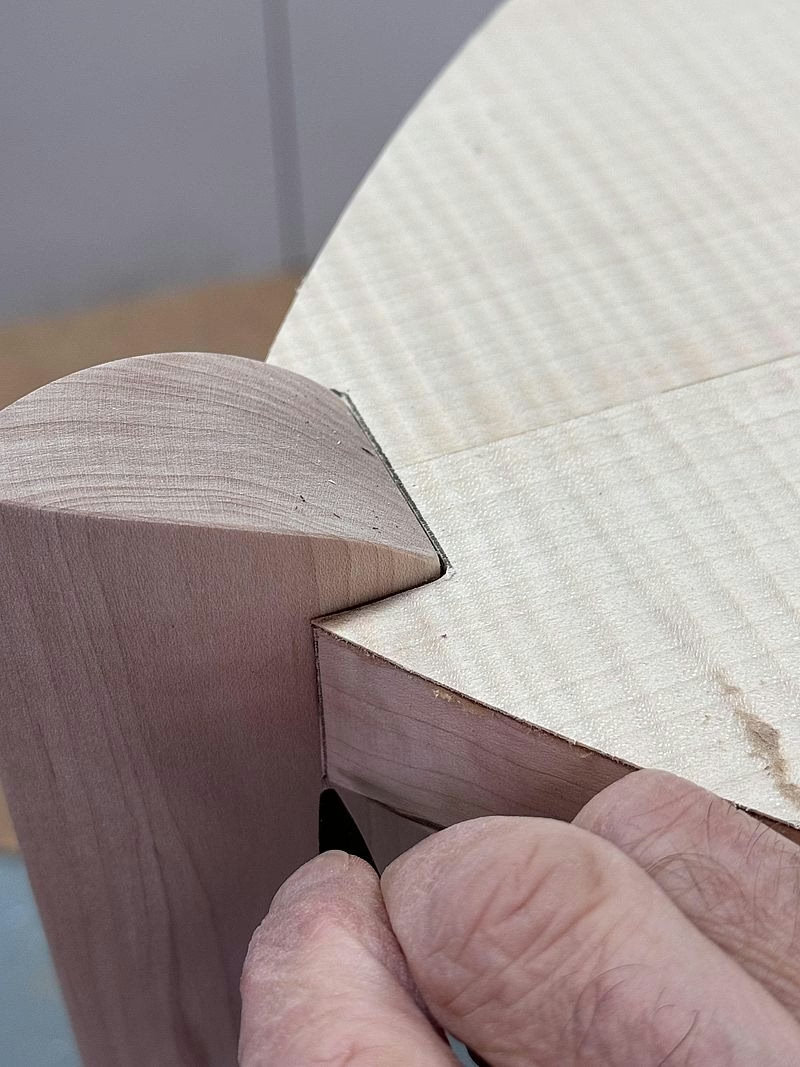
Getting Close
Fine tuning the notch was tedious. A pencil mark lets me know where a bit more material needs to be removed, in order to create an even gap 1/16" wide.
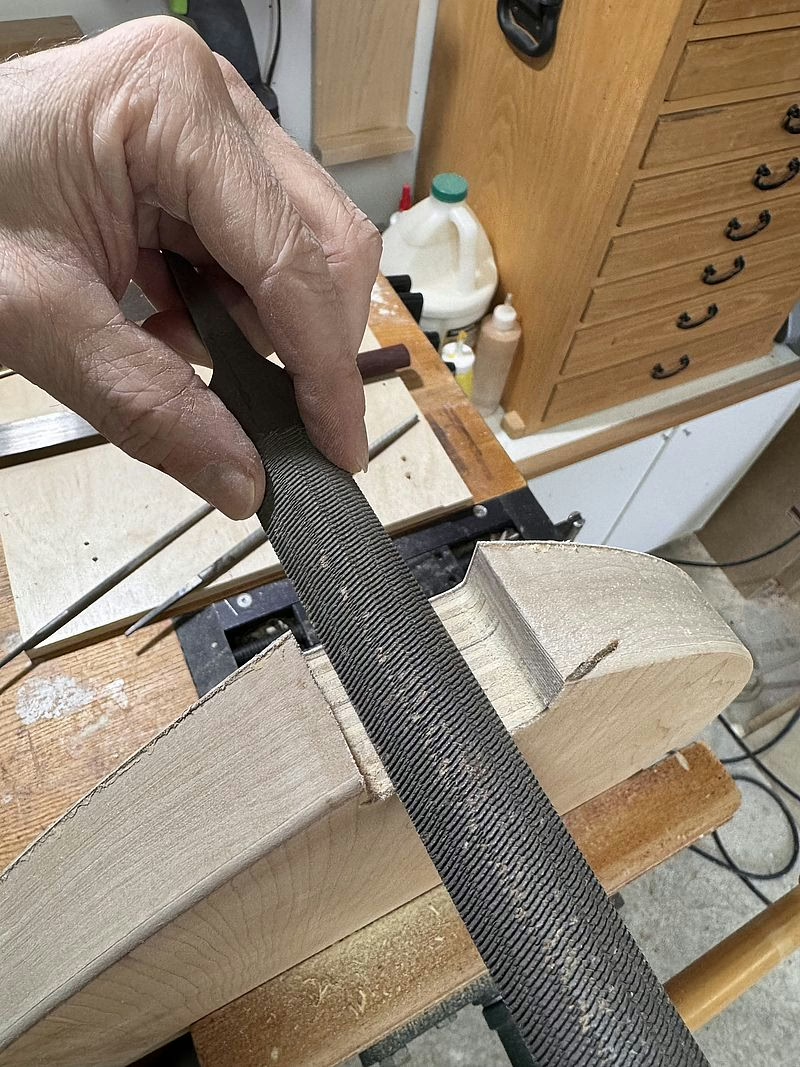
Just a Bit More
A file with a flat face allows me to evenly remove material and create a perfect gap between the leg and top.
Lots of V-Grooves
Here's the pattern, along with the carving I did on the top. It's now ready for its first coat of finish.
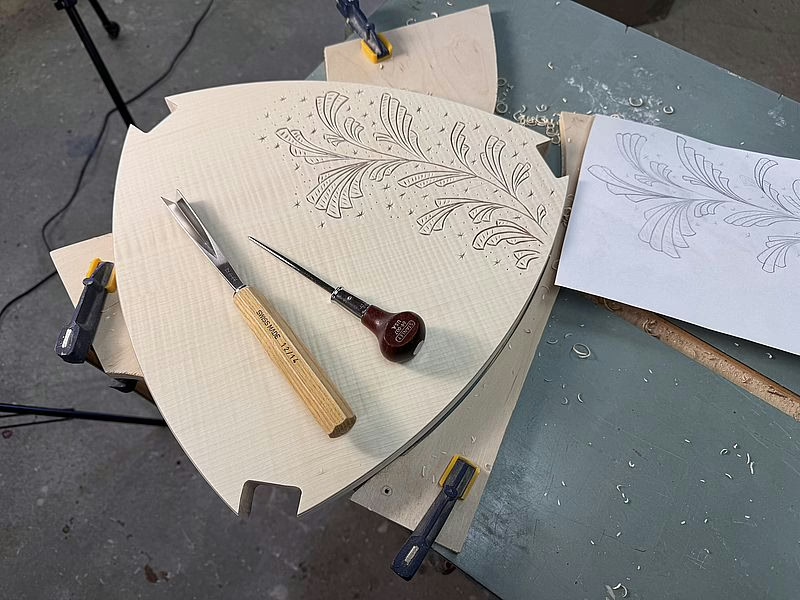
Carving Takes Time
There are a few stages to create the carved design. Here, I'm adding tiny notches within the main shape. The overall pattern resembles frost I saw on our window, not too long ago.


Really interesting design. I have a small slab of roughly triangular red cedar and this has given me the inspiration and ideas on how to make a triangular table from it.
Agreed, Ed. And great to follow the order of the steps and overall process!
It’s great to see a project come together.