FROM ROB'S BENCH
She likes it!

Rob Brown

Blog for January 23, 2025
We left off last week with my mocked-up side table sitting beside our new chair in the living room, with me patiently waiting for my wife to get home.
When I heard the door open I rushed over to let her know it was ready for her to see. A few seconds later I got the good news: she liked it.
Onward!
First thing the next day I headed out to start work on the real thing. Mock-ups are great, but there’s no substitute for using quality material to make the actual side table I’d been thinking about for the last few days.
My first stop was the lumberyard, where I grabbed one stick of 6/4 hard maple. There was enough material in it for at least two of these tables, so that meant I could be picky when it came to planning and executing the cuts so the grain graphics would be as pleasing as possible. That mainly meant, at least for this table, the grain lines would finish as straight as possible.
Legs first
Having a full-size mock-up, as well as the few older sample legs, to work from is helpful, especially when making a non-rectilinear piece of furniture. This table will have curves on its top, the legs will be shaped on all sides and it will be in the general shape of a triangle.
I cut the legs to size and then took care of the mortises that will affix each leg to the aprons with my Festool Domino XL. The Domino XL wasn’t cheap, but it saves me so much time in the shop it’s surely paid for itself by now. With the leg joinery complete, I started to bring the two outer faces of each leg down to size. This meant making some rips with the table saw to remove as much waste as possible, then heading to my bench to use an assortment of hand tools to further refine the shaped surfaces. I got one leg as close to done as possible, then used it as a template to help guide me with the other legs. This ensured the three legs were all as similar as possible.
Aprons are next
The three aprons were then broken out and had mortises added in their outer ends. From there, it was time to cut some angles so the three aprons can join nicely underneath the centre of the table and provide ample strength for the top.
Texture, of course
Generally speaking, I can’t avoid texture when I’m making a piece of furniture, especially when that piece is for use in our own home. Sometimes texture is added in a very prominent place, but other times it works best when it’s a little less conspicuous. In fact, there have been a few times when I’ve only added texture to a piece in a location that will never be seen, though it can easily be touched. Usually that’s under a tabletop, though I didn’t think this table was a great candidate for that sort of approach. Instead, I added carved grooves on the faces of the three aprons, but terminated the lower ends of each groove in-line with radius, so the more visible portions of the aprons have less texture. It’s going to be a detail that some visitors will miss, though it’s one I’ll always see first.
Slow going
It’s too bad I have this pesky magazine job, or I’d be further along with this enjoyable side table. I’m kidding, of course, but even woodworking magazine editors wish they could spend more time in the shop. Earlier today I started work on the core for the top and laminated the first two of three solid wood bent laminations that will cover and protect the three curved edges. If I could snap my fingers to wrap this little project up, I could take a photo of the finished piece for you, but that would mean I’d skip over the fun part: building it. I hope you’re working on a shop project that’s as enjoyable as this little table is for me.
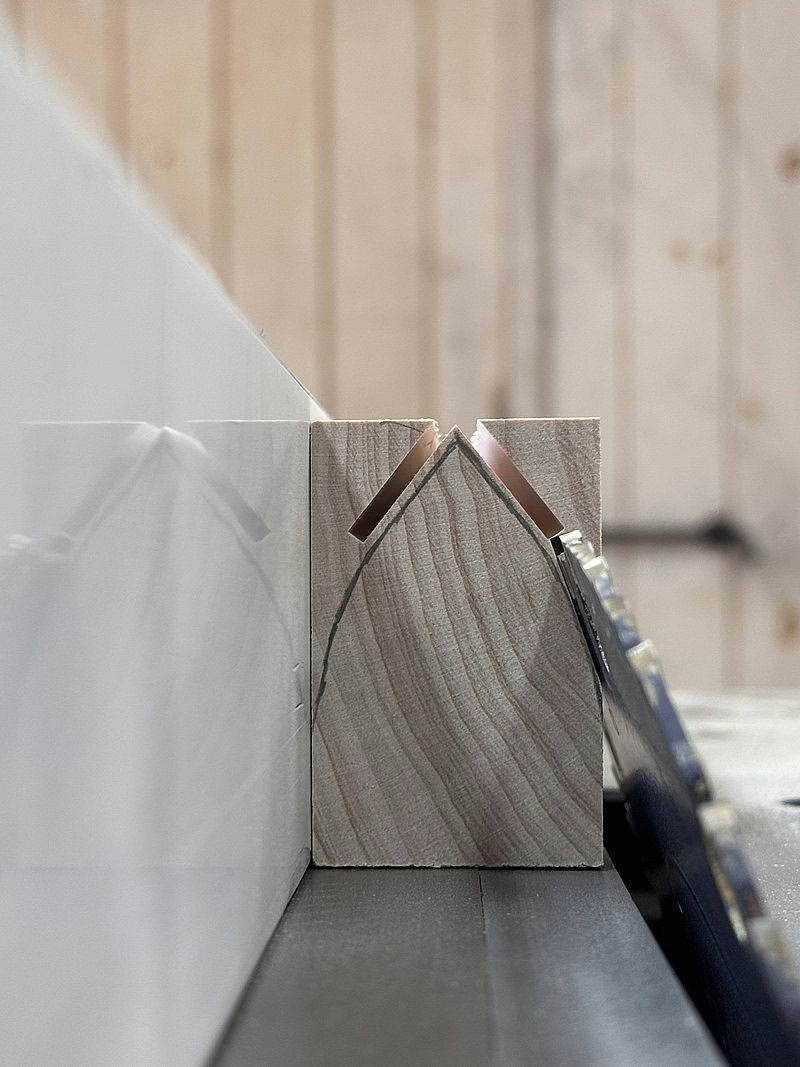
Trim the Waste
Once the leg blanks were cut to size, I made some angled rip cuts on my table saw. This removed most of the waste and ensured the blanks were very similar in size and shape.
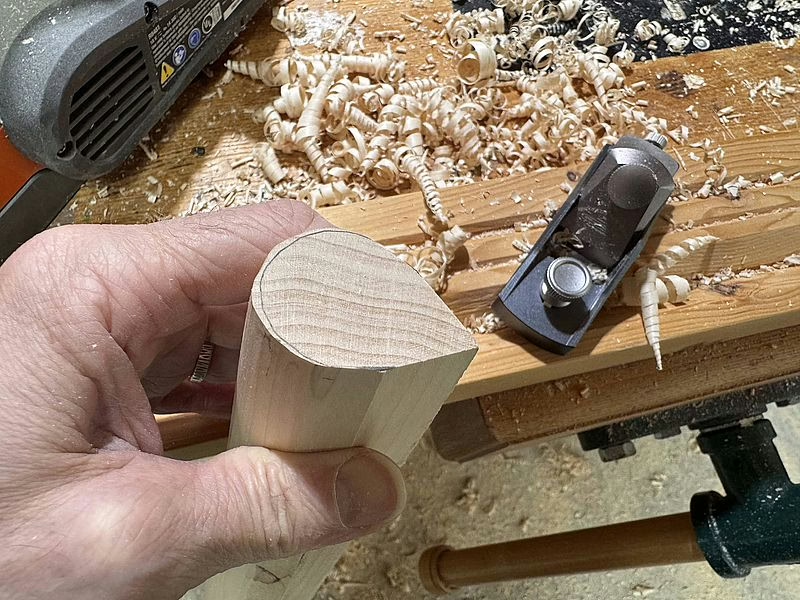
Careful Shaping
This is the lower end of one of the legs. You can see I drew an outline of the leg on the end grain so I’d have a shape to shoot for. Also notice the grain is running almost perfectly straight between the outer pointed tip and the inner edge of the leg. This will give me the straightest grain possible when the leg is complete.
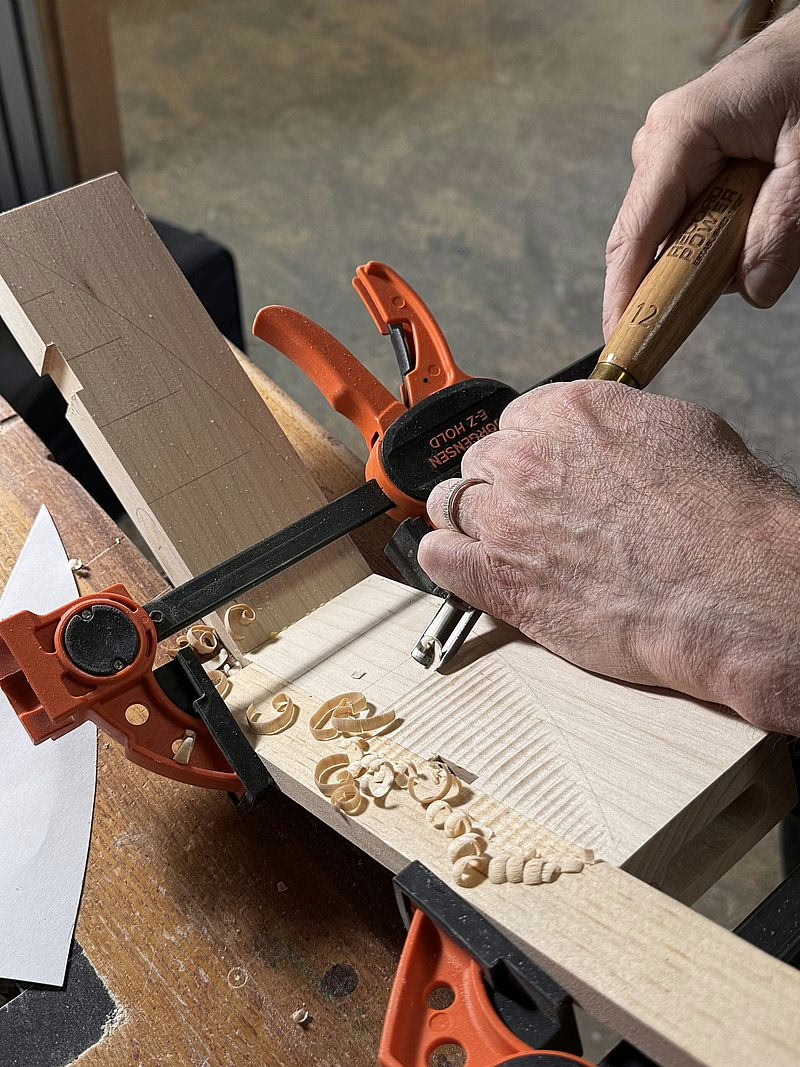
Textured Aprons
Here I’m using a carving gouge to add some grooves to the faces of the aprons. You can see the penciled-on radius where I’m starting the grooves.
Getting Closer
This is the table as it stands today. The legs and aprons are mostly complete, while the top in this photo is from my mock-up. The top is a bit smaller than the real one will be, but it gives you an idea of how it will look when it’s done. If you look carefully, you can see the texture I’ve added to the faces of the aprons.
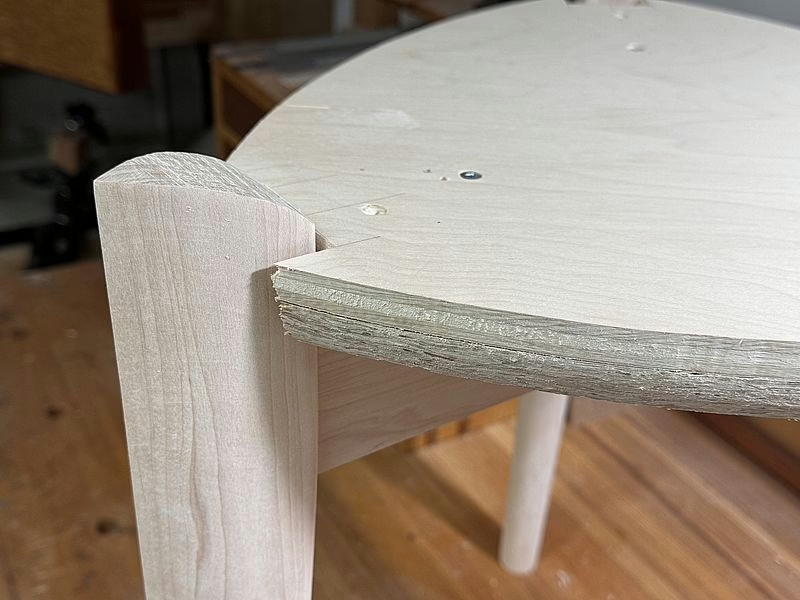
Top and Leg Detail
Although this is the top from the mock-up, the real top will be similar. Notched at the corners to fit around each leg, the top will also have a veneered upper surface and bent laminated curved edges.


Hi Rob, Your little table is turning out great, quite elegant. I’m looking forward to seeing what the final product looks like, I can’t remember if you mentioned if the top will be hard maple as well, either way it will be a surprise to me.
I’ve been wanting to build a similar three legged side table like this for some time, seeing yours makes me want to start building one. Plus now I can borrow some nice design elements and tips that you’ve incorporated.