FROM ROB'S BENCH
Adding patina and a wild epoxy project

Rob Brown

Blog for July 29, 2021
As I mentioned previously, I’m building a bunch of pieces of distressed pine and Douglas fir furniture for a custom home. The building part of the job is fun and easy. It’s adding the right patina to make the piece look 150 years old, then choosing and applying the finish, that are the tricky parts. You’re likely tired of the finishing aspect of this project, so I’ll just give you some idea of how I added the patina to these pieces.
Adding patina is much more than just randomly banging the piece with tools and easing the edges, though there is a decent amount of that in the process. Care should be taken to create natural-looking wear on the piece, which means you need to think about how centuries of wear would look on a specific piece, then do your best to replicate it.
Not my natural thing
Adding patina doesn’t come naturally to me. Up until this job, my work consisted of crisp edges, smooth, blemish-free surfaces, and absolutely no signs of wear or imperfection. Gaps are an absolute no-no. A ding or dent is a sign that something went drastically wrong and, even worse, didn’t get fixed. Scratches are things that only the customer is allowed to leave, even though I wish they wouldn’t.
Making samples with patina to show the client was hard. A piece of furniture has natural areas that will gain wear and patina over the years. Around drawer pulls, front corners of tops and the outside edges of legs are all examples of where wear would occur naturally. But sample panels have no natural wear points. Thankfully, the client understood the patina on a sample panel wouldn’t look natural, and that it would be much different on a piece of furniture.
Add 150 years of wear
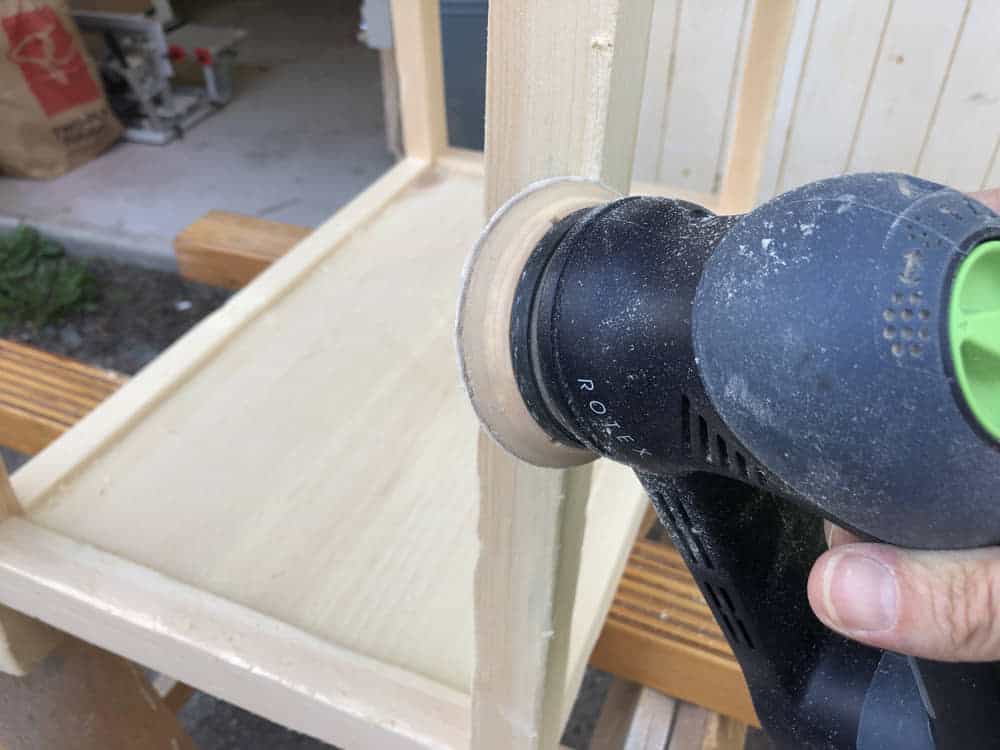
The first step was to drastically ease all of those beautiful sharp, crisp edges I had worked so hard to maintain. It was like I was ruining these pieces on purpose. It was hard to add enough wear at first, but I quickly loosened up and got the hang of it. I used one of my favourite tools of all: my Festool Rotex RO90 Multi-Mode sander. I do a lot of power carving and this multi-mode sander allows me to take very rough wood and smooth it by using different stages of aggression and grits of sandpaper. Adding patina isn’t much different.
All the edges got hit with the coarse sanding mode, then I turned my attention to further rounding the corners that would have received more wear if these pieces of furniture had been built 150 years ago. This sander also helped me add some shallow “wear-troughs” that followed the grain. This was done mostly on the main surfaces of tabletops to replicate the heavy use a top receives over time. I followed the grain because different layers of grain have differing densities, and because it just looks natural. Last but not least, some random depressions were made near user edges to replicate miscellaneous wear and misuse over the years.
Time for files
Once I heavily eased all the edges and corners it was time to get into the grain with the edge of a half round file. A file lets me create cracks and checks near end grain that look similar to worn and dried cracks that might happen over time. I also used the rounded face of the file to create depressions near areas that would have had long-term wear, such as near drawer pulls or on the edge of a top. I also added a lot of deeper slashes, especially to the top edges and outer corners of legs. These can be fairly deep, and should vary in the angle and depth to look natural.
The ends of a file were also used to add some dents and scratches to the piece, mainly in areas of high wear.
Miscellaneous tools
Most of the patina has been added at this stage, but the surfaces of the tops, legs, rails, etc. still looked far too new and fresh. General wear and tear had to be added all over the piece but, again, especially near the high-traffic areas. An awl was great for adding small dents and scratches. A small block plane set to a light cut was used to add cross grain scratches at different angles on the top, legs and other parts. The smooth surface left by the sharp blade will allow the coloured finish to absorb differently, and the edges of the light plane passes will provide a slight tactile interest as well as a light visual. A hammer was also used to tap the surface and create medium-sized flat dents, like those that might be left by a cup or bottle being placed down somewhat hard or another household object coming into contact with the soft pine.
What I didn’t use
I opted not to add any wire brushing to any of these pieces yet, but I might for some of the final few pieces to give a different, almost water-damaged look that implies some light rot. And although I really wanted to (the photos would have been pretty cool), I didn’t tie any of the tabletops to my car’s trailer hitch and drag them around a parking lot. That would have been a lot of wear, and also in a fairly uniform direction. One of these days I’ll do that though, even if just for the photos.
Sand the sharp areas
The last step was to use a folded piece of 100 grit sandpaper in my hand to ensure everything was smooth. My main focus was the gouges and cracks I made with the file, but everything got at least a quick once-over. Old furniture is always pretty smooth to the touch, so even the slightest sharp edge would give away the façade of age. At this stage, I started the process of adding the finish I’d worked so hard on perfecting.
Although it’s not the type of work I usually do, I think this custom furniture will fit quite well in the home where it will be used.
Wild epoxy
CW&HI has a friendly, helpful and busy online forum covering all things woodworking and home improvement. The other day one of our members posted this video about a maker who built a large chest of drawers with 352 pounds of epoxy. Although I don’t think the final piece would look at home in my house, I found the process quite amazing. I guess I’ve still got epoxy on my mind, although I’m not considering making anything this over-the-top!
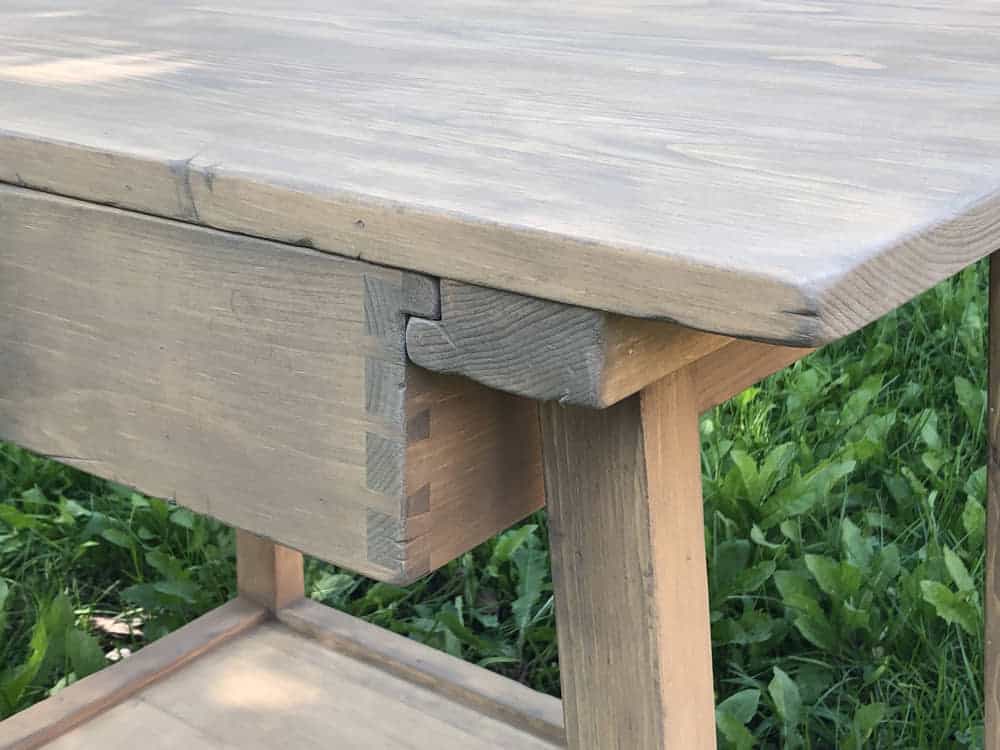
The Finished Bedside Table
Even with slightly angled legs and a unique approach to drawer design, the focal point of this bedside table is the patina and antiqued finish. A drawer pull will be added shortly.
Aggressive Sanding
My Festool RO90 is aggressive and quick when it comes to heavily easing all of the crisp edges and corners of the piece. This is my first step in aging the piece. Heavy wear in high-use areas is key to aging the piece in a natural-looking way.
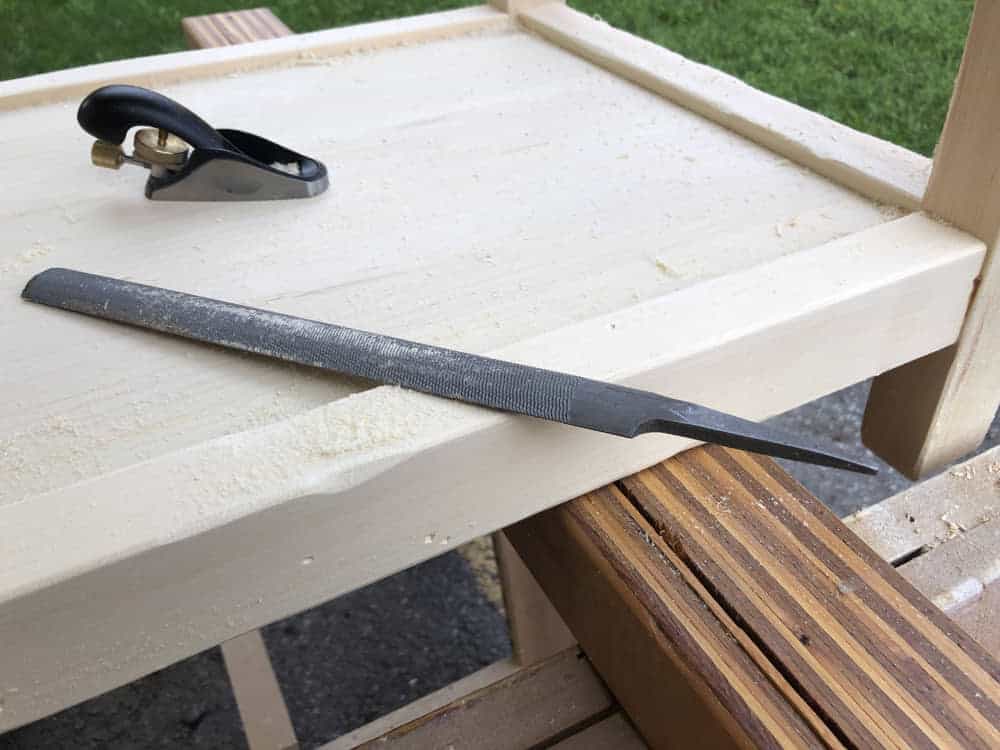
Files and Planes
A half round file does a great job at adding deep scratches to the edges of high-use areas. Varying the angle of the deep scratches keeps things looking natural. Taking very light passes with a small hand plane is great for adding wear, both visual and tactile, to the larger faces of tops, legs and other surfaces.
Wear Where It Would Naturally Be
Corners and edges are the areas that get damaged the most after years of use. Table legs, a little above ground level, will also get hit a fair bit. I hit the lower corners of the four legs on this bedside table with extra gusto.

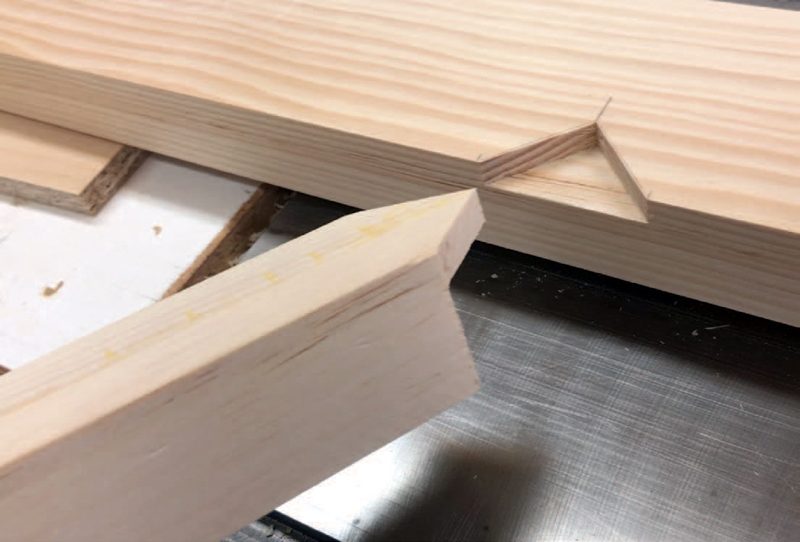
Filed Checks
A half round file does a great job at getting into the wood and leaving what looks like a check in the wood.

Drawer Design
The design of the drawer and drawer runner is one unique feature of this bedside table.