PROJECT
Bow Box – Part 1: design and construction

Rick Campbell

Find more Boxes , Gifts / Crafts projects
A brand new project: Rick Campbell shows you how to put a wooden bow on a gift box.
If you’re still unsure about what woodworking project to give a friend or family member for the Christmas holiday season, we’ve got you covered.
Starting this week, and continuing for the next two weeks, Rick Campbell shows you how to create a bow box. This unique project could be used to contain a gift, though it could easily be the gift.
In Part 1 Rick will take you through the process of building the box, with a neat trick to leave you with continuous grain around its perimeter. Next week Rick covers how to make the ribbons and bow. And finally, in two weeks he’ll share how you can fix the ribbons and bow to the box to complete this great gift project.
Bow Box – Part 1: design and construction
The recipient of this unique gift will be delighted to discover that the elegant ribbons and bows “wrapping” the box aren’t fabric at all, but handcrafted accents made from layers of contrasting wood. Look even closer and you’ll see the grain pattern flows uninterrupted around all four corners of the box – a subtle detail that speaks to the high level of craftsmanship behind the build.
The satisfaction you’ll have building this box is matched only by the joy of presenting it. Best of all, the entire project can be completed in just a couple of days.
Box sides
Cutting the sides of a box sequentially from the same board lets the grain flow seamlessly from corner to corner – that is until you hit the end of the board. The secret to a perfect grain match on all four corners is a clever resawing technique, combined with careful planning and precise execution.
This technique works for boxes of any size or shape. I chose walnut for this box because its rich tones contrast beautifully with the lighter materials selected for the ribbons and bows.
Start by choosing a board for the side panels that has an attractive grain pattern and will finish at least 1” thick after surface planing both faces. A board of this thickness will yield side panels that are approximately 3/8” thick once it is resawn in half and the interior faces are cleaned up. If you want thicker sides, you’ll need to begin with thicker stock.
Square up one end of your board, then cut it to length. The total length should equal exactly the measurements for one long side, one short end, plus an 1/8” allowance for the kerf of your blade. You could also add an extra 1/8″ in overall length to give you a tiny bit of room to work with, however, the more extra length you keep, the further the grain will be off. Joint one edge of the board, then rip the material to the final width of your box sides.
Continuous grain
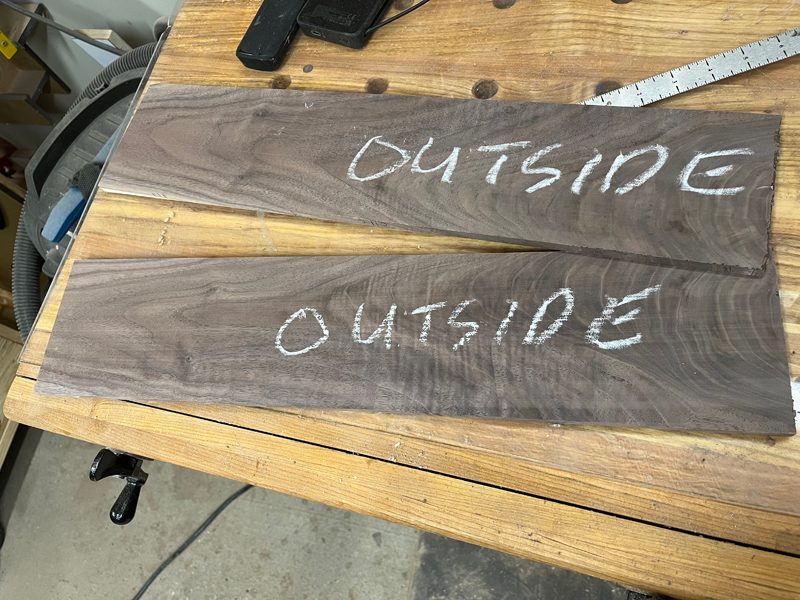
As you move forward with the continuous-grain technique, you’ll quickly discover that maintaining the correct sequence of the parts is essential. The best way to stay organized is to clearly label everything as you go. Although it may not be obvious at this stage, the outside of your blank will eventually become the inside faces of your finished box, so grab your pencil and mark the surfaces accordingly before moving on.
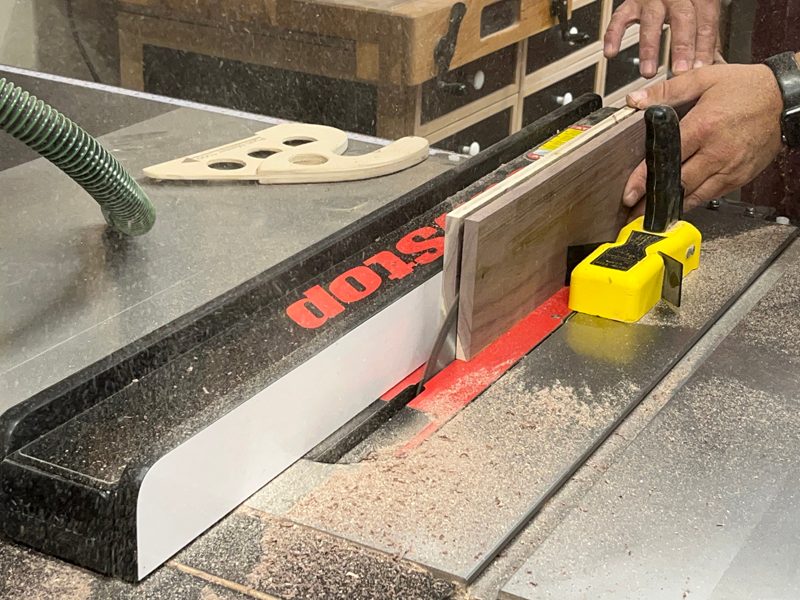
Now, resaw the blank straight down the middle to create two thinner plies. I used a thin kerf blade at the table saw to slice my material in half, but the bandsaw is also a good choice if it’s properly equipped with a wide resaw blade and a high fence – neither of which I have. The cutting depth of my saw blade was not sufficient to reach all the way through the entire width of the material in a single pass, so I completed this process in two stages.
First, I raised the blade to just past the halfway point of the stock, then I passed the material on edge over the blade. I used a featherboard before the blade to keep the stock firmly against the fence and a push stick to keep hands a safe distance from the blade. Then I flipped the board end for end and proceeded to cut the remaining way through, with the same face against the fence. When you open the two halves like a book, you’ll notice the grain pattern is a near-perfect mirror image on both faces. This technique is aptly known as bookmatching and it’s the key to achieving seamless grain continuity around all four sides of the box.
Run the freshly sawn faces through the thickness planer to skim off just enough material to flatten the surface and remove any saw marks. The less you remove, the better the grain match will be. These faces will eventually become the outside of your box, so mark them as such before continuing with the next step.
Before you begin cutting the sides to length, lay out the location of the parts on the edge of the board. It’s also important to sequentially number the adjacent corners to keep track of the orientation. If you skip this step, it will be much more difficult to match up the ends accurately after the parts are separated.
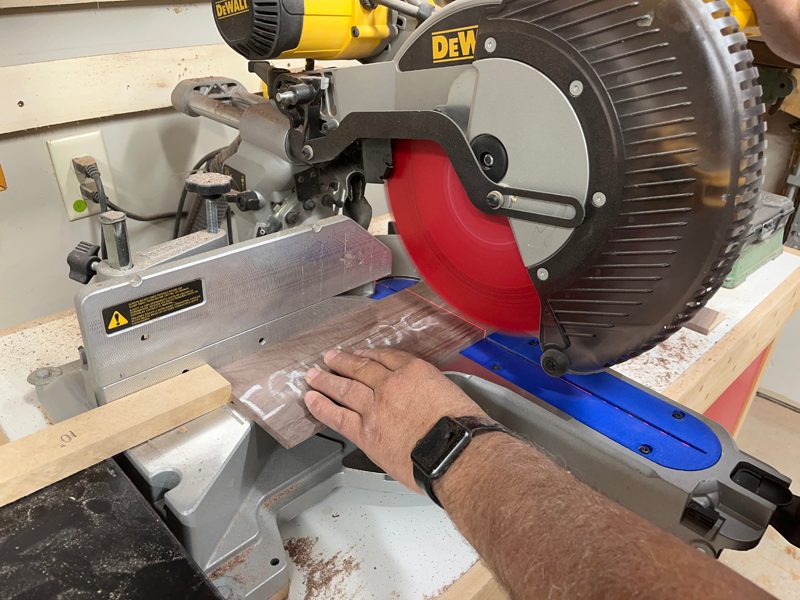
Once all the referencing is complete, set a stop block to cut one side panel to length from each board. It doesn’t really matter if you choose the long sides or short ends, as long as the same part is cut from opposing ends of the two boards. Making a mistake here means the continuous grain approach will be ruined. The remainder of each board will be the exact length needed for the adjacent side, as long as you didn’t leave any extra length when trimming the blank to exact length at the start of this project. I used a mitre saw to complete this step, but the table saw with a mitre gauge or crosscut sled works just as well.
Next, cut 45° mitres on the ends of all four sides. You should do this with a stop or a way of cutting multiple pieces the exact same length. These mitres should not change the overall length of the parts – they simply bevel the ends in preparation for joinery. Again, some people may have trouble being this accurate, so if you think you need a small buffer to work with, cut your blanks a little on the long side, even if this may slightly reduce the chances of the grain lining up as nicely as it could.
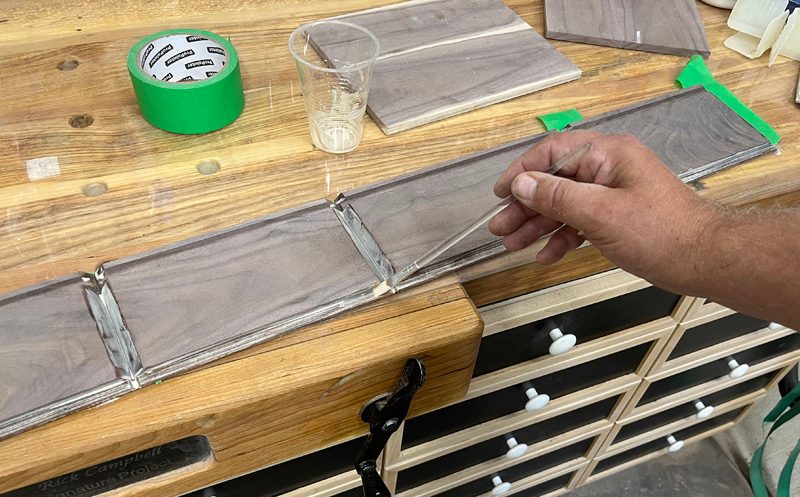
Once complete, you can dry-assemble the sides by placing the four parts face down on a flat surface, applying a few strips of masking tape over the mating corners and wrapping the box together. At that point, add a few pieces of masking tape across the final joint. This will allow you to catch your first glimpse of that beautiful continuous grain pattern flowing around the outside of the box.
Top and bottom panels
Your next task is to prepare material for the top and bottom panels. I didn’t have stock wide enough to cut these parts to size from a single board, so I edge-glued narrow boards to create the wide panels. We’re not going to cut the panels to their final dimensions quite yet, but we are going to finish sand the surfaces. It’s best to sand now as you need to determine the final thickness of these panels so you can create accurate rabbets and dadoes to connect with the sides.
Getting your groove on
You could use a dado stack to prepare the rabbets and dadoes for the side panels, but I prefer to make multiple passes with a standard saw blade so I can sneak up on the perfect fit.
For no particular reason, I started with the grooves that will capture the bottom panel.
This dado starts 1/4” from the bottom edge of the sides. Position your fence for the first pass, then set your blade height to cut roughly half way through the thickness of your side panels. With the inside face pressed firmly against the table, complete your first cut on all the parts. Then slightly nudge the fence a kerf width away before making another run. Repeat this process until the groove is just wide enough for a snug fit with the panel.
Follow the same process to create open rabbets along the top edge of the sides. Don’t be concerned if the rabbets end up slightly too wide; you can always sand off the excess from the top after assembly.
With all this work complete, you can now determine the exact dimensions of the top and bottom panels by measuring the interior length of the dadoes and rabbets. Square up one end of your panel blanks, then set your fence to cut the parts to size. When you cut out the bottom panel, reduce the overall dimensions by roughly 1/8” on the side and end to allow for seasonal wood movement.
Box assembly
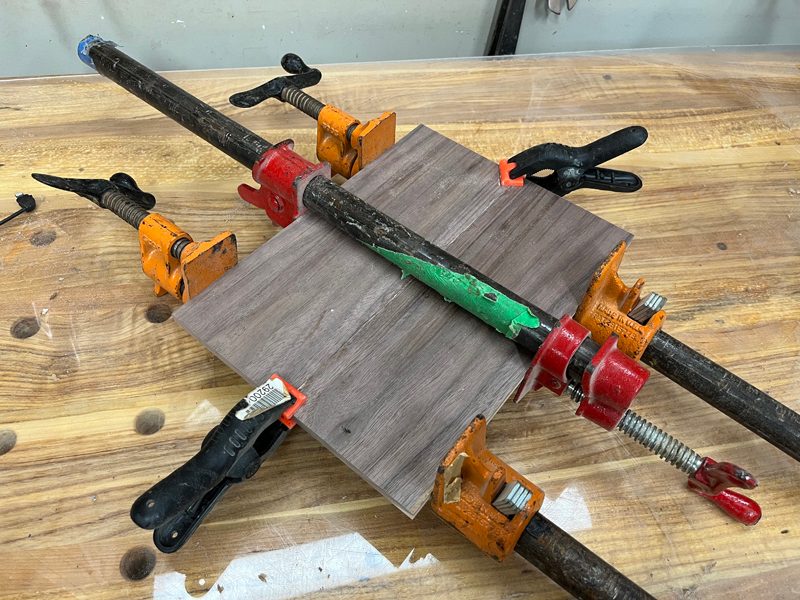
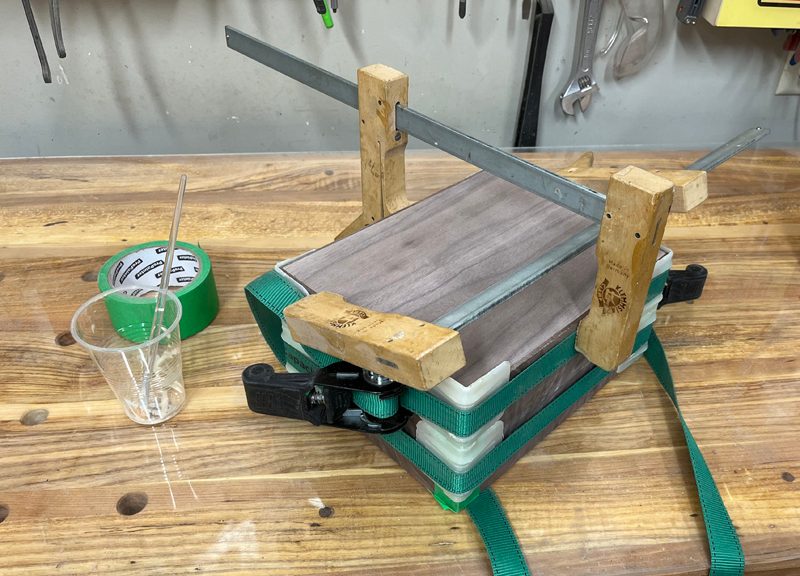
Now we can get ready to assemble the box. It’s a good idea to complete a dry run first so any potential issues can be sorted out before reaching for the glue. I find the easiest way to assemble boxes with mitred corners is to use web clamps with corner brackets to help keep the assembly aligned and square. The brackets also prevent the clamp webbing from biting into the crisp corners. I know some other woodworkers like to continue with masking tape to bring the four parts together.
You’ll also need a clamp to help keep the top seated in the rabbet. If the dress rehearsal goes according to plan, apply glue to the mitres and rabbets, then reassemble the parts for the final time with the clamps securing the joints. No glue is spread in the dadoes at the bottom to allow the panel to float freely in the slot as it expands and contracts with the seasons. After the glue has cured, finish sand the exterior faces before moving onto the next step.
Flip Your Lid
At this stage, you may have already realized that there is no way to get inside the box. Let’s fix that now by slicing off the lid at the table saw. Begin by setting your blade height high enough to cut cleanly through the full thickness of the box sides, then position your fence to the width of the lid. For my box this was 1-1/4”.
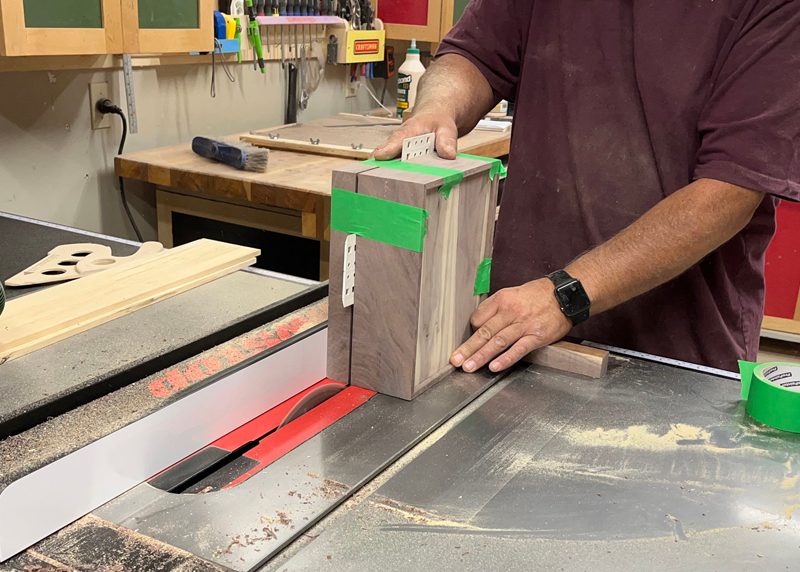
While holding the box firmly against the fence, pass one side over the blade with a backer board behind to help minimize tear-out. Rotate the box to the next side, then repeat the procedure. You can go ahead and cut the third side in the same way but hold off on slicing into the final face. Before you cut the last side, you need to insert some spacers in the saw kerfs created by the previous cuts. This is necessary to prevent the box from collapsing against the blade as you complete the final pass. If you don’t take the time to do this, it could mess up the lip of the box or, even worse, cause kickback.
The easiest way to hold the spacers in place is to compress them between the base and lid using tape stretched tightly across the openings. Once the spacers are in place, go ahead and make the final cut to release the lid. Before moving on, mark the base and lid so they can later be returned to the same orientation.
Box liner
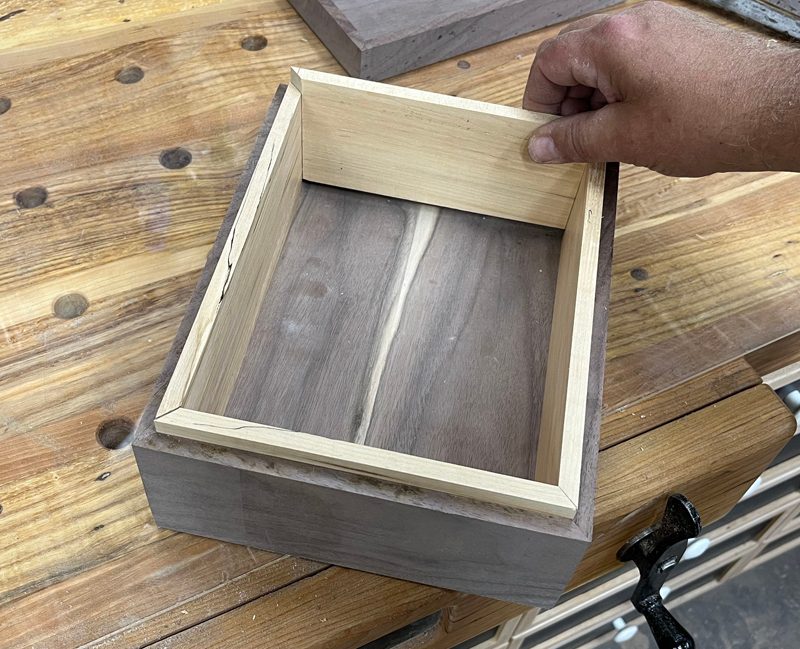
Now we need to come up with a strategy to keep the lid in position on top of the box. The solution here is to line the inside faces with thin material that extends about 1/4” above the top edge of the base. This lip will align the lid on top of the box and prevent it from sliding off.
Use your preferred resawing technique to get thin material close to the desired thickness. For me this was 3/8”. Run the boards through the planer to clean up the faces. Next, set your fence to rip the boards to the finished width. This will be equal to the height of the box interior, plus an additional 1/4” for the lip. Cut the parts to length with 45° bevels on the ends. Your goal is a nice tight fit with no gaps on the ends.
Once all the parts are cut to size, use sandpaper to slightly round the top edges for a more refined look and to help prevent the lid from catching when it slides into place. It’s also easier to sand the interior faces of the liner panels prior to installation. Spread a thin layer of glue on the interior walls of the base, then slip the liners into position. A couple of spring clamps will help secure them to the sides while the glue dries.
Once the clamps are removed, check to see that the lid fits comfortably on top. If it’s too tight, use a sanding block on the outside edges of the lip until the lid slides smoothly into place.
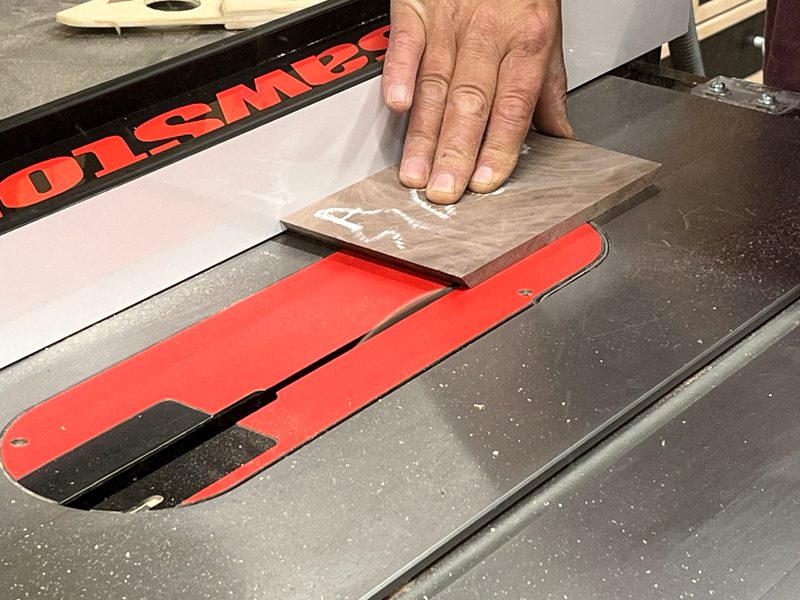
Resaw the Board
Resawing a board down its centre will allow you to use those freshly sawn faces as the outer faces of the box and help keep the grain and colour across the four corners more continuous. Here, Campbell is completing his second pass, after flipping the board over to cut in from both sides on his table saw. Notice the featherboard is in front of the blade, rather than beside or behind it.
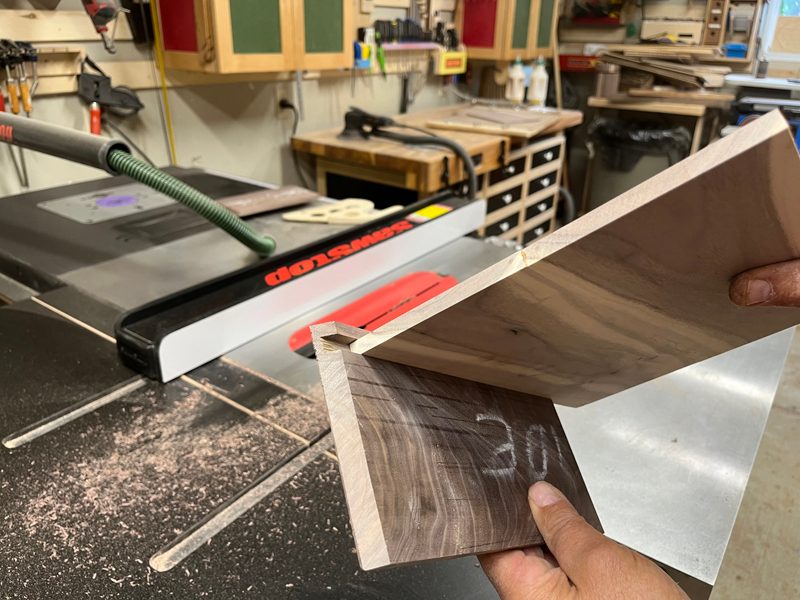
Keep Track
Once the inner re-sawn faces have been planed smooth, label them as the outside faces of the parts.
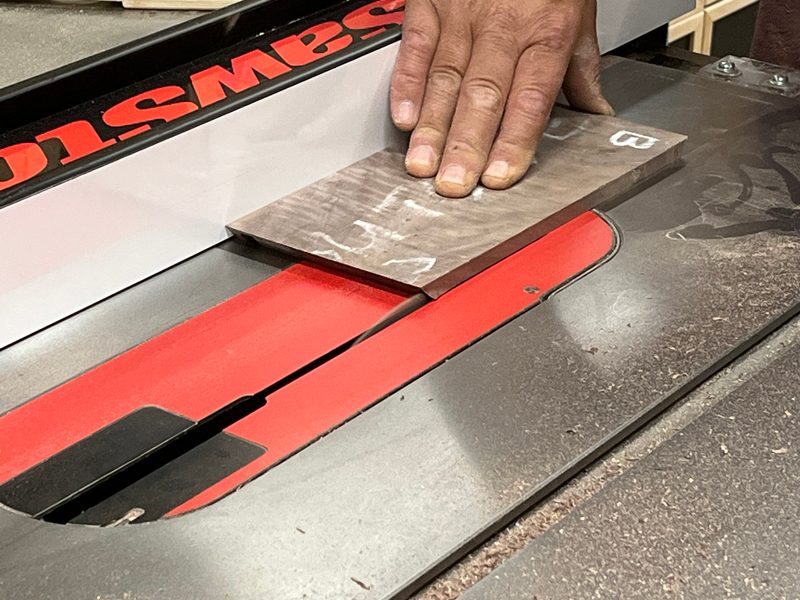
Cut to Length
Campbell cuts the parts to length, ensuring the parts on opposite sides of the box are exactly the same length.
Top and Bottom
Laminate panels for the top and bottom.
Cut to Size
Cut the top and bottom to size. The bottom should be slightly undersized so it can move with the changing seasons. There should be no gaps in the fit of the top panel.
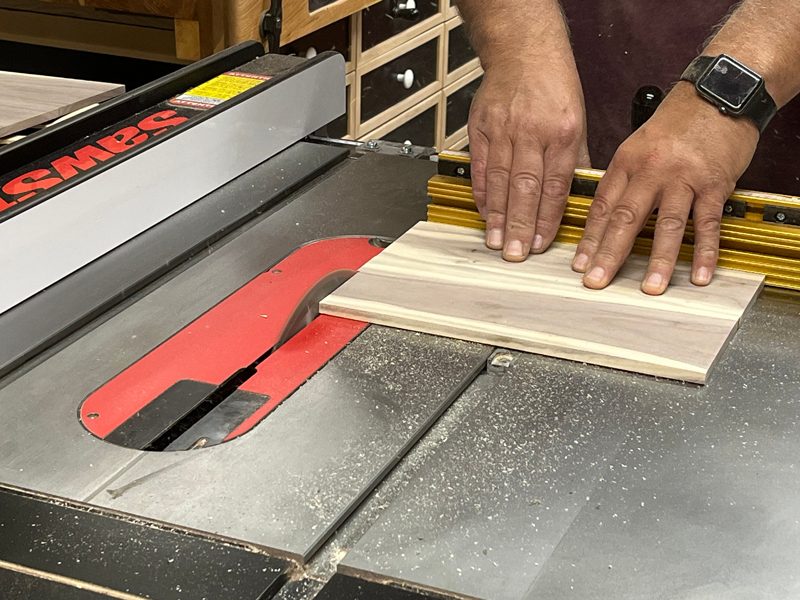
Grooves at the Bottom
The groove to accept the bottom panel needs to be machined away from the bottom edge of the sides. Dial in the width of the groove with multiple passes, adjusting the location of the rip fence as you go.
Nice Fit
The bottom should fit the groove so it’s easy to insert, but so it’s not at all loose.
Rabbets at the Top
Adjust the location of the rip fence so it will leave the upper face of the top flush with the upper edge of the sides. Again, multiple passes are needed to obtain a rabbet wide enough to properly house the top.
Almost Assembled
Apply glue to the bevel joints and the rabbets, before wrapping the four sides together, with the bottom in place. Next, install the top.
Clamps Help
Clamps of all types can help bring this box together for good.
Sand the Faces
Before removing the lid from the base, sand the faces smooth.

First Cut
Campbell makes the first cut to separate the lid from the base on the table saw. Make sure the box maintains contact with the rip fence during this operation, as well as the next three cuts, to remove the top. This ensures an even edge that looks good.

Even Gap
Campbell prefers to make the final cut to remove the lid with spacers and masking tape in place, keeping the two parts positioned properly.
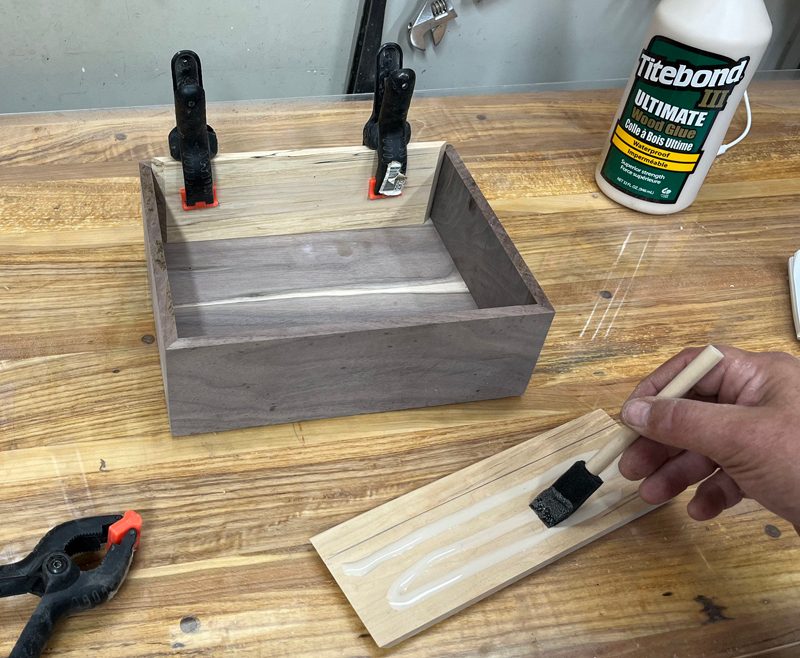
Liner Time
Cut the four liners so they fit snugly into place. When done, sand the liners and the upper edge of the base.
Glue Them In
Apply glue to the liners, then install and clamp them in place. Excessive glue will only squeeze out, making a mess of an otherwise nice glue-up. Be sure to keep glue off the upper 1/4″ of the liners, as that area will be visible.


The ribbon box is very nice! Is there a digital version for a download?
Hi Darwin. Not at this time.