FROM ROB'S BENCH
Maquettes, kids and quality furniture

Rob Brown

Blog for September 24, 2022
I’m in the midst of making a pair of teak patio tables for the backyard using plantation teak from Mys-Teak. The lumber is gorgeous.
It’s sustainably harvested, which is important when you think about the condition our world is in right now. Deforestation is a huge problem that will cause major challenges for humans, animals and our entire ecosystem for a long time.
But this column isn’t going to be about deforestation, climate change and future troubles we’ll face. It’s actually about bringing my 11-year-old son into the shop and spending a few hours making a maquette of the tables so we could work out dimensions, proportion and the overall design of them before I started cutting into the valuable teak that’s been carefully grown for the past few decades. The last thing I want to do is waste any of this gorgeous wood.
Short and fun
Even though it sometimes takes a bit of convincing to get my son into the shop, he enjoys it once he’s there. He immediately starts checking out the tools and asking what they do. He also enjoys looking around at all the work in progress, and other bits and pieces laying around. One thing that always fascinates him are the scraps I have in a box. Varying in size, shape and species, these pieces are always a bit different from the last batch. He’s glued many of them together before, making some sort of a Rube Goldburg-looking object. He’s a natural reuser and recycler, so maybe this column is partially about the future of our planet after all.
Back on track. The task for us the other day was to make a maquette of the table without boring him too much. We used 2×4 material and worked to a full-size drawing I had made the previous day. Although it included some angles, it was a fairly straightforward project. It was also relatively small, which made it even easier for us.
Nearly Finished
Our trusty maquette is waiting in the background while I work on the teak patio tables.
Lots of questions
I guided us through the process and asked him a lot of questions as we worked. What angle is the leg? How thick is the foot? How long is the top rail? Do you think this curve looks good? We shared making the decisions and the cuts as we built.
Working with 2×4 material is surprisingly enjoyable. The cuts don’t need to be perfect. Although we tried to figure out dimensions and scale as best we could, the pressure was off because all the pieces could be replaced easily and cheaply. Long screws held the joints together, which my son drove home.
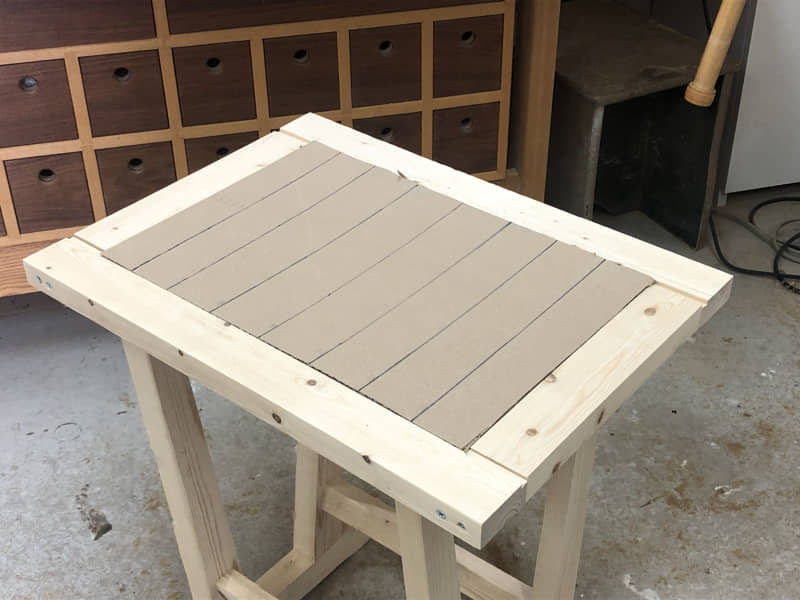
We built the table base, then made a frame for the top and cut a shallow rabbet that would accept a cardboard panel. My son drew some lines on the cardboard to mimic the slats that would eventually make up the area inside the frame. It was coming together very nicely. Best of all, my son wasn’t getting frustrated with the build.
When we were done we took it home and put it on the patio. We talked about its height, and whether that needed to change. We talked about a few design details and worked out a nicer looking table. When we were done critiquing the maquette my son asked me what we were going to do with this table now. I told him I might save a few of the longer pieces, but otherwise we would probably burn most of the 2×4 table. Then he asked if we could paint it and use it in the yard, because he didn’t like the idea of ruining all the work that went into making it. After talking about how this table wouldn’t hold up to the elements (especially the cardboard top) and the fact that the new teak tables would be so much nicer, he agreed to say goodbye to the table we built.
Strong joinery takes time. Screwing something together is quicker. This is just what an 11-year-old needs. That won’t work for a lasting piece of quality furniture, but when you’re building a maquette you can cut corners and keep young minds interested without compromising the long-term quality in a piece of furniture.
I’m sure my son will appreciate the teak patio tables when they’re complete even more now because he had a hand in the design process. If you have young kids who want to spend time in the shop, but their short attention span makes it hard, a maquette could be your answer.
Even if you don’t have kids, making a maquette is a great approach to working out all kinds of details for a project. This is especially true when dealing with angles, curves and lots of parts coming together to make a piece. For some practical tips on making maquettes check out this article.
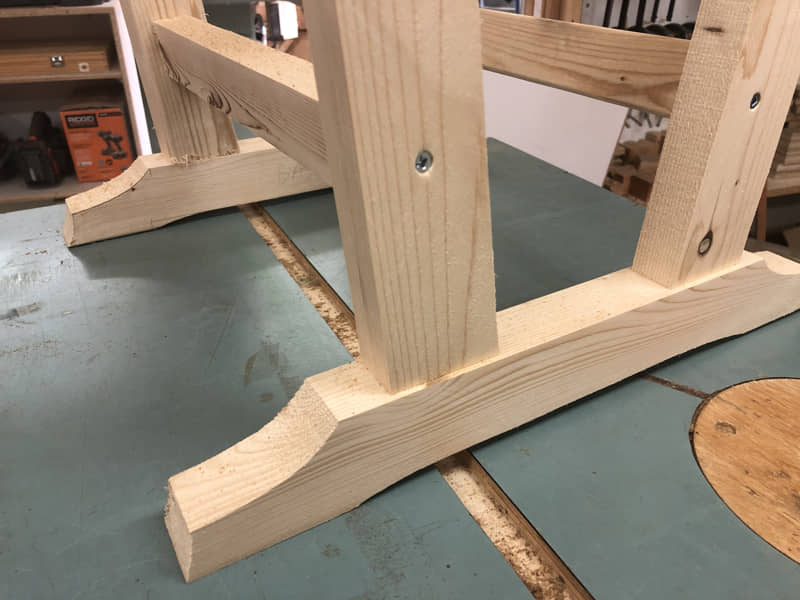
Simple Joinery
Butt joints, reinforced with a screw or two, is all we needed for this table. The ability to get the table together quickly, then easily change it if needed, was all we were looking for.
Cardboard Works Great
Cardboard works great for maquette panels. It's also quick and easy for drawing the slats that will make up the table top.