FROM ROB'S BENCH
How sharp?

Rob Brown

Blog for April 24, 2025
A few weeks ago, I realized how many of my plane irons, chisels and carving gouges were too dull. It’s a misstep I’m not proud of.
I learned in school that a sharp tool is a safe tool and I believe it. A sharp tool acts predictably, while a dull tool lurches and jumps around, mainly when you’re least expecting it. Aside from the safety aspect, there’s also a performance side of this. A sharp tool is obviously going to leave a cleaner surface, be easier to use and just generally get the task accomplished a lot better than a dull counterpart would.
The only downside to sharpening a tool is the sharpening. It takes time, something I rarely have a lot of. Not unlike many other woodworkers, whether they’re pros or amateurs, when I’m in the shop I like to build, not sharpen. I did find out that once I actually start sharpening, it’s sometimes hard to stop. Creating sharp edges that slice through wood like a warm knife through butter is addictive.
The basic science
The world of sharpening can be a murky one. With so many options, gadgets, approaches and (this is a big one) opinions, it can be confusing for someone new to sharpening to get started. Years ago, you’d just purchase an oil stone and get started. There were no jigs on the market. Powered sharpeners were only found in factories. And the internet didn’t offer millions of hits for a “how to sharpen a chisel” search.
While sharpening products have changed a lot over the past 50 years, the science is exactly the same. A blade of any type can be sharpened by honing its surfaces as smoothly as possible to create the smallest possible point or edge between them. This edge would be used on wood to create the smallest possible point of contact between the tool and the wood and a shaving would be removed. If a craftsperson could create an edge sharp enough, the freshly cut surface left after making a cut would be smoother than any surface sandpaper would leave.
My approach
I have an old oil stone I bought about 30 years ago. I have a small collection of diamond water stones, too. I also have a Worksharp WS3000 sharpener. A small collection of small slip stones, honing files and other miscellaneous bits and pieces sit in the bottom of my sharpening drawer and rarely get used. I have some honing compound and a strop, not to mention a few flat pieces of wood I often charge with honing compound to allow me to hone a super-fine edge. I also have a grinder that’s equipped with one cool grinding wheel and one felt wheel, which both come in incredibly handy.
But my favourite piece of sharpening equipment is my honing guide. It’s a simple gadget that takes everything from a narrow chisel to a wide plane iron and simply does a good, reliable job. The traditionalist may rely on holding the item to be sharpened in their hand, though unless you’re very skilled that this, can leave questionable results. I like the fact that this jig will hold my blade at a specific angle so I can sharpen it properly.
My sharpening process
If a blade needs some serious work I’ll start with the cool wheel on my grinder. I may also use the WS3000 to take care of some of the grunt work. If the tool doesn’t need any major reshaping, I’ll generally set it in the honing jig and start with one of my rougher diamond stones, working my way towards the finer diamond stones. After that, some honing with compound on a strop will leave me with a razor-sharp edge. To test this out I have a piece of white pine that I’ve been using over the decades. I use pine mainly because it’s soft and will crush under the tool edge unless that tool is very sharp. I also like pine because it’s even grained. It’s easier to cut a shaving off the end grain of maple, so I aim a bit higher. If the tool will smoothly cut end grain, its time in the honing jig is done and I move onto another tool. If the tool doesn’t slice the pine like butter, it’s back to the strop. And I leave the honing jig on until I’m sure the edge is sharp, so I can repeatedly get the exact same honing angle I’ve been working on.
Each tool doesn’t usually take more than a few minutes, unless there is some major work to do at the grinder or WS3000. But since I usually leave the sharpening process until just about all of my blades are dull, I have a lot of them to get through.
A few weeks ago, I had so many to sharpen that, once I was done, I realized my back doesn’t appreciate the bent-over position needed to finely hone a blade. I likely spent about five hours in that position that day and my back needed a few days to get over that. I should be smart enough to realize these things while they’re happening, but sadly I’m not.
Overall, the process is pretty simple and I can obtain an edge that will easily slice through end grain pine.
Enjoying the fruits of my labour
Right now, my tools are sharp and enjoyable to use. I almost forgot how easy it should be to move a block plane across a narrow edge, as I’ve been using a plane with a blunted, dull edge for so long. It’s borderline embarrassing, really. Hopefully, it will be a while before I have to get my sharpening equipment out again, but if I’ve learned anything it’s that sharpening is easier if done in small doses.
Ready for Action
Here I am, working my way through all my dull tools. Although you can’t see it, my grinder is directly behind me.
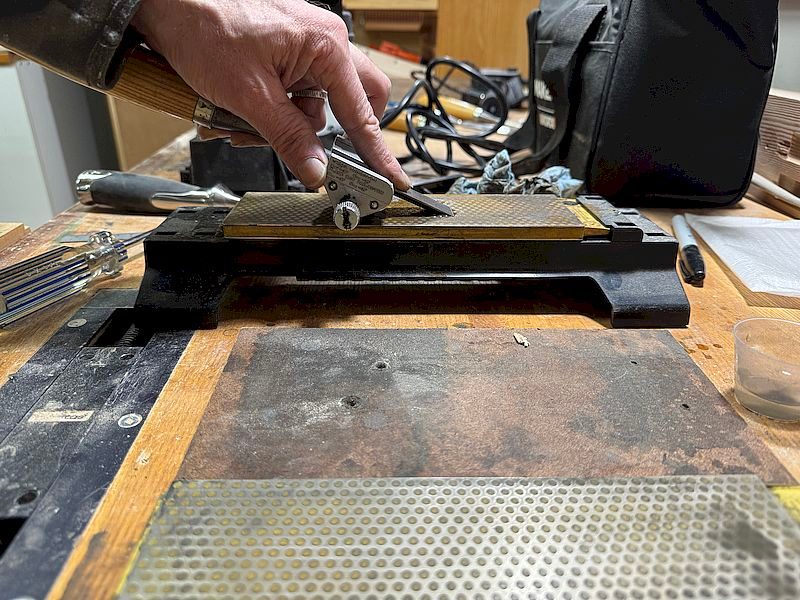
Constant Angle
My jig is great. It keeps each tool at a constant angle so I can bring the two surfaces of the cutting edge together to form a keen edge.
Nice and Smooth
You can see the shiny area where I’ve been honing one face of the edge.

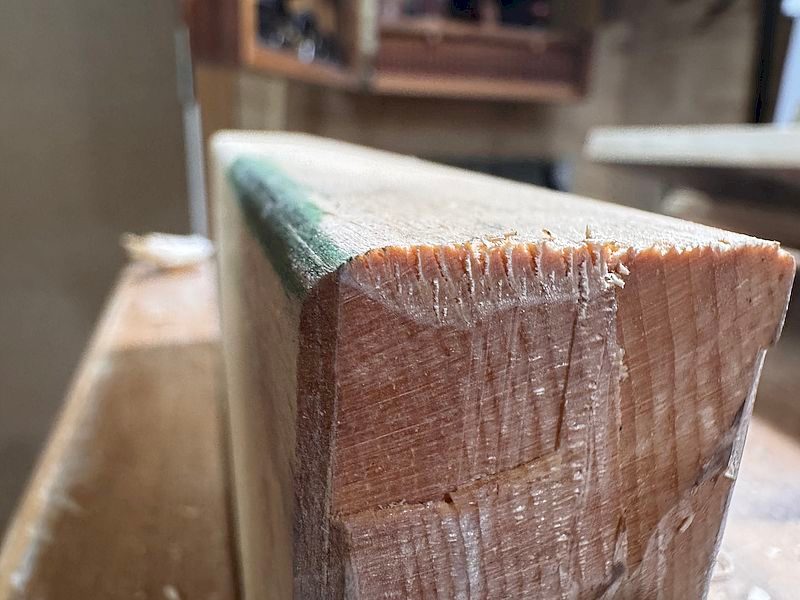
Looks Choppy
The surface my first attempt left wasn’t overly smooth, as you can see in the upper left corner of this piece of pine. A sharp tool will leave a cleaner, smoother surface, even on end grain pine.
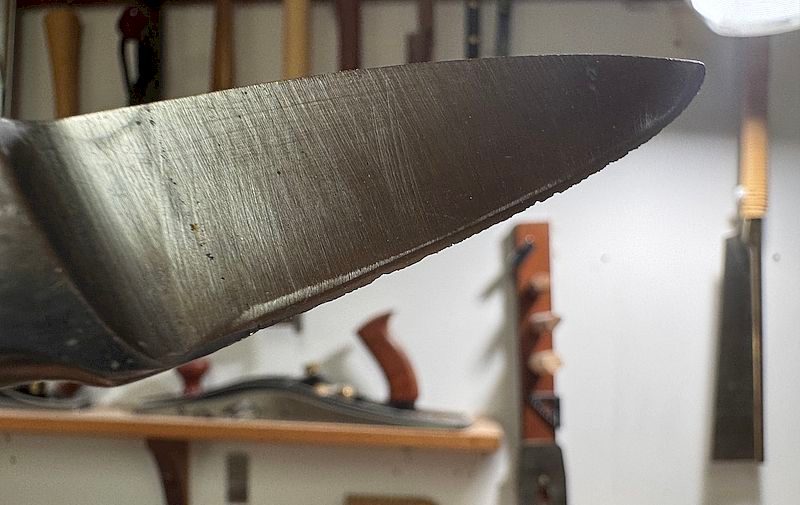
Kitchen Knives, Too
With all this sharpening equipment out, I thought I better hit the kitchen knives, too. As you can see, these take a bit of a beating. This small kitchen knife edge isn’t supposed to look serrated.
First Try
This is my first attempt at slicing end grain pine with this freshly sharpened tool. It was good, though not great, so I’ll spend a bit more time stropping.
That’s Better
I almost continued the sharpening process but thought better of it. The surface it leaves in the pine was very smooth and it took virtually no effort to create it with a sharp tool.


I totally agree with you about sharpening. Sometimes I use sandpaper after using diamond plates to clean up the edges and use a shop made strop. I do enjoy your articles. I do not build furniture, I do repair some furniture, but not anything expensive. The last one was an old(maybe 60+years) piano bench. I was told by the owner(my sitter-in-law) that her mother or grandmother rescued it from the roadside trash. It had been repaired several time, mostly by a non-woodworker with too big screws and nails. It had 6 layers of covering on the top. The joints were coming apart. Took it all apart, reshaped most of the pieces and patched missing wood. I did not try to hide the repairs as I wanted it to show that it had served its purpose for many years.