FROM ROB'S BENCH
Care to snaptoggle?

Rob Brown

Blog for October 27, 2022
A few weeks ago, I mentioned how our bathroom reno is 99% complete, and the only things left on my list were a toilet paper holder, a few towel hooks and three small inset shelves.
I think I also stupidly mentioned how it was “easygoing at this point.” (You can read the blog here.) Let’s start with the simple one: The toilet paper holder hasn’t shown up yet, so it has given me no grief whatsoever.
The hooks, on the other hand, gave me a run for my money. When my partner ordered these artisanal concrete towel hooks online I assured her I could easily install these simple hooks on the wall. I thought to myself, “How hard could it be?” It’s amazing how some simple tasks go so far off course.
Upon checking out the hooks and the included hardware, I realized this was going to be a bit harder than I initially thought. The 1/4″ hanger bolt the hook came with works great, as long as you have a stud perfectly positioned where you want the hook to go. I was able to talk my partner into placing one hook over a stud, but having the other hook 16″ away made no sense at all. After letting her know this simple install was now on the tricky side, she reminded me how I said hanging these hooks would be super easy. She was right, after all. Frustrating, but life goes on.
She mentioned how she would just check online to learn how hooks were to be hung on drywall, but it was hard to explain to her how this specific hook and its accompanying hardware wasn’t a normal situation. The concrete hook had an embedded 1/4″ thread, so the hardware we needed to use had to have the same thread.
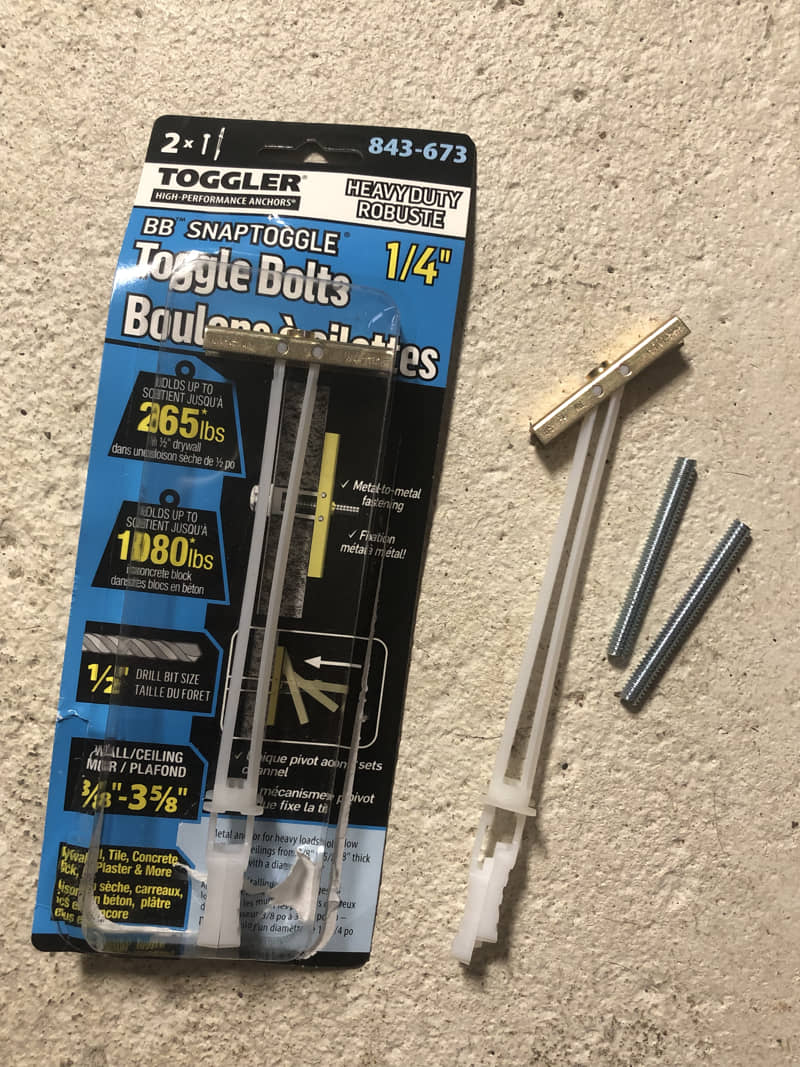
I took off for my local big box store, as I figured they would have something to help me hang this hook. At one point I had three associates scratching their heads trying to come up with a solution. Eventually one thought of something, and off we went to aisle No. 19. I wasn’t familiar with “Snaptoggle” toggle bolts, but they are quite strong in drywall and were available in a few different sizes, one being a 1/4″ thread. Perfect solution! The supplied bolt comes with a head, but I would be able to cut that off and grind the tip smooth so it would work. I grabbed a couple packs of two and headed home with a smile on my face.
The Problem
Threads are embedded in this concrete hook so it can easily be hung. The only problem is you need a perfectly positioned stud to screw the hanger bolt into for it all to work. Another option would be to install the hooks on a piece of solid wood then attach the piece of wood to the studs. This option wasn’t clean enough, visually, for us.
Easy, or so I thought
Drill a 1/2″ diameter hole in the drywall, insert the metal end into the cavity behind the drywall, straighten out the metal portion of the hardware so it sits flat against the inside face of the drywall, press in the small circular flange that holds everything in place, cut off the protruding two plastic arms, hang the hook. I even practiced on a piece of drywall and it worked great. Well, that was until I realized these are one-time use items, and I was down to three of these pieces of hardware. Once you press the circular flange into place it locks against the serrations on the plastic arms, similar to a zip tie. No worries, as I had four, yet only needed three.
This is when I installed the first hook into the stud. I drilled a pilot hole, threaded the included hanger bolt into the concrete hook and threaded the screw portion of the hanger bolt into the stud. Quite simple.
Next up, use the new hardware to hang the other hook. It was at this point I wondered if we could get by with just one hook. It was quite a large hook. Maybe it could hold two large bath towels. No, stupid idea, I quickly told myself.
I drilled the 1/2″ hole in the drywall and started to insert the metal end of the Snaptoggle bolt. It fit through the hole nicely, but just before the entire metal portion disappeared it came to a stop. I pressed a bit harder, then harder still, but it wasn’t going anywhere. Then I remembered what was behind the drywall on this wall of the bathroom. Because we were very cramped for space, we placed the 2×4 studs on their faces against this interior block wall to give us something to attach the drywall to. The metal portion of the hook needed more than 1-1/2″ to be fully inserted into the cavity behind the drywall before it could rotate flat against the rear face of the drywall.
An angled hole
After some more head scratching, I realized the base of the hook was wide enough to cover a 1/2″ diameter hole drilled in the drywall. I could re-drill the hole on an angle, allowing just enough room to slide the metal hook through the hole far enough so that it could rotate into position. That worked, and I was back in business.
I pressed the circular ring against the drywall, fixing the hardware in place, then snipped off the two plastic arms. I reached for the bolt, only to immediately realize I forgot to remove the head of the bolt and it wouldn’t work just yet. It was too late at night to head to the shop so I put this simple job off until the next day.
Off with its head
When at the shop the next day I held each bolt in my vise and cut the heads off the three bolts. The bolts turned out fine, but I did damage my vise jaws slightly. Oh, well. I grinded the freshly cut ends smooth so they would both work. When I finished my work day at the shop I headed home, threaded rods in hand.
I didn’t immediately insert them into the hardware and install the hooks because it was dinner time and I was hungry. This simple task could wait a few hours until I had two minutes to complete it.
A few hours later I headed down to the basement, installed the threaded rod into one of the Snaptoggle clamps, then turned the concrete hook onto the threaded rod. All was going great until the concrete hook stopped rotating about 3/8″ away from the wall. It never crossed my mind that the threaded bolt I was dealing with was too long. It sat well into the cavity behind the drywall, but the threads in the hook were only so deep. Back to the shop with the threaded bolts tomorrow to shorten them.
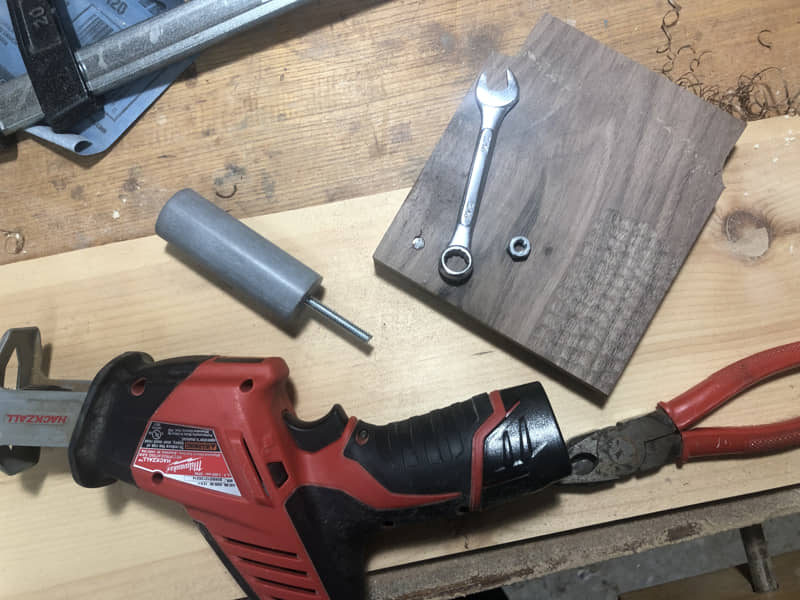
Back at the shop, I didn’t want to risk further damaging the jaws of my vise, so I made a simple jig to help keep each bolt stationary while I cut them to length. It was just a hole drilled into a piece of wood, which was held in my vise. I gently grasped the other ends of the bolts with a pair of pliers and cut the bolts a little bit more than 1/2″ shorter. The threads were slightly damaged, but nothing a few passes of a 1/4″ nut couldn’t take care of. More grinding of the cut ends and I was finally ready to install these hooks for good.
The home stretch
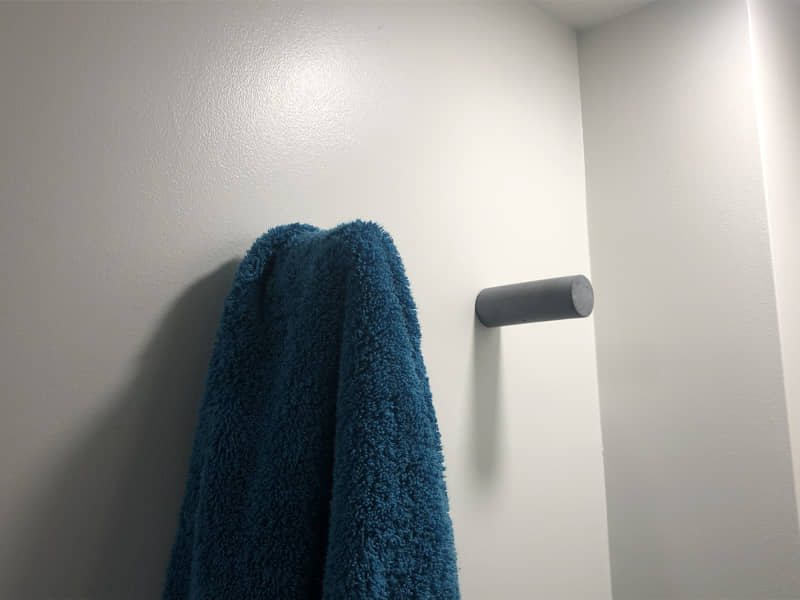
I had travelled many kilometres to the hardware store, then back and forth (and back and forth again) to my shop, in order to sort out a solution to hang these “simple hooks.” I guess I had jumped through enough hoops to please the renovation gods, as both the threaded rods and the concrete hooks installed against the drywall worked nicely and I hung the hooks in place.
I reached for a bath towel and put in on the hook. It was at this point that I thought to myself, “Will these hooks even hold the towels properly?” There’s really no lip or edge to add a positive grasping action to the towel. Even the concrete hook itself is very smooth so there’s no texture there to grasp the towel. I wasn’t about to bring this up with my partner, as these hooks were installed and working as they were intended to. The thought of removing the hooks and hardware, filling the holes in the drywall, repainting and then having to start on another solution for hanging our towels wasn’t one I was too keen on. If these hooks prove to not grasp the towels, we will just sell the house and move. I think it might be easier.
The third project to finish off the bathroom, a trio of solid wood inset shelves, has yet to be worked on. They won’t give me too many troubles, will they?
The Solution
Snaptoggle hardware allowed me to install the hooks in drywall. Once they’re installed a small threaded hole in the centre of the metal portion of the hardware allows you to thread a bolt into it.
Shortening the Bolt
With one end of the threaded rod in the hook (so I could easily grasp it), and the other end in a 1/2" deep hole in some scrap, I was able to quickly and accurately trim the threaded rod to length.
Finally
Now that the hooks are installed, I hope they hold a towel properly.


Hi Michel,
Very true. Planning can only be taken so far, and with a million things on my mind some blocking (although it could have saved me a lot of time and energy) didn’t even get considered before drywall went up. And you’re correct….the hooks weren’t even purchased at that stage.
Hi Walt,
Although you’re right, I hadn’t planned that far ahead during the reno. With so many things on my mind, smaller details like this slip through the cracks. It’s all done now though, so all is good!
Yes but it has to be planned in advance. Like Rob, I don’t think I would have put a huge priority on towel hooks when building wall. As a matter of fact, they were probably not chosen and ordered at that time.
I totally find that the exact same situation could have happened to me.
A few pieces of blocking between the studs, located where the towel bars are to be placed, then some photos as reminders, would have save a lot of trips to the store and workshop. Money too as the blocking is usually made from scrap that will thrown away.