FROM ROB'S BENCH
A kitchen carving party

Rob Brown

Blog for April 10, 2025
With all the dead trees on the ground from the ice storm, I wanted to do something with all that wood.
It’s almost like a disease; I see part of a tree on the ground and immediately think of all the potential it has. And since one of the worst things is wasted potential, I pick it up put my brain in motion.
As I mentioned last week, our neighbours had a few tree branches come down. I grabbed a chunk, split it, trimmed it to size and my kids and I carved some spreading knives with it. They turned out great. They’re pretty much dry now, so all we have to do is make the last series of cuts on the knives to leave us with a nice, clean surface, then apply a few coats of finish, before letting the finish dry. In due time that little project will be sorted and we can start using our knives.
Next up, spoons
Since I caught the carving bug, and had a bit of extra wood, my wife and I sat down in the kitchen and started a pair of spoons. Thankfully, I didn’t even have to talk her into it. A quick “sure, that would be fun” was her response when I asked her if I should bring home some carving tools.
Kitchen carving party
As you’d expect, my workshop is great for wood dust and chips. It all drops to the floor, it eventually gets swept up, some dust remains, life goes on. But our home isn’t quite as forgiving. Thankfully, we have no carpeting. I grabbed two small footstools from the living room and put them in the middle of our kitchen floor. “Right here?” my wife asked, as I motioned her to sit down. “Sure, why not? Good lighting and we can just sweep it up afterwards,” I replied.
I handed her a stick of wood that was bandsawn into a vague spoon shape and we sat down and got to work.
Get a grip
My wife has never carved spoons before, so we went over the different grips. The elbow grip for removing wood while pushing away from you. The thumb push grip, similar to the elbow grip, but for a more controlled cutting action. And the pull grip, which is used when one end of the spoon is pressed into your stomach and your non-grip hand is holding the far end of the spoon. There are more grips, but I wanted to keep it simple to start her off.
Read the wood
As most woodworkers know, the wood’s grain direction is to be respected. This is especially true when using hand tools. My wife and I talked a bit about this, how to use it to her advantage and what would happen if a few basic downhill / uphill cutting rules weren’t followed. We also talked about how cutting across end grain wasn’t going to be easy, but by removing small amounts of wood, it was possible.
One final rule
The biggest rule for carving spoons and knives, at least in my mind, is to keep the elbow of your dominant hand (the one with the knife in it) tucked in to your side. If it’s kept there, it helps prevent your carving hand from lurching forward as the knife exits the cut. This means there’s a far less chance of cutting yourself. It’s easy to start out in this position, but only for about five seconds. If someone is new to carving, you forget about your cutting elbow almost right away, because you have the grips to consider, the wood’s grain direction to worry about and a design goal somewhere in the back of your mind. A very gentle reminder now and then was all I could do.
Steep learning curve
The first 10 minutes weren’t pretty. It’s fairly simple to take each one of the rules individually and put them to work. The different grips aren’t rocket science, and can easily be employed in practice. It’s also fairly simple to understand how uphill and downhill cutting should be considered. And we all know the general shape of a spoon, so that’s an easy one, too. But to bring them all together, while keeping your elbows in check, is far from easy.
My wife was getting visibly frustrated and I just wanted to be encouraging, while also teach her what I thought were the things she was having the most trouble with. Grain direction was giving her the most trouble, at first. She was trying to cut uphill and that was only leading to the wood chipping out or causing her knife to just simply stop moving, like it had come up against an immovable object. I kept a close eye, but was careful not to jump all over her. Learning is very experiential. I just wanted to ensure she was learning enough to start to have some more success, and she was.
Her wild elbows were next on my list. They were regularly 10″ away from her sides as she carved. A gentle reminder, and in they would come. She started to complain about sore shoulders, a tight upper back and a sore neck. Not surprising, considering all the things she had to remember.
Within about 30 minutes it was obvious that she’d learned a lot. No longer was she complaining about the wood grain or the uncomfortable grips. And that stick of wood I had given her was now looking a lot more spoon-shaped. All the corners were eased, the bowl was slightly hollowed and there wasn’t even a single drop of blood on the nice white birch blank she was carving. All this was a huge success, as far as I was concerned.
Getting closer
After about an hour my wife admitted she had been a fraction of an inch from giving up after the first 10 minutes, but thankfully she pressed on. She’s the kind of person who either does just that — giving up after not having a decent amount of immediate success, or getting ultra-focused and spending the next few hours smashing through whatever challenge is in front of her. She took the latter route and we carved for about two and a half hours before stopping for the night.
Still more to go
I’ve done a bit more carving, but I haven’t tricked my wife into picking up any of the carving tools since that first night. My spoon is mostly done, and I’ve even got another one almost complete, so maybe showing her how nice they look when they’re complete will spur her on to do a bit more carving.
Maybe next week I’ll have a few photos of all the finished spoons and knives in our home. No promises though, as I fear some of my spare time over the next few days will end up going into salvaging more downed trees and cutting them up into more and more spoon and knife blanks. I guess I’m a bit like my wife; once I lock onto something it’s hard to stop.
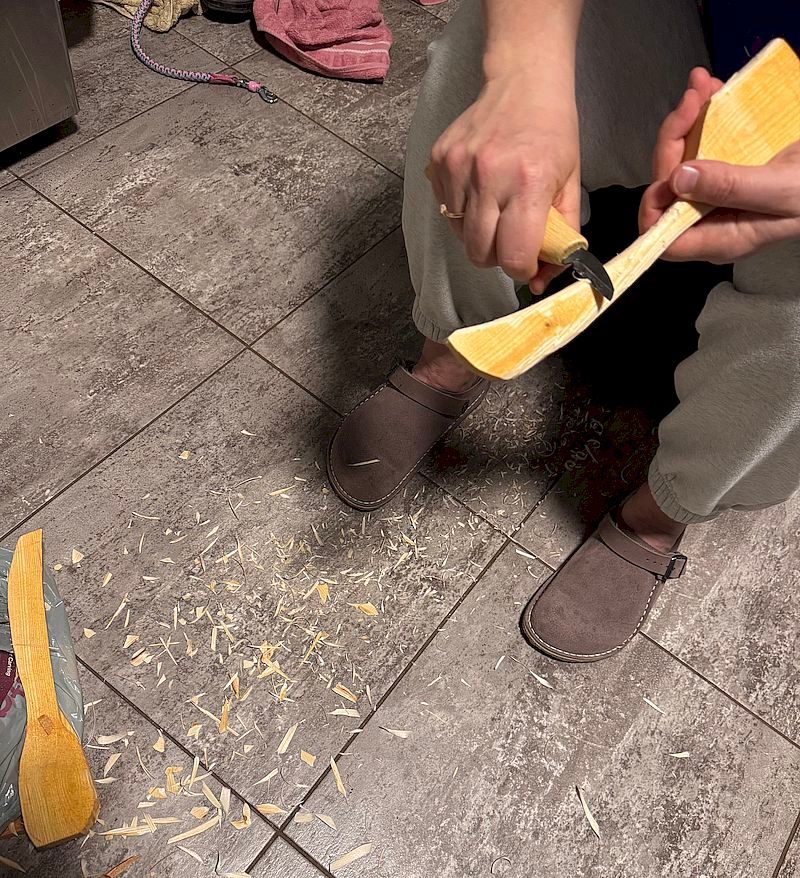
Get a Grip
My wife, using a pull grip to remove some wood from her spoon blank. A few basic grips are enough to get a new carver well on their way to success.
Kitchen Cleanup
Carving in our kitchen went well, even though it’s not quite as good as my shop. Notice our kitchen floor, littered with hundreds of wood shavings. A broom made quick work of them when we were done.
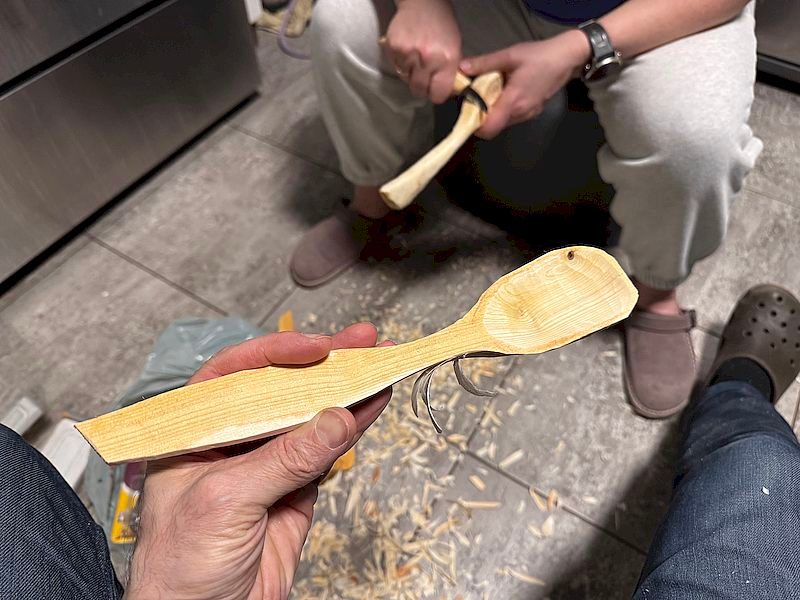
Birch Stirring Spoon
This was my project for the night. Once it’s done it will make a great addition to our utensil collection on our kitchen counter.
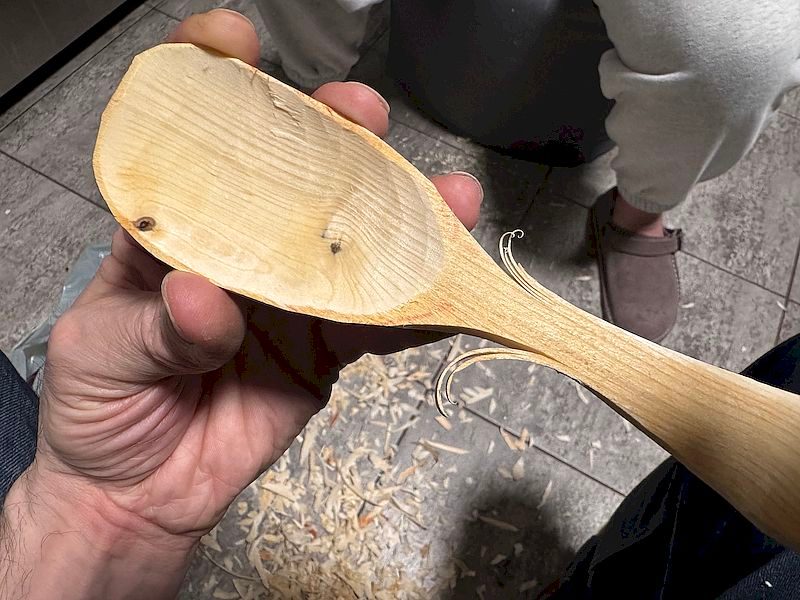
Grain Direction
Carving downhill is the only way to go. Learning about grain direction is so much more important when using hand tools.


Hi Ralph,
Yes, the wood was still very wet when we carved these spoons. It was a real treat to carve.
Hi, Rob. First, great job and great use of the damaged trees/branches. Did you cut the wood green?