Timber! a great structural material
About a month ago I wrote about a backyard structure I’d like to start planning. I asked for your feedback, and got a few emails.
The first three emails I received were from readers (here is a link to the post) who had nothing to share but were really looking forward to hearing advice from other readers.
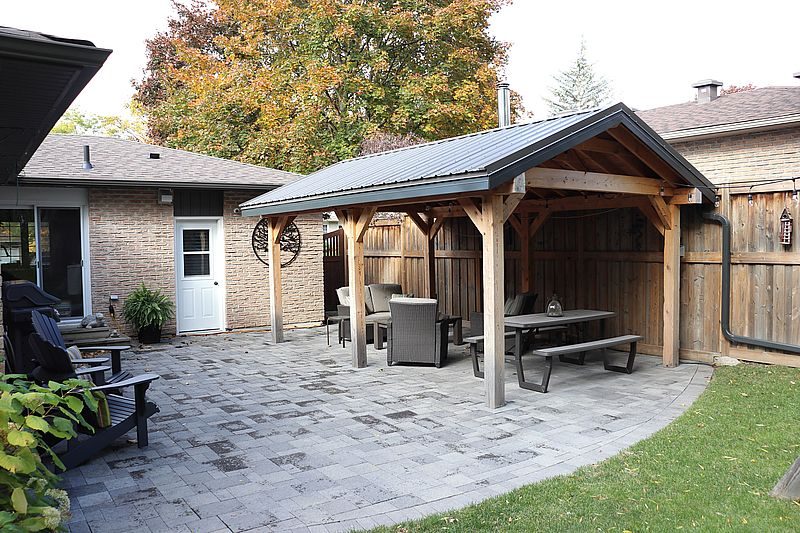
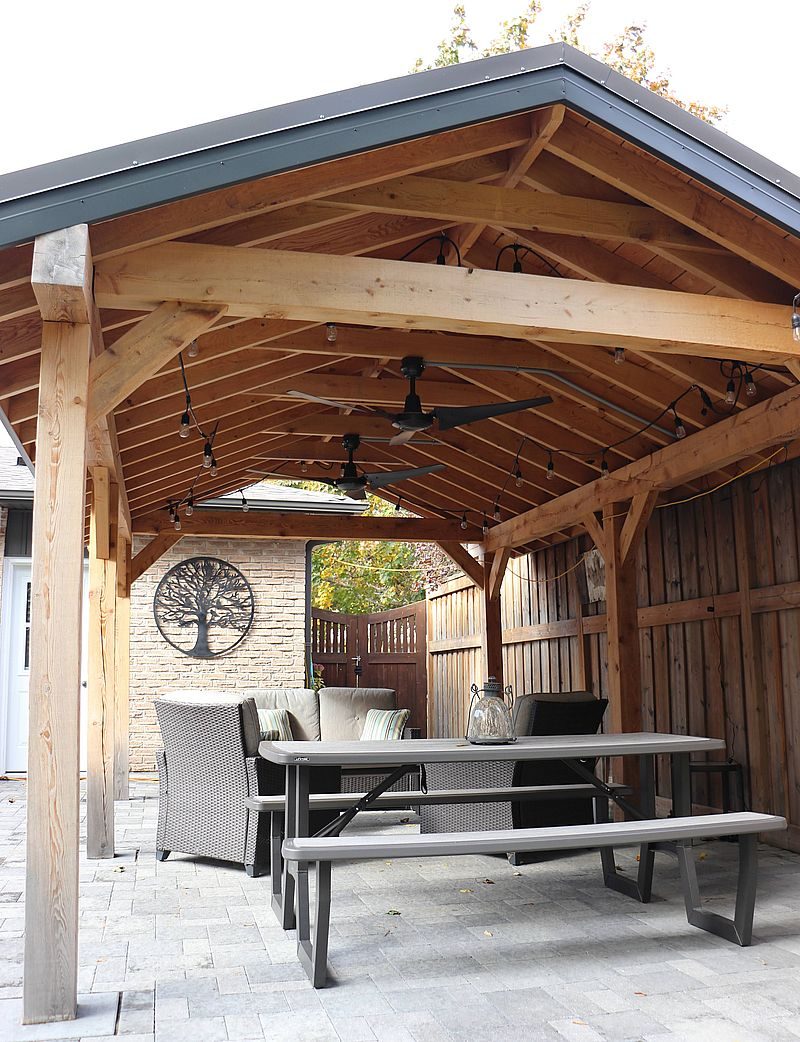
The fourth was from a reader named Scott M., who made a vaguely similar backyard structure to what I had in mind. His 20’x13′ hemlock structure was erected in 2020, just before material prices skyrocketed. After having a metal / fabric canopy for a few years Scott decided to get serious with a more permanent structure, and what he built is a beauty. Scott decided on a timber frame structure so he could learn some new skills, which is something I really admire.
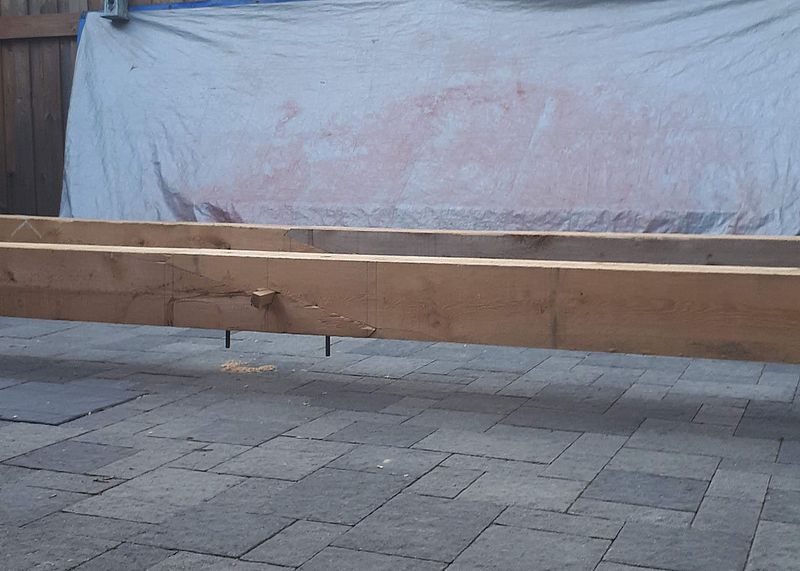
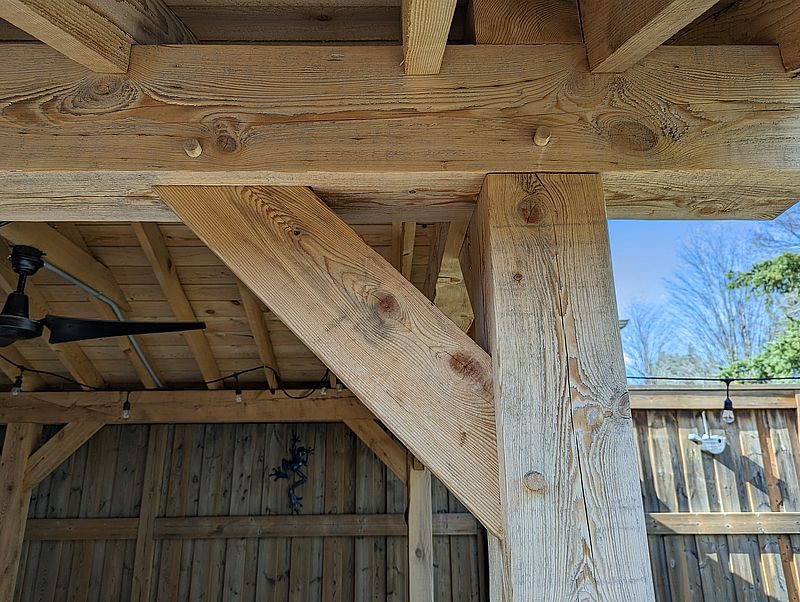
The posts are 6×6″ and the beams are 6×8″. Scott made two 20′ long 6″x8″ beams by splicing together two pieces with a wedged scarf joint. “It didn’t come out perfectly,” Scott admitted, “but it was interesting to try it out. It’s supposed to stay together without any fasteners, but it started splitting in a couple of spots, so I added some carriage bolts to squeeze it together, just to be safe. I think I made the angles at the tips of the joints too steep, and the pressure of the wedges was splitting the wood. I think it was 45°, but would have been better at 22.5°.
A Great Structure
When all the hard work was done, Scott can enjoy this shelter rain or sun, night or day.
Deep cuts and big joints
Scott cut everything with a 7-1/4″ circular saw, a hand saw and reciprocating saw. “I would go as far as I could with the circular saw, but since it only cuts about 2-1/2″ deep, I had to cut from both sides and then finish the cut with the hand saw or reciprocating saw with a 12″ blade on it.”
The mortise and tenon joints were also a challenge, as you can imagine. “I did the mortises with a 1″ spade bit in a corded drill and 1″ chisel,” Scott told me, “and I cut the tenons with the circular saw, taking multiple passes and cleaning up with the chisel and a block plane.”
“For the angle braces,” Scott continued, “I ripped the 6″x6″s in half to make 3″x6″ workpieces. I also made small pockets in addition to the mortise for the angle braces so the entire piece would fit inside the posts/beams about 1/4″. I drilled holes and used 1″ maple dowel to secure the joints. I slightly offset the holes on the tenons (~1/16″) to help pull the joint together tightly. Other than the carriage bolts on the beam, there are no other fasteners on the frames.”
All of this sounded so cool to me. I generally deal with tight tolerances on furniture projects, so the thought of dealing with a mortise and tenon joint that large fascinated me. It’s got to be challenging in its own way, even if the tolerances aren’t as tight as furniture making, to produce joints that are tight and strong in a project this large.
Heavy assemblies
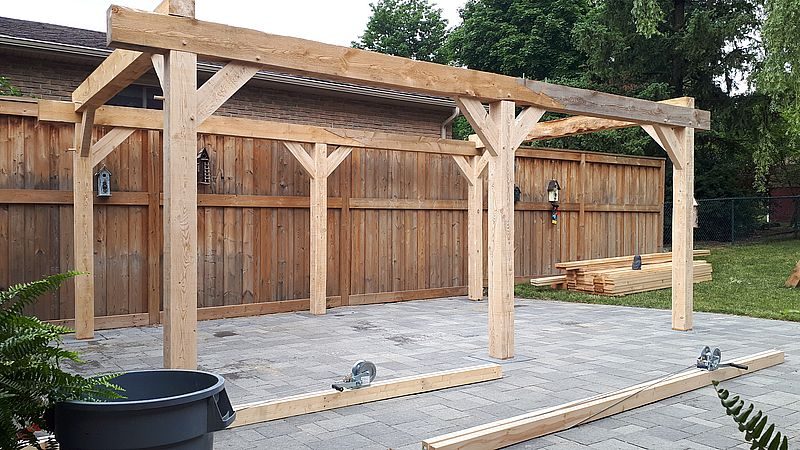
Scott assembled the sections on the ground, then used 2x4s and a winch to carefully stand everything upright and quickly assemble things. “It was quite a process,” Scott explained, “but two people were able to raise each frame into an upright position without any major incidents. It might have been better to enlist the help of 5 or 6 people to raise them,” he admitted, “but I’m used to figuring out how to do things by myself or with minimal help because I work alone.”
After the structure had been up for about a year, Scott decided to make it even more functional and comfortable. “I installed PVC conduit as inconspicuously as I could and installed two ceiling fans with switches, a light switch and some receptacles. We have some string lights, and while I don’t really like the look of them, they work well and give a nice light at night.”
Mighty tempting
Timber framing has been something I’ve been keen on for many years, but I always figured it was out of my reach. I really don’t have much knowledge at all about where timbers come from or how these sorts of structures get built. Now that I’ve carefully looked over these photos, and gotten a few tips, I feel like it’s possibly within my grasp.
Thanks a lot, Scott. Now I have to consider spending thousands and thousands of dollars on timbers, talk my friends into coming over to lift heavy materials into place and risk these massive beams come down in the middle of a wind storm a few weeks after they go up. It’s true what they say, a little bit of knowledge can be a very dangerous thing.
Beam Splice Joint
Scott needed a pair of longer beams to span the length of his structure, so he spliced them both together. I’d love to try my hand at this joint! He added a few carriage bolts just to make sure the joints would stay together.
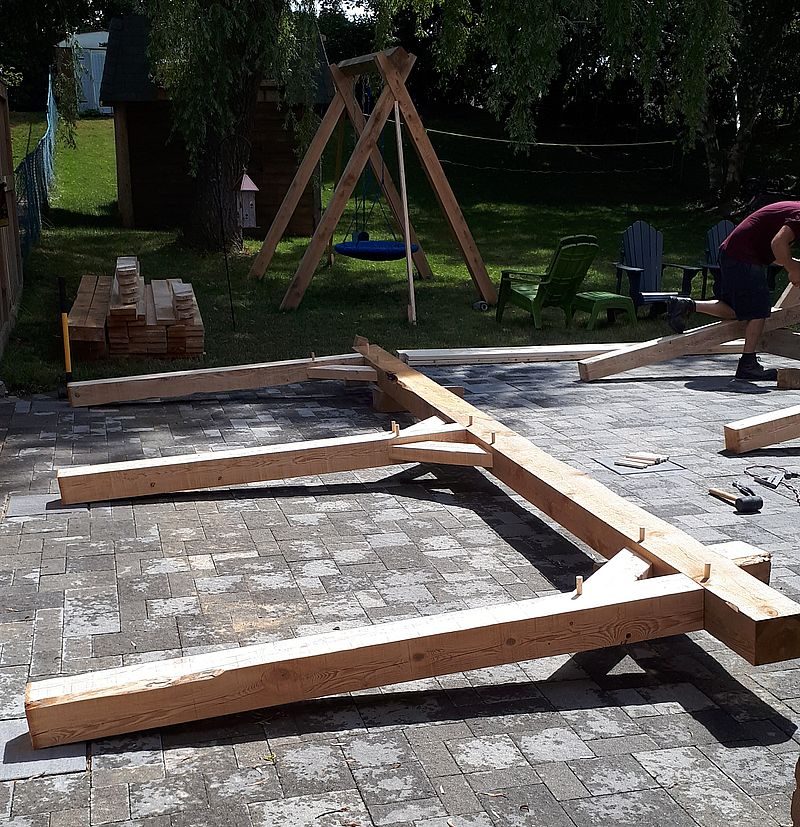
Large Assemblies
These side assemblies are now complete and just needed to be raised onto their feet before being joined with the other members. No easy task, but some hard work and ingenuity were all that was needed.
Getting There
The bulk of the heavier framing is done at this stage. It looks a bit like the skeleton of a tiny barn to me
Pegged Joinery
Solid maple pegs driven through the mortise and tenon joints help keep this timber frame structure together.
Fit It Out
Electricity was brought into the structure so lights and fans could be added. Nice details like this will pay off hugely in the long run.

Rob Brown - rbrown@canadianwoodworking.com
Rob is a studio furniture maker and the editor at Canadian Woodworking & Home Improvement. Instagram at @RobBrownTeaches


I think you did a hellova job, Scott!! Looks great!!
How is it anchored? The only thing holding it in place is gravity.
Ideally, I would have dug and poured proper piers with saddles, but the thought of taking up such a large area of the patio was daunting. Not to mention the substrate of the patio is HPB, which I imagine would have constantly caved into the holes.
The open ends of the gables also face east and west, so the prevailing winds aren’t hitting the big flat surfaces. It has been through some intense storms in the last couple of years and I think the weight of it makes it difficult to move. Fingers crossed.
This is quite a project. It turned out to be beautiful. Scott M. did a beautiful job making this wonderful outdoor living space.
Hi Rob, that structure looks nice.
How it is anchored?
The uprights don’t look long enough to be set in the ground, however that may simply be an artifact of the photo.
Regards, Rod