SITE MAINTENANCE IN PROGRESS
New heights for an old friend
Steven Der-Garabedian
Steven Der-Garabedian
June 2025
The only thing more dependable than a shop-made sawhorse is an adjustable one.
Advertisement
- DIFFICULTY2/5
- LENGTH/TIME1/5
- COST1/5
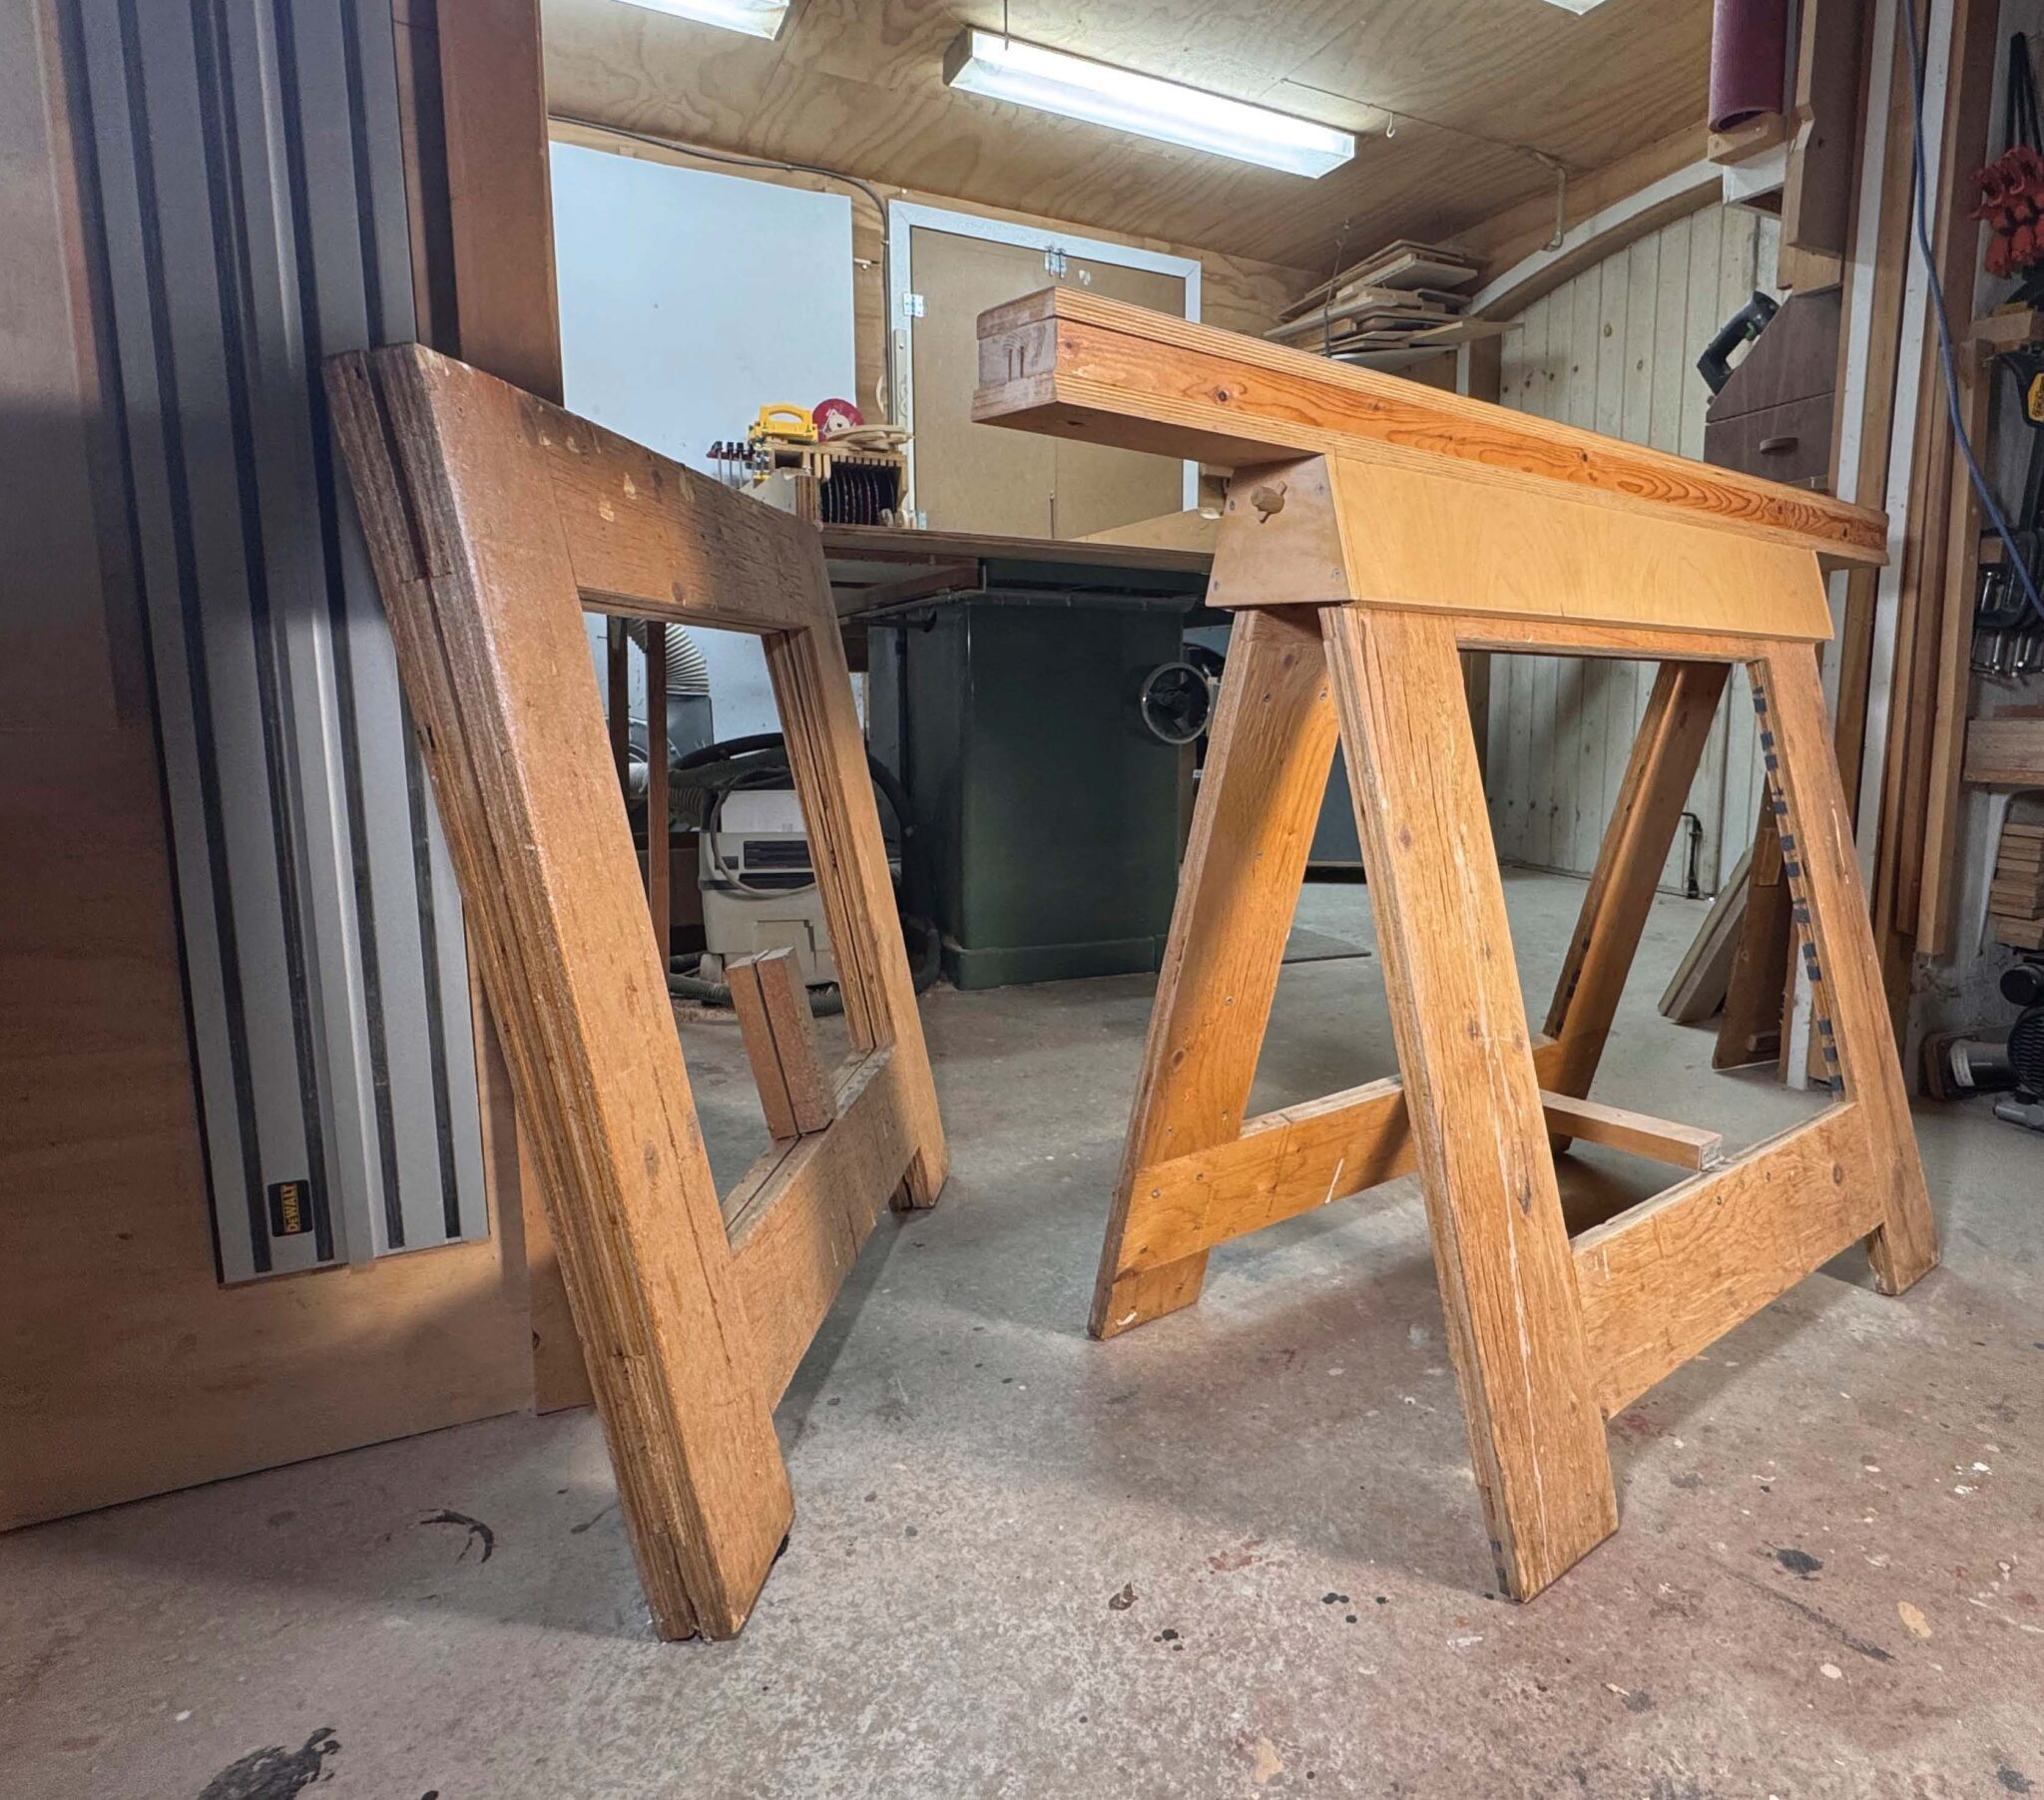
One of the first projects I built during my formal education at Rosewood Studio in Perth, Ontario, was a pair of Krenov-style sawhorses. While I’m happy with their height for most projects in my shop, there are a few times I wish they had a bit more reach, height-wise.
Not so long ago, as I got lost in the local Ikea labyrinth, I noticed one of the bases for a utility table had a smart adjustable height system. Time to see if I could use the idea to make my silent partners even more useful.
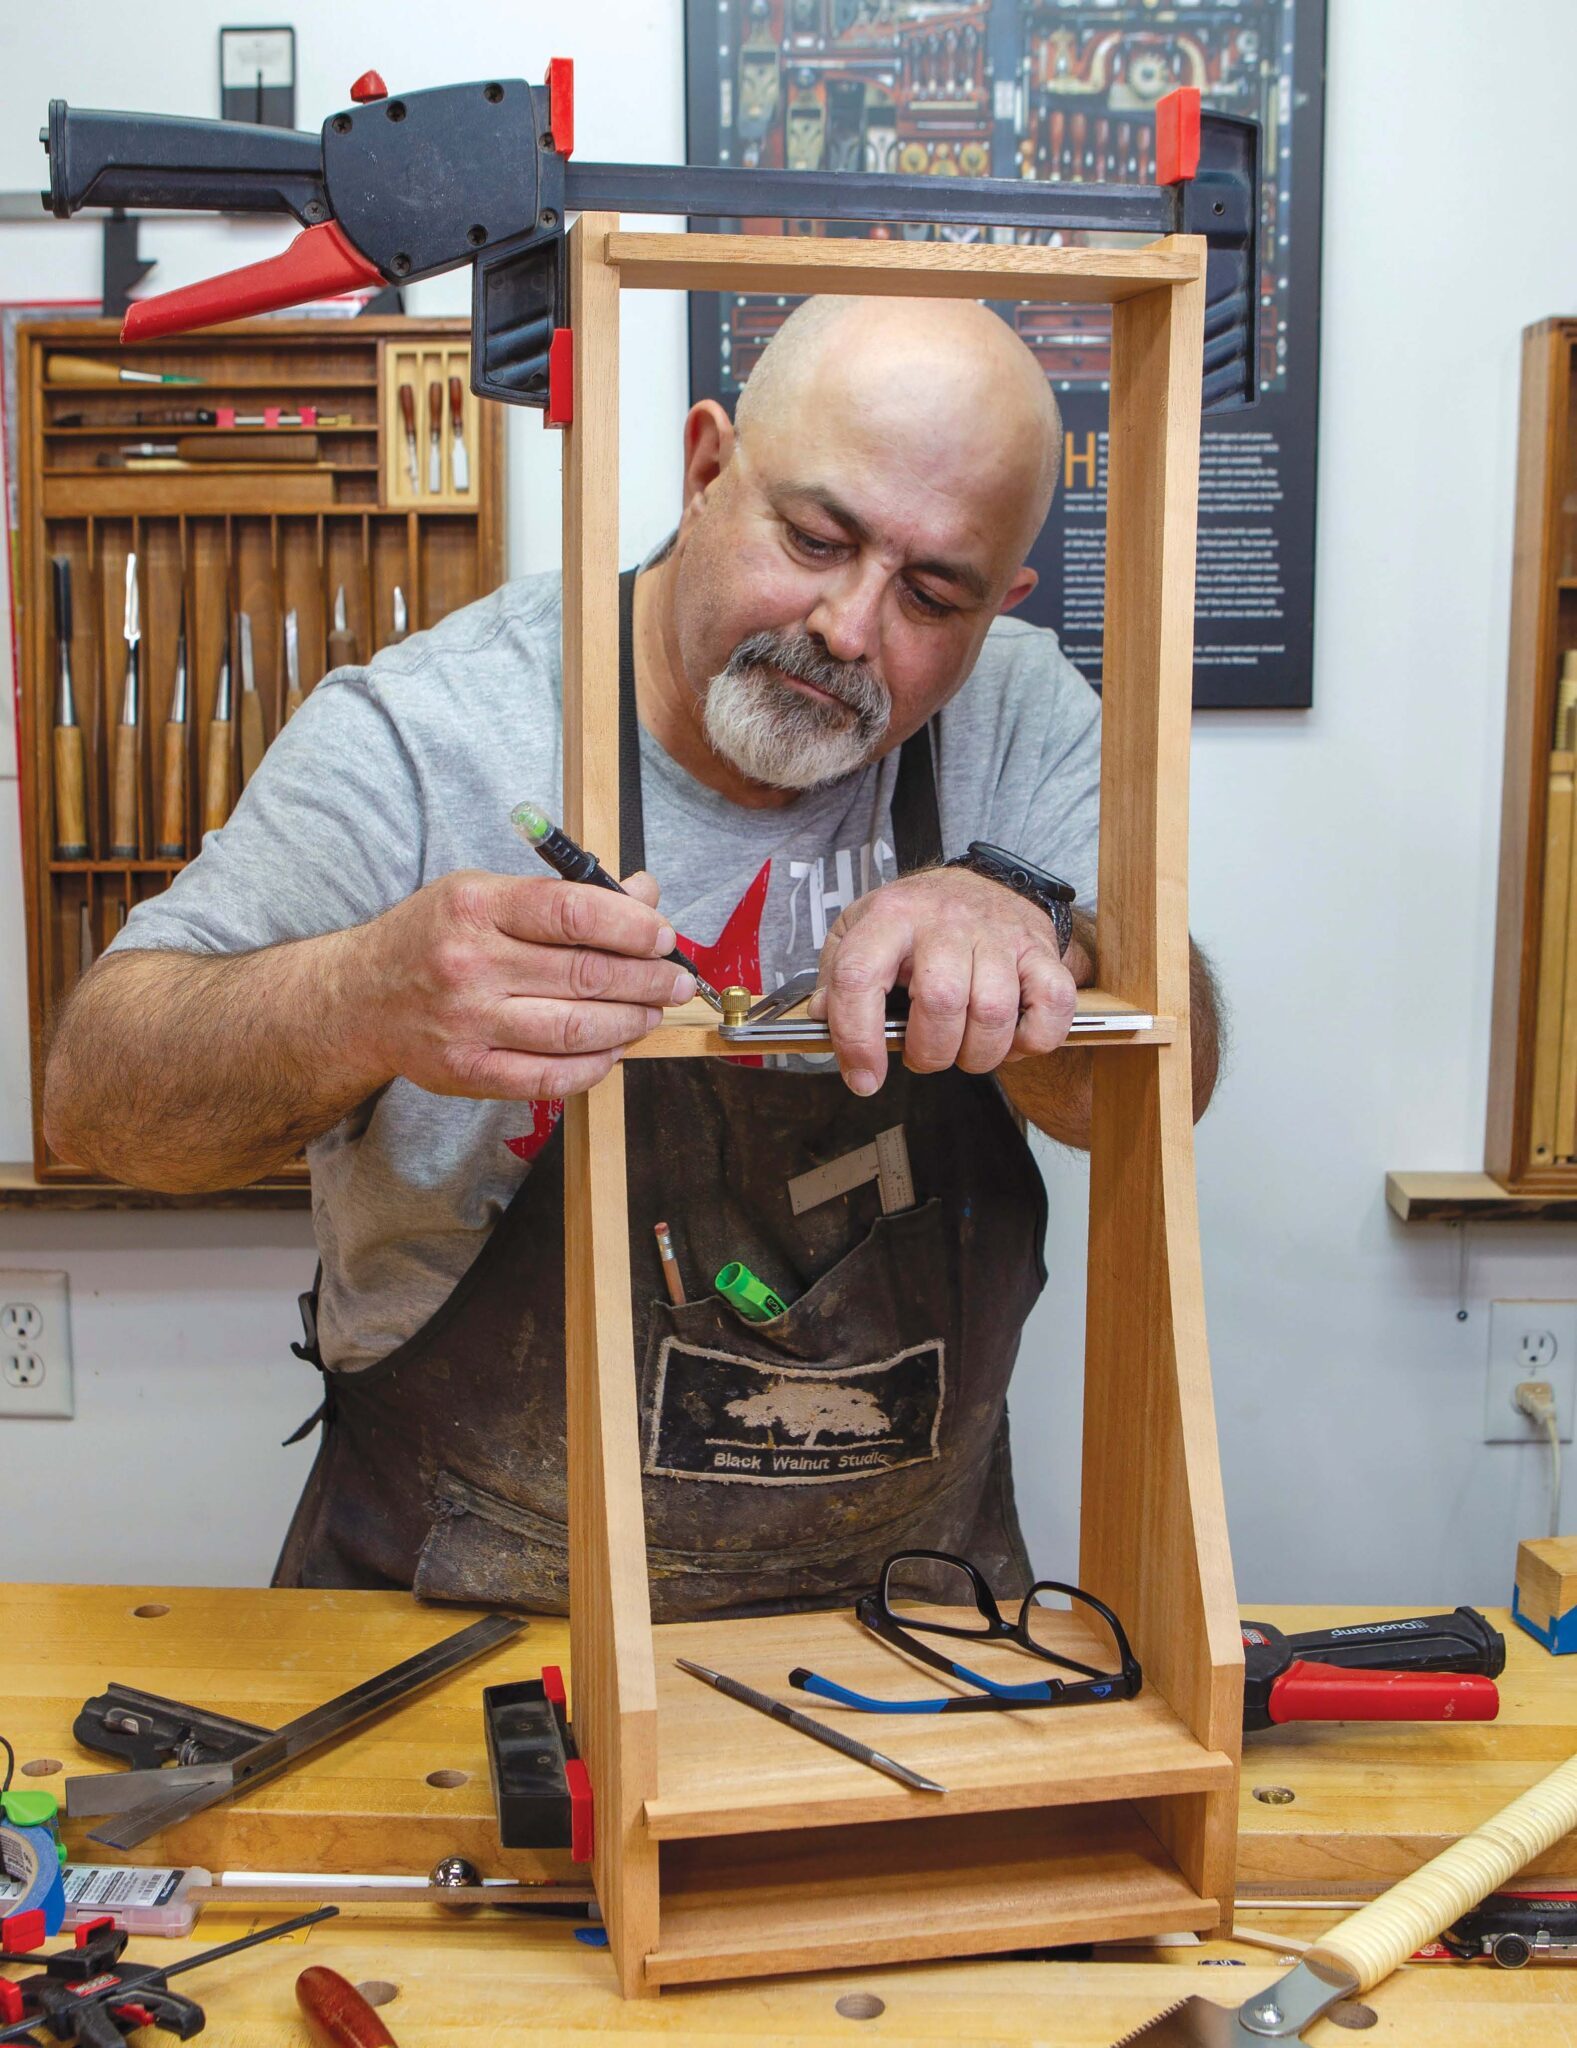
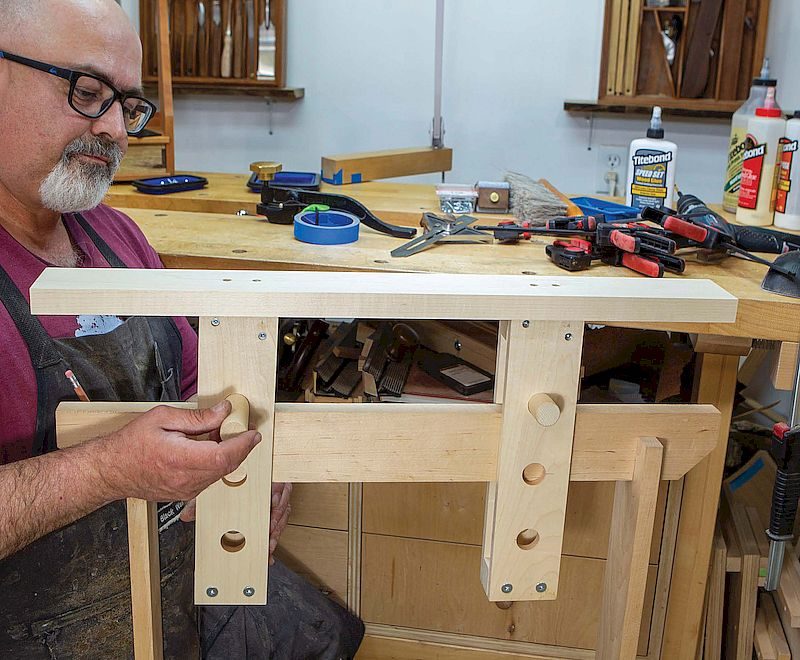
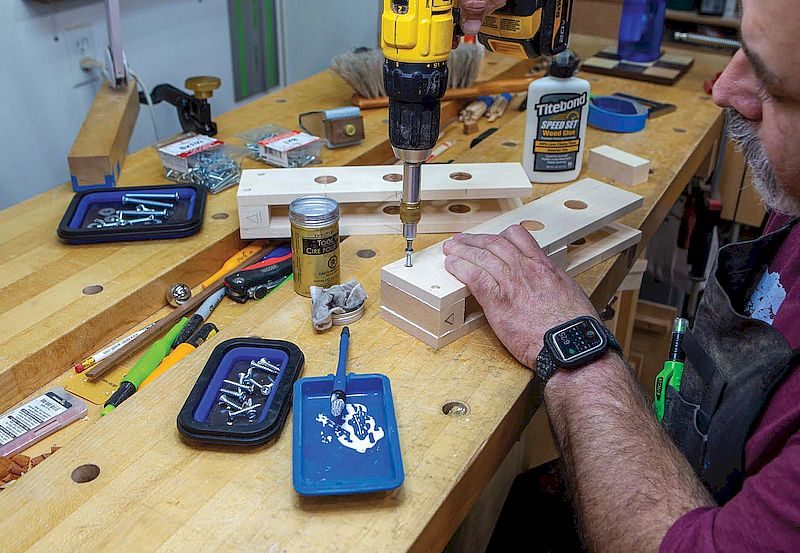
Mating Pairs
Der-Garabedian tapes the mating pairs together and drills them so they’re exactly the same. Notice the cabinetmaker’s triangle to help him keep track of them until assembly.
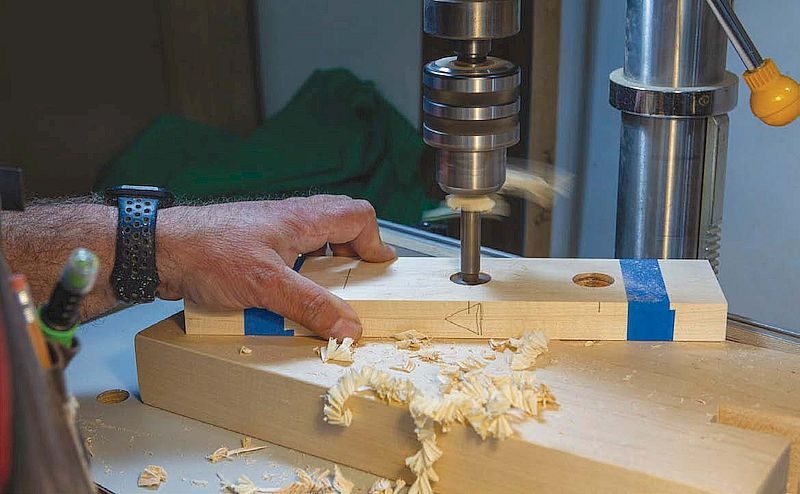
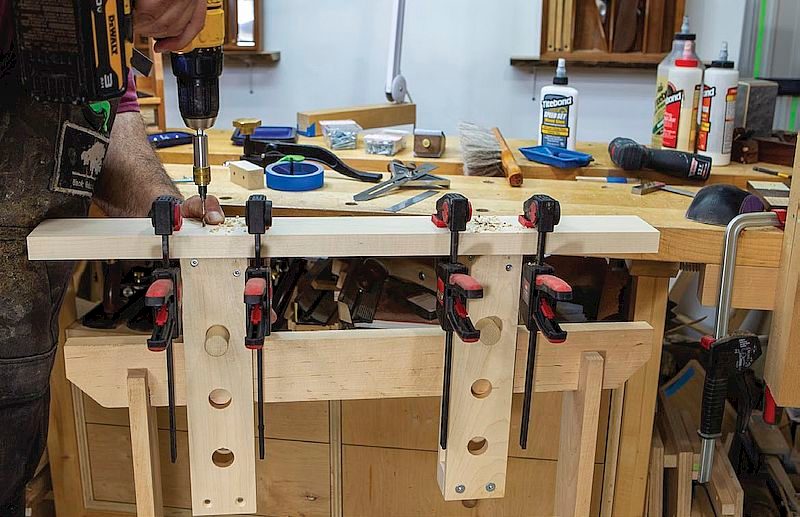
Drill Holes First
With two rail and spacer combinations clamped together evenly, drill the pilot holes and countersinks in one end of each assembly. Use the spacer for the other end in the middle of the assembly to keep the rails parallel with each other while drilling.
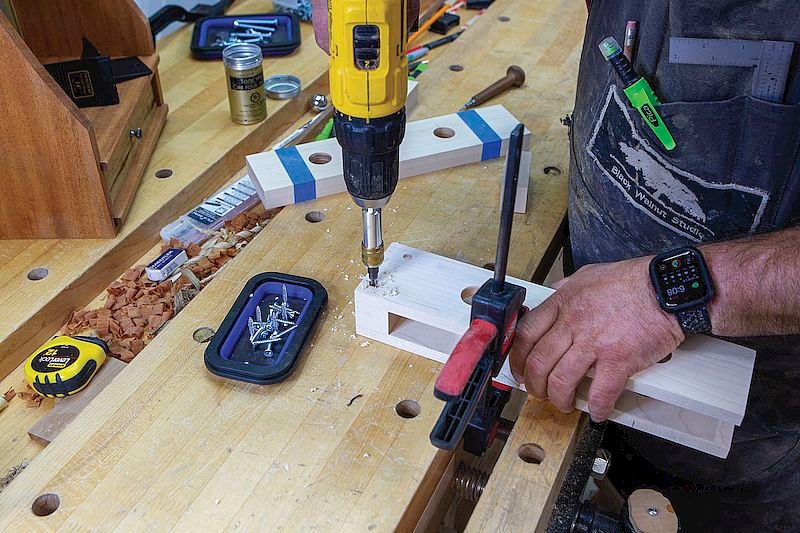
Drive in Screws
With the pilot holes and countersinks complete, apply a bit of glue to the joint and drive home the screws in one end.
Drill the Holes
After pre-drilling, Der-Garabedian drills pilot holes through the top and into each rail assembly.
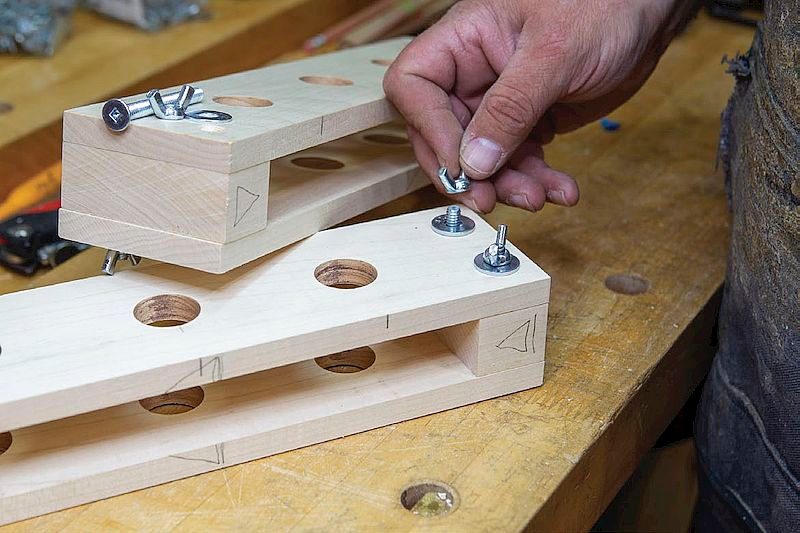
Bolt Clearance Holes
Through clearance holes are bored in the other end so bolts can be installed. The wing nuts and bolts can be removed to install the rail assemblies when they’re needed.
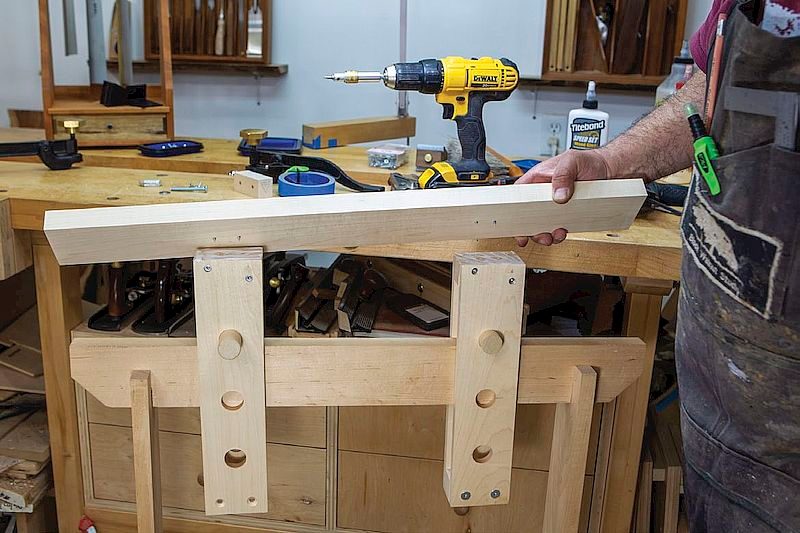
Secure the Top
Glue and screws will keep the top fixed to the two rail assemblies for good.
Good Canadian maple
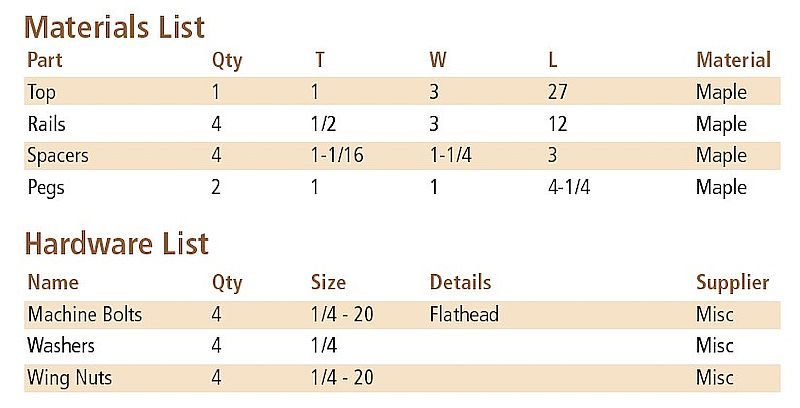
I milled up some hard maple and got to work. Each adjustable riser needs a top, four rails, four spacers and a pair of pegs. In keeping with the original design, all pieces are 3″ wide. The top is 1″ thick and 27″ long. The side rails are slimmed down to 1/2″ and are 12″ long. Since the spacers allow the assembly to straddle the sawhorse, we need these to be 1″ thick, however I milled mine at 1-1/16″ to give a bit more wiggle room. If you only have 1″ stock then a couple of pieces of veneer will work in a pinch. These are 1-1/4″ wide.
Getting to work
In order to keep the peg holes lined up, I drilled the rails in mating pairs. Make sure to mark all pieces with a cabinetmaker’s triangle. Tape the pairs together, then mark a centre line. I drilled my holes from the top at 3-3/4″, 6-3/4″ and 9-3/4″, although the last holes are just for continuity rather than usability in my design. Drill these holes with a 1″ forstner bit to accommodate the 1″ dowels that will be used for pegs.
Next, pre-drill the top spacers to the rails, then apply glue and drive in a pair of #8 × 1″ flathead screws from both sides. Offset each side so the screws don’t hit each other if you countersink them a bit too deep. Use the bottom spacer to keep the rails parallel.
After letting the glue cure a short time, drill countersunk holes for the 2-1/2″ flathead 1/4″-20 machine bolts. Lock these in with a washer and wing nut. Repeat for the other rail assembly.
Lining it up
It took a bit of head scratching to find the best method to attach the top to the rail assemblies. I started off making a mark 6″ in from both ends of the top. Next, I placed clamps so they could not shift left or right. I then measured to make sure they were centred across the width of the top and pre-drilled and countersunk for two #8 × 1-3/4″ flathead screws each. I removed the top, applied glue to the tops of the rails and drove in the screws from the top. To help in seating the top back into position, I drove the screws in until their points just poked through the bottom of the top.
Ready to use
If you need a bit more height than I do, you can definitely make the rails longer (within reason) and drill more holes. One of the best features of the Krenov-style sawhorse is that all the weight is carried down the legs, into the feet and onto the ground. This new modification continues that trend. I was worried that the new assembly might roll on the dowels, but it held its position nicely when in use. You could also create a sloped top by changing peg locations. It doesn’t take a lot of materials nor a long time to make. In fact, in an afternoon you could make a pair that will help you, too.

Steve Der-Garabedian - info@blackwalnutstudio.ca
Steve is a worker of wood, a teacher, a writer, a photographer and the owner of Black Walnut Studio.
More Shop projects to consider