SITE MAINTENANCE IN PROGRESS
Just the essentials: world’s simplest router table
Rob Brown
Rob Brown
Len Churchill
June 2025
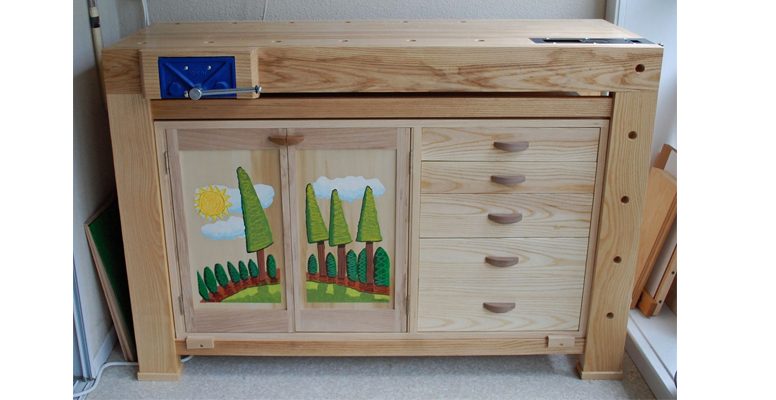
This bare-bones router table can be made in no time and will give woodworkers of all skill levels a functional fixture to up their routing skills and improve their efficiency.
Advertisement
A router is surely the most multi-functional power tool in a woodworker’s arsenal. Used freehand, a router can do a wide variety of things, but make jigs or fixtures for it and it only becomes even more versatile and functional.
One way to increase its potential is to use it in a router table. Typically, a router table is made up of a table surface that the router gets mounted to underneath, a fence to guide the workpiece and some sort of a base to support the table surface. The first two items are very simple, though the base can run the gamut from having just a set of four legs and four aprons, to including myriad drawers, cubbies and other storage areas, not to mention an integrated on-off switch, dust control measures, internal router lift mechanisms and other features. You can spend a fair amount of money on a router table, if you so choose. You can also spend countless hours designing and building an impressive shop-made version trimmed out with figured wood, flashy features and flexible attachments.
In this article I’ll take you not only through the “how” but also share with you the “why”. If you’re a beginner woodworker it’s important to know why you’re building something a certain way. An experienced woodworker could likely complete this shop fixture by just looking at the main image of the project.
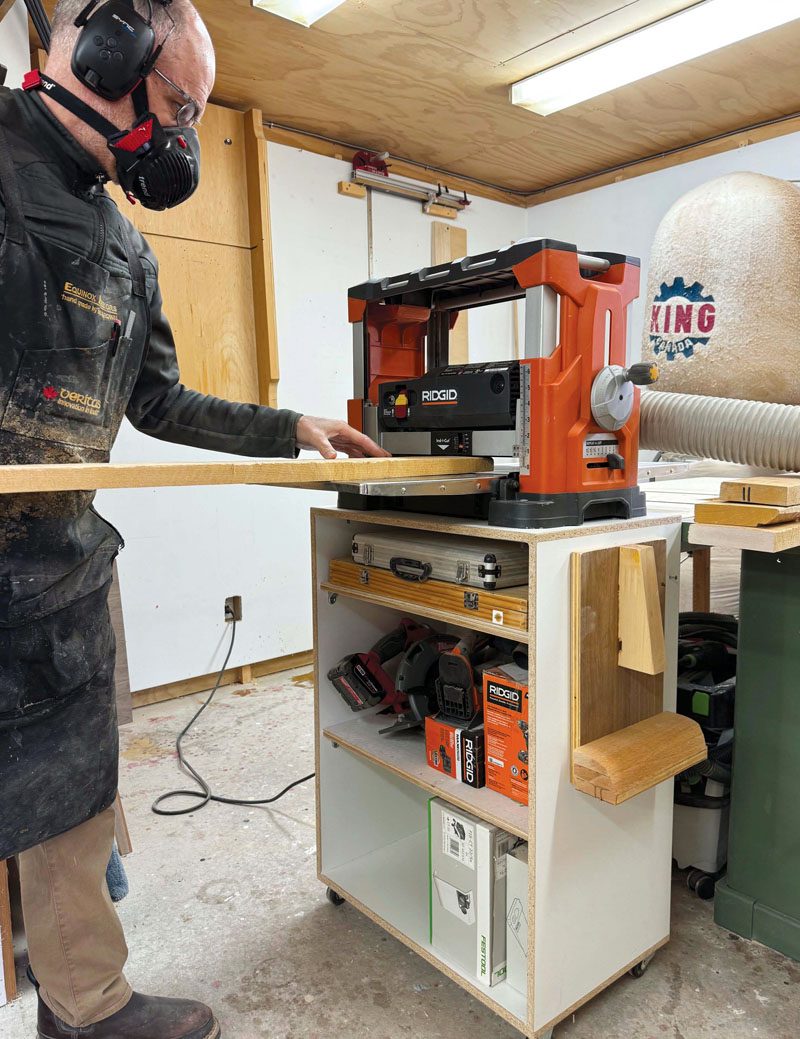
Select Your Size
Brown uses this top to machine longer lengths of trim and other workpieces. Its longer length helps support the workpieces as they’re machined. A shorter, more squarish, top will work well for machining smaller workpieces.
Bit Size Matters
Larger router bits create more vibration. A thicker, stronger top will help dampen those vibrations and leave you with a better cut.
Drill for the Bolts
After the bolt clearance holes have been bored, counter sink the bolt heads in the upper surface of the top. It’s possible to bore flat-bottomed countersink holes and use pan head bolts, but flat head bolts are much more common.
Enough Length?
Most bits will adequately protrude above the table height once they’re installed, though that’s not always going to be the case.
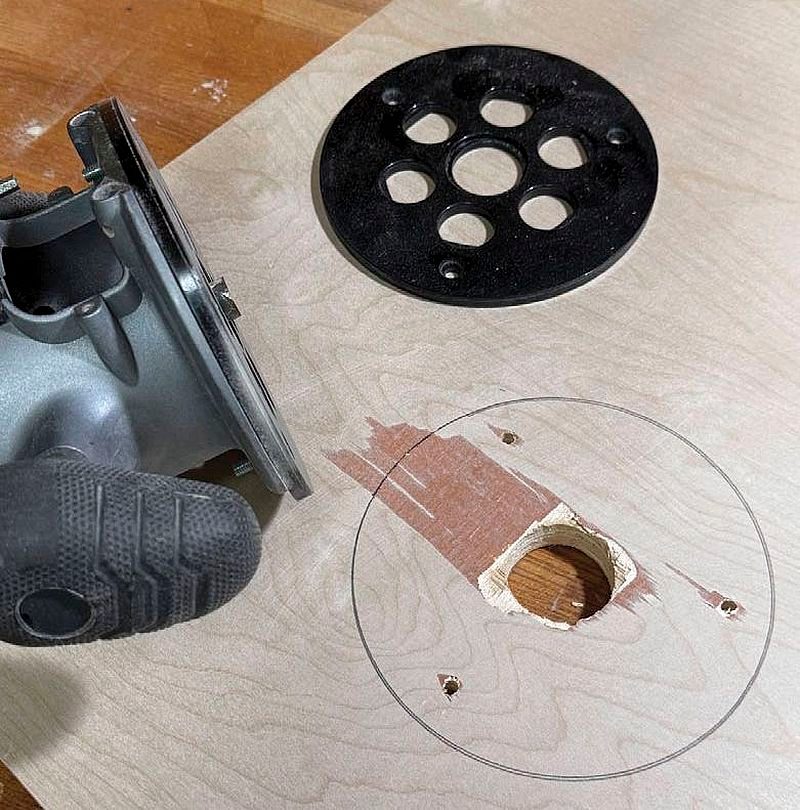
Create a Recess
If you absolutely need a bit more height from one of your bits, you can machine a recess in the underside of the table, allowing the router to sit a bit closer to the upper work surface. Removing too much material will weaken the top.
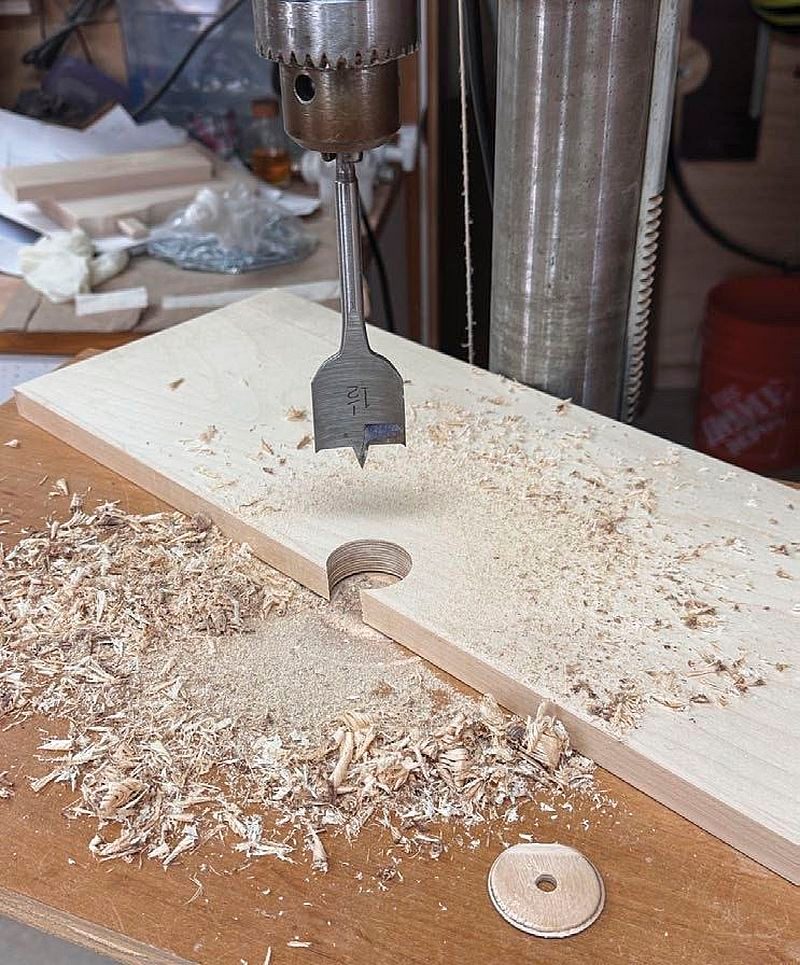
Drill a Cutout
A notch in the edge of the fence will allow you to adjust the depth of the fence, relative to the cutting edge of the router. Unless you’re using a very large diameter bit, the notch doesn’t need to be too big.
Wax Works Wonders
Applying a couple coats of finish to the fence’s edge, sanding between coats, then hitting that cured finish with wax and steel wool, will create a much smoother fence edge to run workpieces across.

Remove the Wings
With the notch cut into the fence, remove the wings so the notch can be opened up so a rotating router bit doesn’t come into contact with the fence.

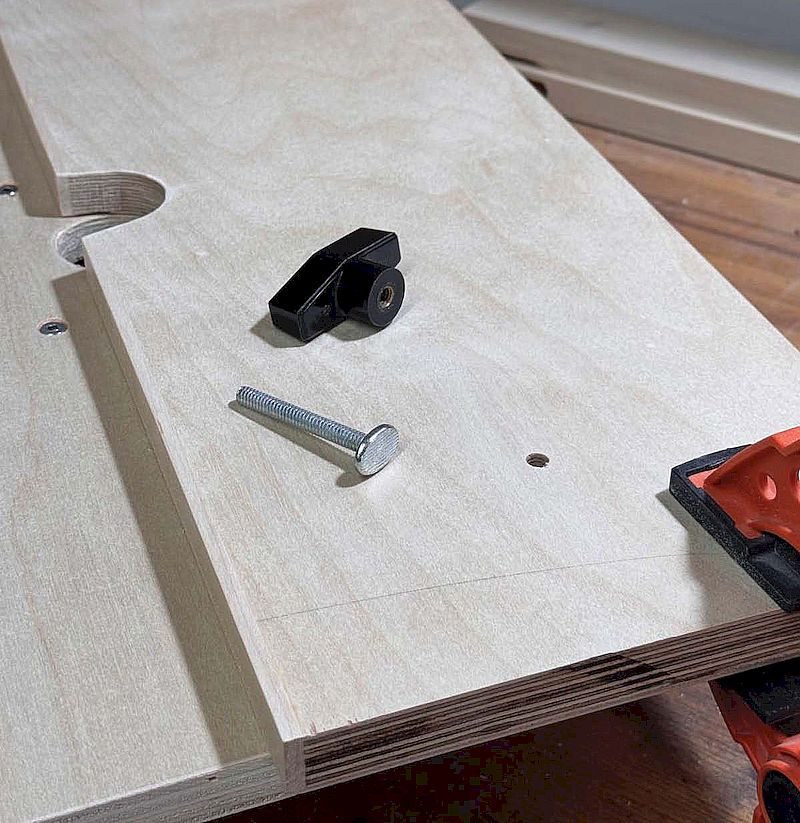
Pivot Bolt
If it’s hard to use clamps on both sides of the fence, it might be easier to use some sort of a bolt to fix one end of the fence in place. This will allow it to be rotated forward and backward, depending on the type of operation you want to make. In a pinch, you could even use a few screws to secure the fence to the router table.
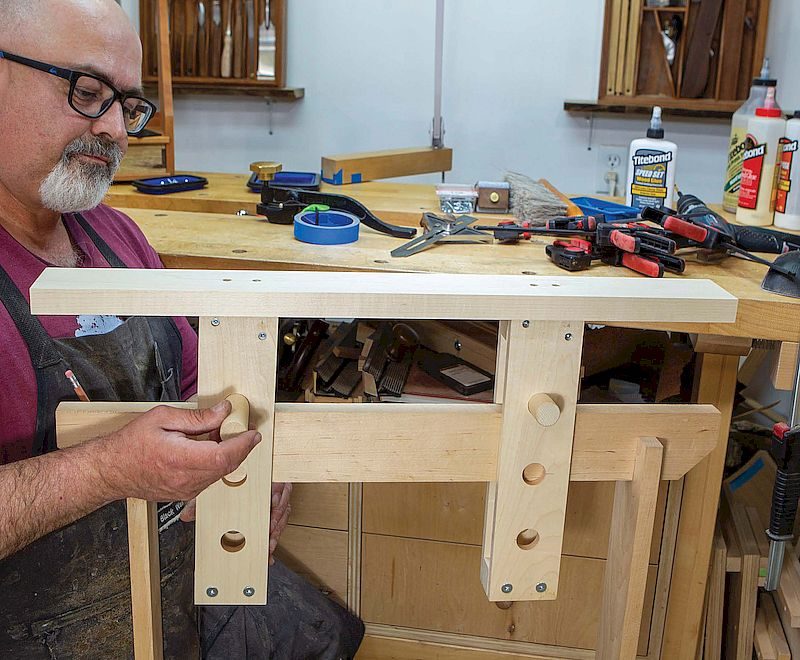
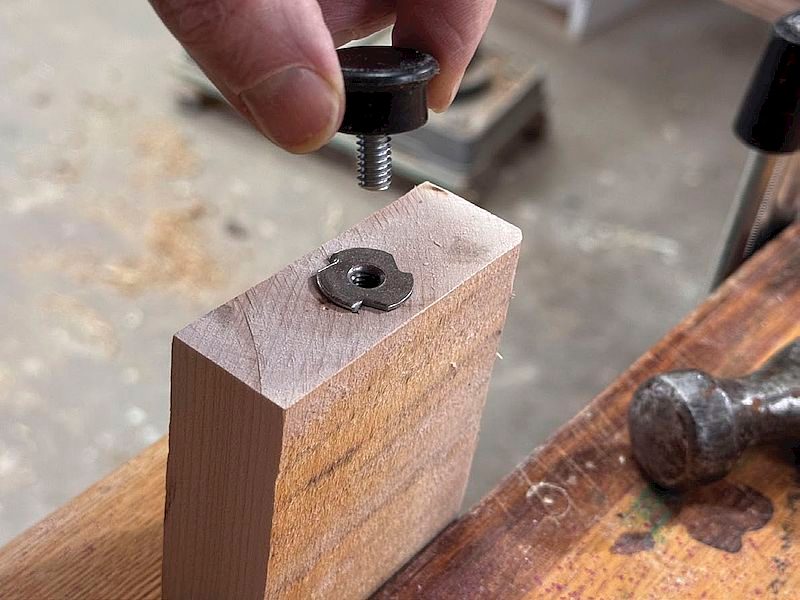
Adjustable Foot
A T-nut hammered into a hole in the lower end of a leg will allow you to thread in an adjustable foot. This approach will let you easily adjust the height of the leg and support a large router tabletop so it doesn’t flex in use.
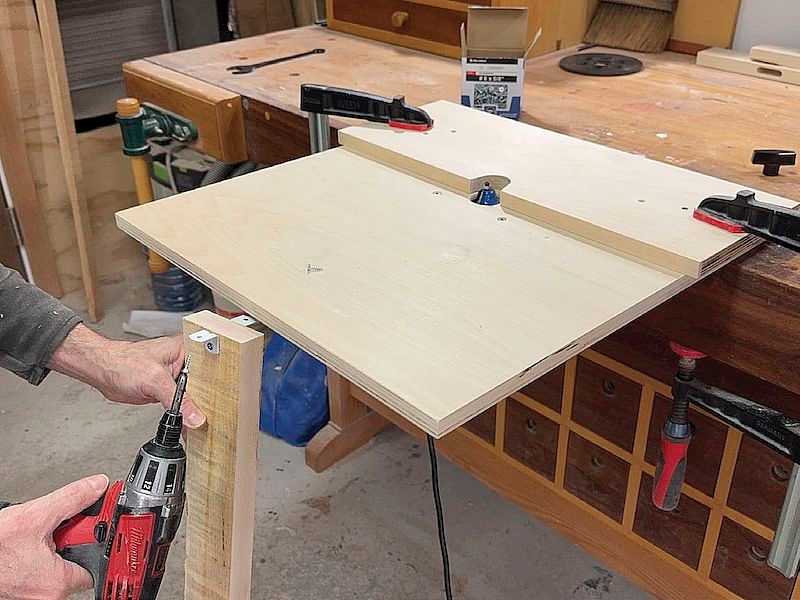
Attach the Leg
A screw into the top of the leg, coupled with some simple brackets, will keep the leg positioned under the router table.
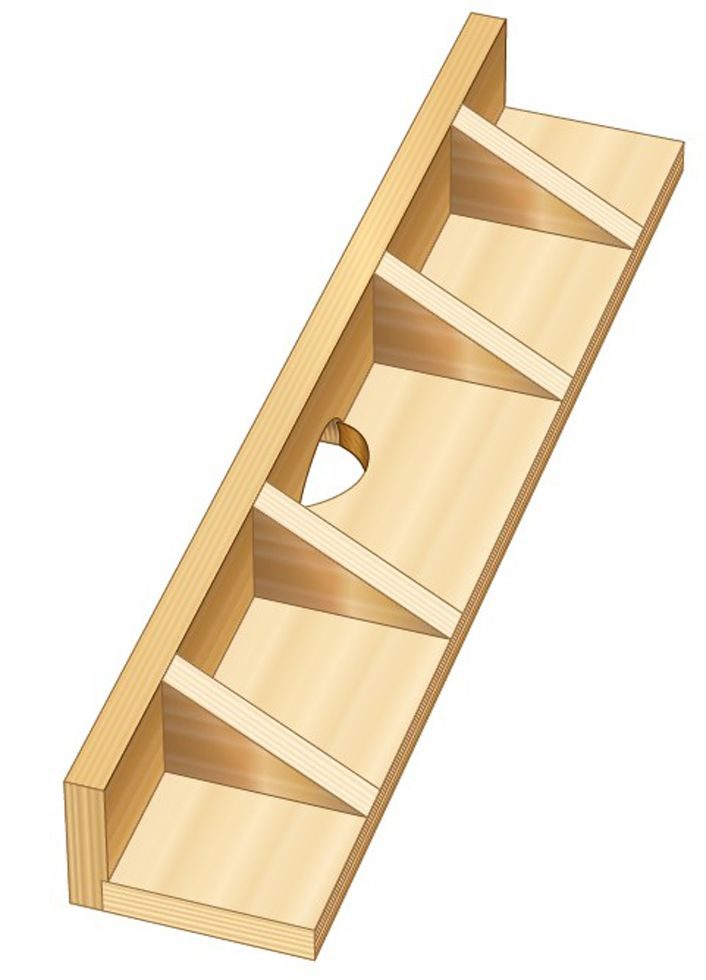
Getting Fancy
If you need a higher fence for certain operations, you can create one and still keep the process simple. A rabbet joint fixes the face and bottom together, while accurate 90° blocking can be attached between the first two parts. Screws and glue blocks will help create a solid, yet simple, fence.
Accessorize
Accessories like featherboards, adjustable screw stops and even shop-made or purchased dust collection housing to direct wood chips will help make this simple router table even safer and more functional, without breaking the bank.
A different approach altogether
Another approach to making a router table is to pare down the entire unit until you’re left with just the bare bones that will still do the basics quite well. This approach can save you time, money and space, while still providing you with a functioning router table. How heavily you reduce options depends on the type of work you’ll be doing. It will also depend on whether you already have another router table or not.
A top is critical
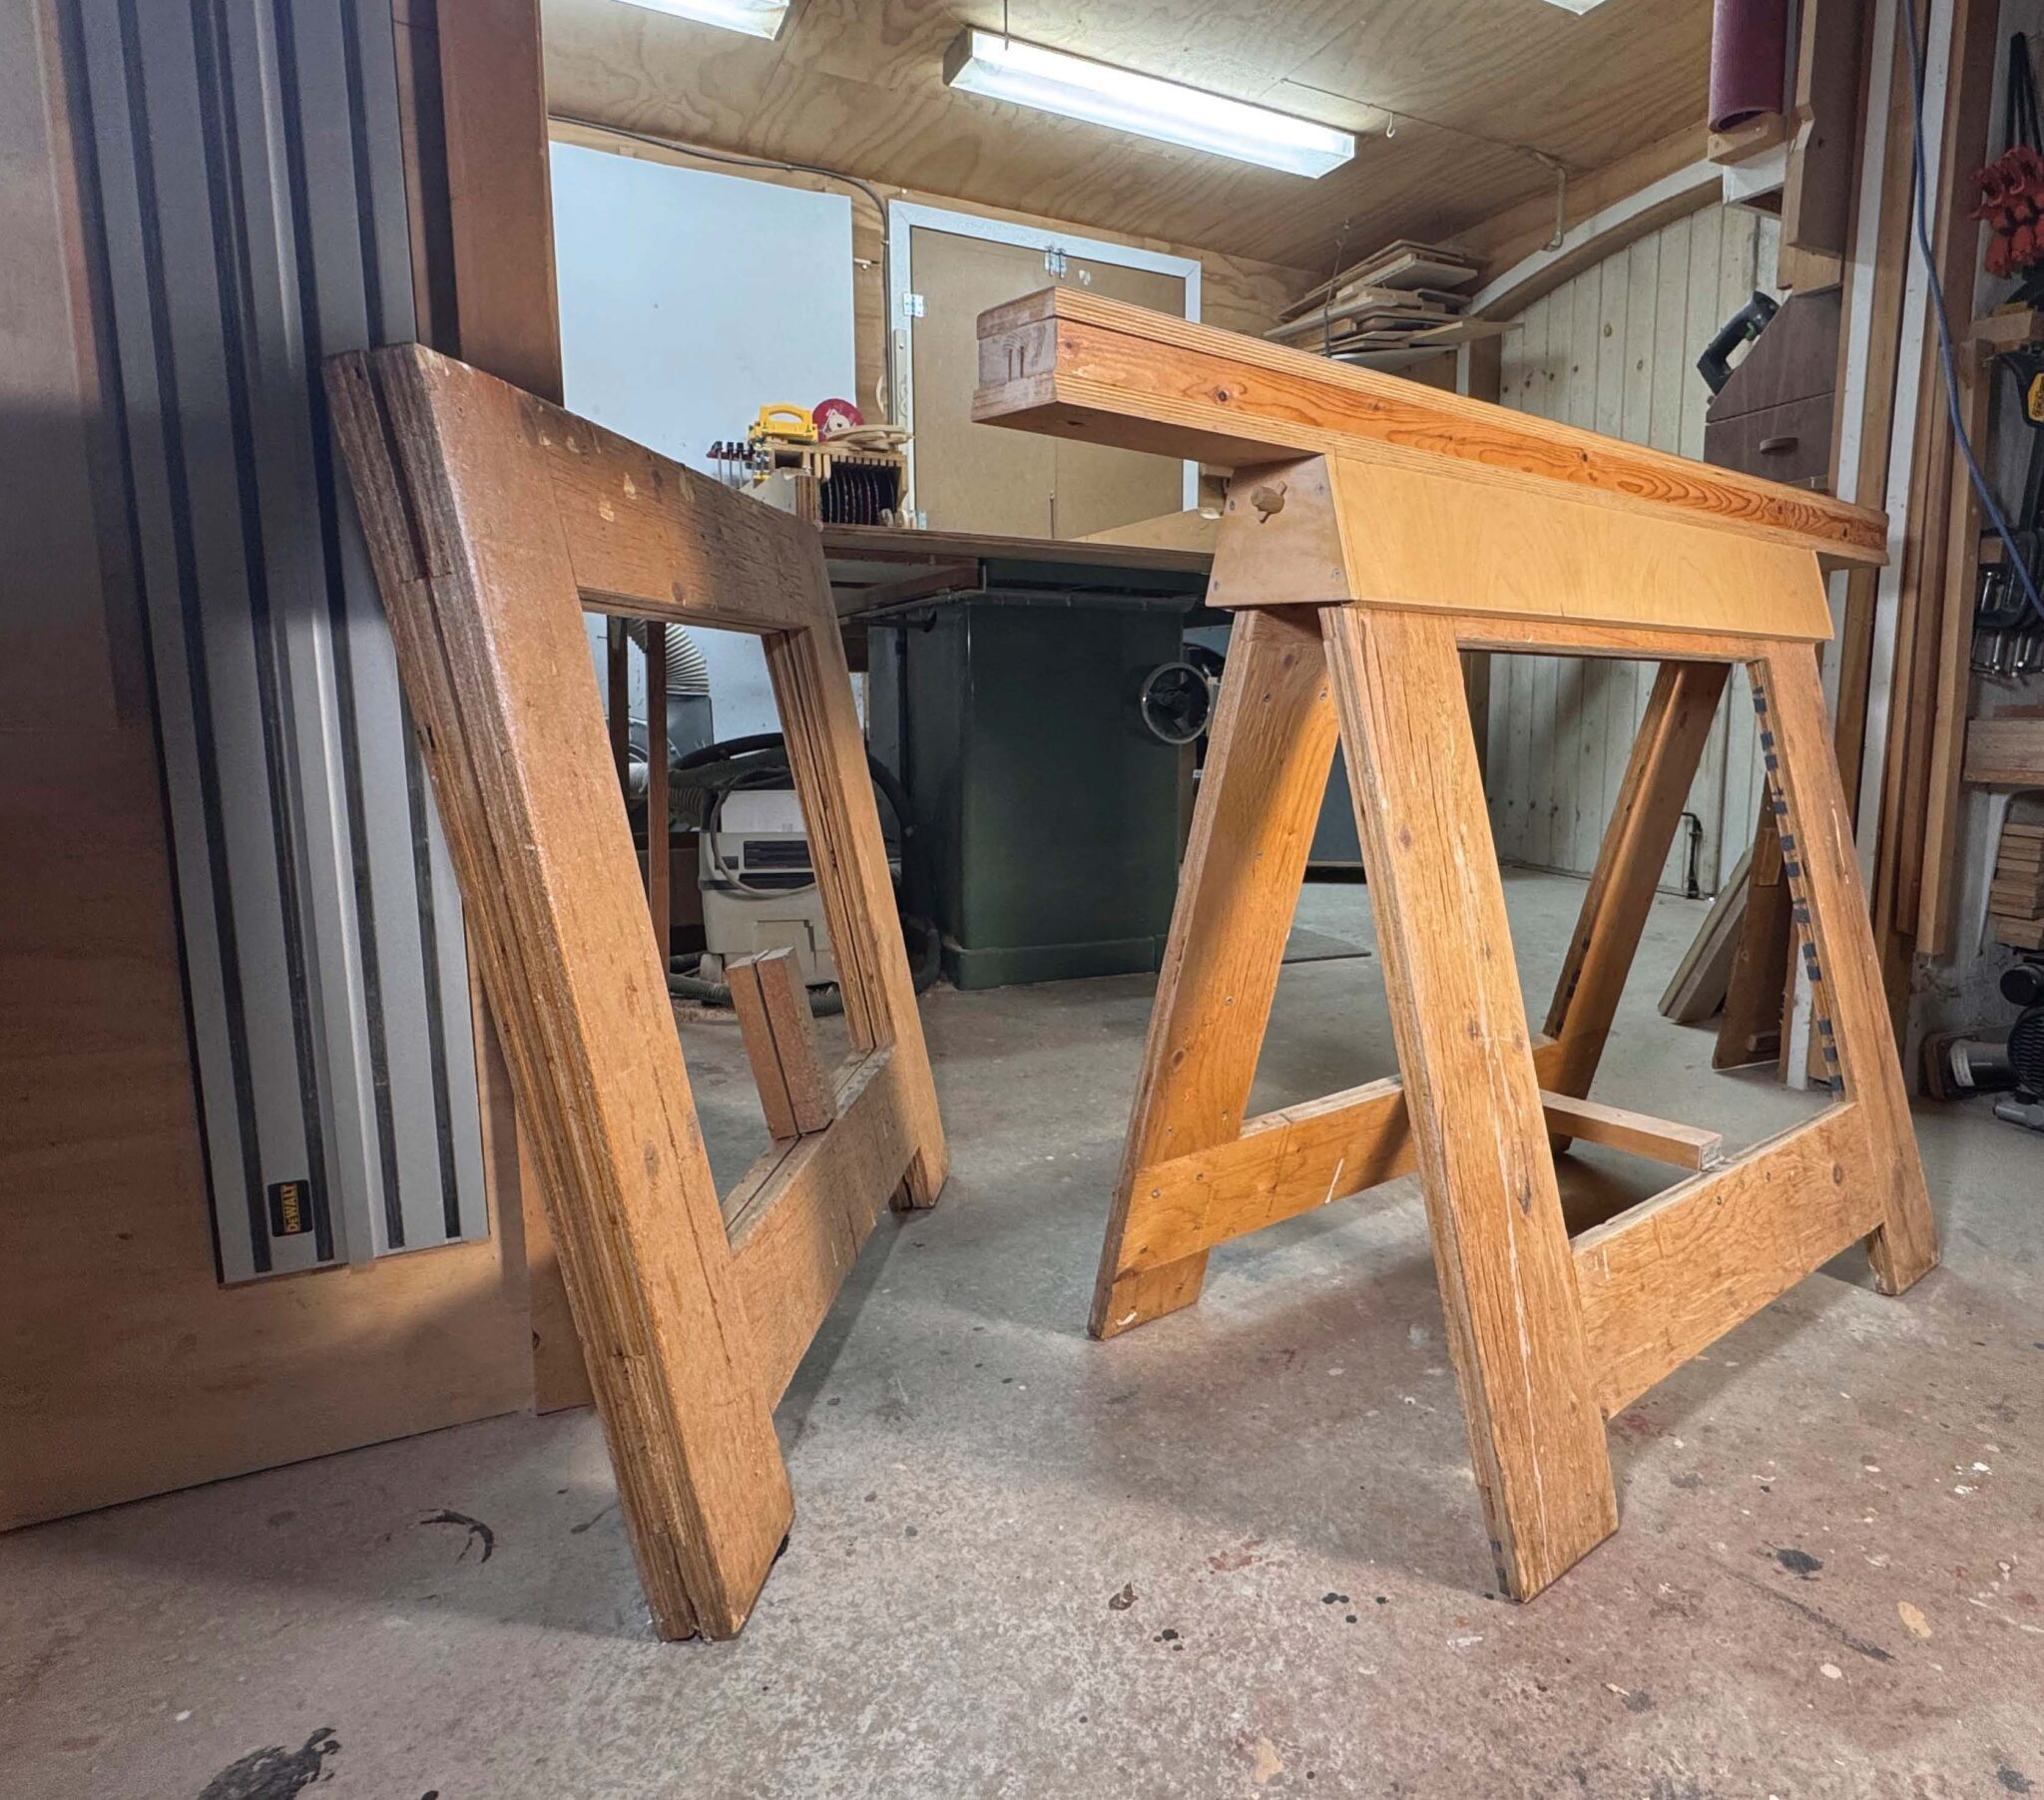
A top is an absolute necessity. Not only does it hold the router in place, but it also gives you a surface to reference the workpiece off of. If you’re only going to use bits with bearings, a top is all you’ll need. The top will accept a router on its underside and be clamped directly to another work surface, like a workbench, table saw top, pair of sawhorses or outfeed table.
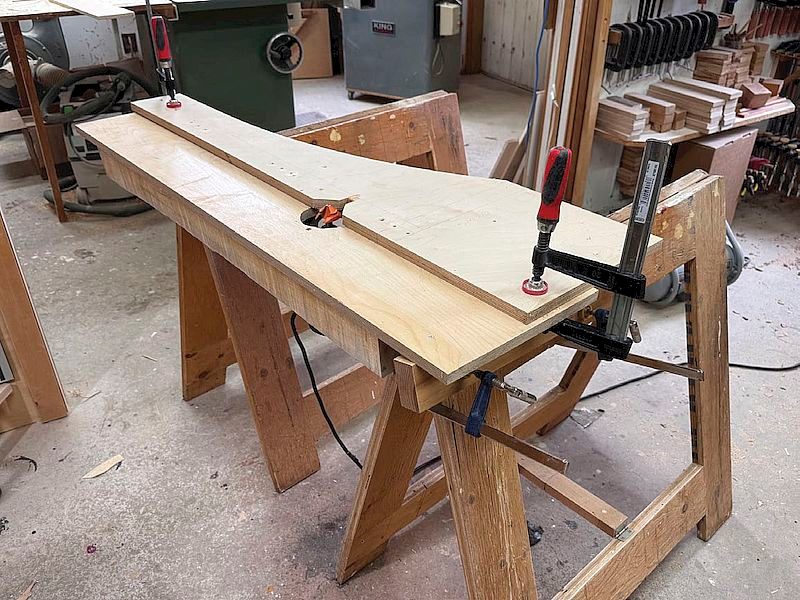
Consider size first
If you plan on running a lot of longer workpieces, such as trim or mouldings, machine a longer top to support the long workpieces; say something at least 36″ long or longer. And in this case, the width can be narrower; somewhere around 15″ should be fine. On the other hand, if you’re mainly going to use this simple router table to machine small jewelry box parts and other small workpieces, a top about 16″ × 20″ could work out very well. Everyone making a router table like this needs to consider their unique usage requirements and make a top that will support the work they will be asking the router table to machine. Keep in mind, there’s nothing wrong with making a few simple tops to take care of a wider variety of operations.
A top should be fairly strong and stable. Making one out of 1/2″ material is likely too weak, unless you only plan to use a small trim router under it, and only make very light passes, which would likely be just fine.
With top thickness still in mind, consider how large of a router bit you’re going to be using. A large bit that produces more vibration and torque will need a thicker top.
Generally speaking, 3/4″ material is likely the best option for this type of router tabletop.
What material?
It’s important that a router tabletop is flat, though once this top is clamped to the other work surface it will take the shape of that surface. Just make sure the surface you’re clamping it to doesn’t flex or twist the router tabletop out of flat.
A piece of plywood is likely the best material for a router table, even though it does have a slight tendency to twist or warp. A piece of particleboard or MDF is an option that stays flatter, though they aren’t as strong as plywood. This will matter more if you plan on machining heavier joints with larger routers and bits, as bolt holes may have a tendency to come loose when using a softer or less durable material. Also, if you’ll need to put a lot of downward pressure on the workpiece while machining it, plywood will stand up to that sort of stress much better than particleboard or MDF. Unless this router table is going to be used for the most lightweight of operations, I strongly recommend plywood.
Laminating the top with plastic laminate, or even applying a durable finish to both the upper and lower surfaces, will help the workpieces move over the top more easily and protect the surface for the long run. Having said that, I’ve had good success with just bare plywood faces for these simple router tables, so don’t shy away from that approach, too. If you’re going to use this router table a lot, going the extra distance will likely be worth your while, but if this really is a less-is-more project, stick with a bare top surface.
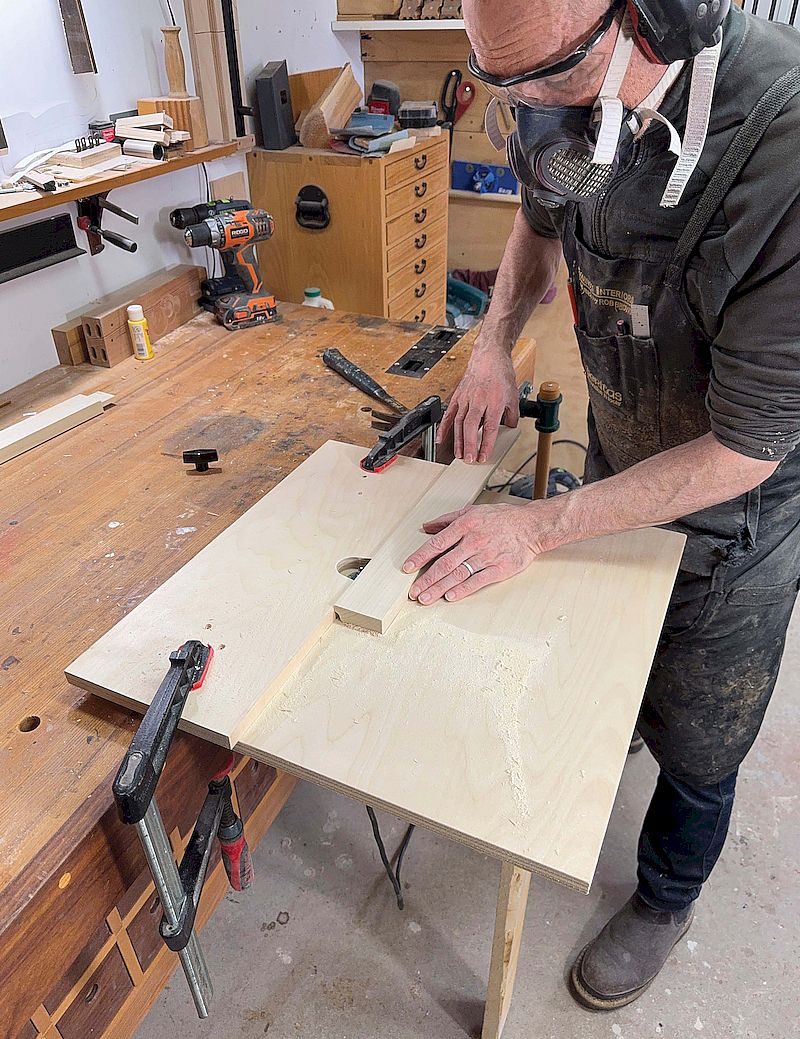
Attach your router
With your top (or tops) complete, the next step is to attach a router to its underside. The router should be attached back of the centre line of the table, so there’s more top material on the worker side of the router than on the rear side. Keep in mind, this top will be clamped, bolted or screwed to another surface, so if the router is positioned too far back it will limit where the top can be secured to another solid fixture.
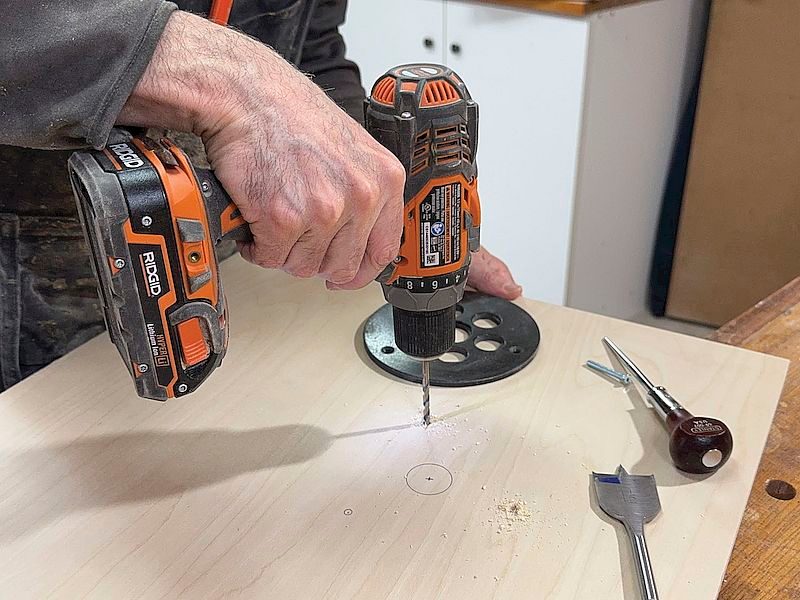
The simplest approach is to use the router’s baseplate to locate where the bolt clearance holes and router bit clearance hole need to be. First, drill the clearance holes and countersink them on the upper surface, so the heads are just barely below the work surface. Next, use a medium-sized spade bit or hole saw to remove the material in the centre to allow a router bit to protrude through the top. Don’t remove a large amount of material unless you know you’re going to be using a large router bit in this router table. A 1-1/2″ diameter hole is usually more than enough, but every situation is different.
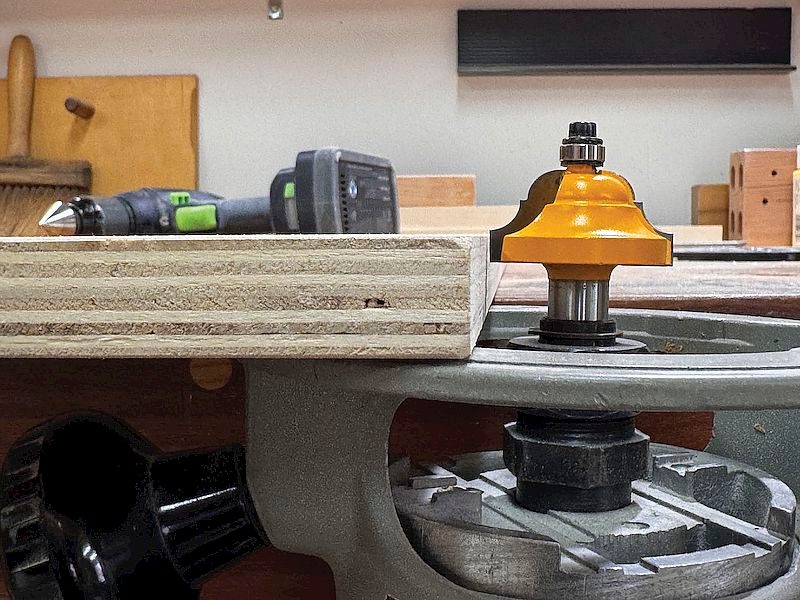
The main potential downside to securing the router under a 3/4″ thick top is that when the router bit is installed in your router there’s an outside chance you can’t adjust the bit so it’s as far above the 3/4″ thick tabletop as you need it to be. This will be a rare occurrence. You can usually extend the bit slightly from the collet, but that will only give you so much extra extension. For now, I’d suggest just keeping the following solution in the back of your mind, just in case you need it down the road, and proceeding with this build.
But what’s the solution, you ask? If you ever need to have a bit protrude farther above this top surface you can remove a small amount of thickness from the underside of the top, directly where the router comes into contact with the underside of the top. This will allow the bit to protrude farther above the table. Just don’t remove too much material, as that only weakens the router-to-top union.
Make sure you remove the router’s baseplate when you install the router under the top. You may also need to buy some longer bolts to fix your router in place. Make sure to get the correct thread and diameter.
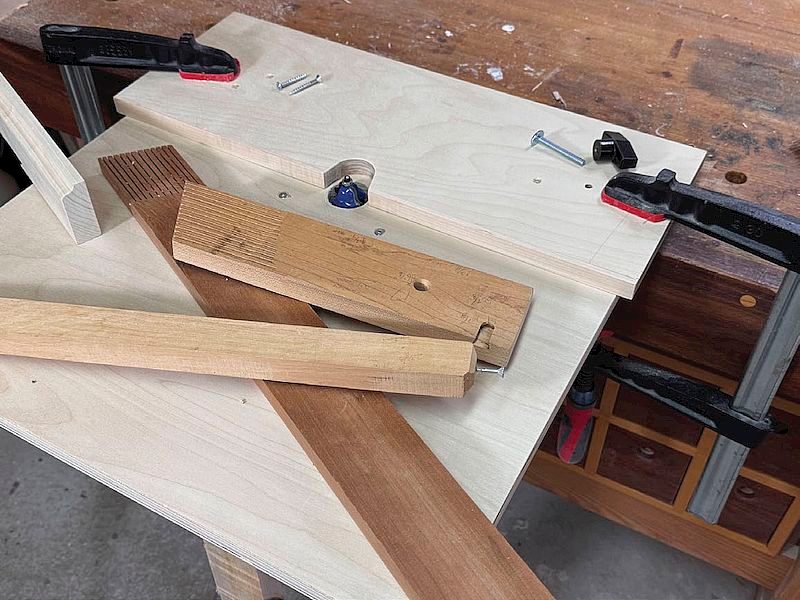
Fence
Unless you’re only going to use router bits with bearings, which is unlikely, you’ll need a fence. My main router table fence is somewhat complex, with a fairly high split fence and dust collection port, but for this bare-bones router table, simple is the name of the game. I’ll describe two approaches, but I would recommend you make both, unless you already have a nicer, larger router table with a hot-rod fence. In that case, you’ll just make one of the fences.
Option 1: Start super simple
Starting with a piece of material at least the length as your router table, rip it to 3″ to 5″ wide. A long fence should be on the wide side to protect against deflection. Straight-grained solid wood is great for this fence, but I’ve used plywood in the past with success. Material that’s 3/4″ works fine, though you can easily make it a bit thicker if you’re using solid wood.
Make sure the front edge of the fence is smooth, as that allows a workpiece to slide on it more easily. Two good options are either adding a strip of 1/8″ solid wood edging to the edge of the fence or applying a coat or two of a durable finish to the front edge and using wax and steel wool to buff it smooth after it cures. Minimizing friction is important for safe, efficient use. Because we’re going to cut into one of the edges of the fence in the next step, it’s a good idea to ensure both edges of the fence are smooth enough to easily run a workpiece across.
Since there are many times when a fence will have to be positioned so its edge is overlapping the router bit, a notch needs to be cut into the edge of the fence. At the midpoint of the fence, a 1″ diameter hole, centred about 3/4″ back from the edge of the fence, will take care of the majority of scenarios. Use a bandsaw or hand saw to trim off the two wings on either side of the opening. If you think you will be using a large bit from time to time, you can make another fence with a large opening on it. Cutting one larger hole is an option, but it’s easier and safer to use a fence with a notch only as large as it needs to be.
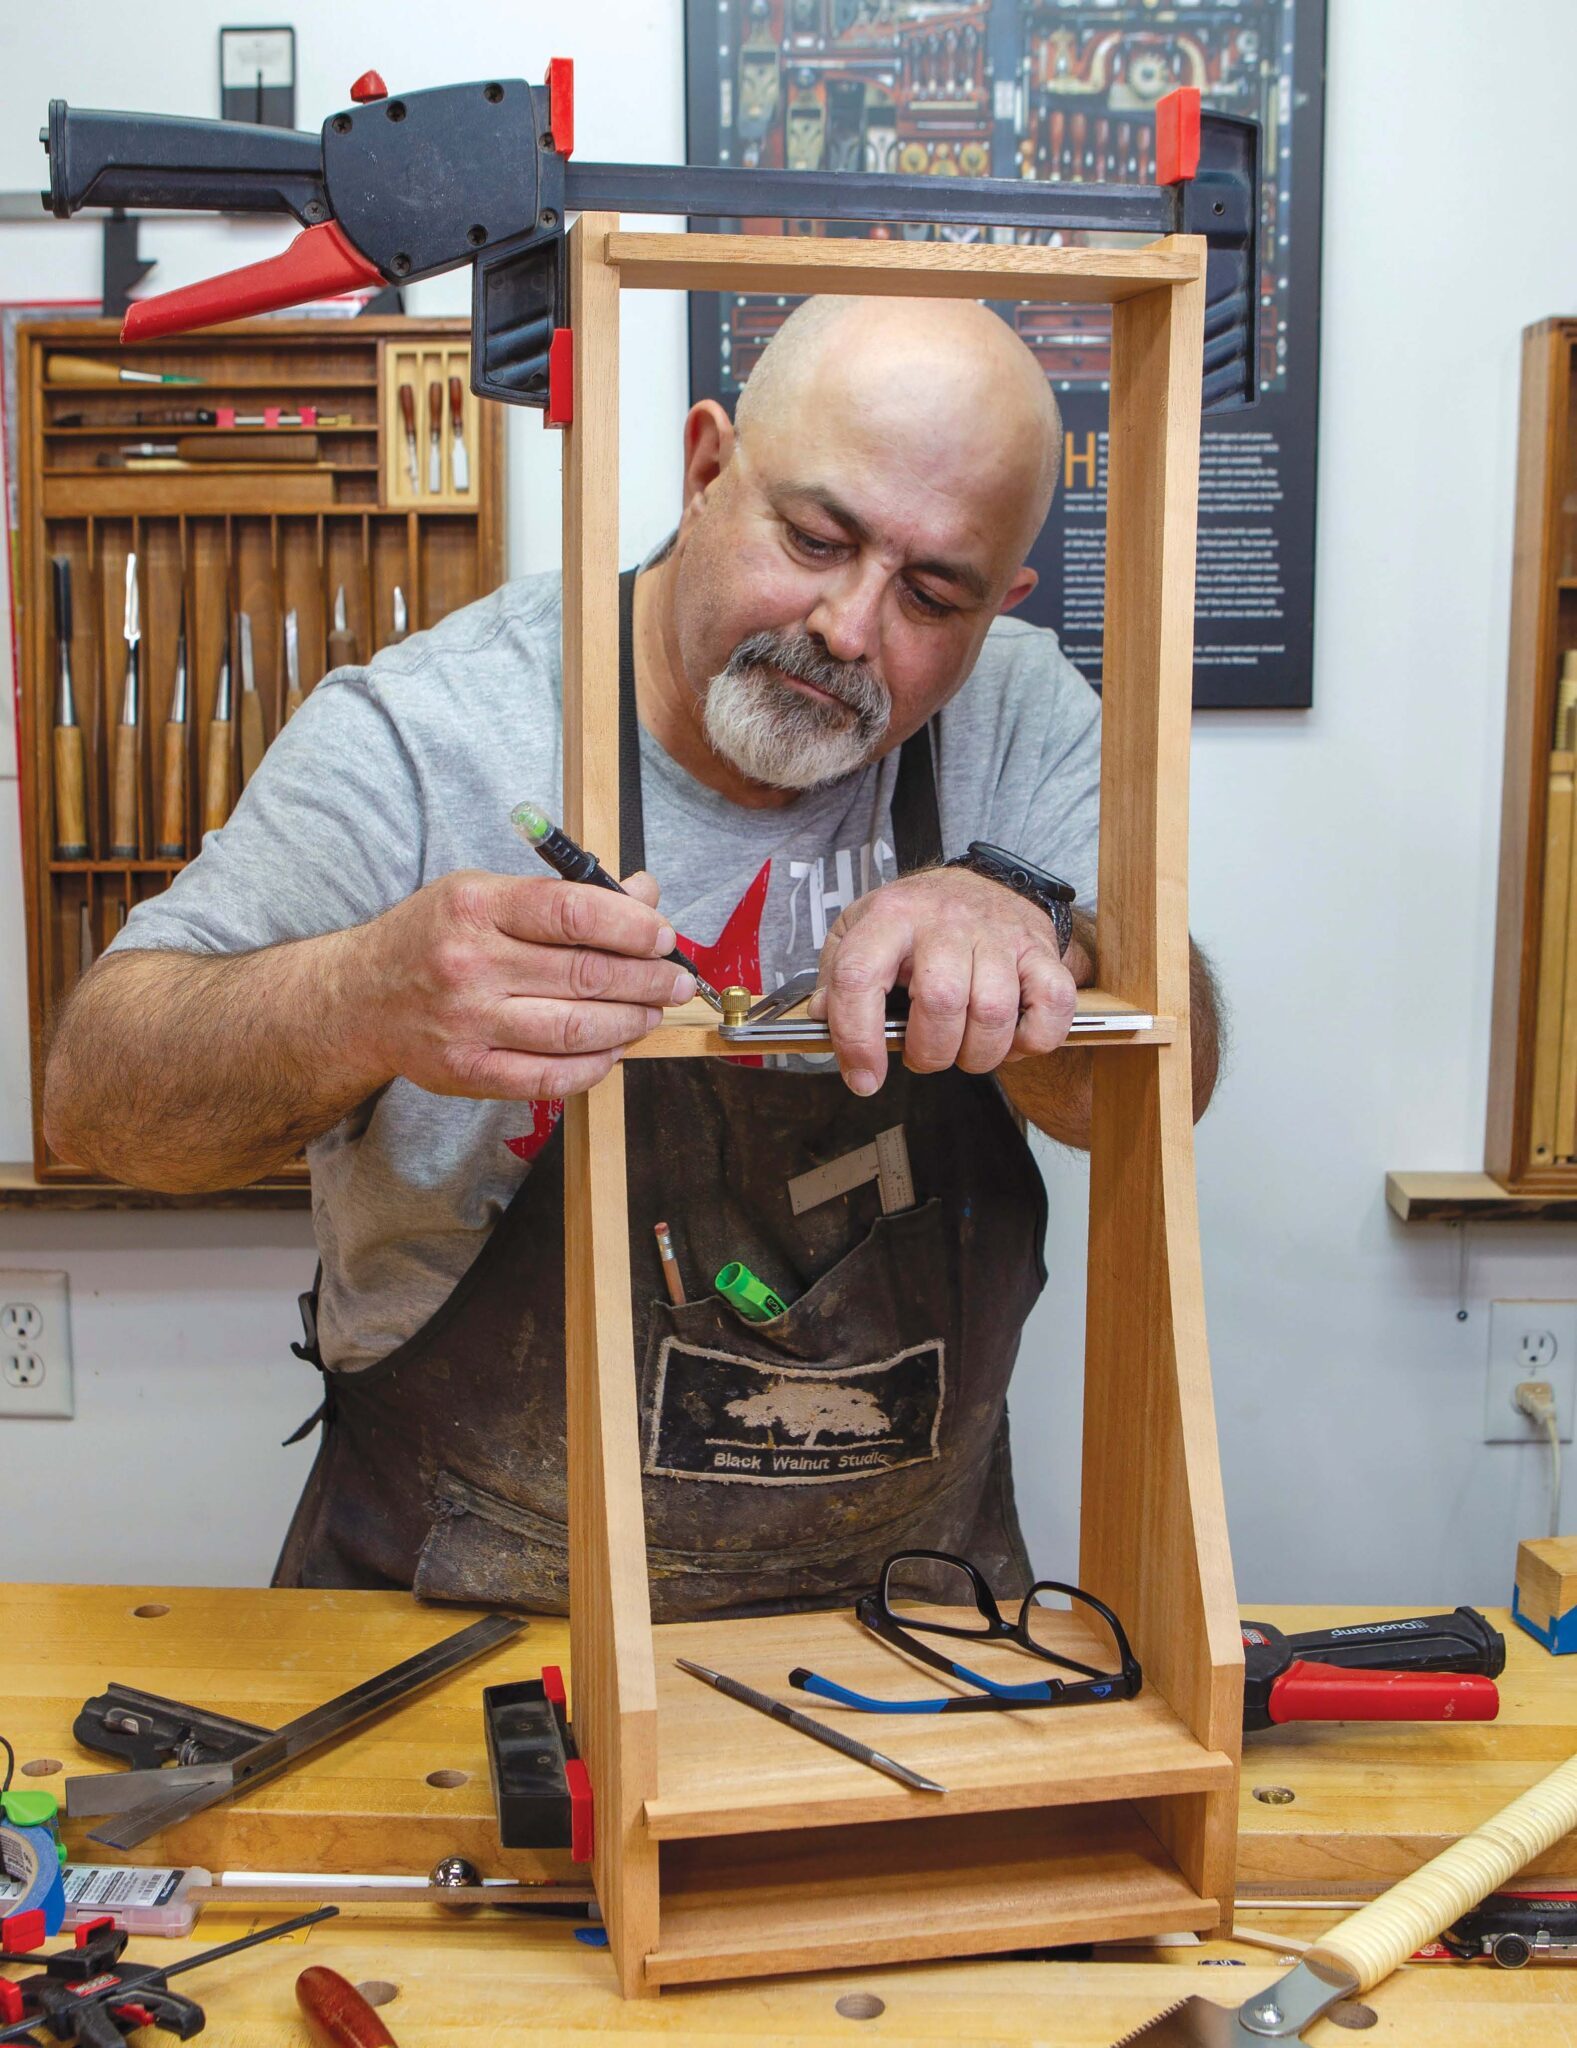
Option 2: A more functional fence
If you want to make a more functional fence, that’s an option, too. Start with the same length of material for the base of the fence, but machine another piece to act as the face. It can be the same length and about 4″ or so wide. These two parts will get joined with a rabbet joint. Cut a few more pieces to act as 90° brackets and ensure they each have one edge and one end perfectly square. These can be short lengths of 2 × 4, solid wood or plywood. When you assemble these parts, ensure they’re all as close to square as possible, as you’ll sometimes be using this fence to position a workpiece perpendicular to the table. Assemble the fence and use screws in countersunk holes and glue to bring it together for good.
A notch will very likely be needed, so you can add that after the glue has dried. It would be possible to notch both the face and base before assembly. It doesn’t need to be pretty, so any combination of medium-sized drill bits, hand saws and jigsaws is recommended. Just make sure to locate the notch away from where any support blocks are.
Fixing the fence in place
Clamping the fence to the top is the simplest approach, though it doesn’t always work. As you’ll quickly find out when you install this router table to another fixture, there’s a chance you’ll have trouble clamping the fence and top at the same time, as the fixture itself is in the way. If that’s the case, using some sort of pivot bolt to secure one end of the fence and a clamp at the other end will allow both ends to be fixed in place, while the clamped end can be adjusted forward or backward to give you your cut. If you locate the pivot bolt vaguely centred on the width of your fence, you can use the same hole for both edges of the fence.
In use
Once everything is installed, it’s always a good idea to ensure the bit will freely rotate by giving it a spin with your fingers. Sometimes the fence, or another obstruction, is in the way. Obviously, the router should be unplugged at this point.
During use, the tabletop should provide good support for the workpiece. If you feel any flex at all, adding a support leg (or two) or angled bracket will quickly take care of that. A single screw through the top, into the leg or bracket, might be enough to hold the supports in place during use. Adding a T-nut and using an adjustable threaded plastic foot will give you the luxury of adjusting the height of this support quickly and easily. Another option is to screw a length of solid wood under the top to support a longer top and help keep it flat.
One of the most important rules about using a router table of any type is to feed the stock in the correct direction, or the rotating bit may grab the workpiece and send it flying. When looking directly at the router table, with the fence on the far side of the table, always move the workpiece from right to left.
Accessories like featherboards, stops and especially push sticks will turn this simple fixture into an even more capable workhorse.

Rob Brown - rbrown@canadianwoodworking.com
Rob is the editor at Canadian Woodworking & Home Improvement and a studio furniture maker.
More Shop projects to consider