SITE MAINTENANCE IN PROGRESS
A better place for your saws
Steven Der-Garabedian
Steven Der-Garabedian
Len Churchill
June 2025
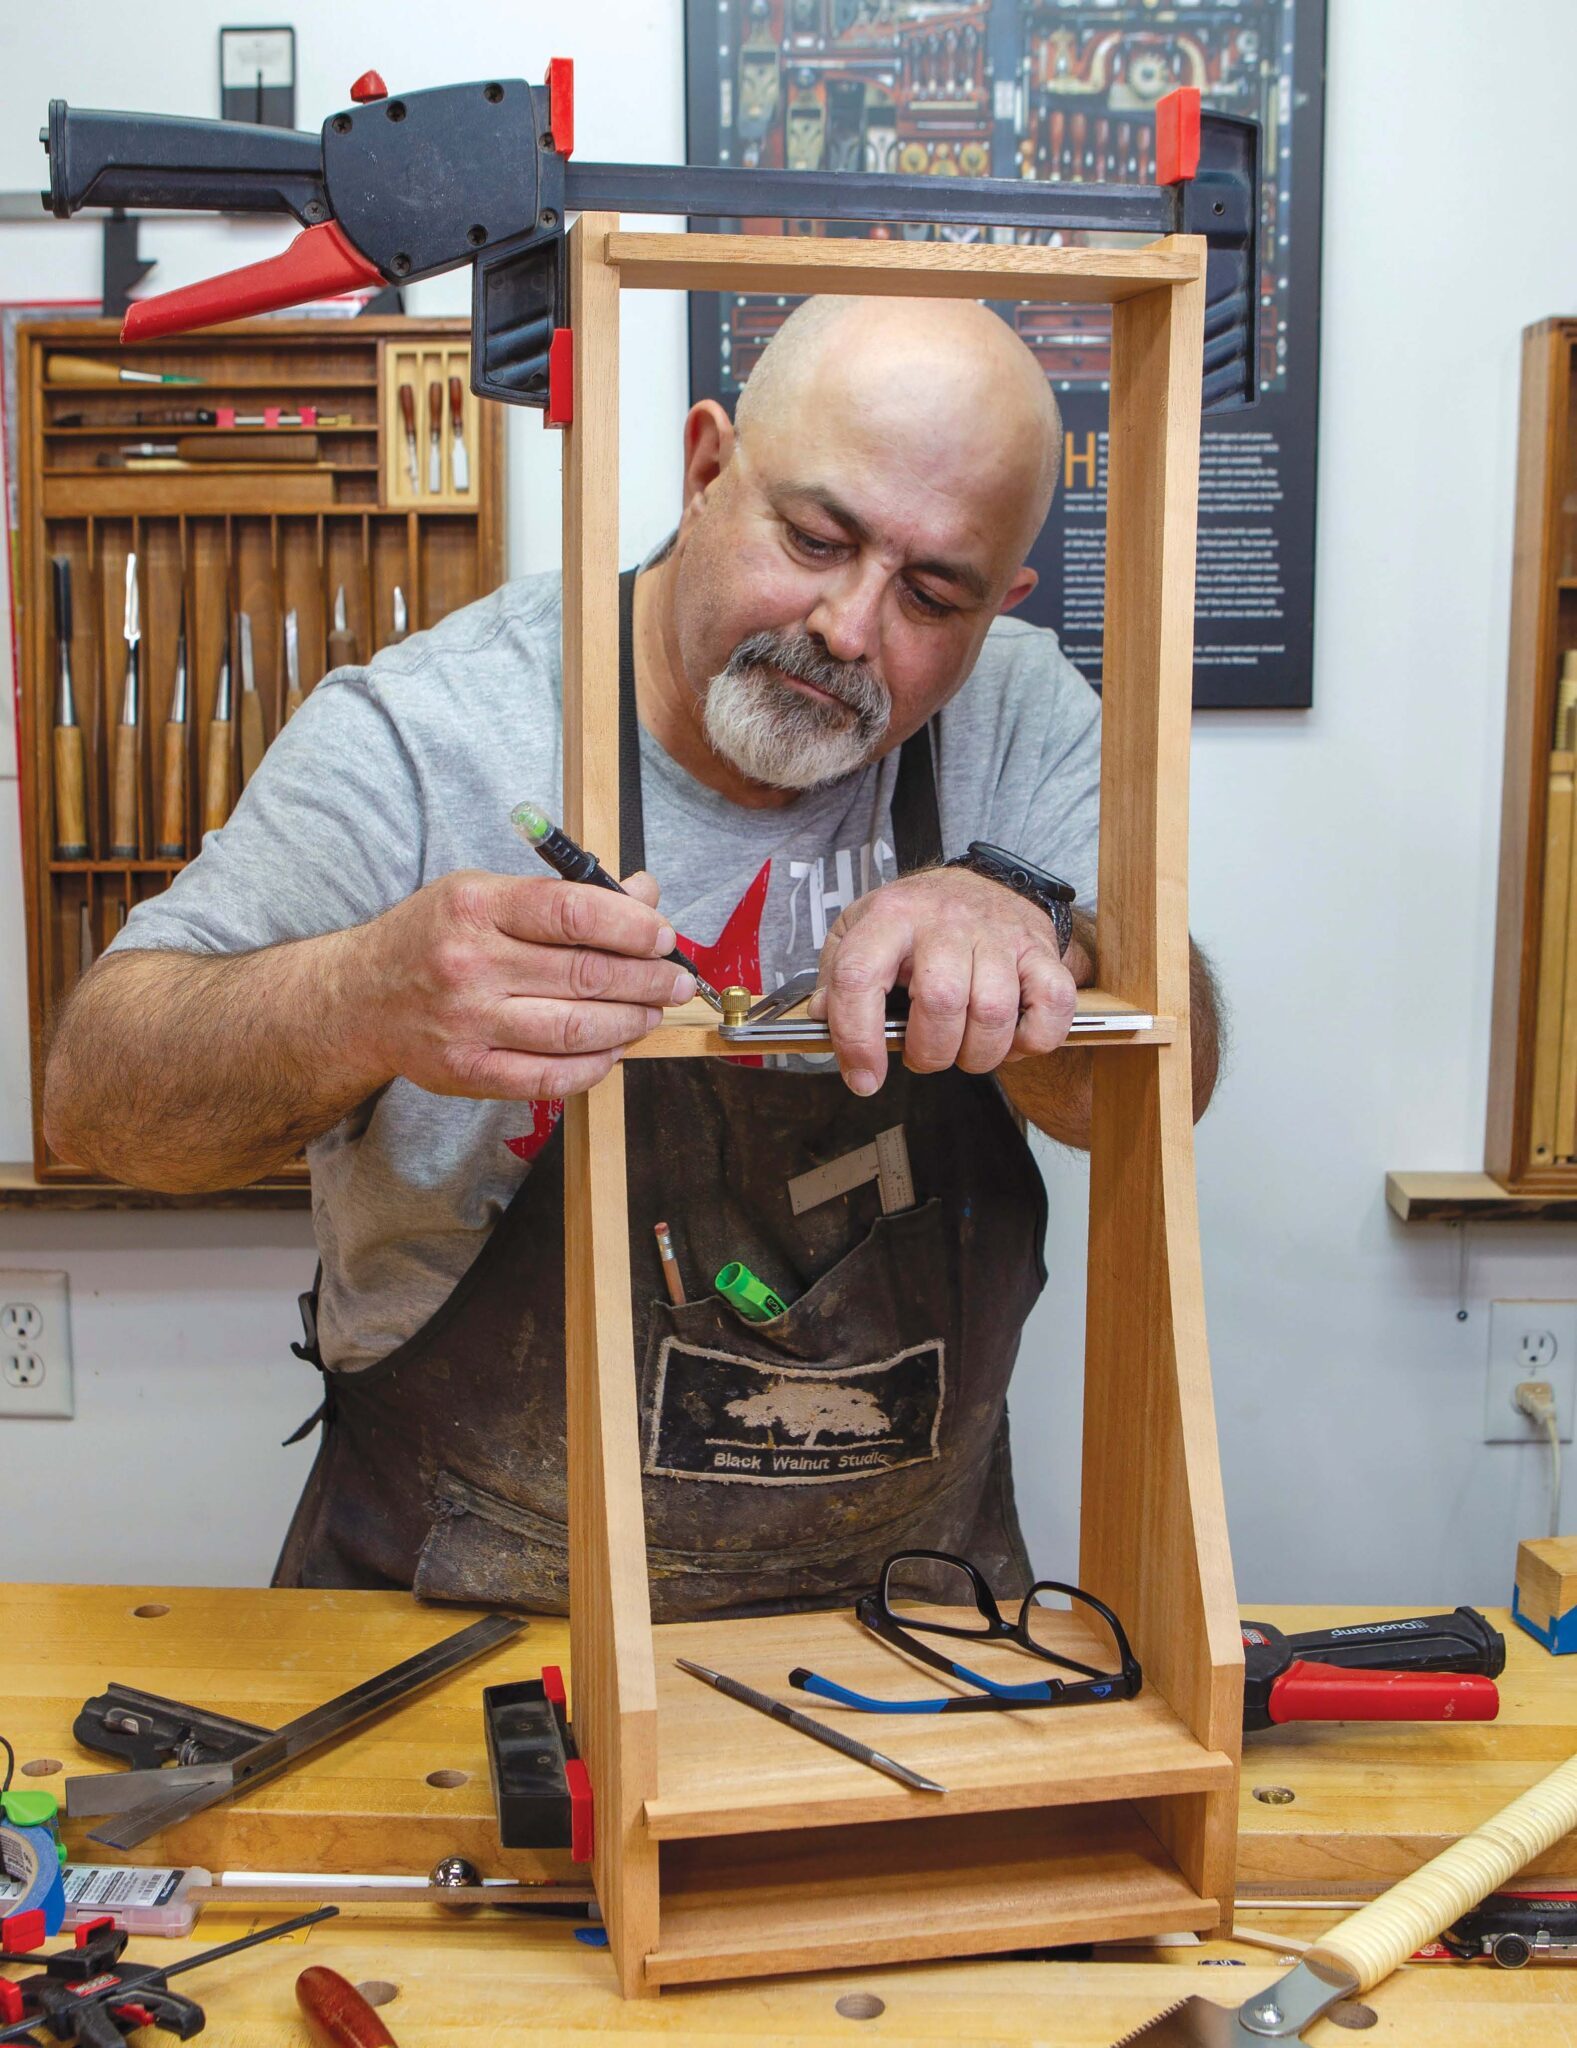
Organize your favourite hand saws with this customizable stand.
Advertisement
- DIFFICULTY3/5
- LENGTH/TIME3/5
- COST3/5
One of my pet peeves is having metal tools touch other metal tools, whether they’re chisels or, in this case, hand saws. It was time for me to rectify this situation. While I have both North American and Japanese saws, I gravitate to using my Eastern saws. I have a pair of dozuki saws for cutting dovetails and a double-edged ryoba for both rip and crosscuts. I also needed to find a home for my flush cutting saw.
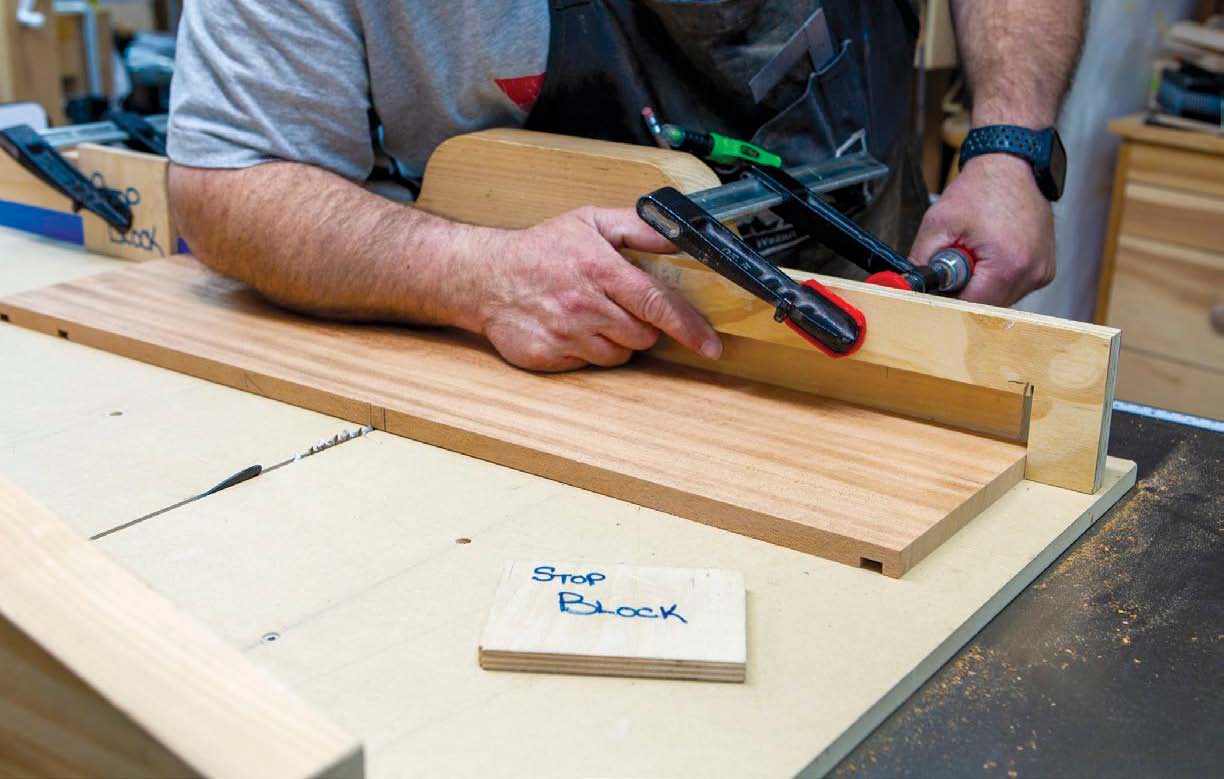
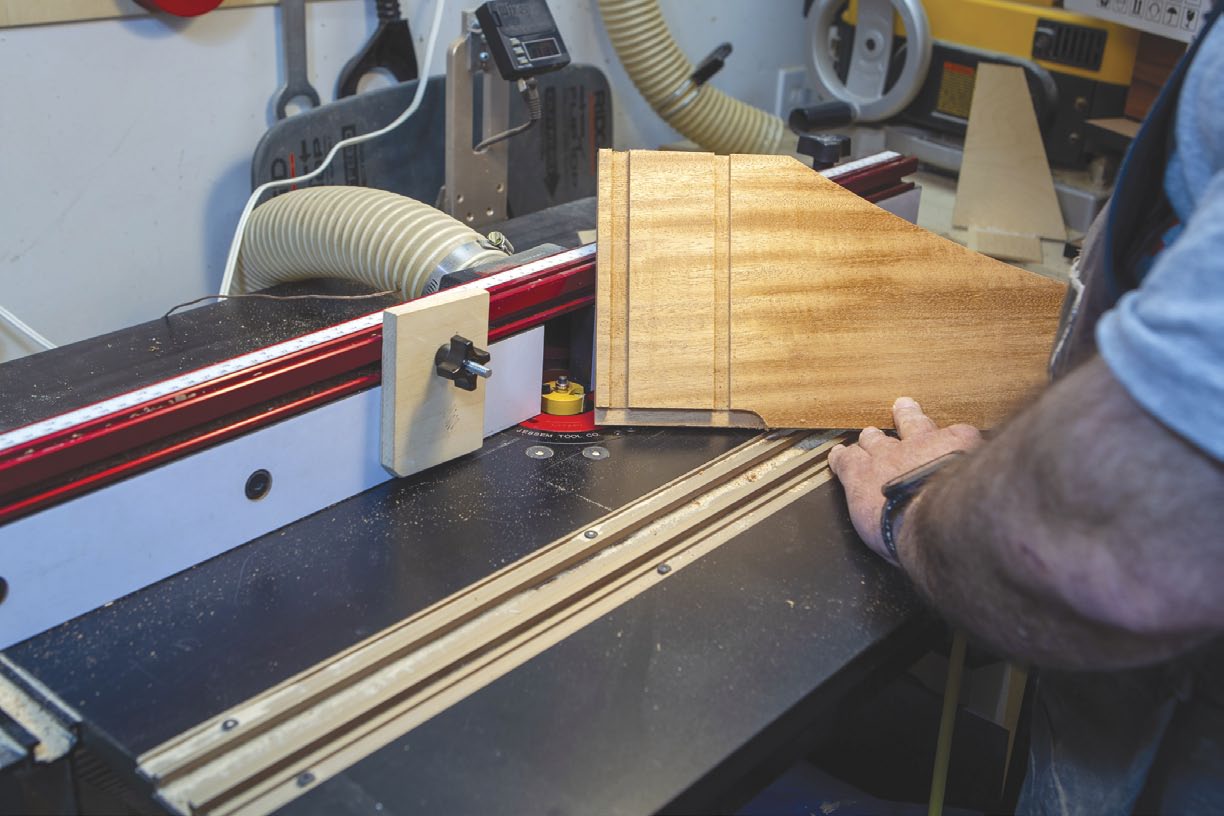
Accurate Stops
Der-Garabedian usually uses his standard stop block when setting stops on his crosscut sled, but if the end of the workpiece is too far away from the blade, he uses a shop-made L-stop. Here, he sets up a stop to machine one end of a pair of dadoes.
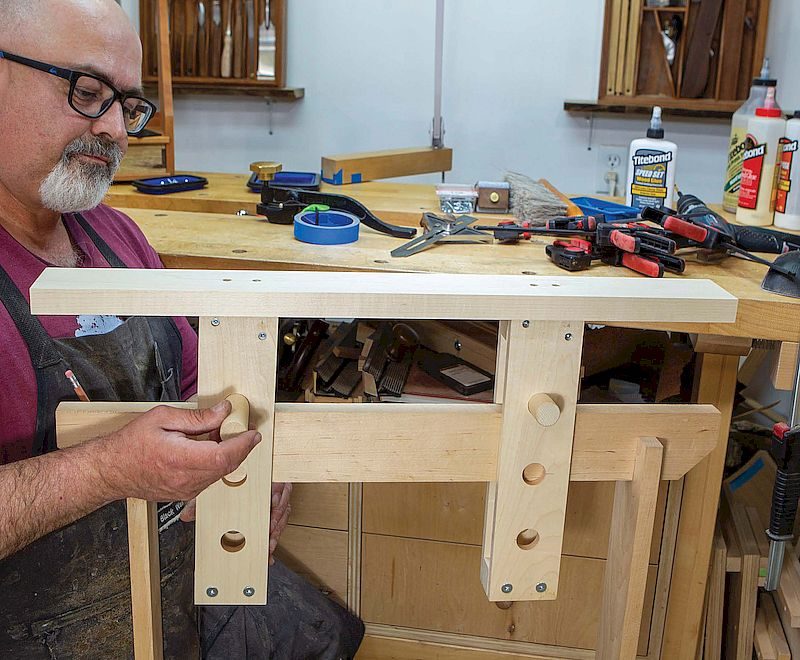
Shelf Height
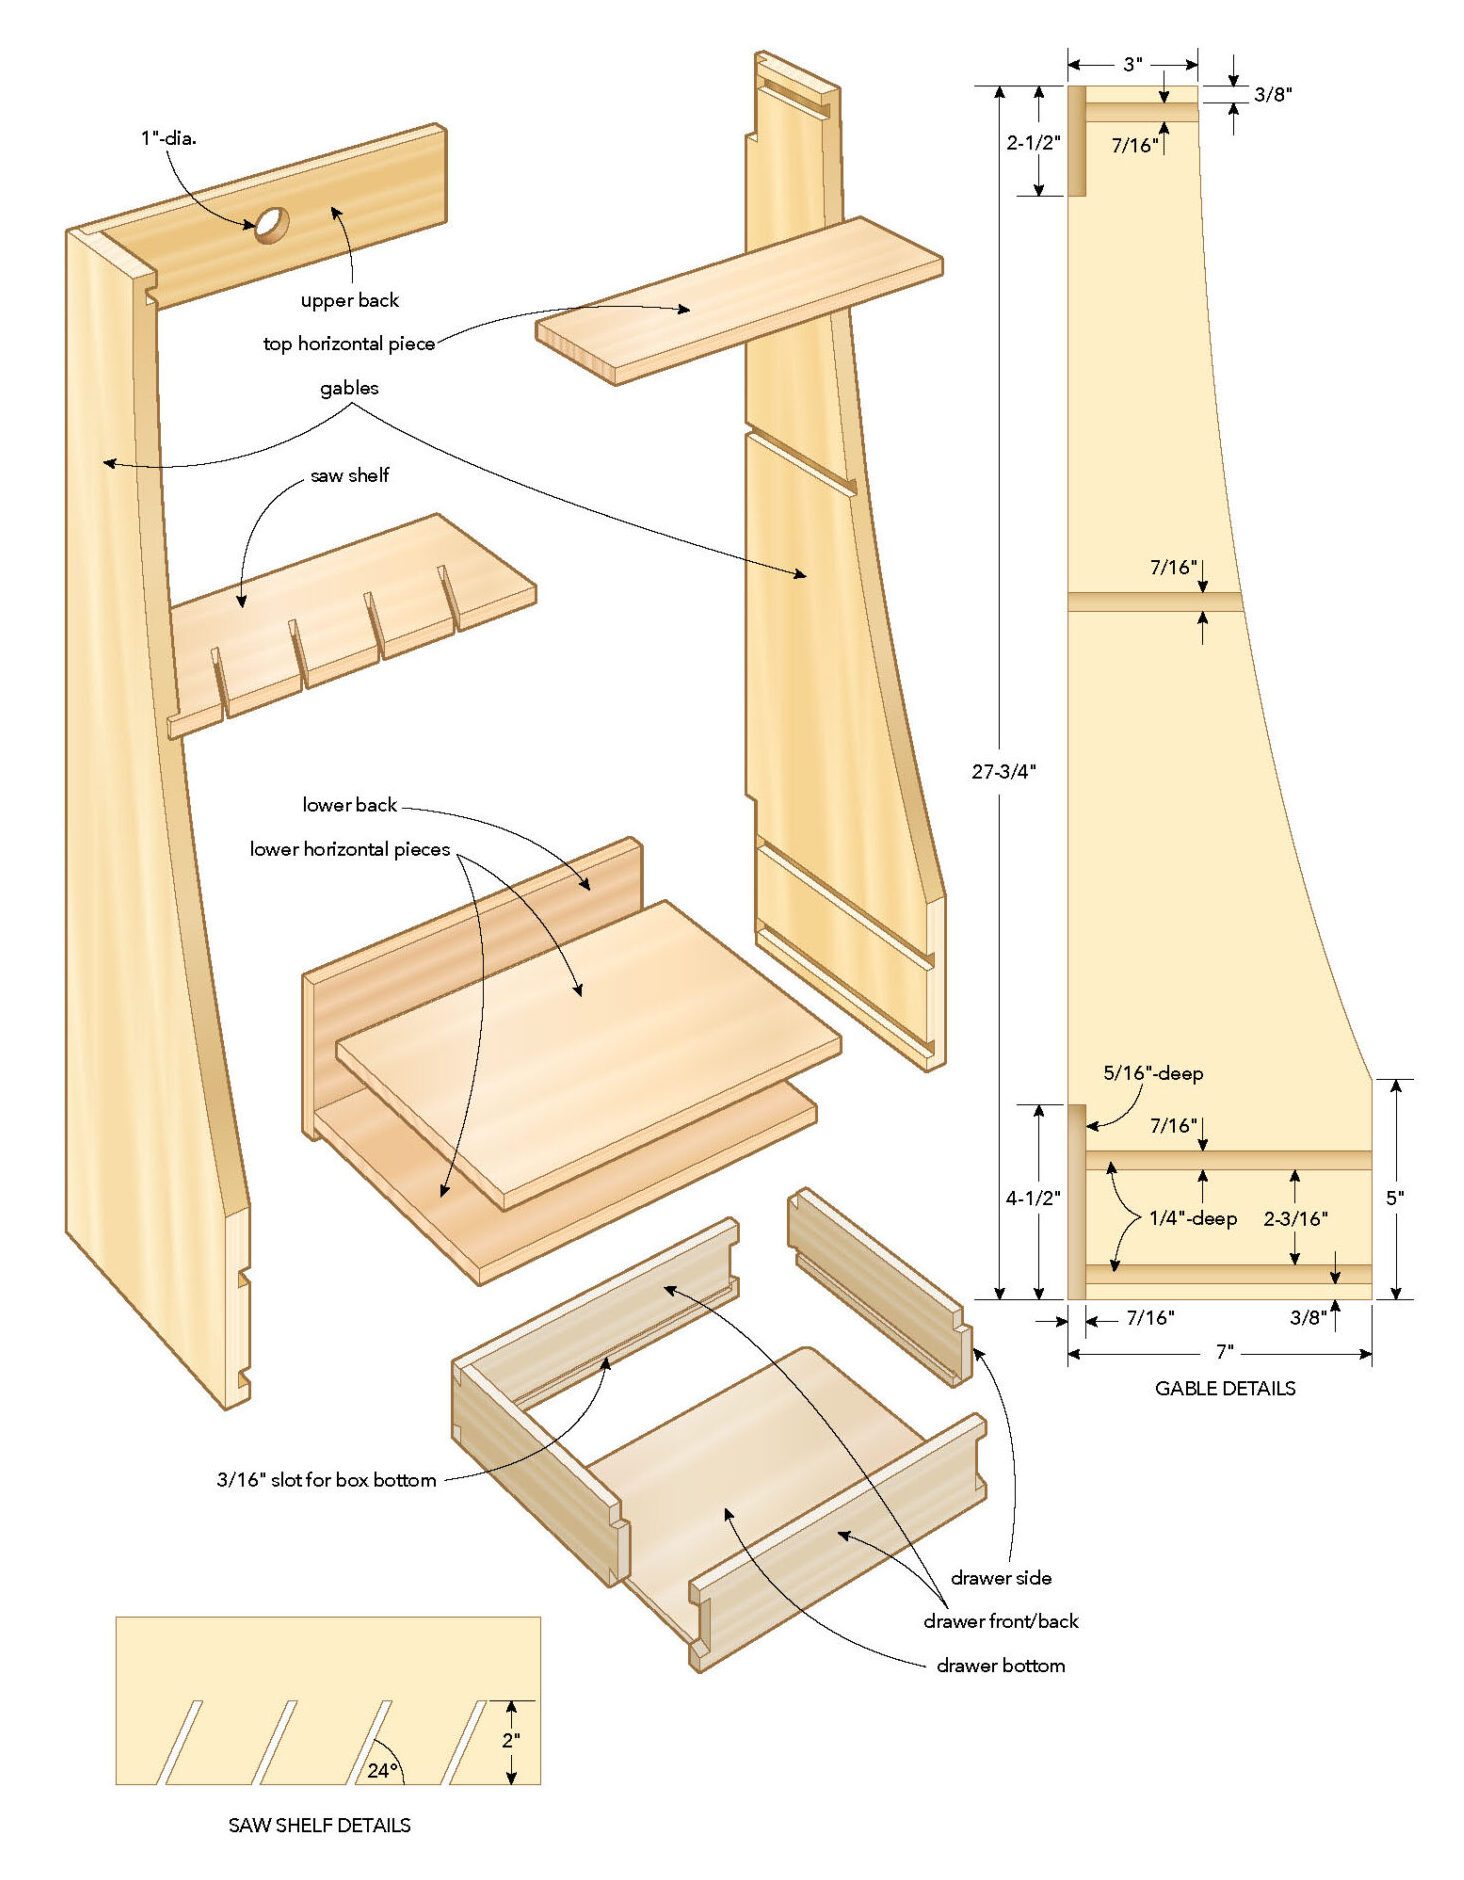
The main opening of the case needs to be a bit larger than the length of the longest saw. Here, Der-Garabedian marks where the upper surface of the saw shelf is located on the gables.
Temporary Bond
So the two gables can be easily machined to be equal, Der-Garabedian chose to apply tape to a few areas of the mating gables, then add a few drops of CA adhesive to one side and some accelerator to the other side, and bring the two halves together so they could be machined. The parts can be pulled apart once the curved front edge has been cut on both pieces.

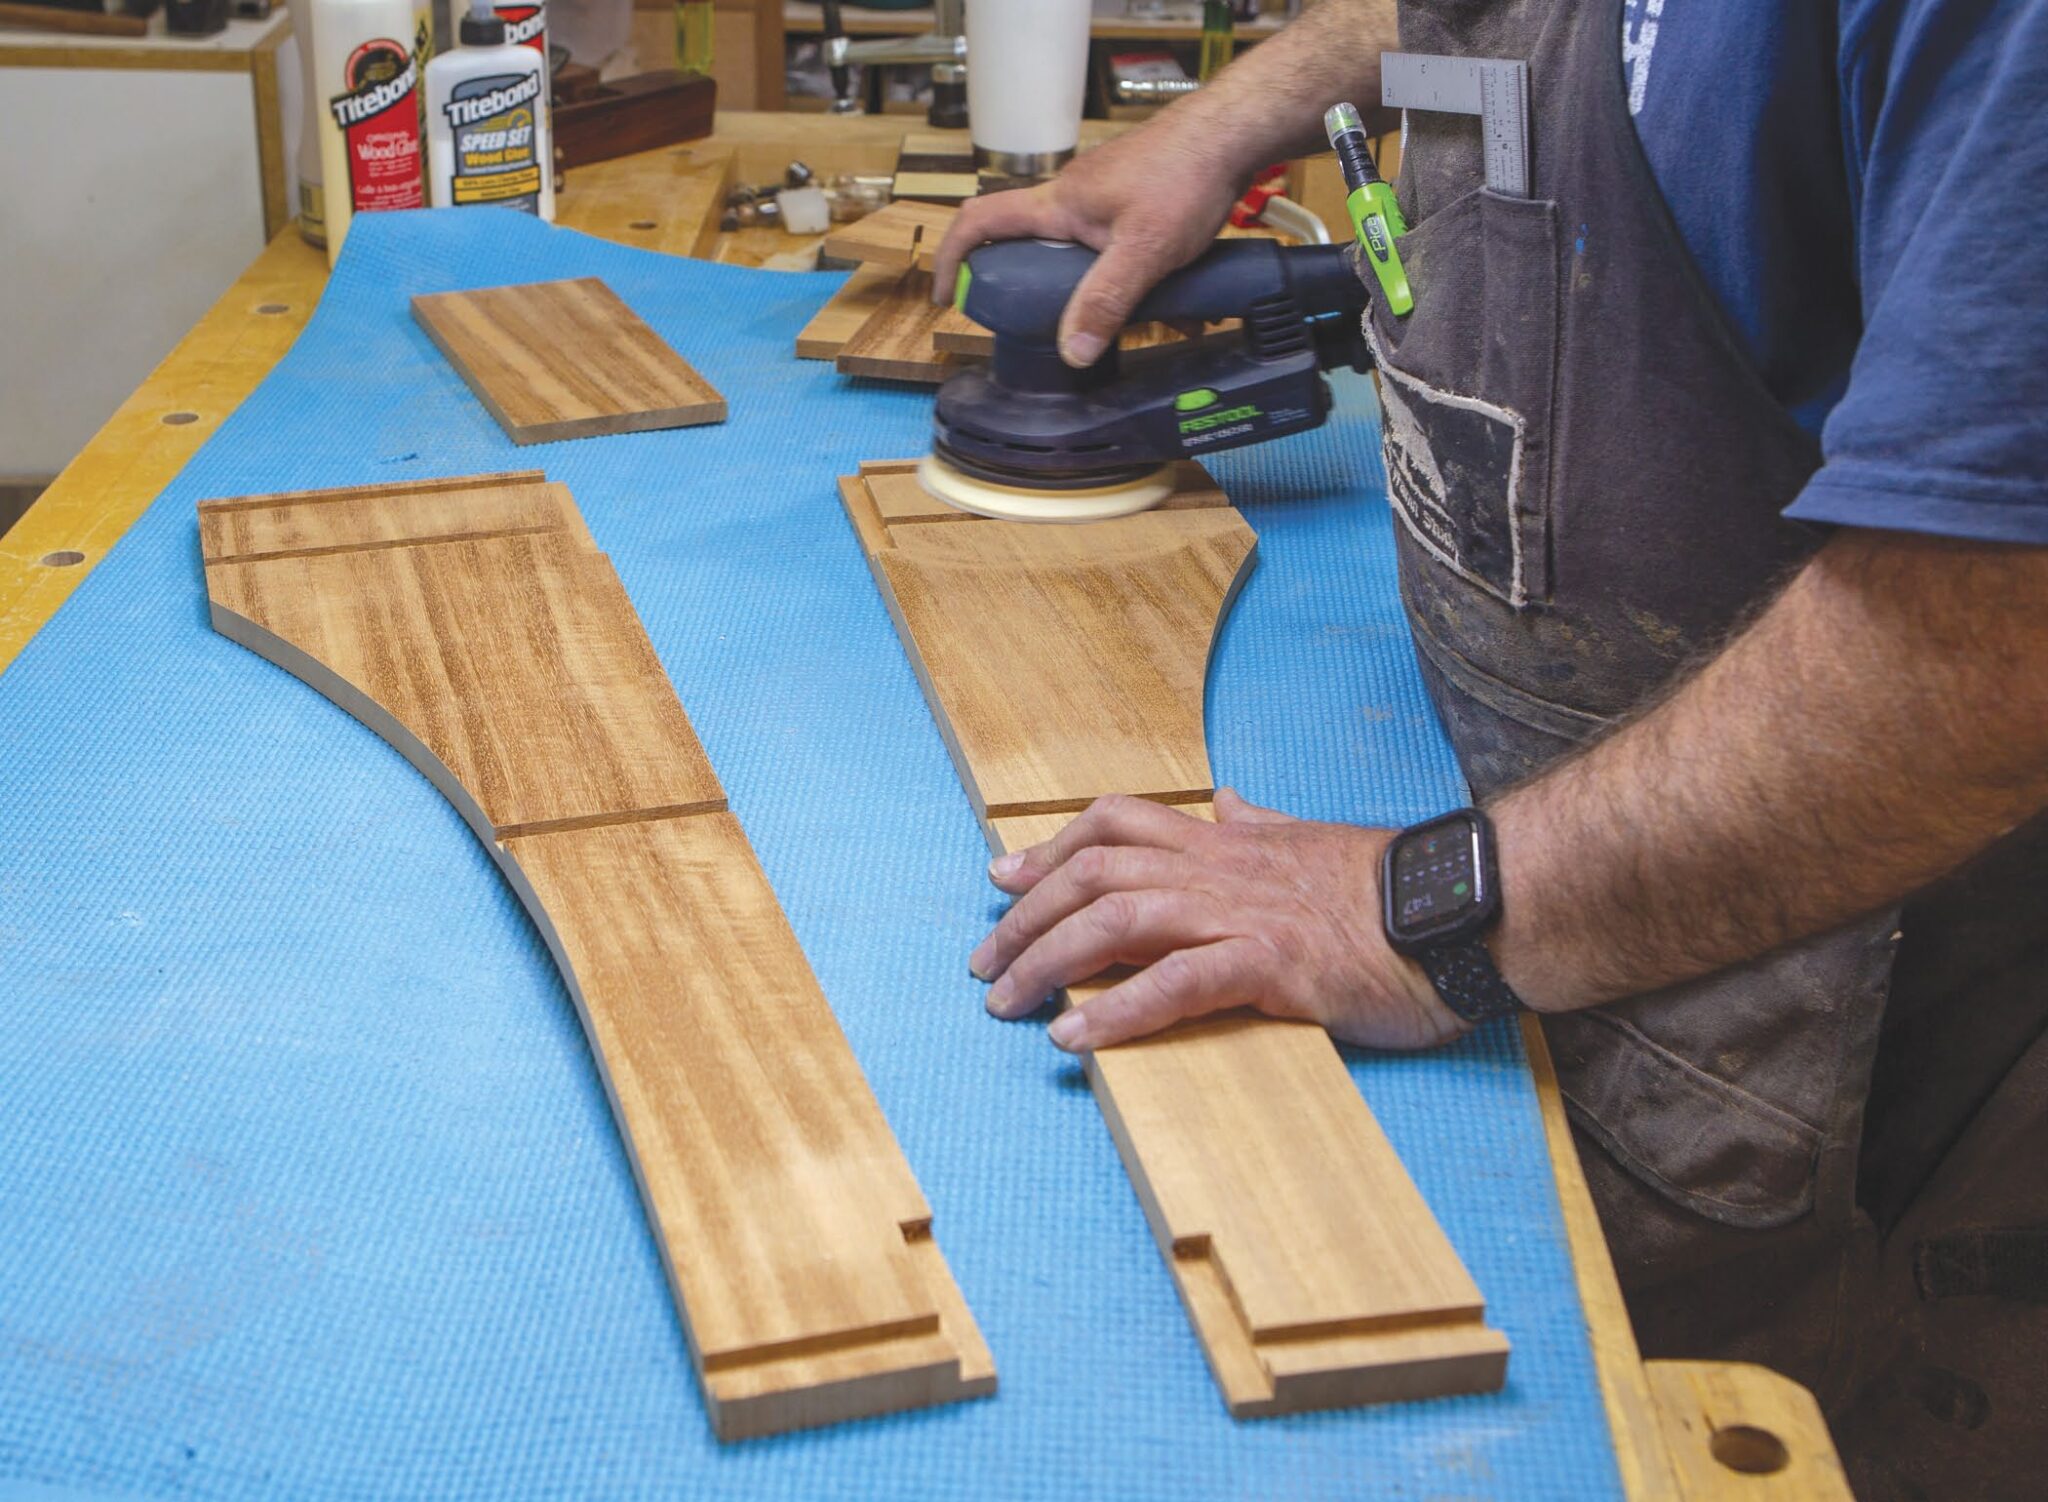
Smooth, Even Curves
A spokeshave will smooth the curved edges left by a bandsaw. Since the two gables are fixed together, the curves will match.
Draw a Curve
With the gables temporarily fixed face to face, Der-Garabedian uses a thin piece of wood and clamps to help him draw a curved line on the gables so they can then be cut.
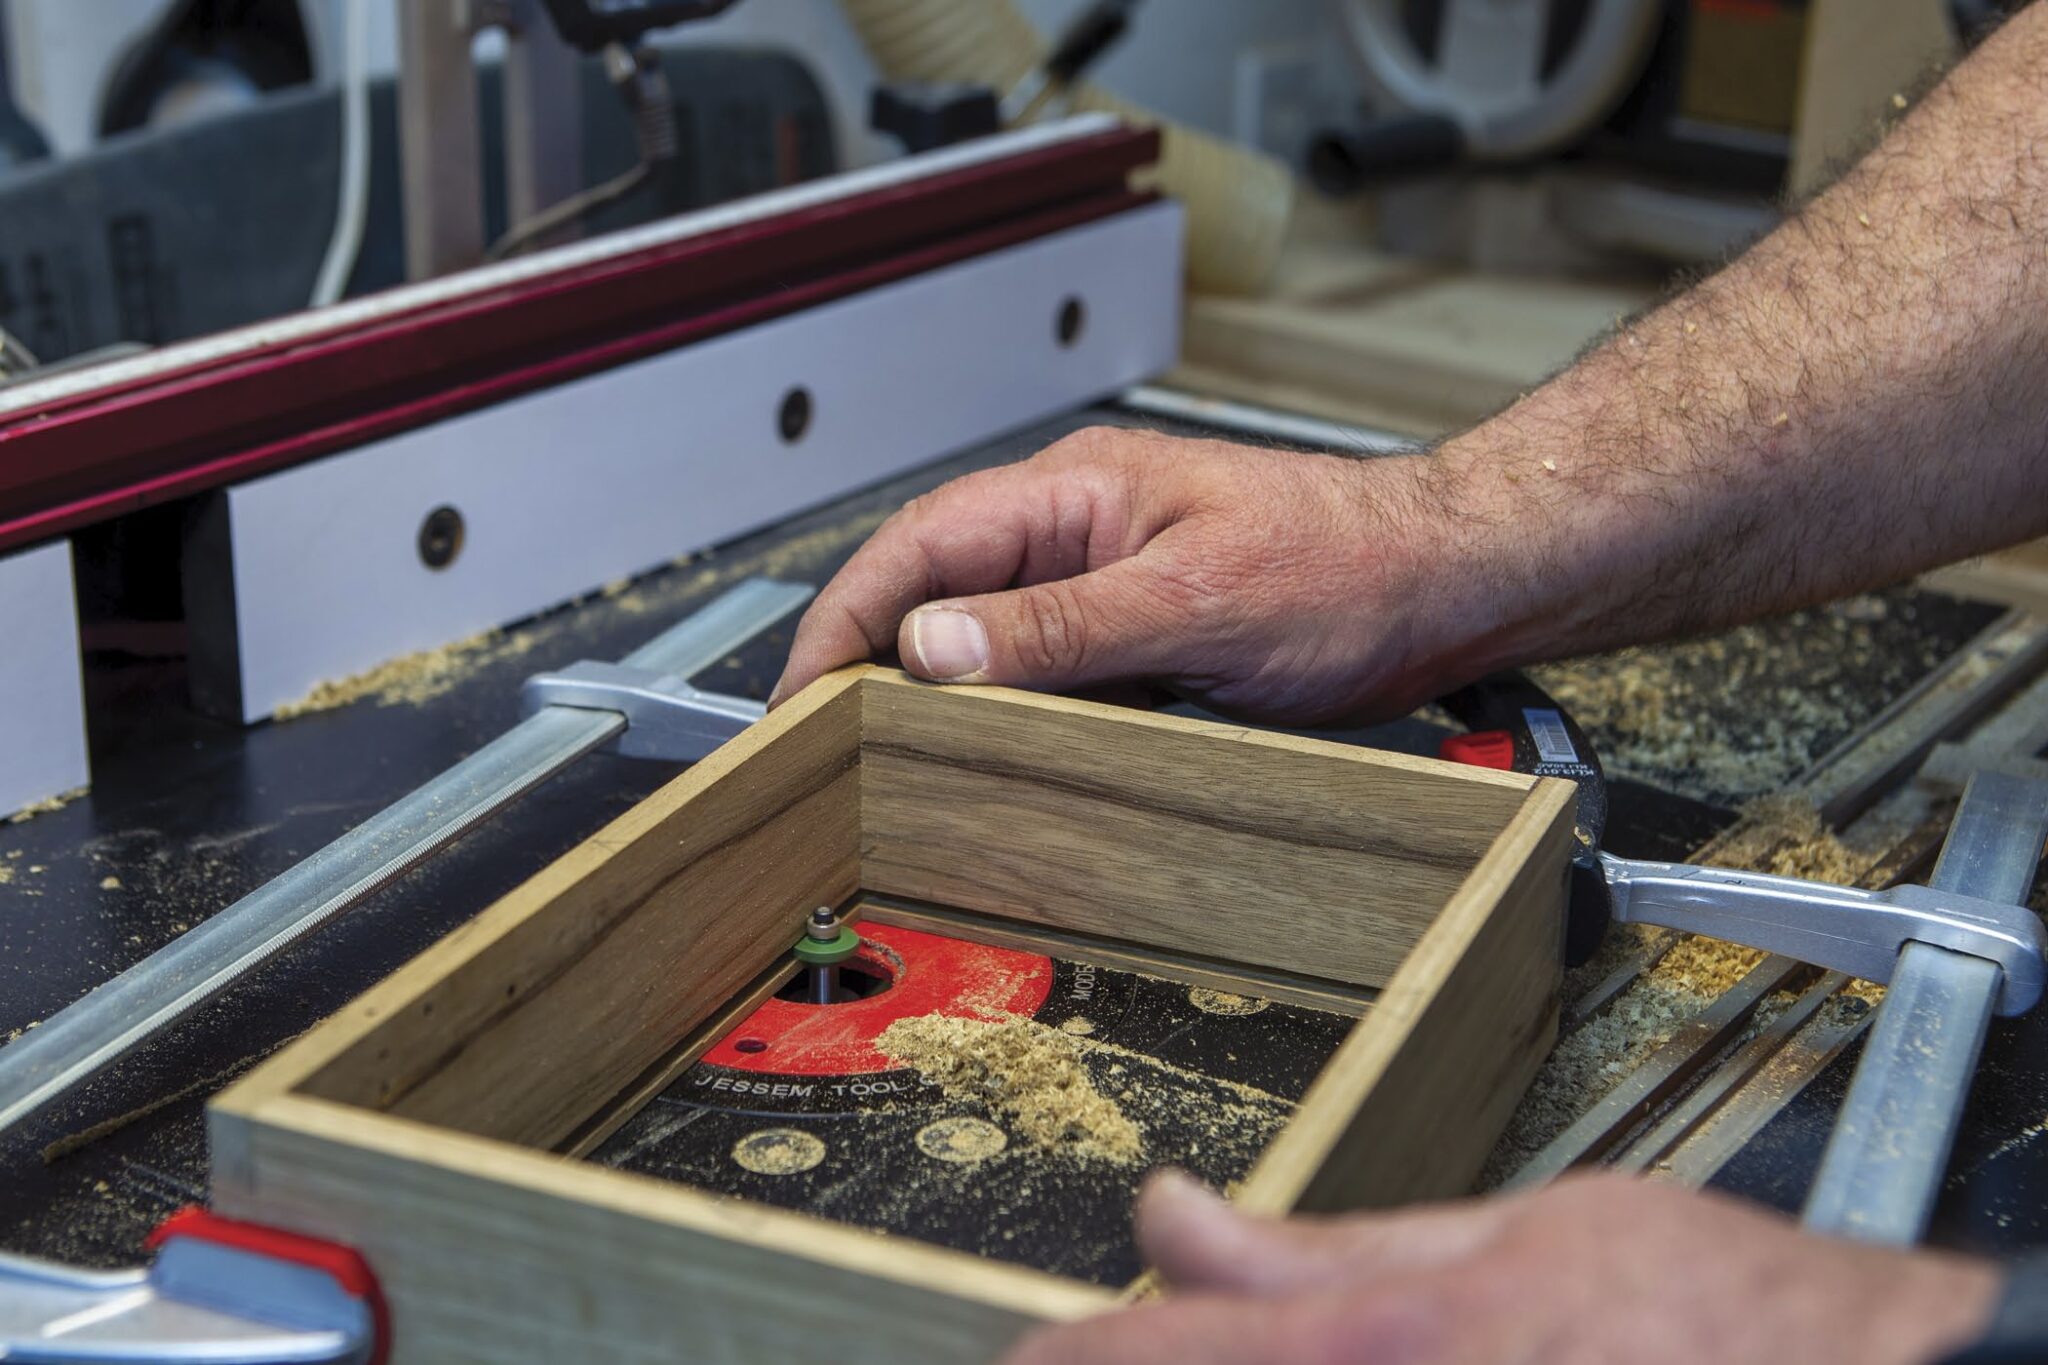
Rabbets for Backs
Using a rabbet bit in a router table, Der-Garabedian machines rabbets in the gables to accept the upper and lower backs.
Square Things Up
With the gables clamped together edge-to-edge, the ends of the routed rabbets can be squared up to accept the mating workpieces.
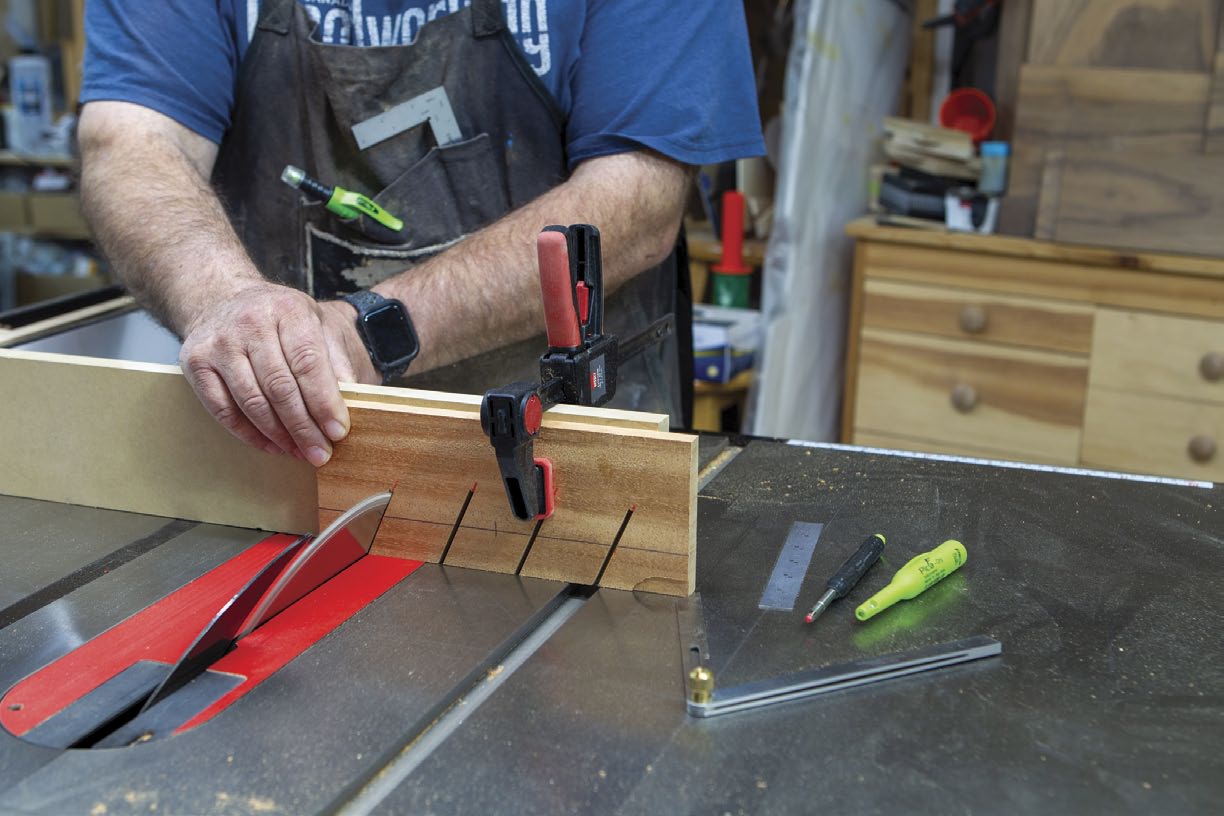
Saw Slots
Although Der-Garabedian chose to make his saw slots in the saw shelf angled, there’s nothing wrong with cutting them perpendicular to the front edge of the saw shelf.
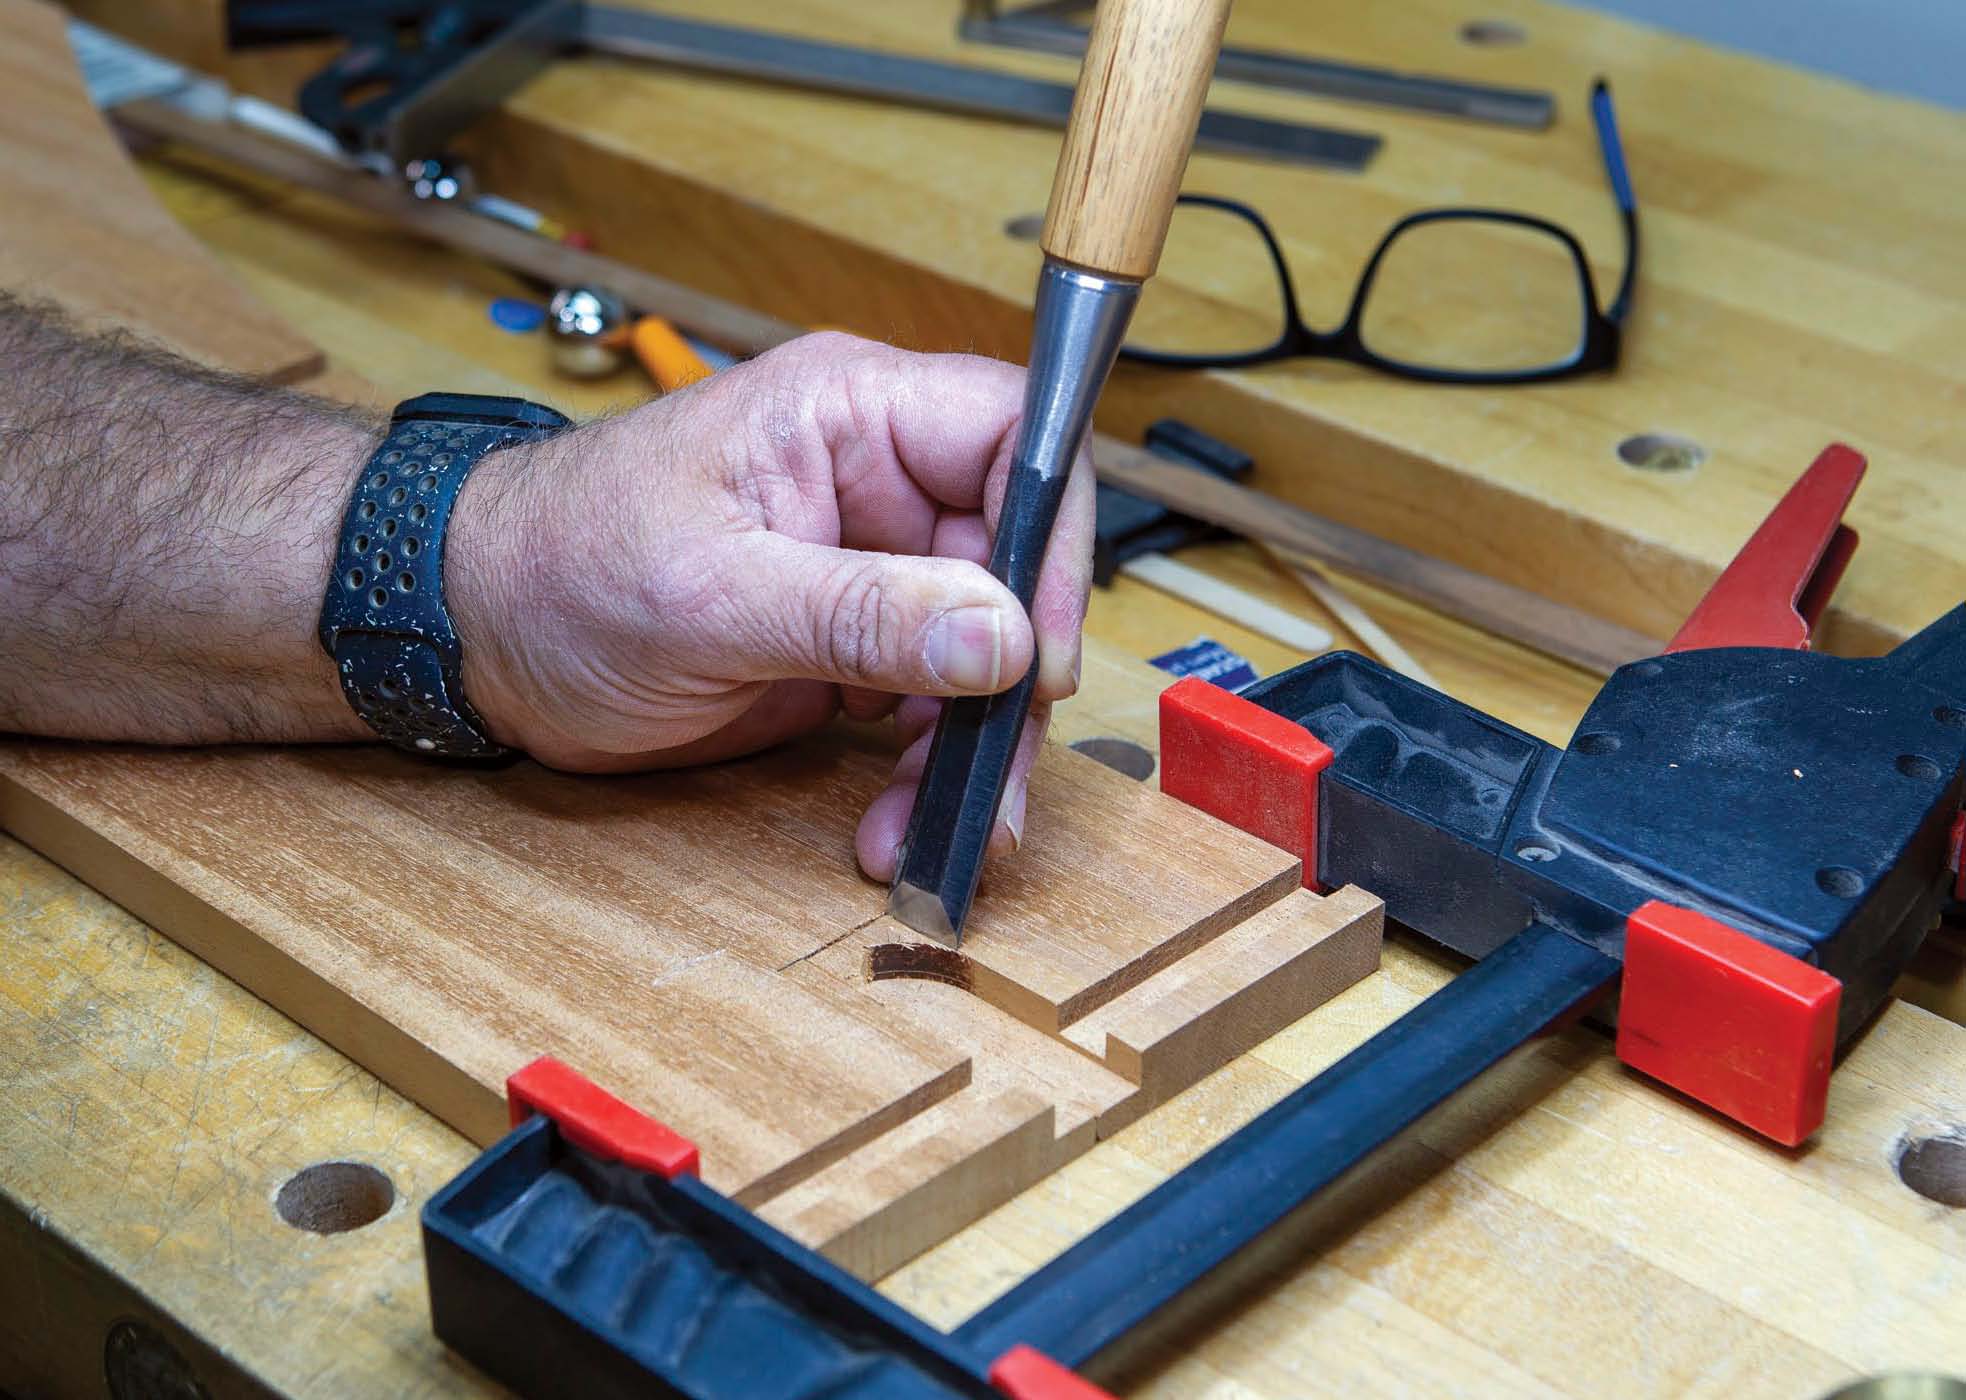
Cut Dovetails
Because these drawer parts aren’t overly wide, cutting one single dovetail in each drawer side works well. A block, positioned immediately above the cut line in the drawer front and back, will help you position a chisel to remove the waste more accurately.
An Angle Is the Answer
Der-Garabedian angles his workpiece so he can cut straight downward when cutting his dovetails.
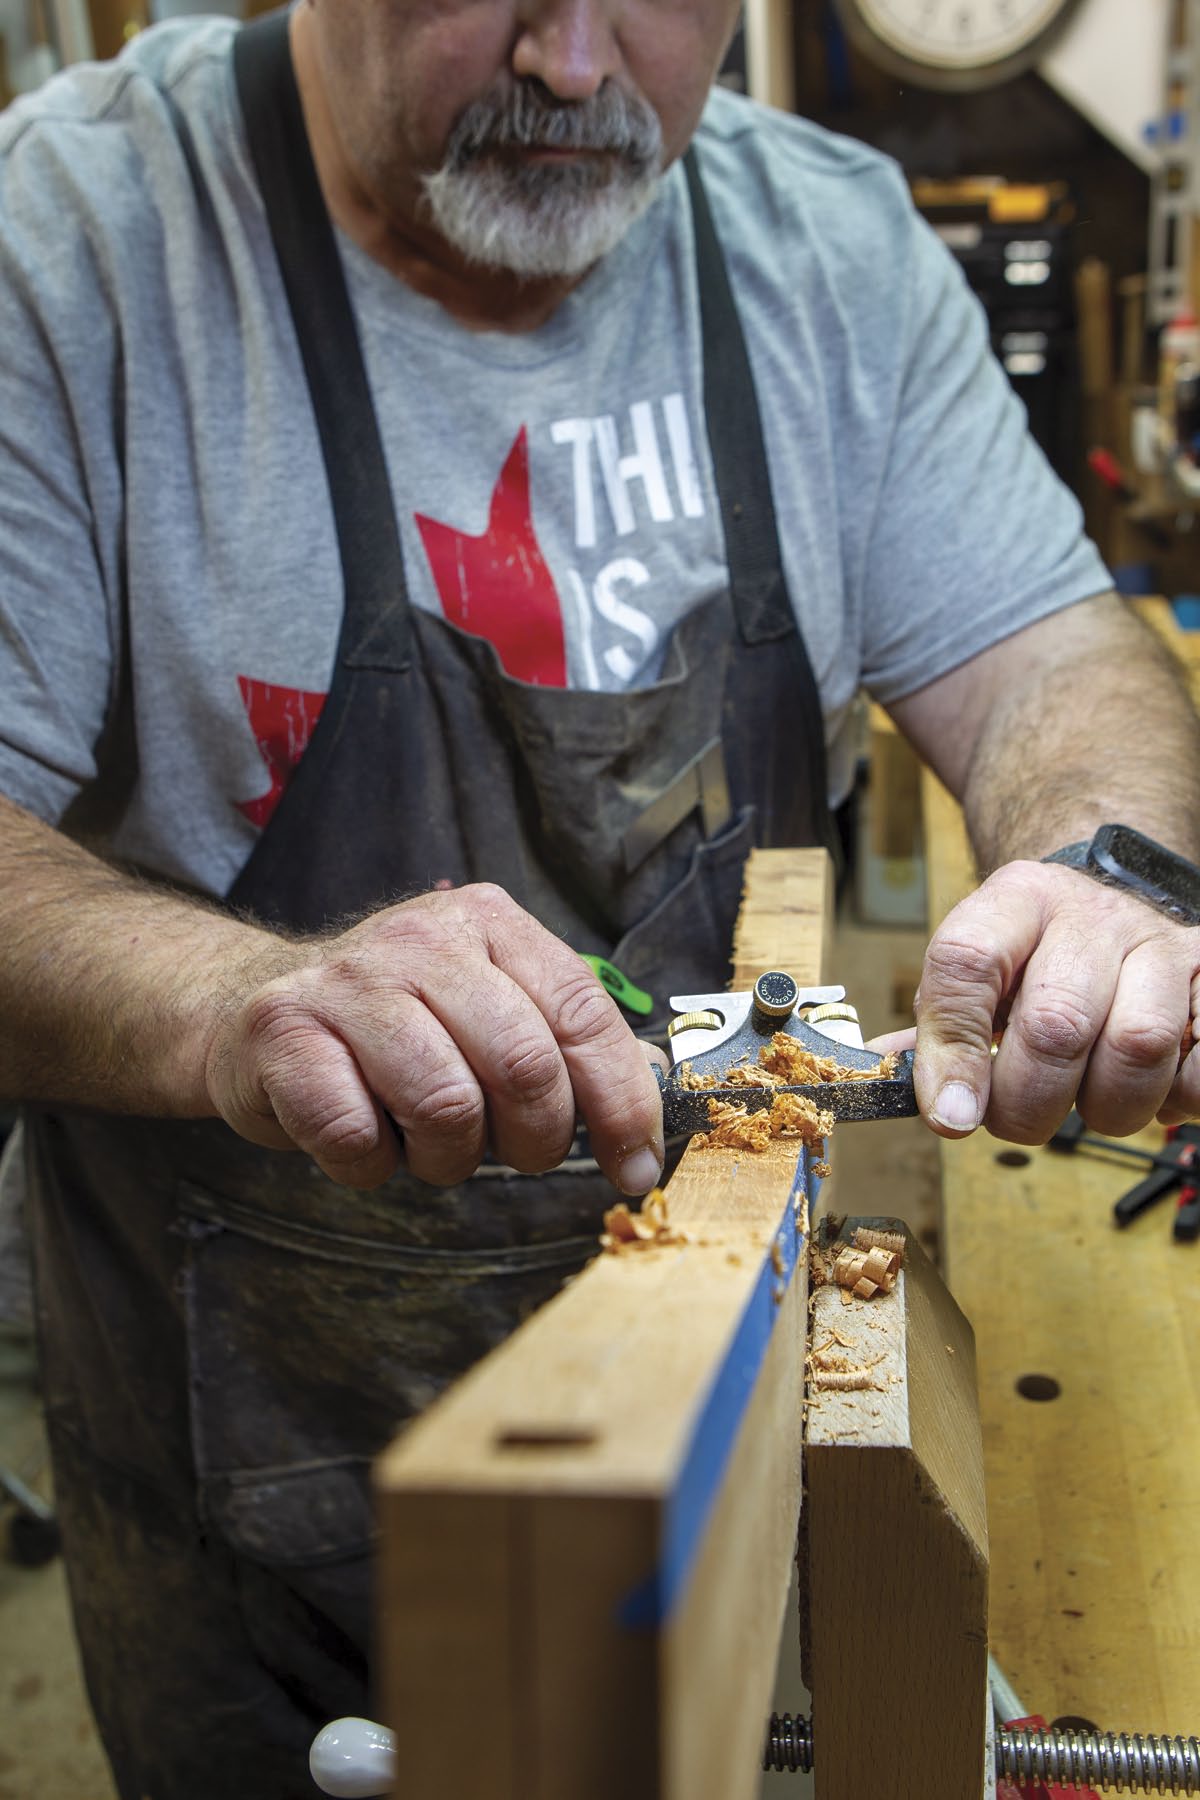
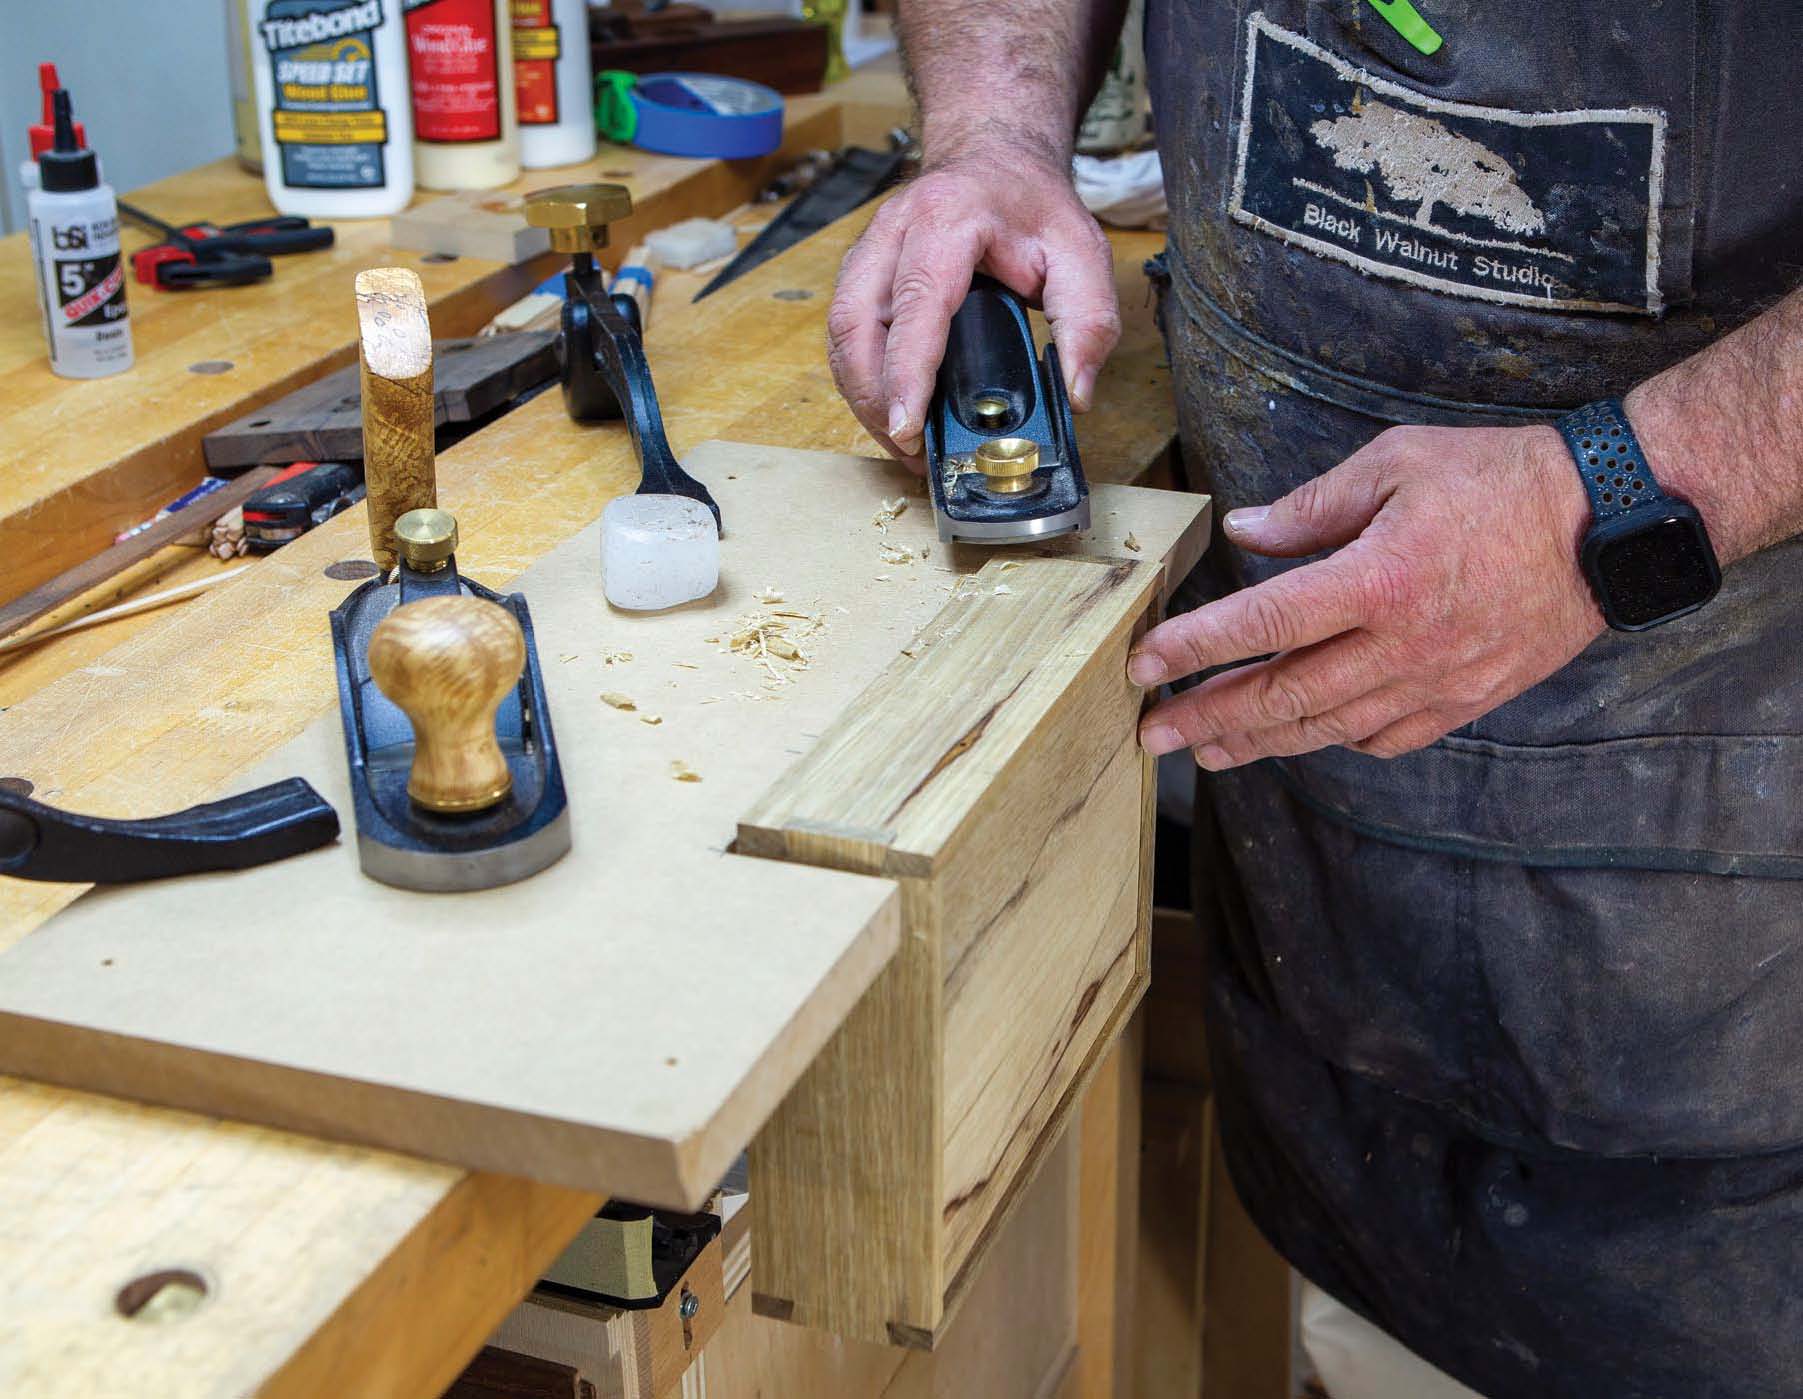
Clean Them Up
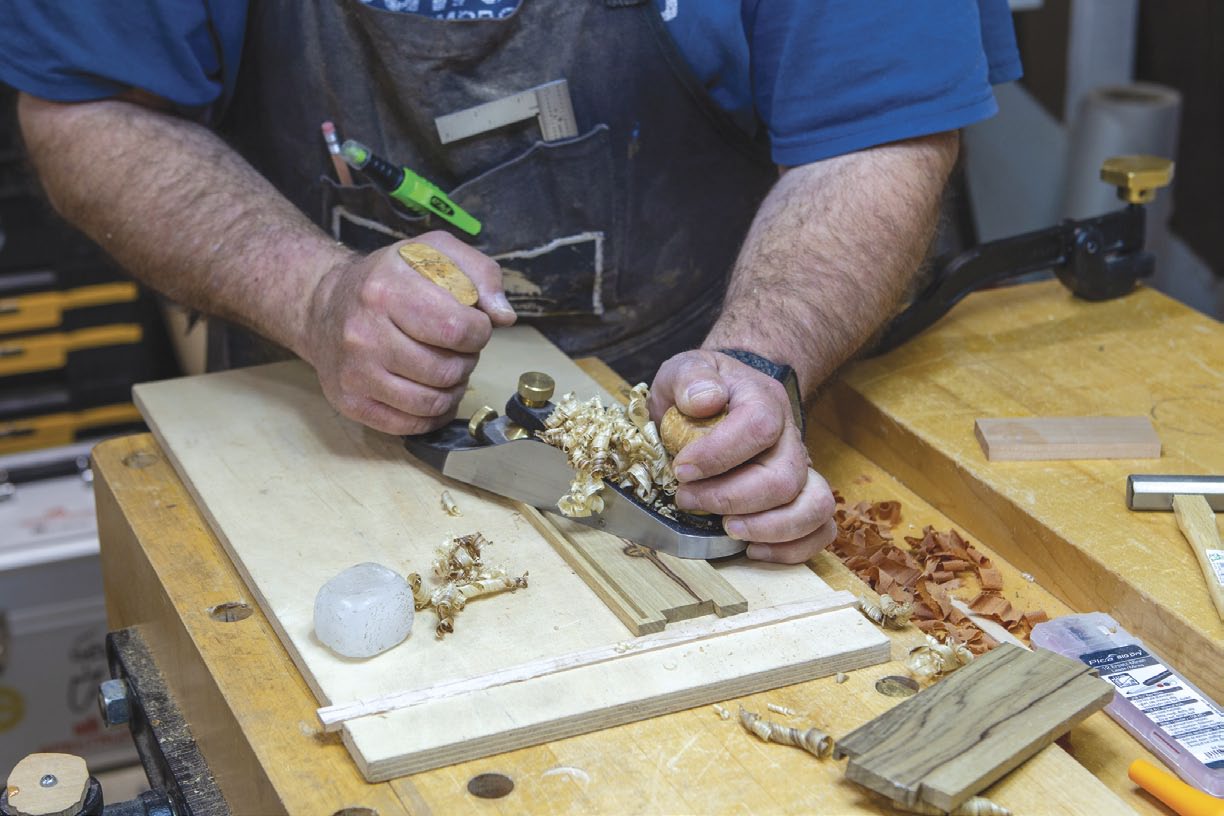
A hand plane takes care of smoothing the inner faces of the drawer parts before assembly.
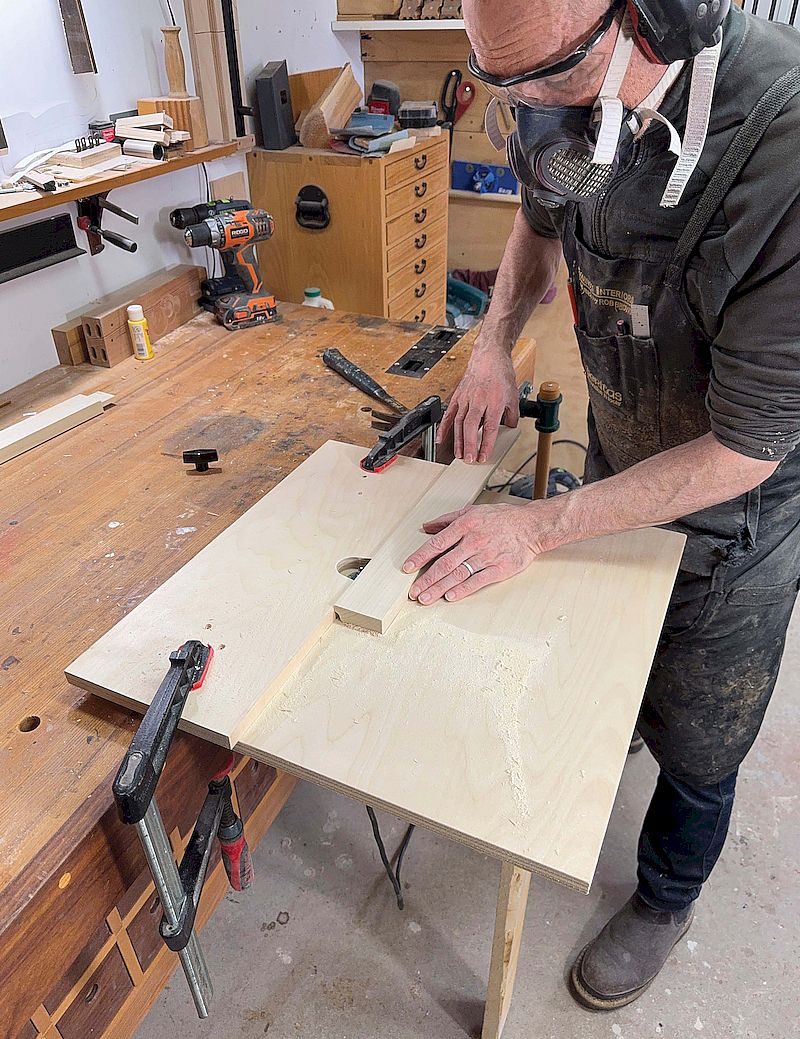
Routed Slot
A slot cutter installed in a router table makes quick work of machining stopped grooves in the drawer parts to accept the drawer bottom.
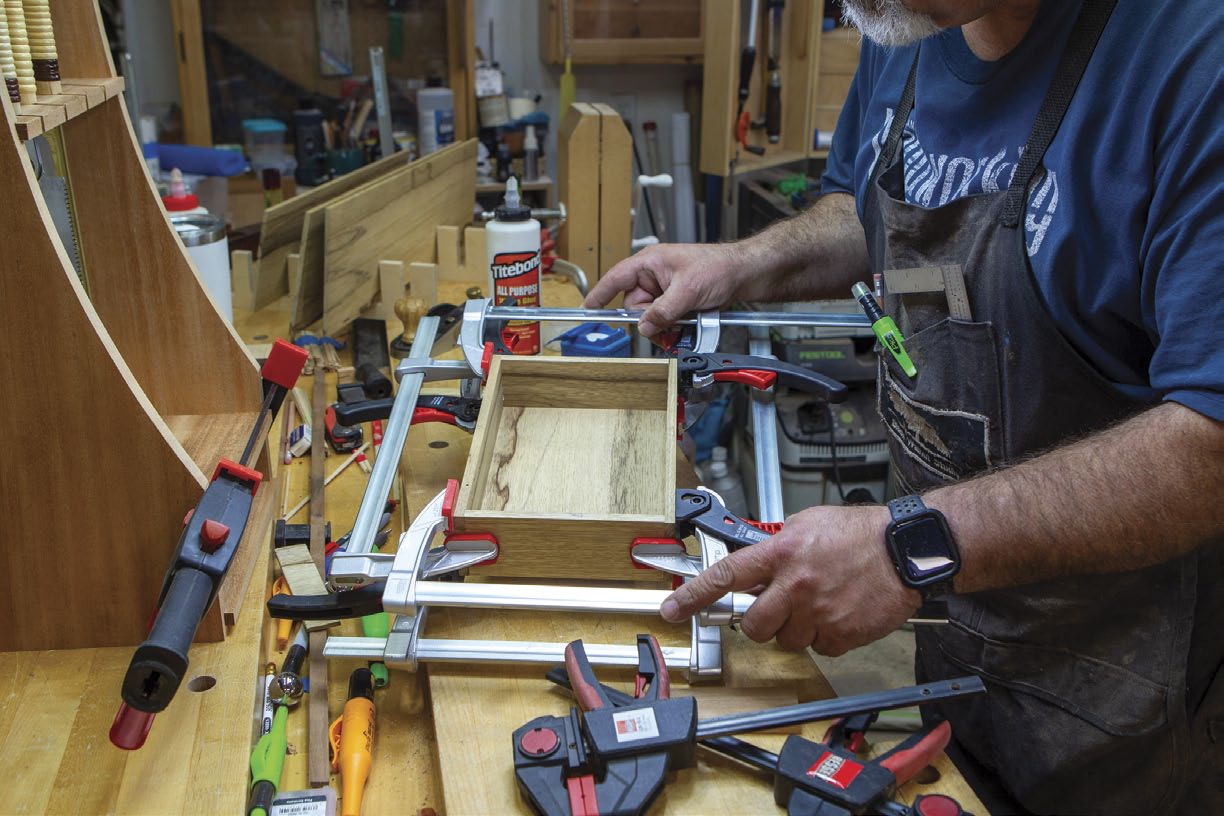
Lots of Clamps
A series of clamps, applied in opposing directions, brings the drawer parts together.
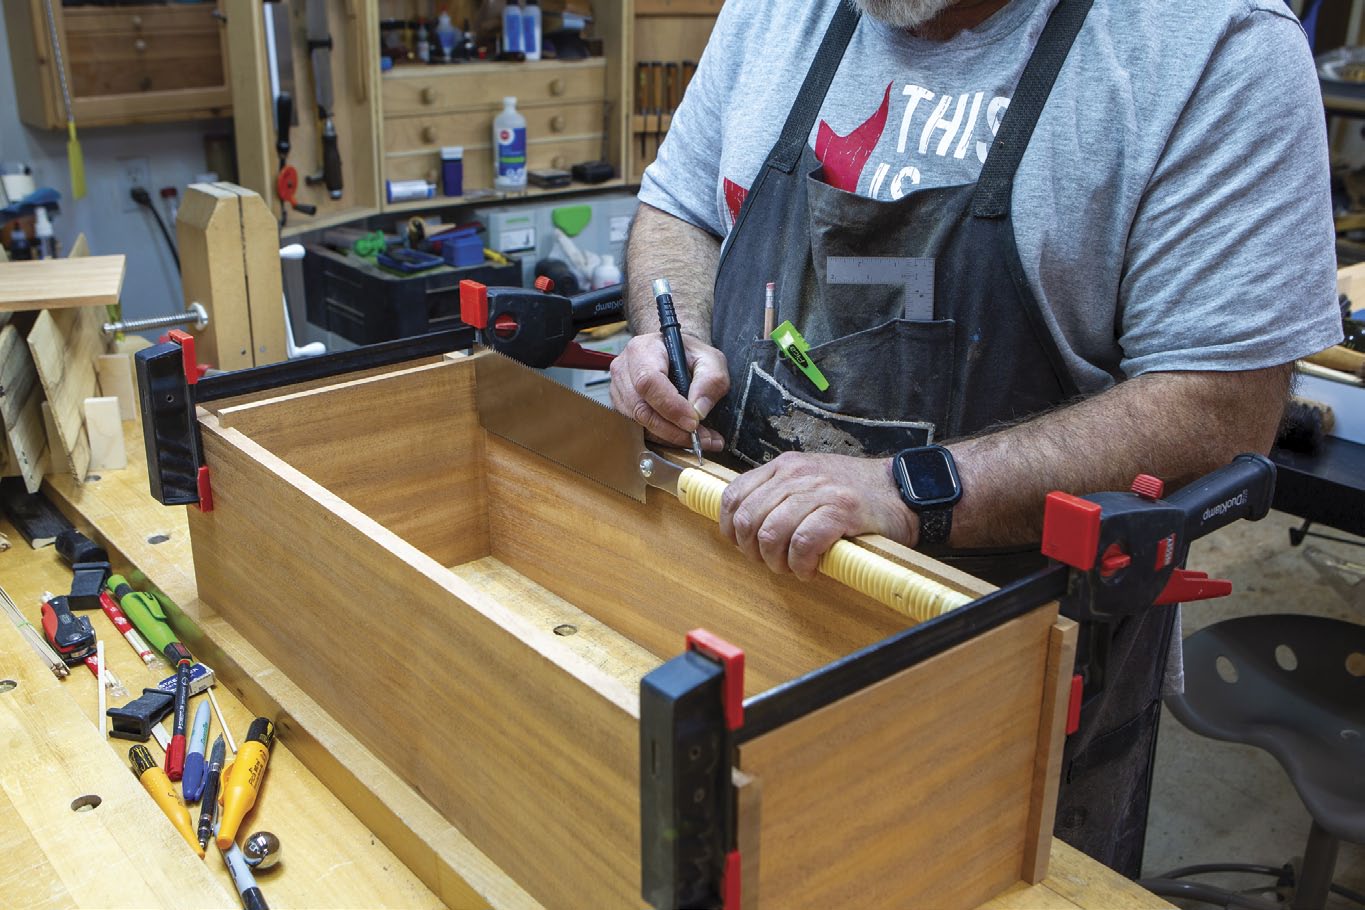
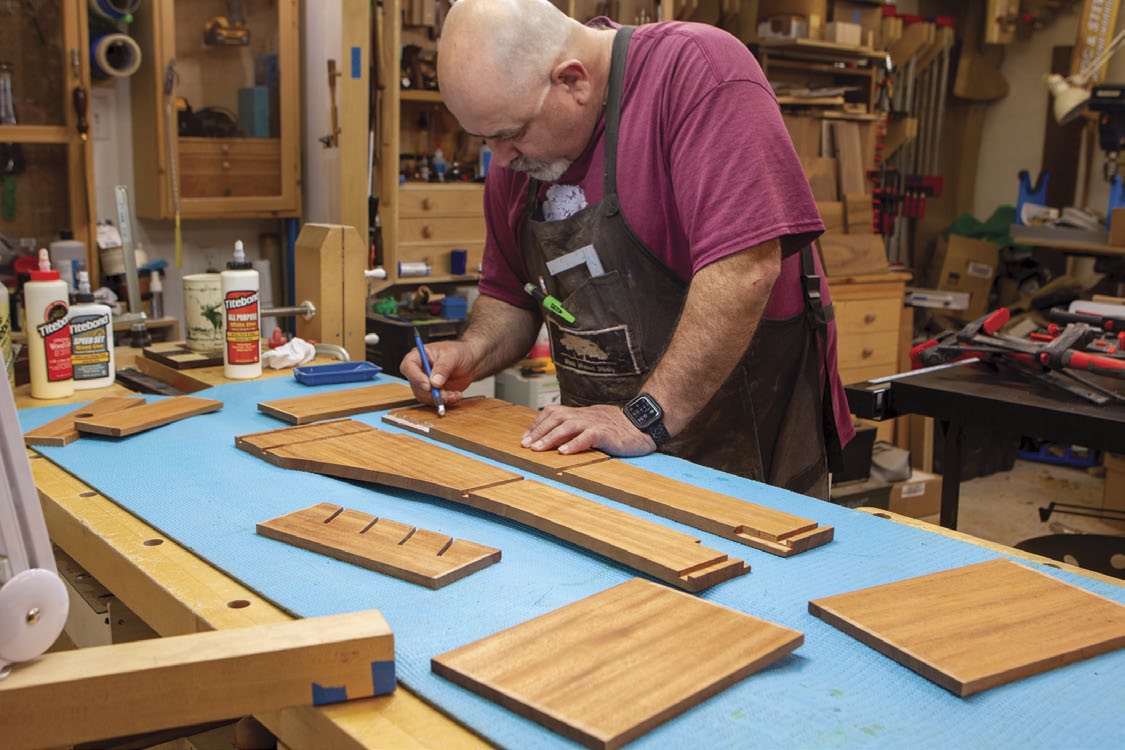
Dry Run
Because there are a lot of parts, a dry run is important. You don’t want any surprises after glue is applied.
Prepare for Assembly
The inner surfaces of the parts need to be sanded before assembly can take place.
Work Smart
Der-Garabedian made a simple jig with two notches in it to hold the assembled drawer so he can plane the corner joints flush.
From the ground up
I wanted to have a stand that could sit on the end of my bench but could also be hung on a wall when I needed a clear top. I have a pair of veneer saws and some saw guides that could be housed in a drawer. I didn’t want anything that looked heavy or only had straight lines, nor resemble the Studley Toolbox. Something nice and simple.
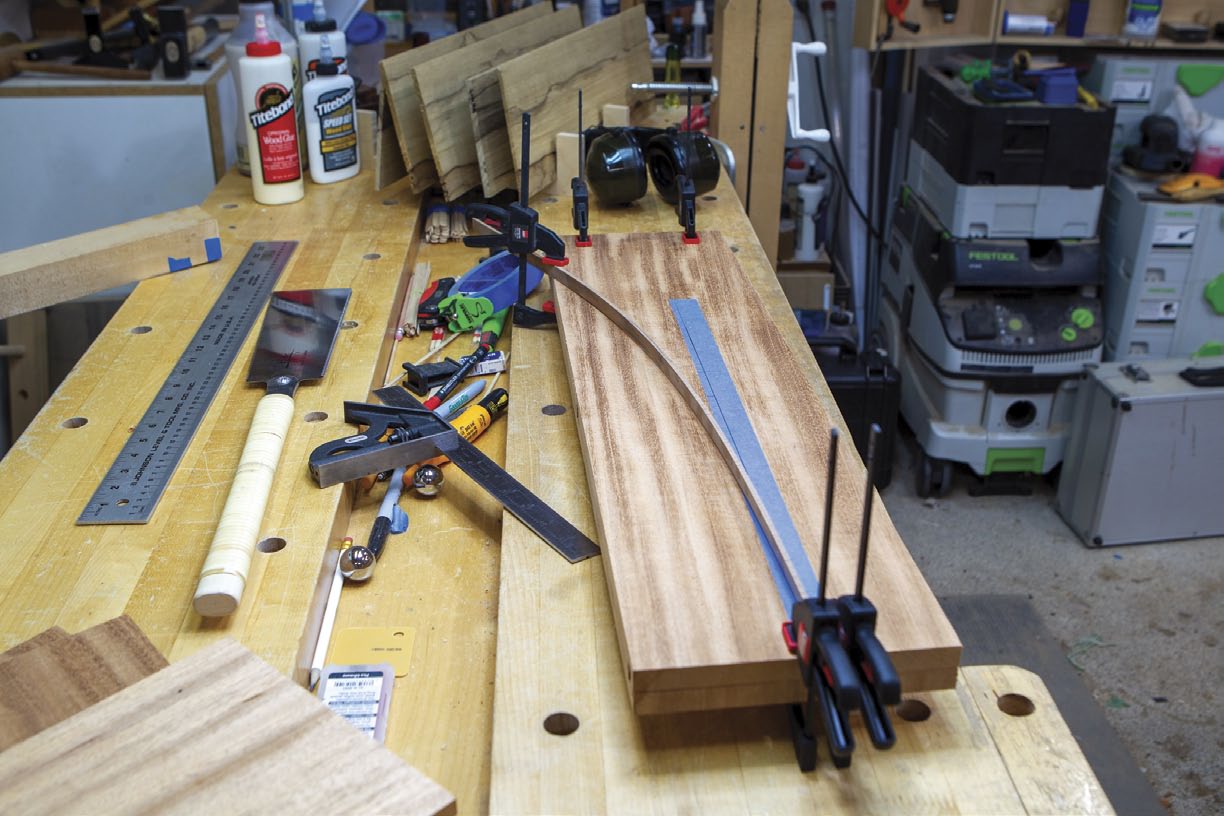
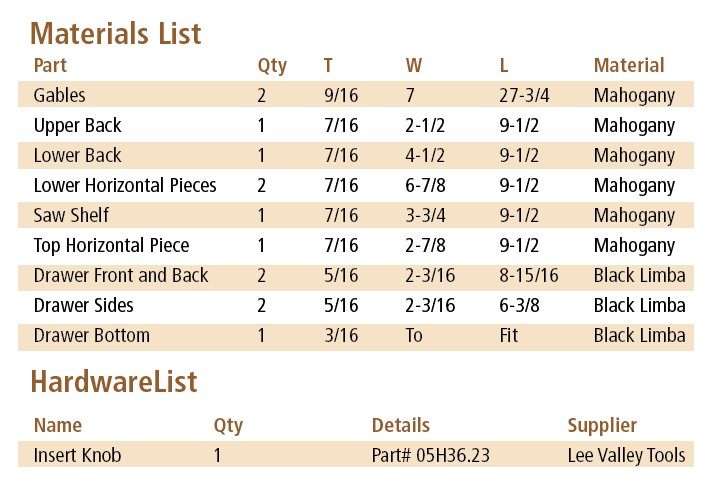
After measuring my saws for both length and width I went to my local wood supplier and picked out a pre-milled piece of mahogany that was 8′ long by 7-1/2″ wide and 3/4″ thick. I also picked up a small piece of black limba for the drawer parts that I thought would add some contrast.
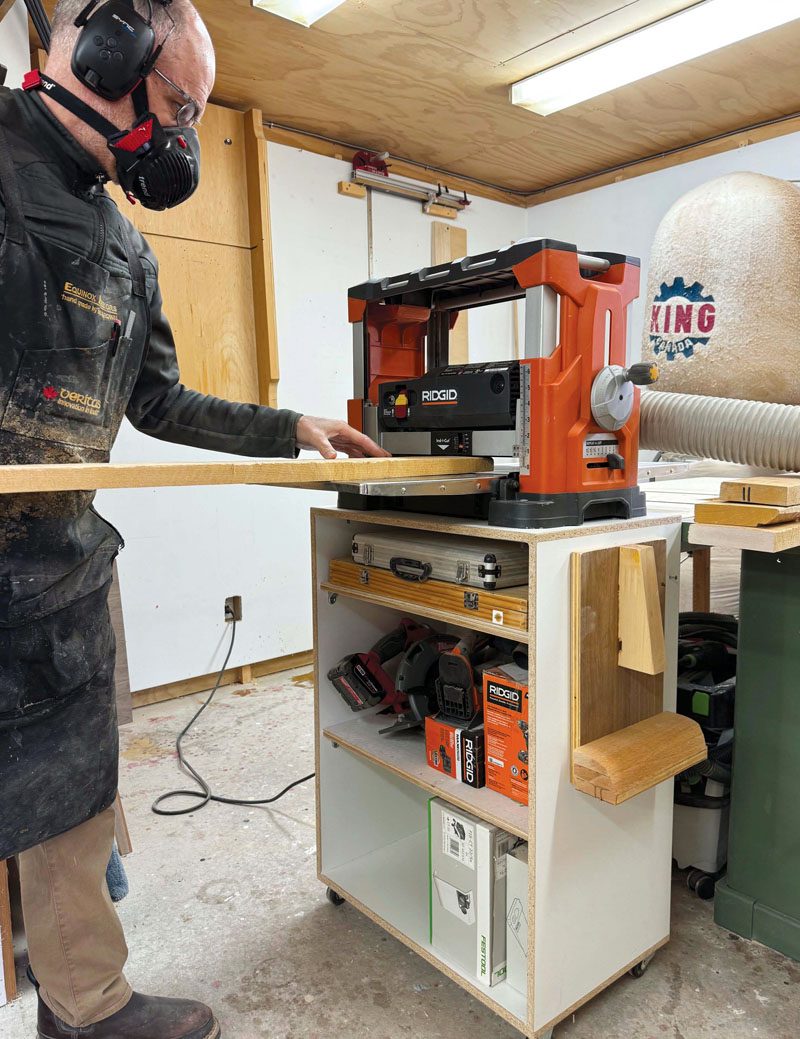
More milling
I don’t like using standard thicknesses for projects as 1/2″ and 3/4″ are what mass producers’ machines are set for. Changing dimensions by even 1/16″ will make the work more pleasing to the eye. For the sides of the stand I milled the pieces to 9/16″ thick by 7″ wide and 27-3/4″ long. These will be cut with a sweeping curve from 3″ at the top to the 7″ width just above the drawer. The other parts for the carcass were all milled to 7/16″ thick. Finally, the drawer parts were milled to 5/16″ thick except the bottom which I thinned down to 3/16″.
In keeping with the simple theme for the stand, I opted for grooves in the side pieces to hold the cross members. I left these pieces slightly wider than the listed dimensions as these would be trimmed after one of the dry-clamping runs. The grooves are easier to cut with the side pieces still in rectangular form rather than with the curve sliced out of the front.
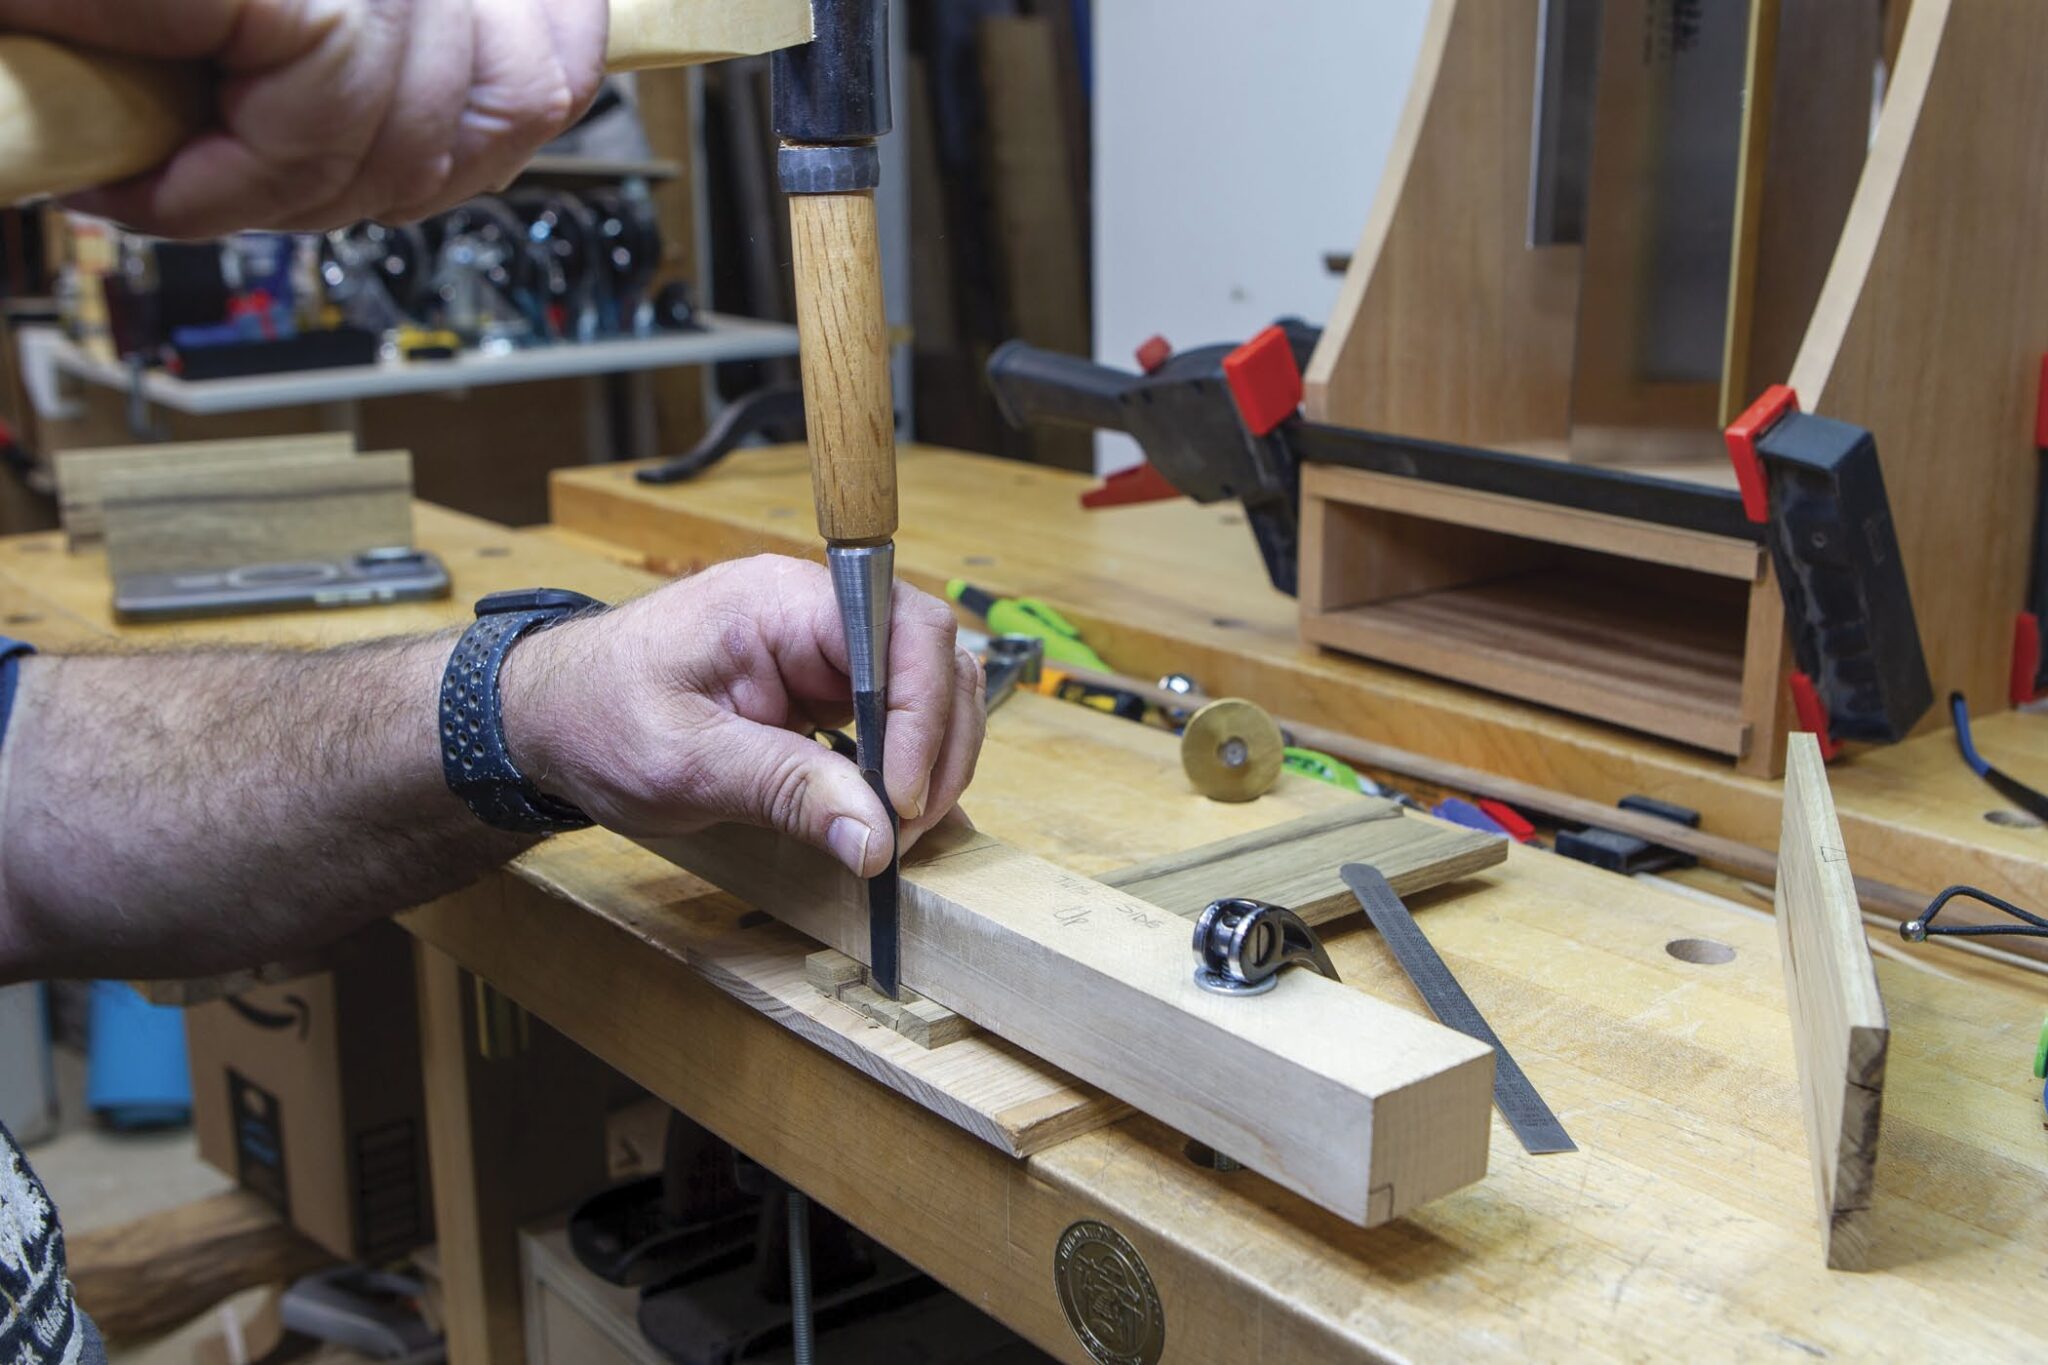
Stops, stops and more stops
In order to make sure the cross pieces were perfectly horizontal, I used my crosscut sled and a pair of stops. I don’t have a dedicated sled for a dado stack, and since the grooves are only 7/16″ wide, I went with a cross cut blade and just incrementally moved the pieces between the stops. The top and bottom grooves start at 3/8″ in from their respective ends and I cut these in both pieces with this initial setup. All the grooves are 1/4″ deep. After taking a rough measurement of my longest saw I added the next groove 2-3/16″ from the top of the bottom grooves. This creates the space for the drawer.
Next, dry assemble the stand and centre your longest saw, and a small gap, in the opening. Mark the bottom of the handle and create another mark 7/16″ down. Cut this once more on the table saw using a pair of stops. Due to the length of the side pieces, I needed a bit more reach than the fence the crosscut sled provided. Using a stop shaped like an “L” did the trick.
Gracefully curved
Even with a sharp blade, some woods end up with whiskers, especially during crosscuts. A shooting board and hand plane, or even some sandpaper on a flat block, will quickly remedy that situation.
In order to cut identical curves in both side pieces, you could opt for a template and a bearing pattern bit on the router, but this creates a lot more work, especially for only two pieces. Instead, I temporarily fastened both sides to each other with masking tape and small drops of CA glue. The trick is to make sure that both sides have the tape lined up, so you don’t adhere the two parts together for good.
Line up the sides, back to back, and run tape across both inside faces. Cut them with a sharp knife to separate them. Next, apply some CA glue to one side and spray accelerator on the other. Close the book, so to speak, and press the two sides together for a few seconds.
Using a thin piece of wood, clamp one end 3″ in from the back at the top and the other end at a point 5″ up from the bottom. Trace this line and, using the bandsaw, cut the curve into the sides. Don’t toss the waste pieces into the wood pile just yet. To clean up the bandsaw marks, a curved bottom spokeshave works well. A spindle sander or even sandpaper on its own will also do a good job.
Back support
Since one of the requirements of the stand was to be able to hang it on a wall, the backs needed to be inset into the sides. I used a rabbeting bit on the router to cut a stopped rabbet 7/16″ deep and 5/16″ high. To test my setup, I used the offcuts from the previous step. The top back piece is 2-1/2″ wide and the bottom is 4-1/2″ wide. The top also gets a 1″ hole drilled in the middle, but offset slightly to the bottom. Stop the rabbets 1/4″ shy of each width, as these will be squared up using a chisel.
After squaring the rabbets, dry fit the backs onto the carcass and butt the horizontal shelves to them — all except the middle one. The middle saw support shelf is flush with the back. Now trim the horizontal members to their final widths. Good designs don’t always have all of the pieces flush. I ended up leaving mine 1/4″ longer than the front of the sides.
An angled profile
If you have a lot of saws to house in your stand, you could fit them closely with slots straight in. However, I thought giving them a slightly angled profile, 24° in my case, was a pleasing change. Again, using one of the waste offcuts, lay out what works best for your saws and taste. The cuts, which reach 2″ from the front of the cross piece, are approximately 3/16″ wide, which is 1-1/2 times the width of a typical table saw blade.
Drawer time
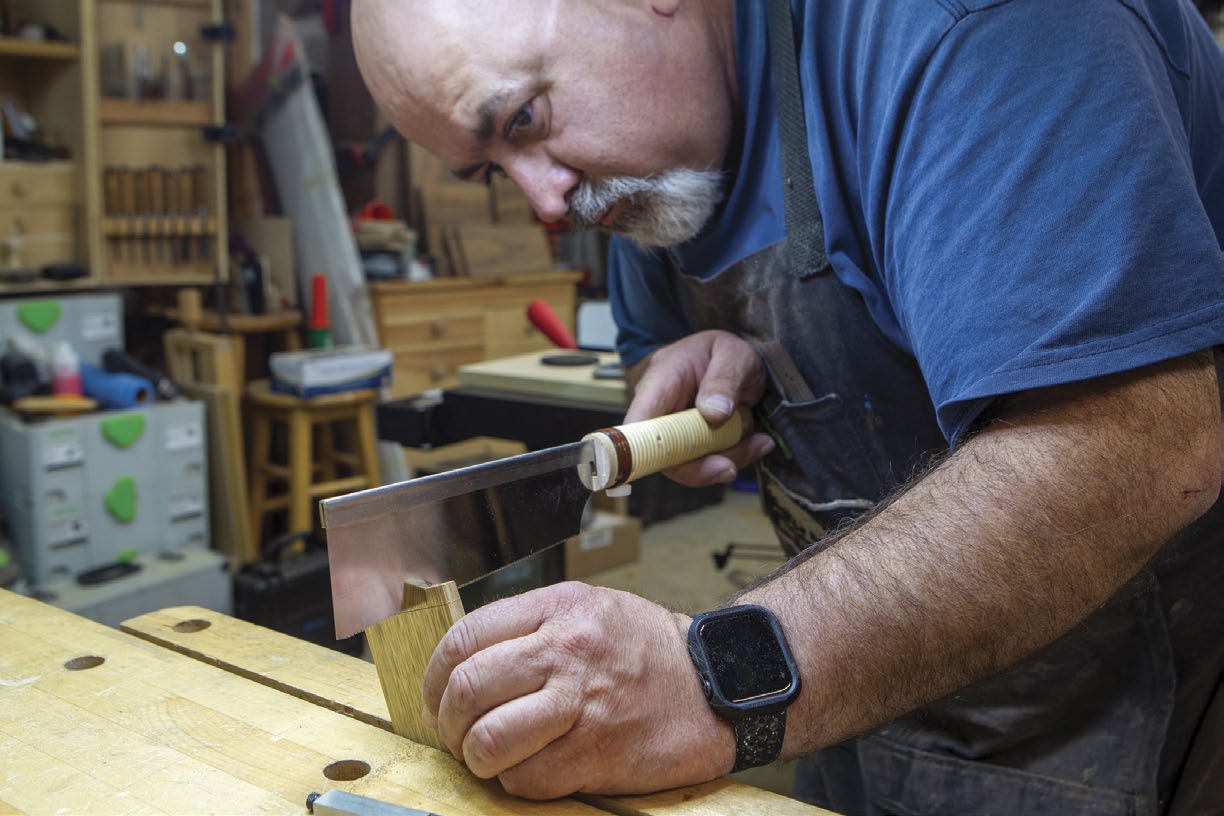
I thought it just wouldn’t be right to make a saw stand if I didn’t at least use one of my saws while making it, so I broke out the dozuki and cut some dovetails. Due to the height of the drawer, I opted for a single tail in each corner. Tradition in fine furniture calls for half-blind dovetails on the front. However, this is a shop accessory and I thought it would be fitting to be able to see them.
I like cutting dovetails, but you could also create a drawer with many other forms of joinery, including drawer lock bits on the router, pinned rabbets, etc. You could also choose not to have a drawer. If you do decide to go with one, inset it so it’s slightly recessed in its opening, instead of flush with the front.
If you’ve read some of my previous articles, you know I like to use a box slotting bit from Lee Valley Tools for drawer bottoms. The method calls for you to dry assemble the drawer, then run the bearing bit along the bottom of the drawer. I started this slot 1/4″ from the bottom and created a 3/16″ slot with two passes. If you choose this method, then you’ll also need to round the corners of the bottom for a good fit. Choose the method and design you have the tools for. Glue up the drawer and set it aside to cure.
Finish first
It would be hard to apply finish in the drawer opening so I opted to put a finish on before final assembly. First, sand all surfaces and remove any scratches. I went with two coats of Osmo Top Oil and a fine furniture wax. Tape off any spots that will receive glue and apply the finish of your choice.
After the finish has been applied and left to cure, it’s time to assemble the stand. Apply glue where needed and use as many clamps as needed. My dry fitting session gave me an idea of how many and where to use them.
While the glue sets on the carcass, I turned my attention back to the drawer. I chose to use an insert knob from Lee Valley Tools with an ebony insert. It’s a fairly easy process of using a plug cutter, then glueing in the insert and finally shaping it on a lathe or even chucking it in a drill press.
I also made a drawer board out of 3/4″ MDF to hold and support the drawer while I hand planed the outsides. The insides were done before gluing the drawer together. After the clamps come off the carcass, fit the drawer to its opening, either with hand planes or sanding. Once it fits smoothly, apply a finish to the drawer as well.
I think my saws will be happy now that they’re out of a crowded hand tool cabinet. Maybe this will lead to better organization for the rest of my tools. Then again, I like a little bit of chaos in my shop.

Steve Der-Garabedian - info@blackwalnutstudio.ca
Steve is a worker of wood, a teacher, a writer, a photographer and the owner of Black Walnut Studio.
More Featured projects to consider