SITE MAINTENANCE IN PROGRESS
Build a bevel shooting board
James Dobson
James Dobson
Len Churchill
June 2025
This simple jig makes bevels easy and accurate every time.
Advertisement
- DIFFICULTY2/5
- LENGTH/TIME2/5
- COST1/5
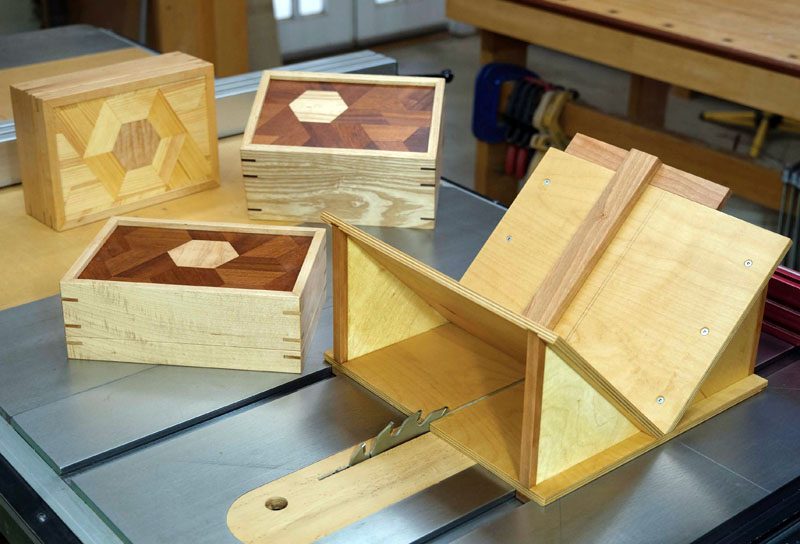
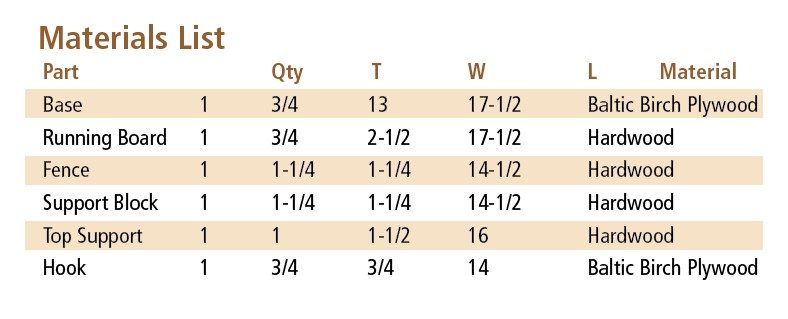
This shooting board is for cutting bevels in the endgrain of workpieces. It’s perfect for small boxes and small case sides. This jig isn’t to be confused with a mitre shooting board, which could be used for picture frames. A bevel runs the width of a wider workpiece, while a mitre is angled across the face of a workpiece.
This jig is built from Baltic birch plywood and a few pieces of hardwood. It should be sized around the plane you plan to use with it. I’m using Veritas’s Low Angle Jack plane, which is common in many workshops, but be aware that you may need to adjust dimensions to fit the plane you wish to use.
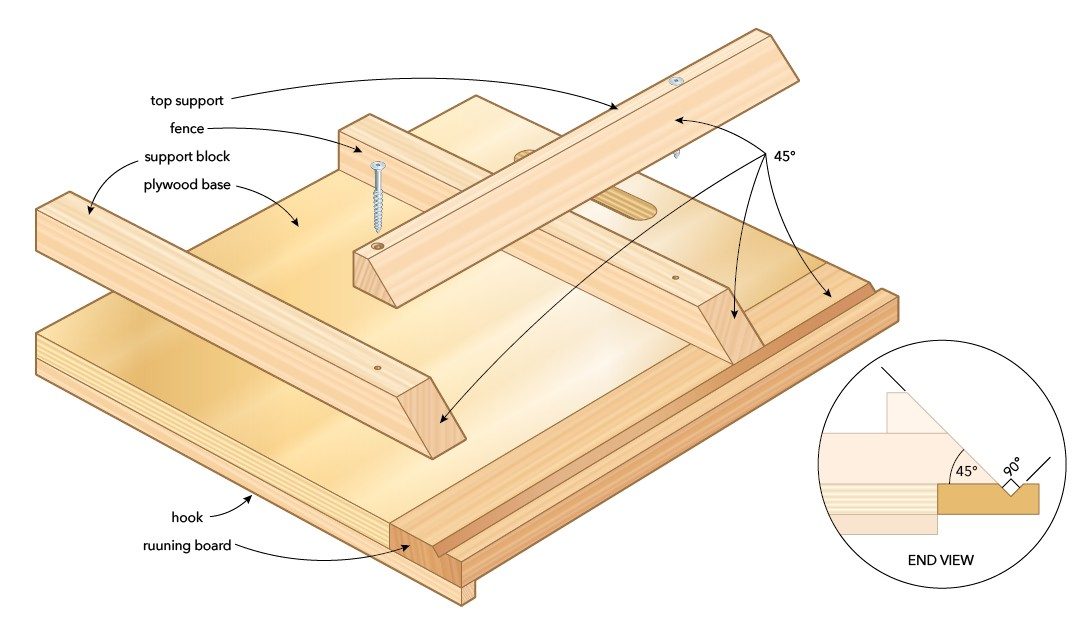
Start by shaping the running board by planing a 2-1/2″ wide piece of hardwood to the exact same thickness as your piece of plywood, which is unlikely to be exactly 3/4″. Ensure both sides of this board are exactly parallel. You will use it to ensure that your fence is square to the plane, later in the process. Set your table saw blade to 45° and cut a groove about halfway through the thickness of this piece of hardwood. Flip the board end for end and adjust your fence so you’re removing a triangular piece of wood from the board.
Glue this piece of hardwood to the sheet of plywood. Use two or three biscuits, dowels or Dominos if you need assistance aligning the pieces.
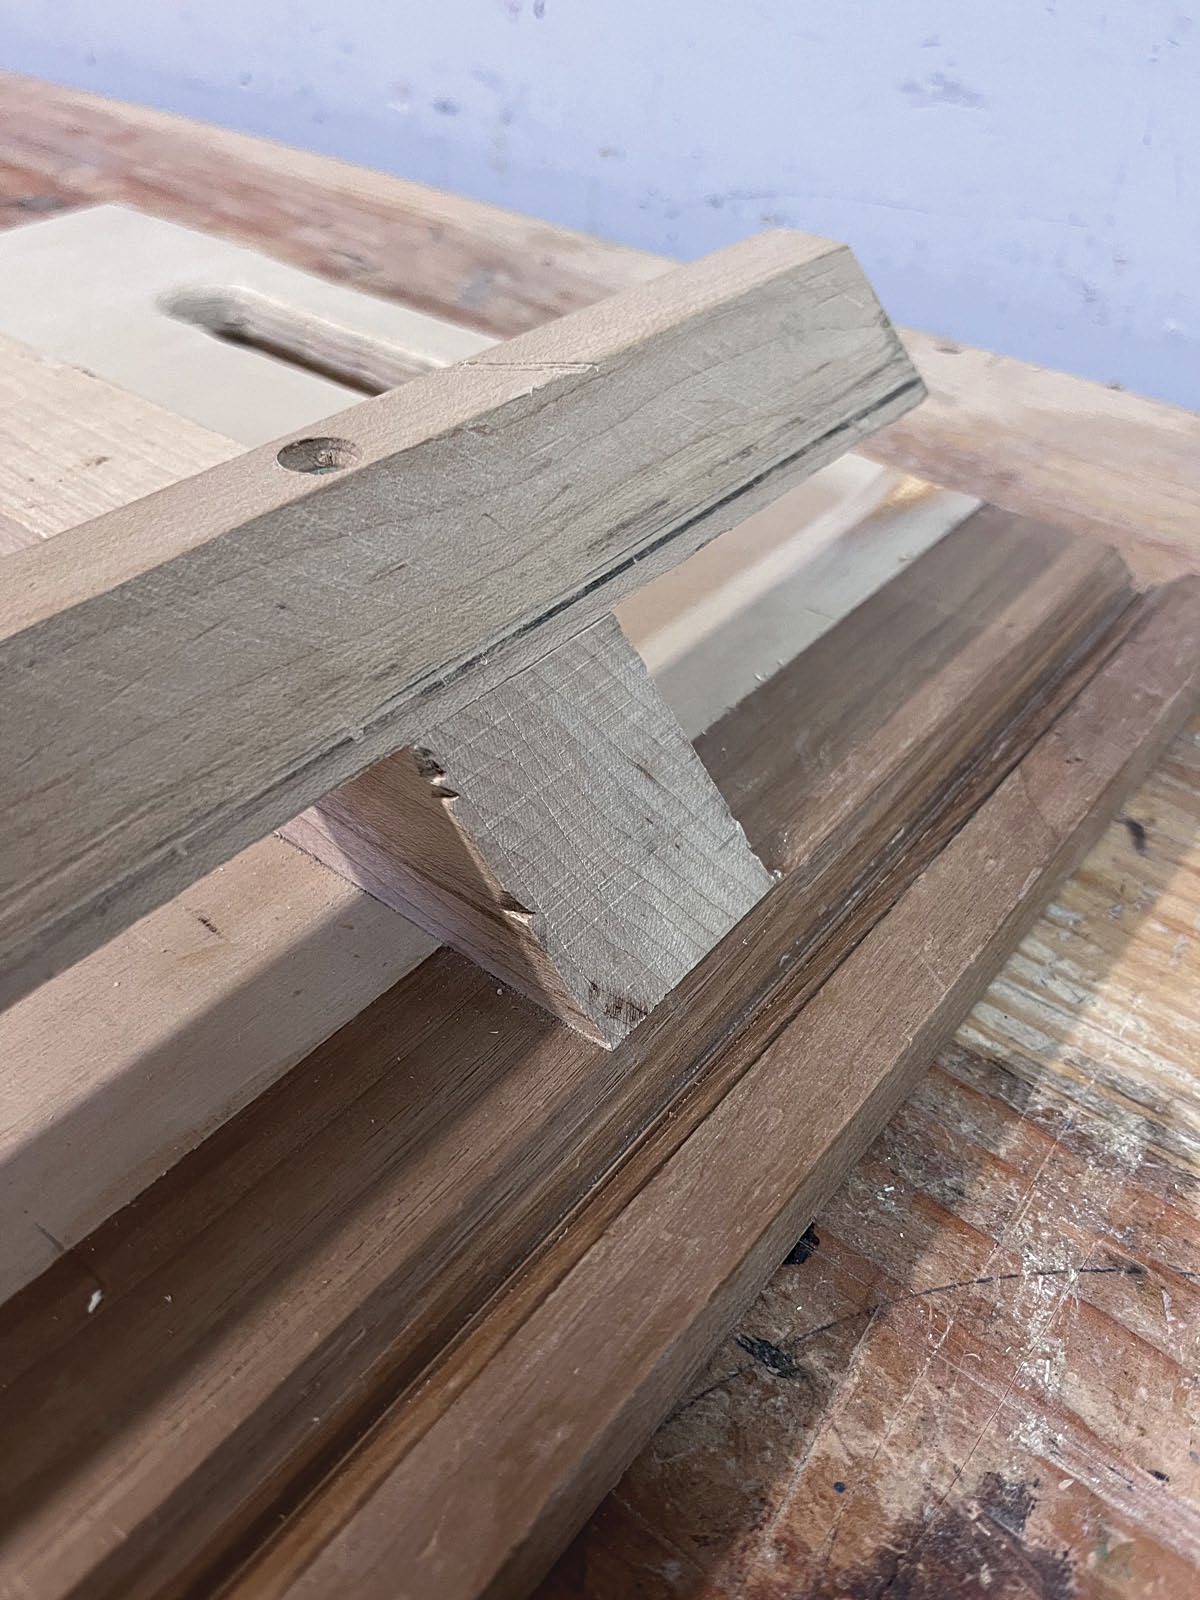
Running Board
The running board supports your hand plane during use. A V-notch is cut into the running board before assembly.
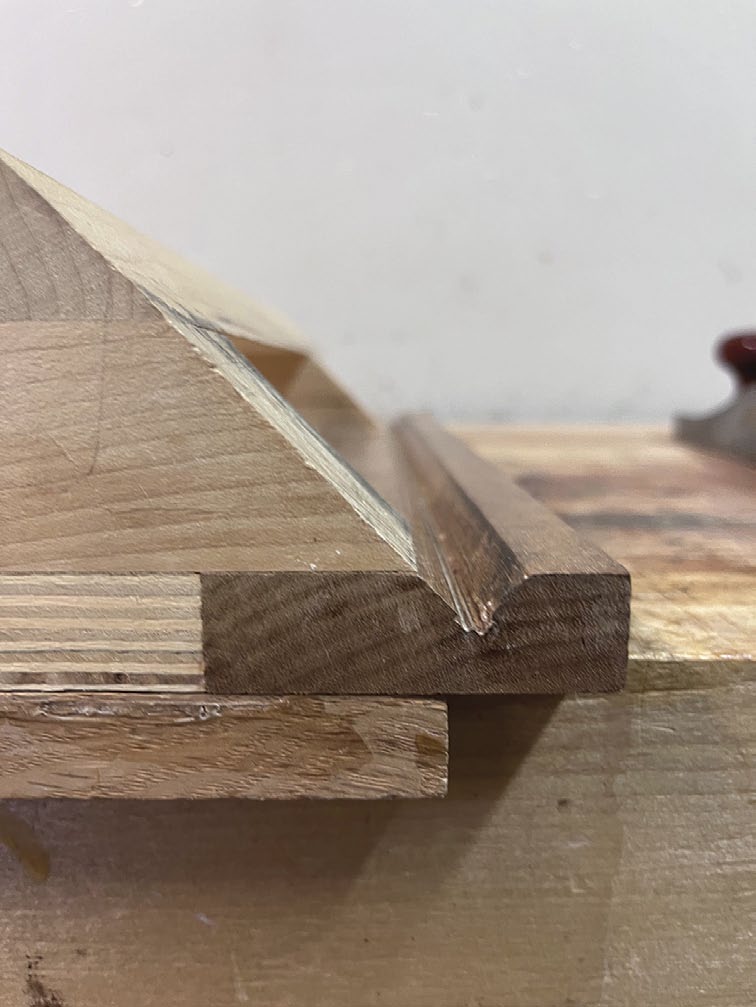
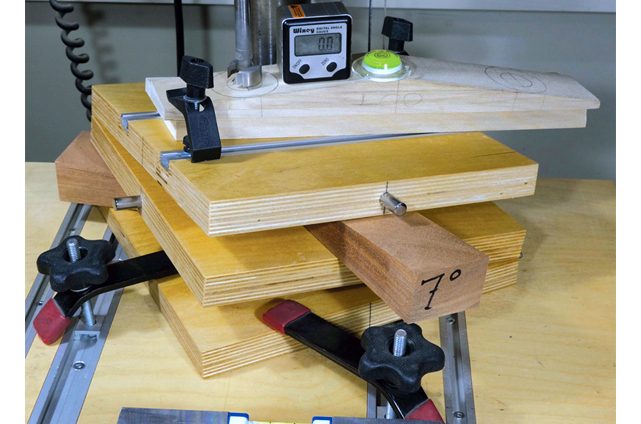
Careful Alignment
The 45° angles on the fence, the support block and the top support are all carefully aligned with the V-notch in the running board. The hand plane will run on these surfaces during use.
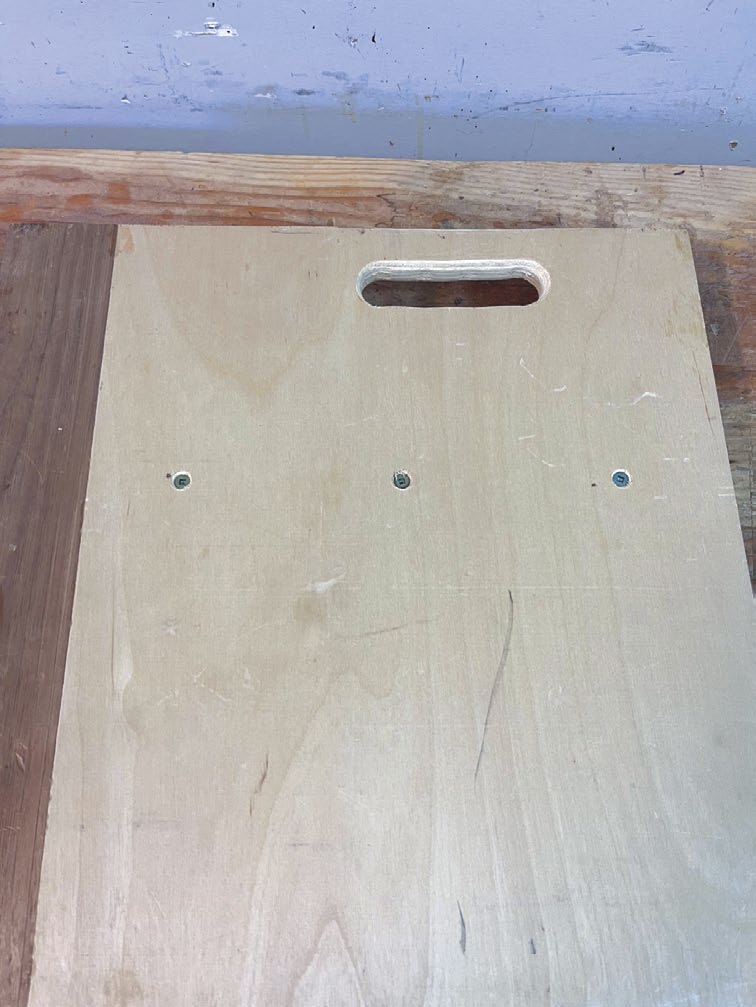
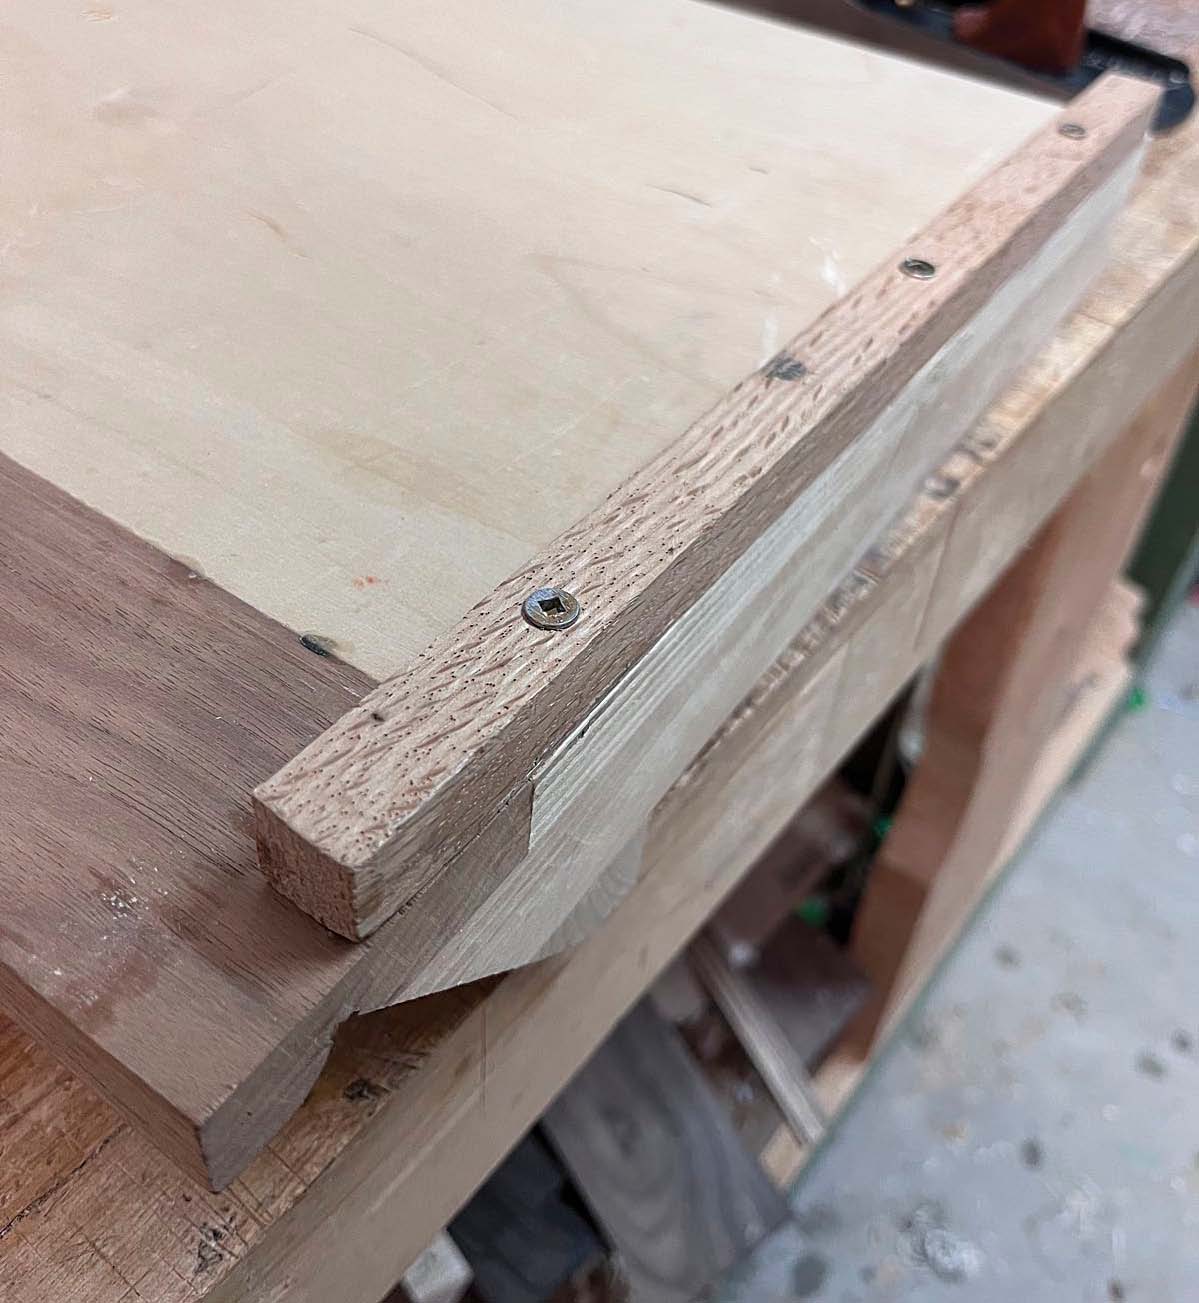
Attach the Fence
The fence is carefully aligned so it’s perpendicular to the V-notch, then fixed in place from below with screws. Not using glue will mean you can further tweak the angle to achieve a perfectly square cut down the road.
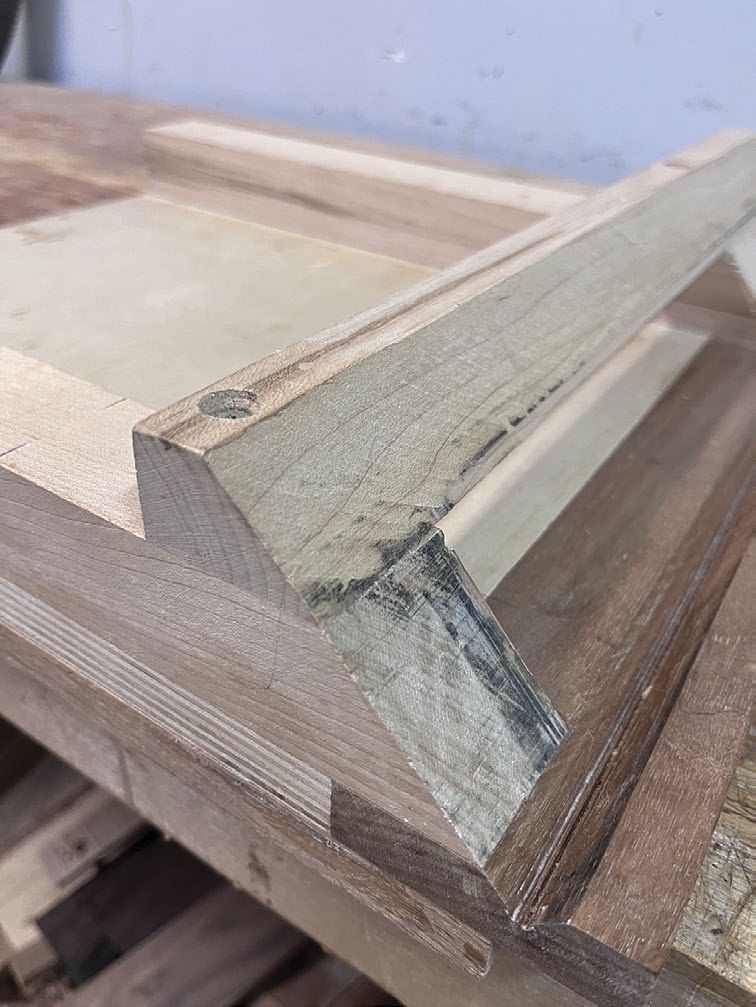
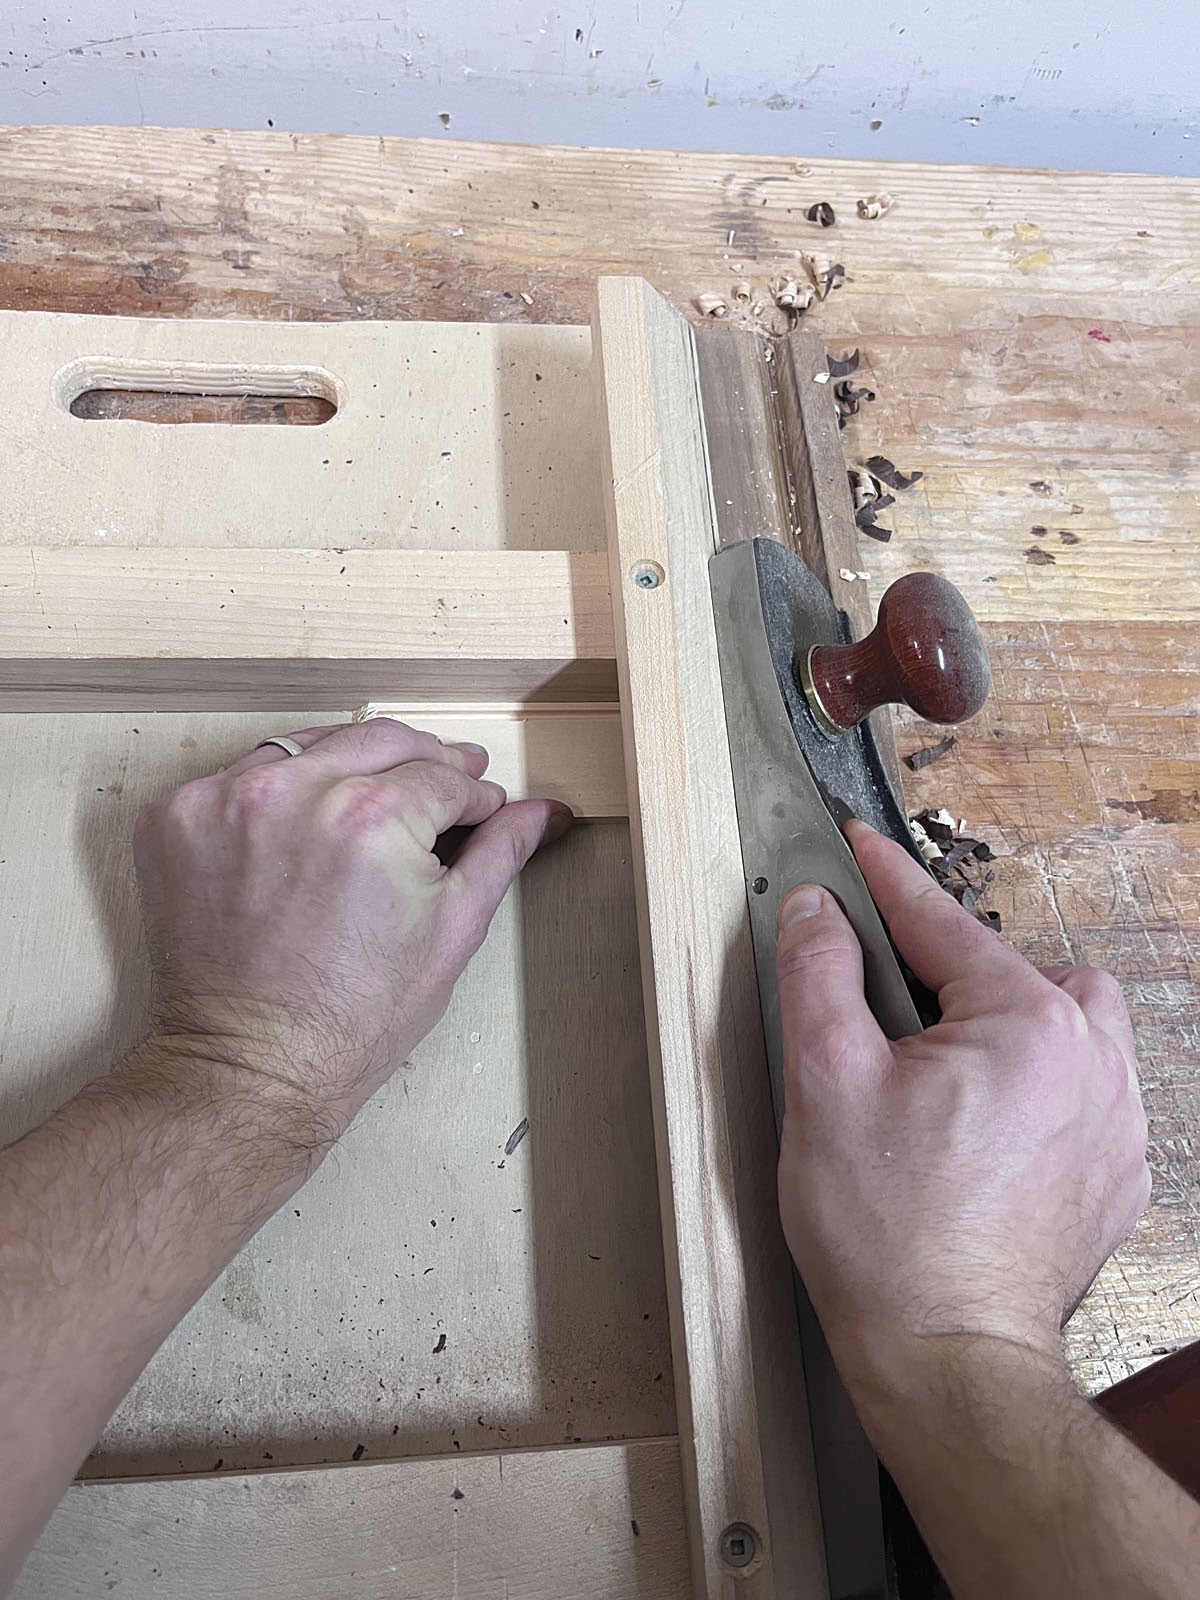
Extend It
The top support extends beyond the fence to offer some support for the hand plane during use.
Keep Still
The hook, which gets fastened to the underside of the shooting board, does a good job at keeping the shooting board in place during use. Clamping the whole jig down might also be needed.
Time to Bevel
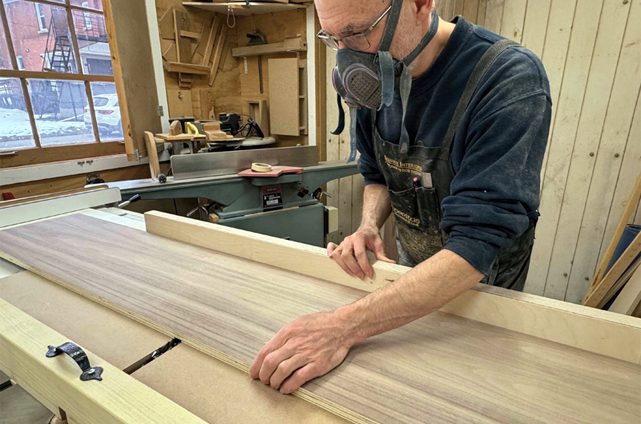
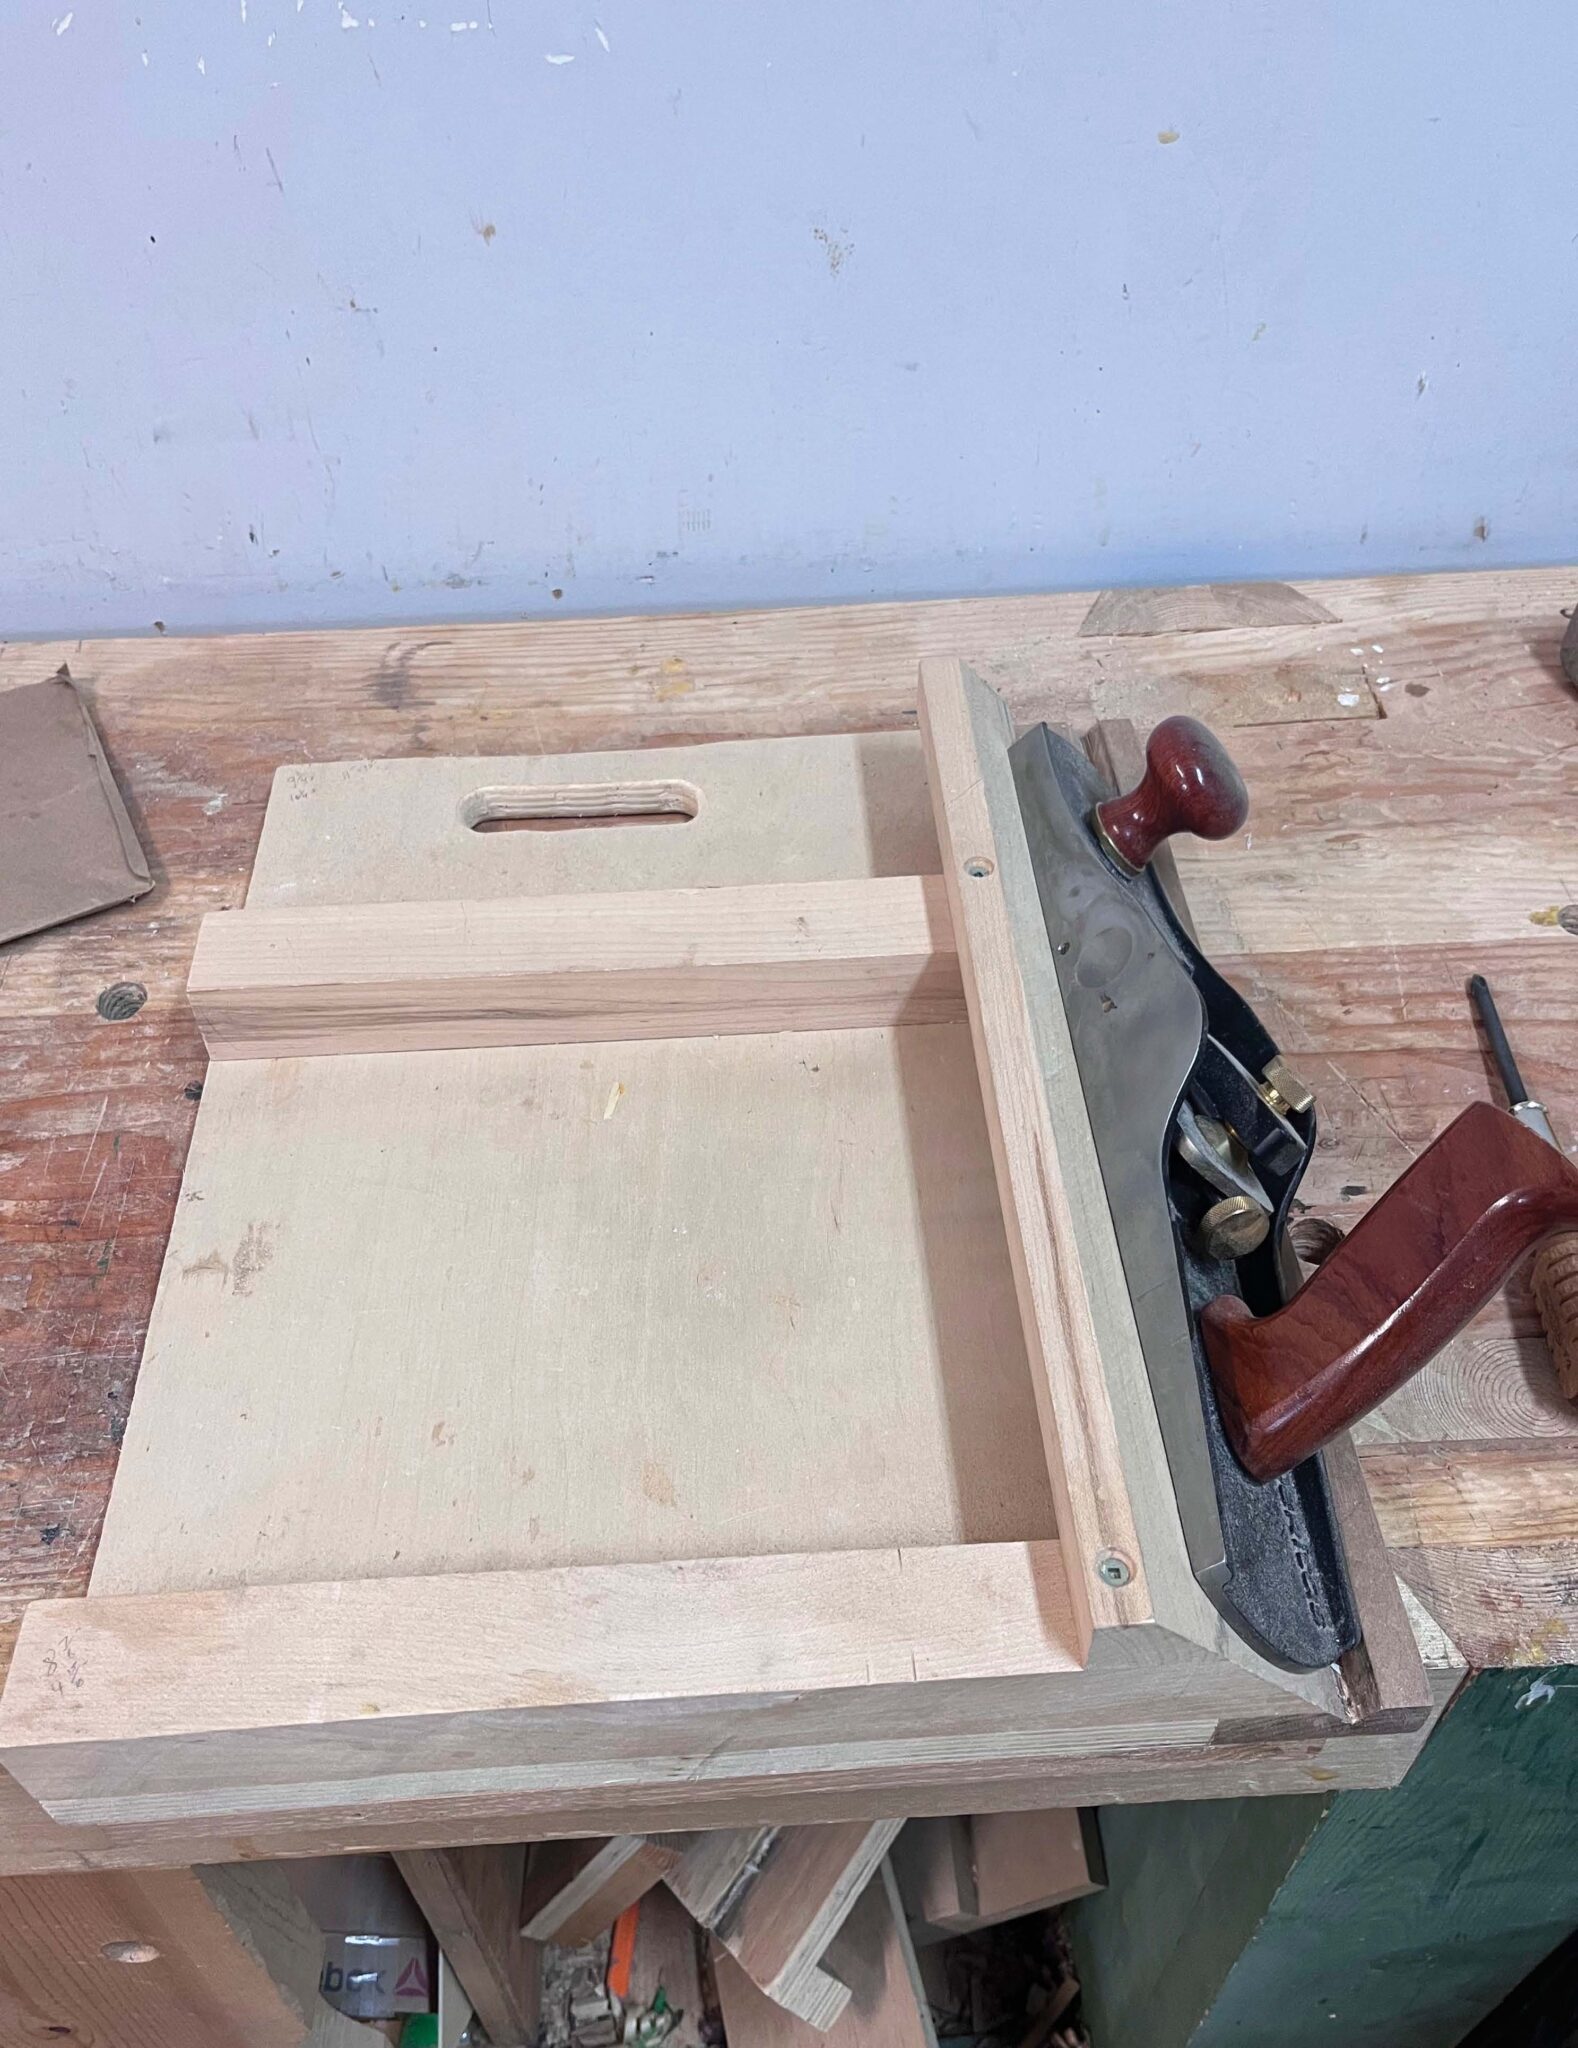
In use, the workpiece gets pressed against the fence while the user trims the bevel onto it
The fence and the support block
These two pieces are identical. The fence is the part the workpiece will rest against during use, while the support block just keeps the top support parallel with the base. Make both at the same time and use the better one for the fence. Ensure you have a flat face and that each corner is perfectly square.
The height of the fence will depend upon the width of your plane. My fence is 1-1/4″ tall. When my plane (a Veritas Low Angle Jack plane – 2-3/4″ wide) is running in the groove at a 45° angle, the top edge of the plane projects above the fence and rests upon the top support. Depending on the width of your plane, you may need to adjust the fence height.
Cut a 45° angle on the end of each piece. Attach your support block first. Drill three holes through the plywood base and countersink from the bottom. Align the support block at 90° to the track cut in your running board. The slope on the support block should align with the groove in the running board. Once aligned, attach with clamps. Making sure it does not shift, drill pilot holes through the plywood base into the support block and attach with screws. You can add glue but I find it difficult to keep the block perfectly aligned with slippery glue in the joint.
The fence is attached in exactly the same way but perfect alignment is critical here. Start by drilling the holes in the plywood base and countersinking. Aligning your fence is complicated here by the difficulty in placing a clamp at the centre of the jig. To overcome this, ensure that the slopes are aligned on the fence and the running board and then drive a screw through the base into the fence (don’t forget the pilot hole). Tighten it so the fence doesn’t wiggle back and forth, but not so tight you can’t shift it. Using your square, align the fence square to the running board, then clamp the end in place. Add the remaining two screws to secure it.
Add the top support
The final piece is the top support. Rip a piece of hardwood at 45° and crosscut it to the same length as your plywood base. Drill pilot holes, countersink and attach to the fence and support block aligning the slope of the top support with those on the block and fence. The top support, fence/support block and running board should have a surface on the same plane that is aligned at 45° relative to the plywood base. This is what your hand plane will travel on, in use. The top support extends past the fence to provide support to your hand plane at the end of each stroke.
The hook
The final task is to attach a hook on the bottom edge of the plywood base. This is just a simple strip of material that hooks to your bench to keep the jig from sliding away as you use it. Drill pilot holes and attach it with a couple of screws. You can also add a handle or a hole for hanging the shooting board on the wall.
Test it out
Take a couple of passes on a test board. Ensure that your plane blade is not skewed; it needs to be aligned with the mouth of the plane for the jig to work. Check your angle. If you’ve been accurate to this point you should have a perfect 45° bevel. Then check to see that your 45° cut is 90° to the edge of the test board. Again, accuracy in your work to this point should mean it’s square, but if not, here you can make some adjustments. A strip or two of tape against the fence can accommodate slight deviations. Or, if you didn’t secure the fence to the base with glue, you can make some slight adjustments to it and re-attach it. Once the jig is aligned, long edge bevels should be simple.
The bevel joint is the bane of many a woodworker’s experience. They look so simple but the smallest of errors or slips can leave a gap that ruins their smooth, seamless look. Putting time into a dedicated shooting board can save you hours of frustration later.

James Dobson - grailwoodworks@gmail.com
More Jigs projects to consider