Optical illusions in wood

The only gift more fascinating than a custom-made cutting board is one that incorporates an optical illusion.
- DIFFICULTY2/5
- LENGTH/TIME2/5
- COST1/5
This board includes a lot of end grain gluing. It’s fairly strong, but won’t stand up to a lot of abuse. These boards will serve me more as art than for food prep. If you want, you could easily create this illusion in an end-grain board.
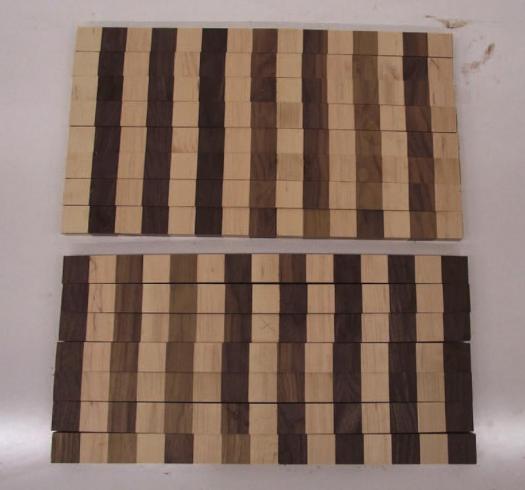
Alternating Strips
Pictured here are enough strips for one board. They were cross-cut from two separate panels, with opposing wood species patterns, and will eventually be glued up, alternating one of each strip.
Helping Hand
Chemerika used hot-melt glue to temporarily fix a plastic drawer slider to two of her woodworking squares. One was fixed to drill holes on the left hand side of the wood squares (1st photo below), while the other was fixed to drill holes on the right hand side (2nd photo below).
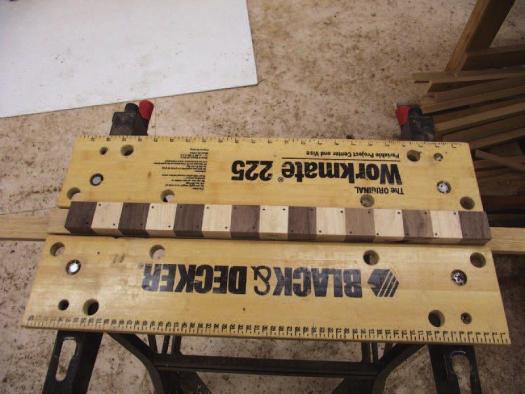
Secure the Strips
Chemerika used a Workmate to hold each strip while she located and drilled the holes with a hand drill.
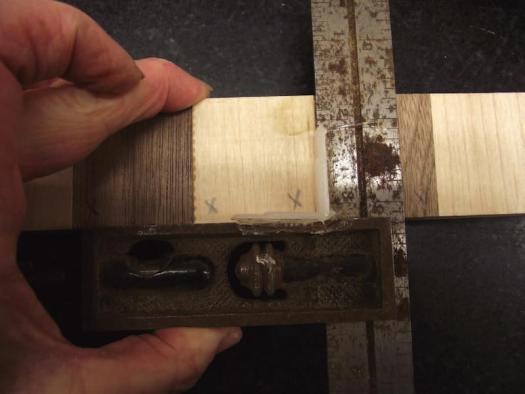
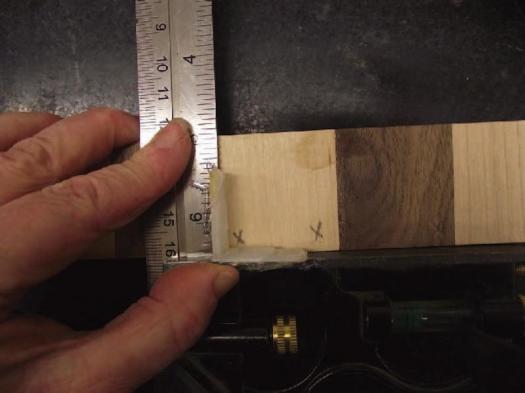
Careful Planning
To locate all the holes, Chemerika laid all the strips out in their final order, looked at a picture of the illusion and marked an “X” as needed.

Lots of Plugs
Chemerika drilled extra-deep plugs, then cut them to about 1/4" long on her bandsaw. This sped up the tedious process of making enough plugs.
Machine and glue some strips
Though you can use any two species you want, contrasting colours are crucial. I first glued up 15 alternating strips of 1-1/2″ wide by 7/8″ thick walnut and maple, approximately 40″ long for two boards, or 20″ long if you’re only making one board. I recommend doing two boards, as the first step is to glue up opposing boards, then alternate cross-cut strips from each board when you glue the strips back together.
Gluing up the first panel, I started with walnut on the outside edges and maple as the center strip. I glued up the second panel the opposite way. This size of glue-up yields two boards that are approximately 22-1/2″ x 22-1/2″ x 7/8″ thick.
Cross-cut then start drilling
I then cross-cut these glue ups into 1-1/2″ long slices. The slices are laid out alternating a slice from each glue-up. Following the pattern, I marked where each plug of the alternating colour of wood should be placed. Surely there’s a science to where to locate the holes, but I found it much easier to simply look at a photo of the illusion while I was planning their locations.
I made two jigs for right and left side drilling of the plugs by adapting two of my woodworking squares. I hot-glued a plastic drawer corner into each of the squares so there was a small amount of wood between the edge of the plugs and the sides of the block being drilled. This made the placement of each plug uniform and easy to drill. I drilled 3/8″ holes about 1/4″ deep. I set up a Workmate and used a hand drill to bore the plug holes. Another option would be to use a drill press, though determining the exact location of each hole is harder than you would think.
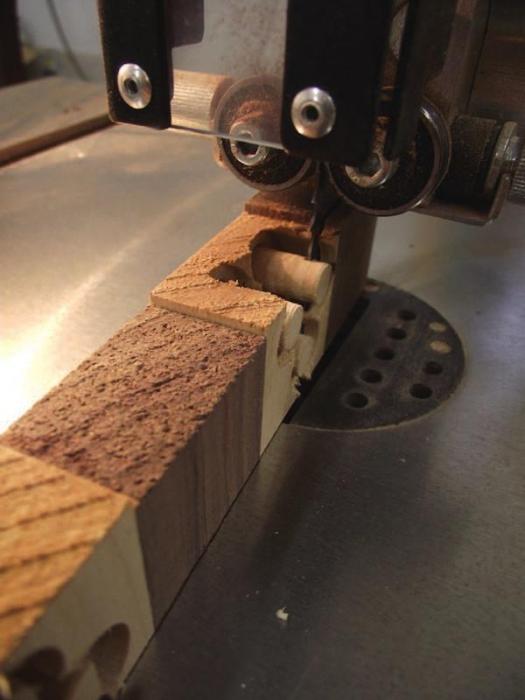
Drill some plugs
I drilled all of the plugs from scrap pieces of maple and walnut. Use whatever two species you started with, or the strength of the illusion will be weakened. They were about 1″ long so I took the plug blank, after I drilled it, to the bandsaw and cut slices of plugs a little more than 1/4″ deep. This way I did not have to drill nearly as many plugs, as I could get about three plugs out of each plug blank. Depending on the type of plug cutter you have, this may not be possible. While cutting the plugs on the bandsaw, the offcuts tended to fly around a little, and there was a bit of a search around the shop for them when I was complete, but overall time was saved with this process.
If the plug holes are close to the outer edge of each square, you should install the plugs after assembling the strips, so you don’t chip any of the short grain wood. Otherwise, it doesn’t really matter when the plugs are installed.
The slices were glued up in the correct order to make the checkerboard pattern. I used cauls to keep the strips aligned as evenly as possible. Once the board was dry, I glued the plugs into the holes and let them dry. I then flushed the plugs, sanded the surface and finished all surfaces with mineral oil.
You could use smaller sizes to get a smaller board if desired. Start with 1″ square strips and drill 1/4″ diameter holes to make a board 15″ x 15″ x 7/8″ thick.

Lisa Chemerika - ourliser@gmail.com

