< 
How to safely and accurately mill lumber

Milling rough lumber is an important skill to have. Set yourself up for success by learning the proper steps.
Milling lumber is a crucial step in furniture making. The goal is to machine the parts to the correct dimensions while at the same time keeping them flat, straight and square. The milling process often releases tension in the wood that may cause it to cup and twist. Additionally, as the wood is milled, it’s likely to have some movement until the moisture content stabilizes, which can take a day or more. Starting with properly air- or kiln-dried lumber helps, as does letting the lumber acclimate in the shop for a week or more before milling. It’s important to follow a process that maximizes the chances of success.
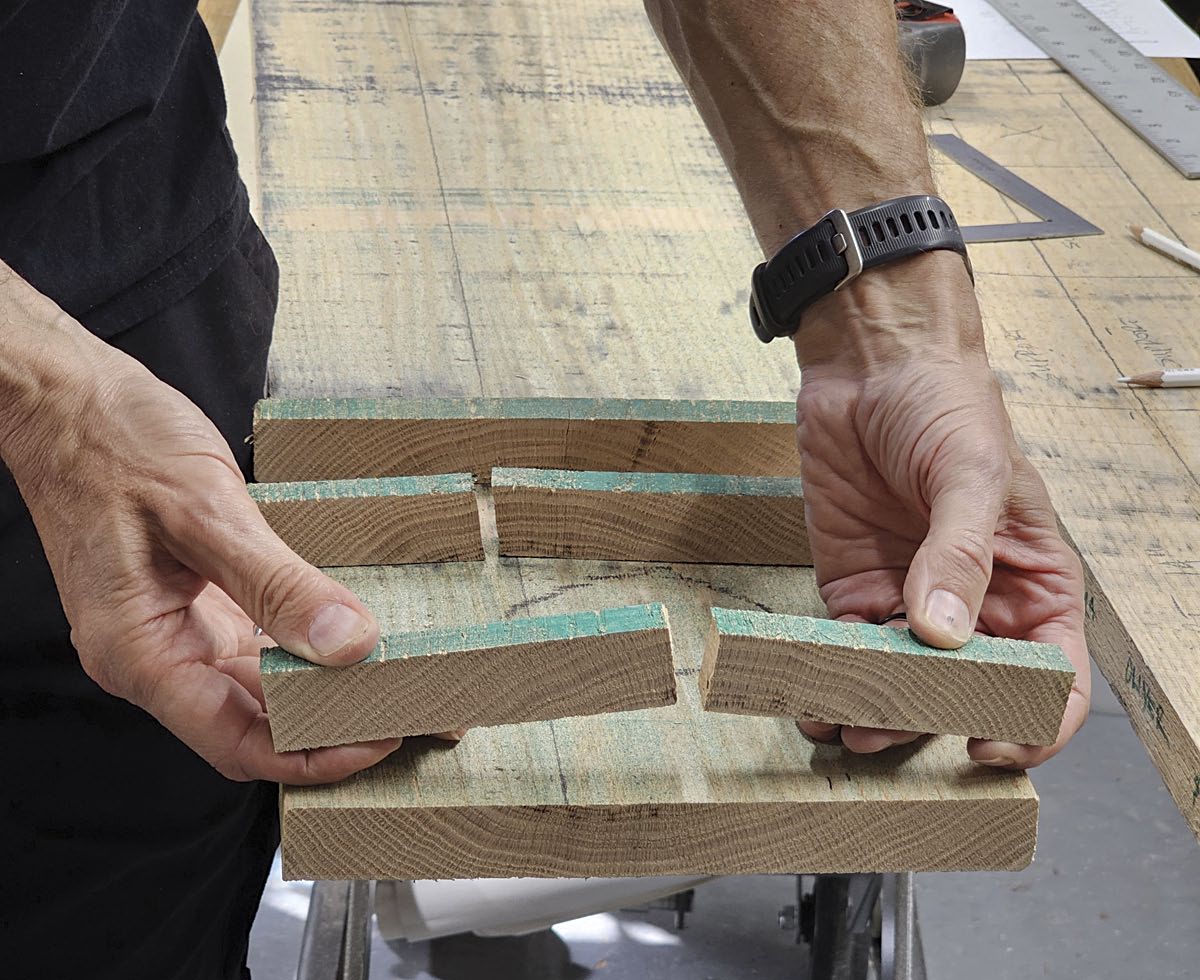
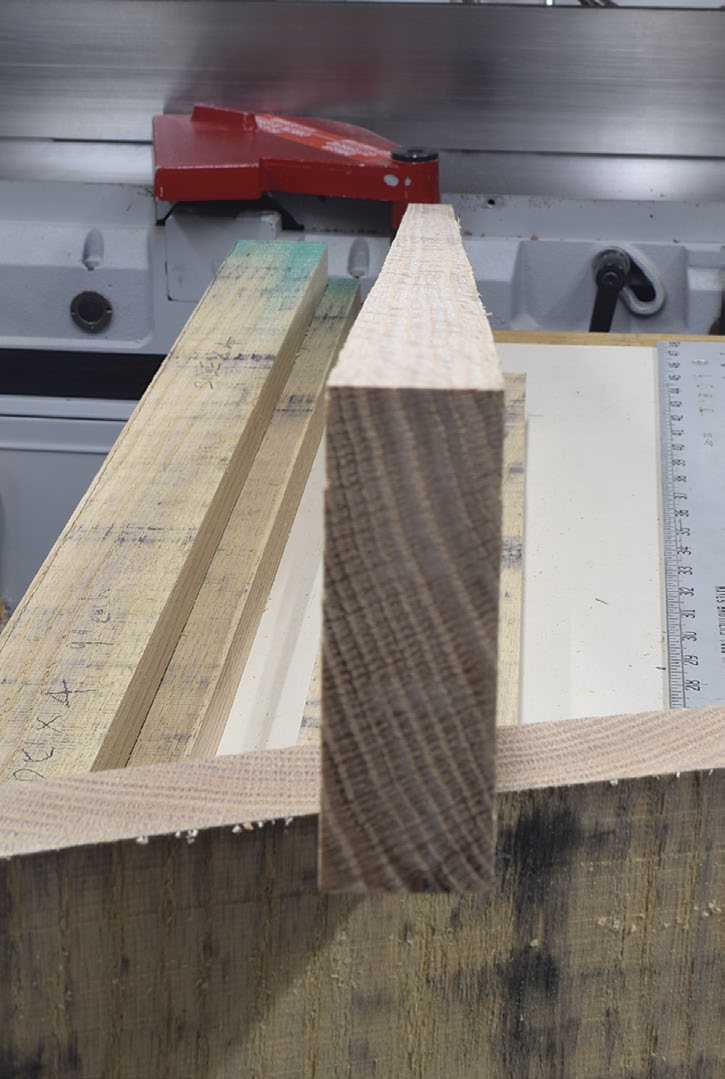
Beware of Cracks
The ends of the boards may have hidden cracks and checks that can spoil a part. Cut off an inch at a time from the end until you’re confident the crack has been removed.
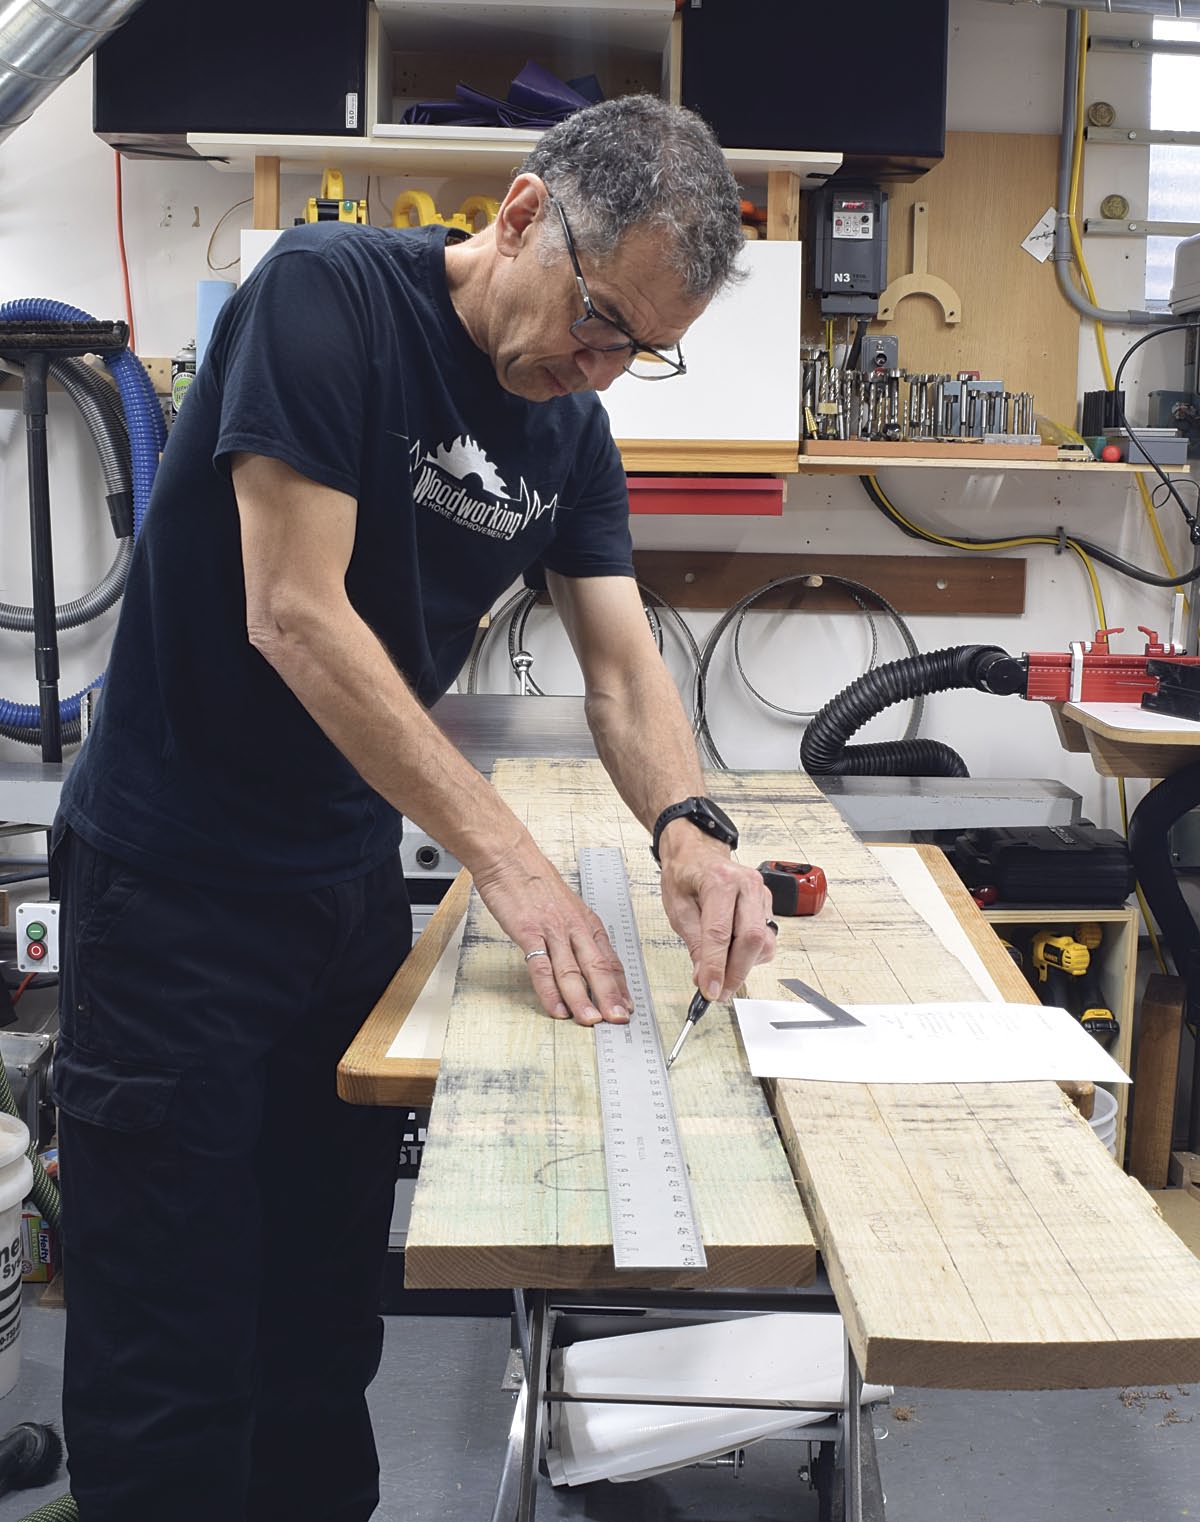
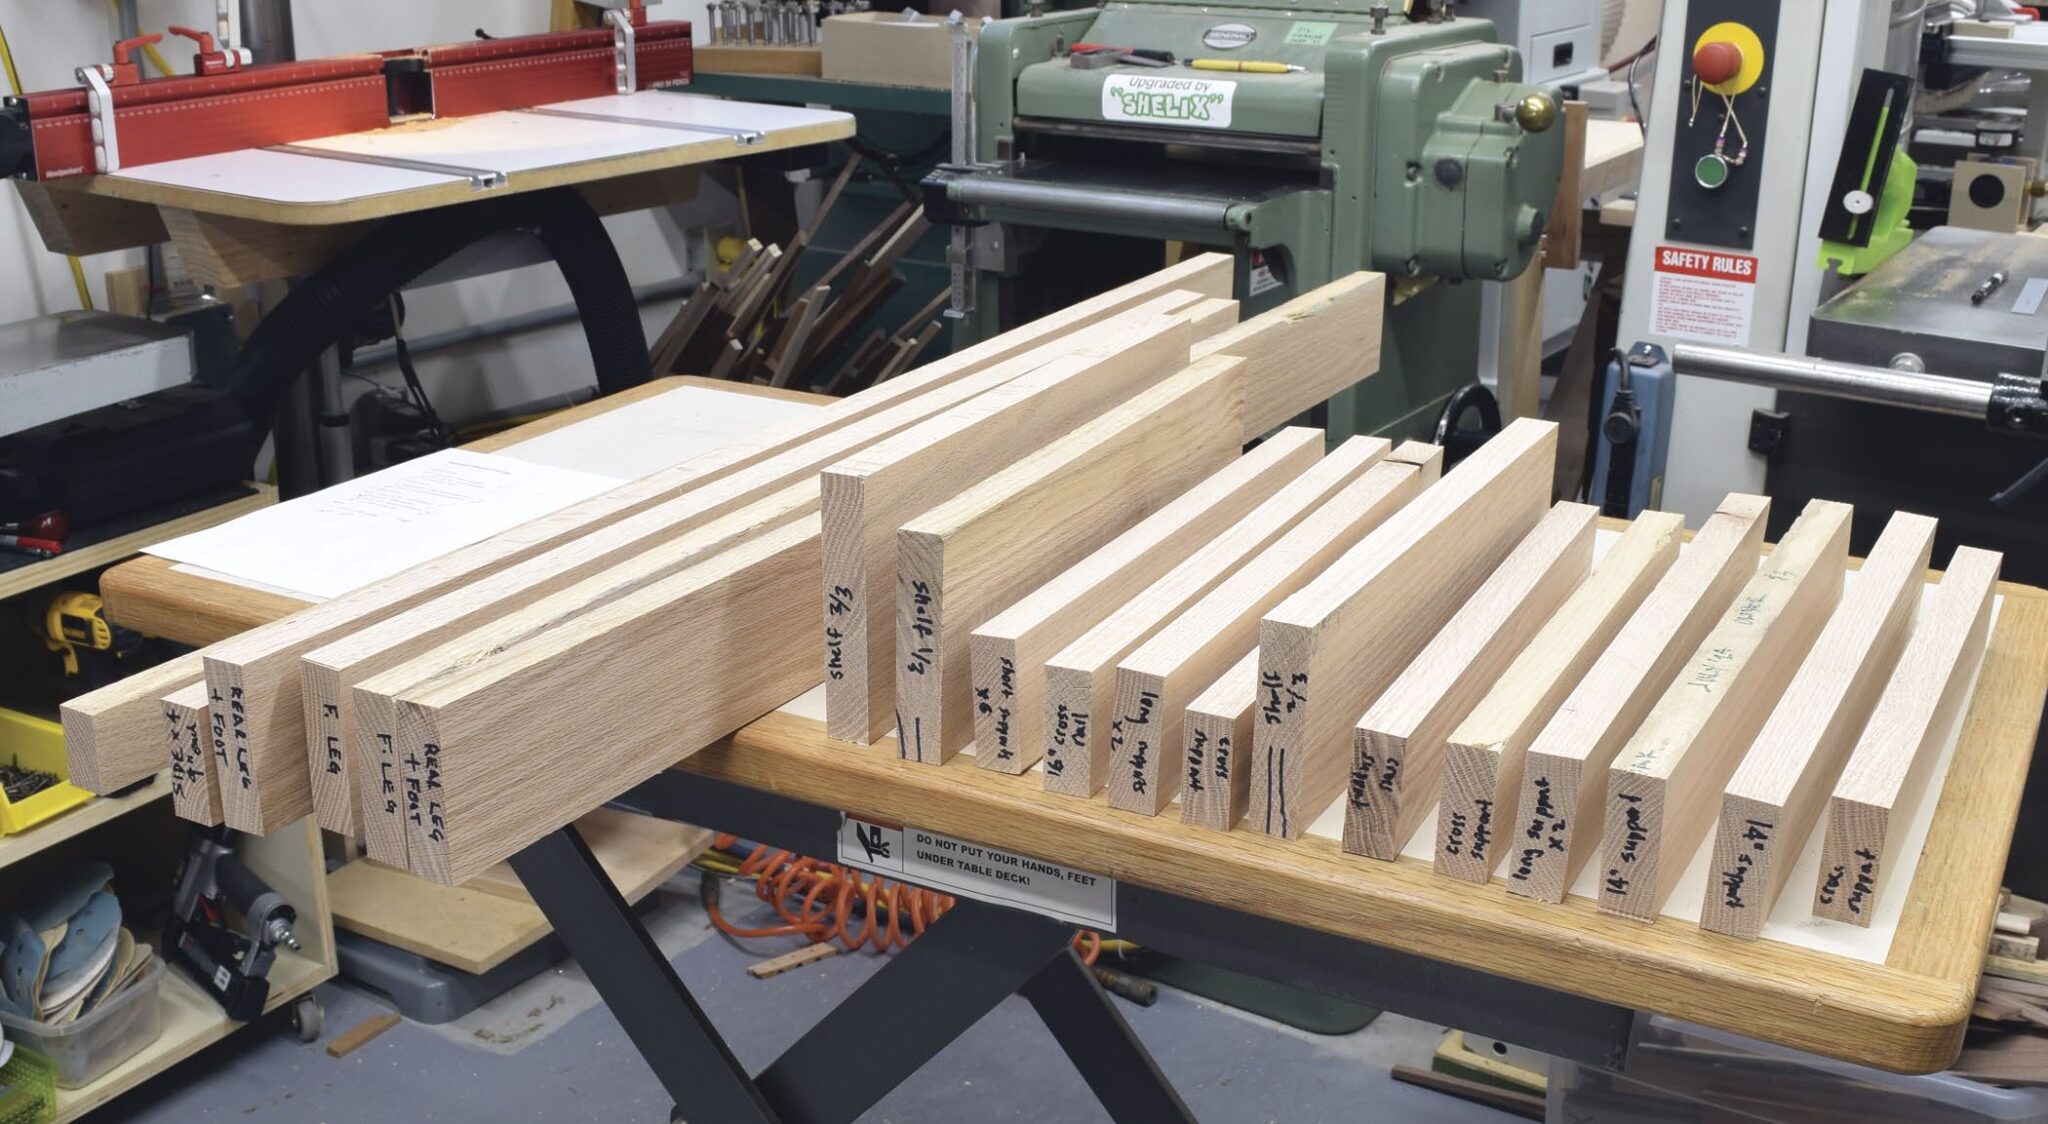
Part Layout
Bedrosian uses a cut list, a straightedge and a wide pencil to mark out each of the parts. Leave extra length and width to allow for planer snipe and wood movement. Pay attention to the grain orientation for each of the parts to give a harmonious look when the project is completed.
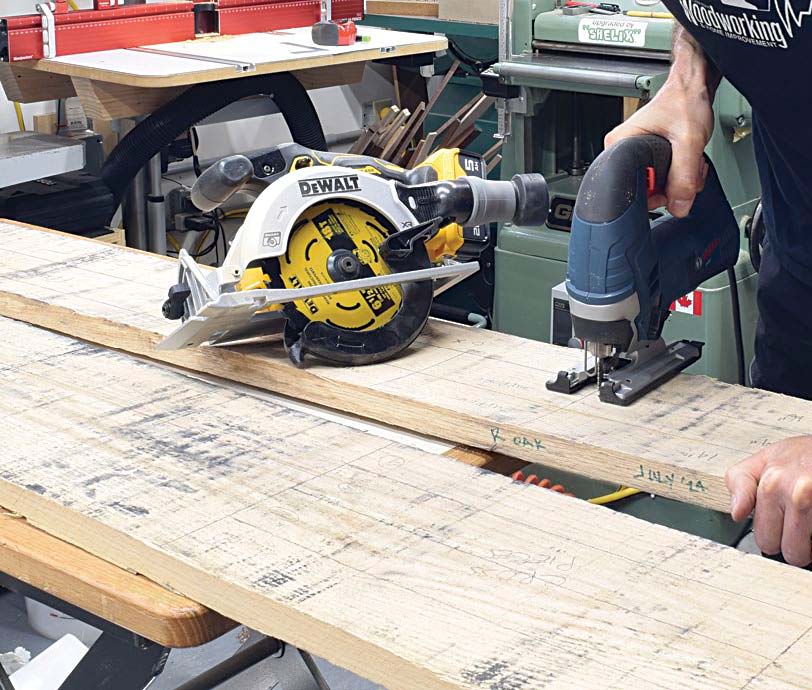
Bring the Saw to the Workpiece
A jigsaw, handheld circular saw or a hand saw are the safest ways to cut the boards to length.
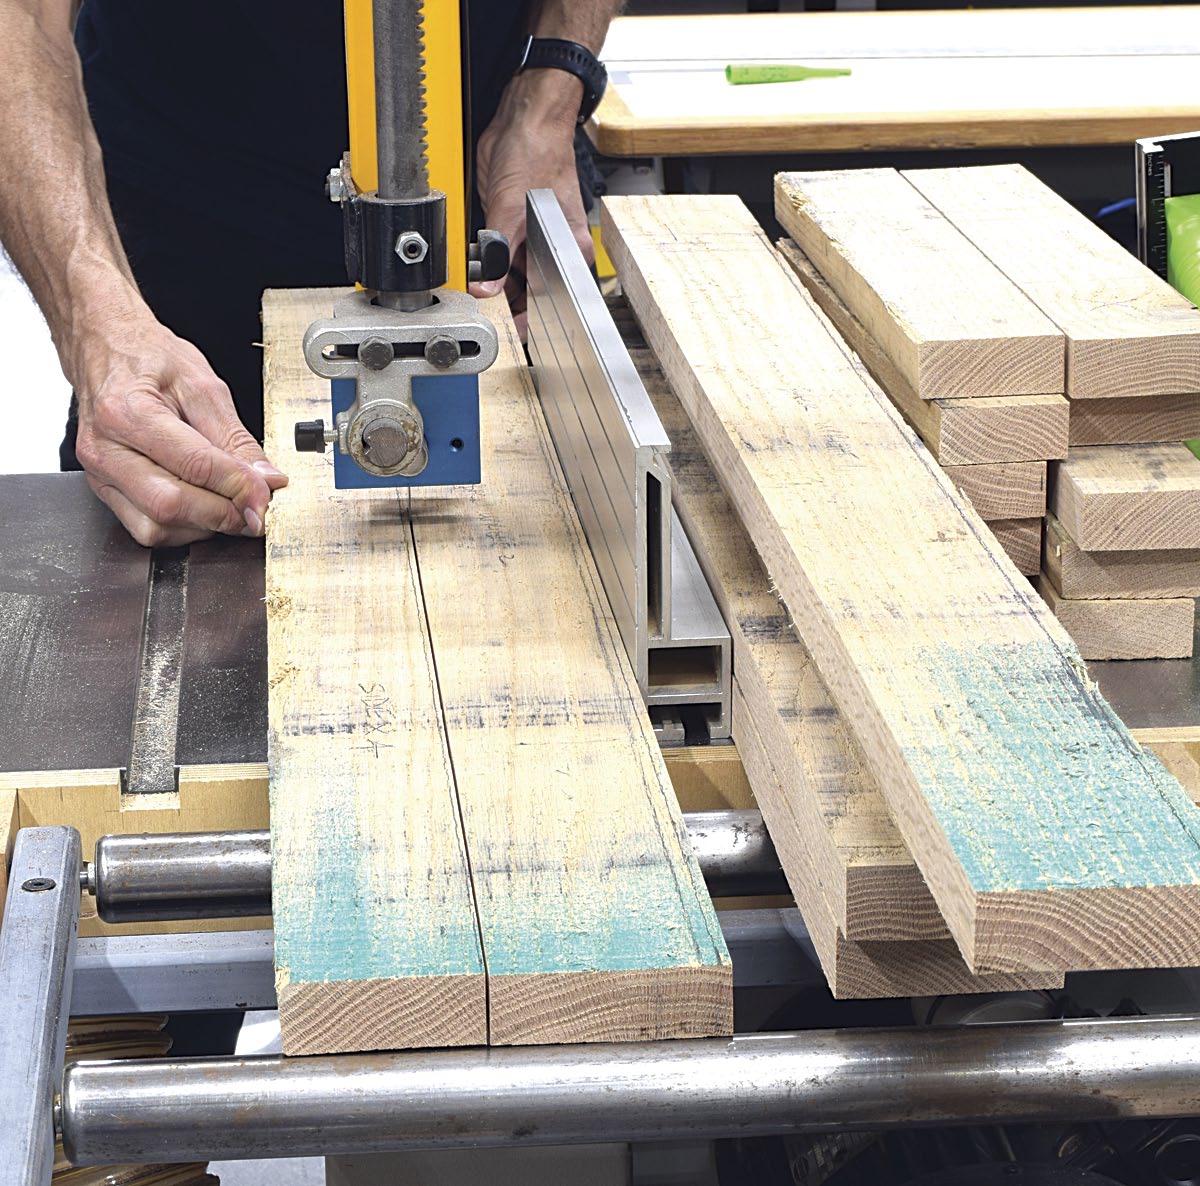
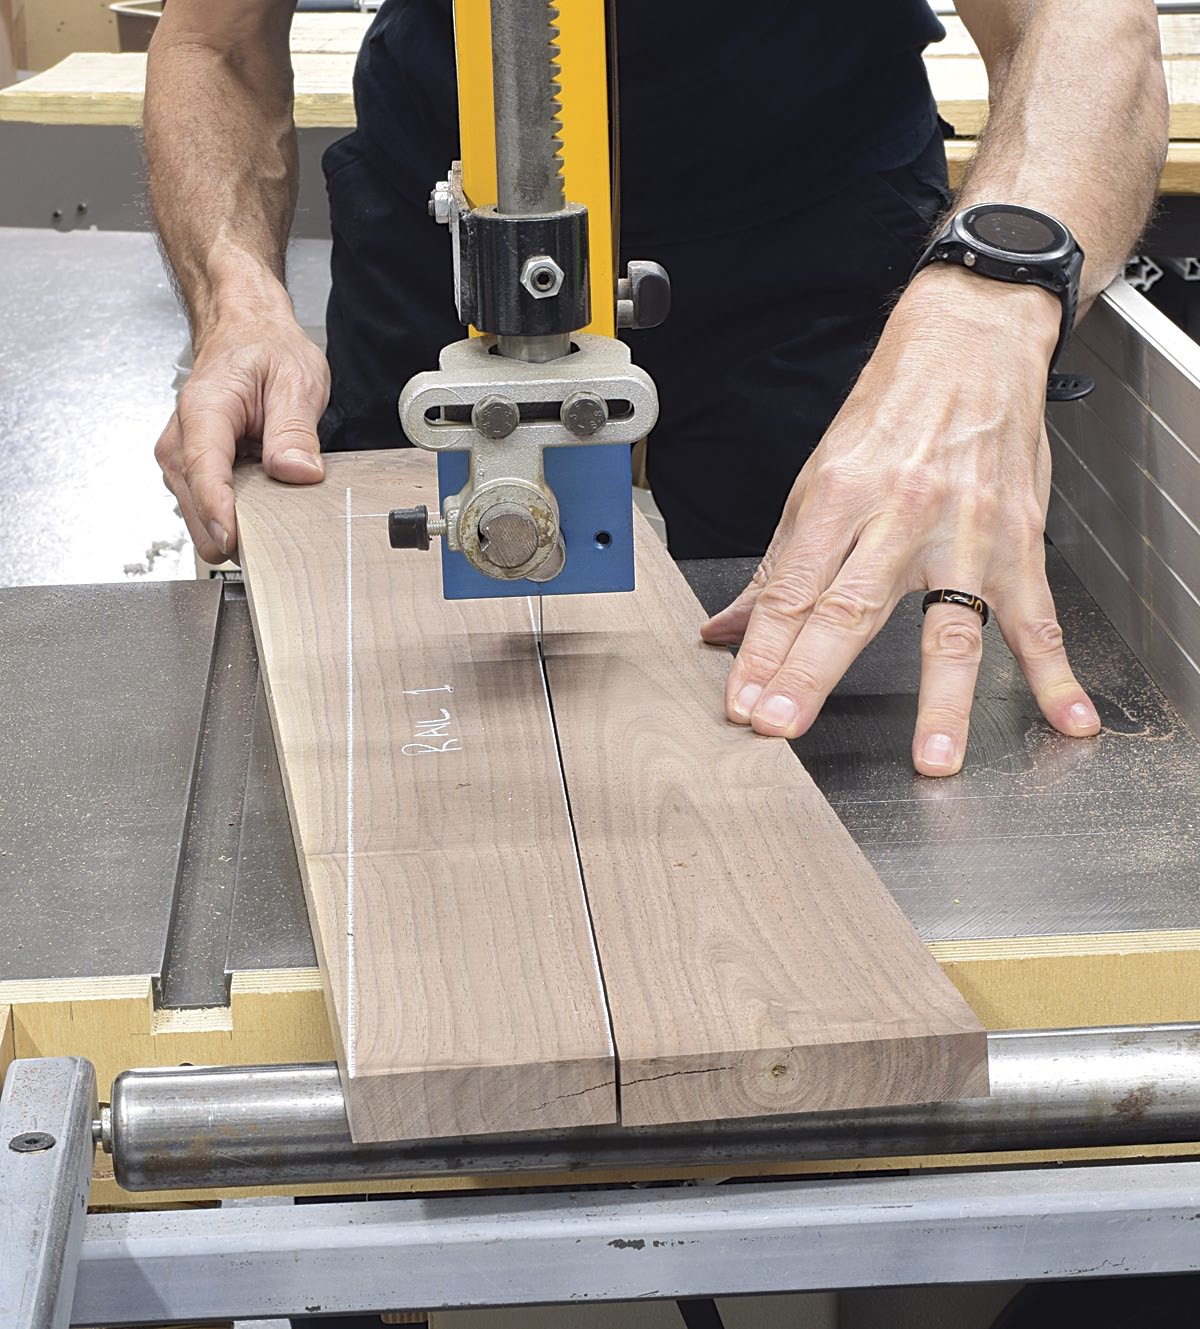
Head to the Bandsaw for Ripping
There’s too much chance of kickback when ripping rough lumber at a table saw, so Bedrosian uses his bandsaw instead. He uses the fence if the edge of the board is relatively straight and the cut is parallel to the edge.
Look for Problem Boards
Cutting the boards to width releases tension within the lumber that may cause warping. This typically isn’t a problem for shorter boards, but longer boards need inspection. Bedrosian checks for excessive twisting or cupping that could result in the part being too thin after jointing and planing.
Follow the Grain
In some cases, as with this walnut board, the grain is angled. To get the best-looking part, Bedrosian draws the cutline parallel to the grain and follows that line with a freehand cut at his bandsaw.
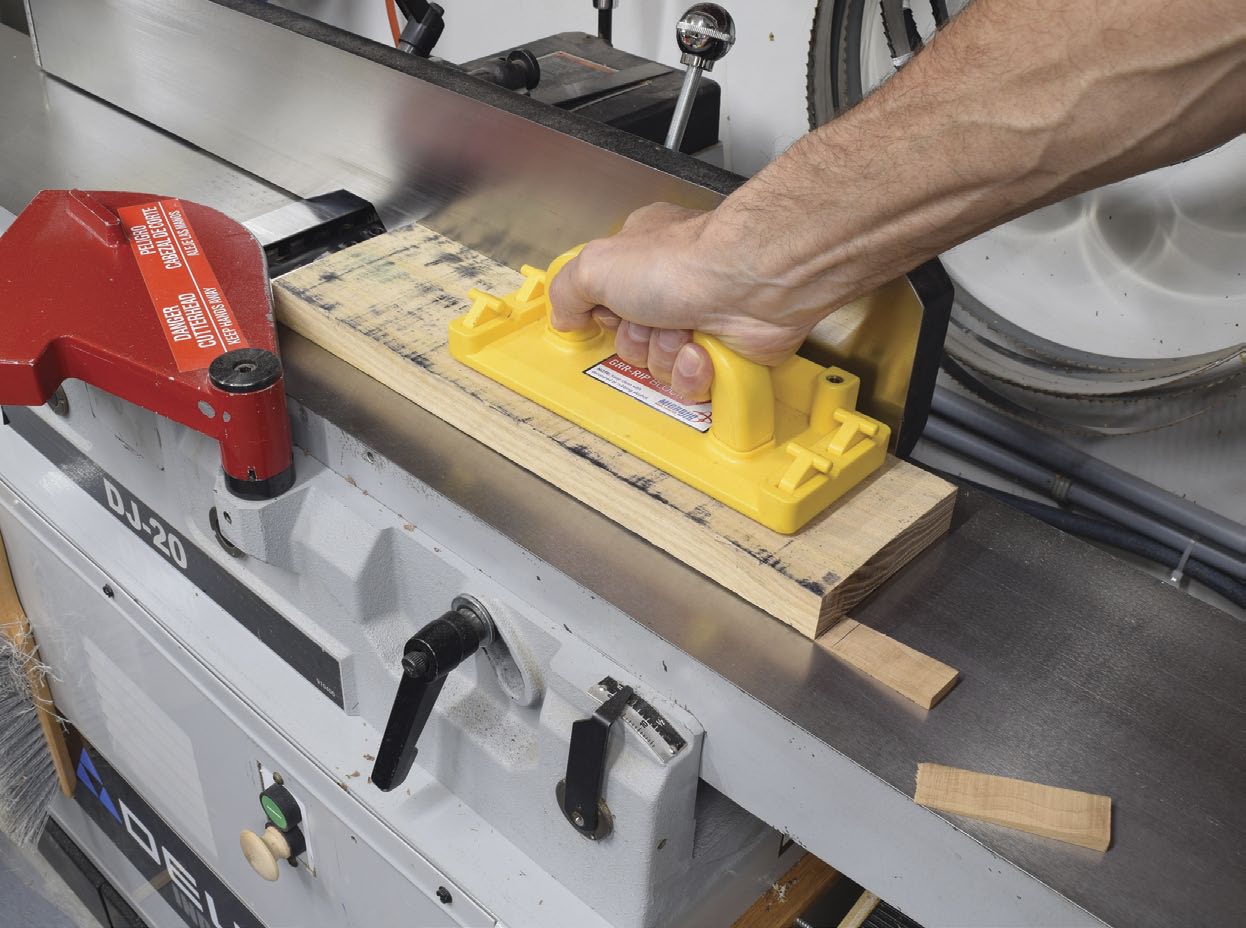
Wedge Away Any Twist
It’s not uncommon for rough-sawn lumber to be twisted, causing it to rock on the infeed table. To stabilize the board, Bedrosian uses a small wooden wedge under the high side. He inserts the wedge only far enough so the twist is the same between the front and back. This equalizes the amount of wood removed from both sides of the board, allowing him to get the maximum thickness. Bedrosian pulls out the wedge before it gets to the cutterhead.
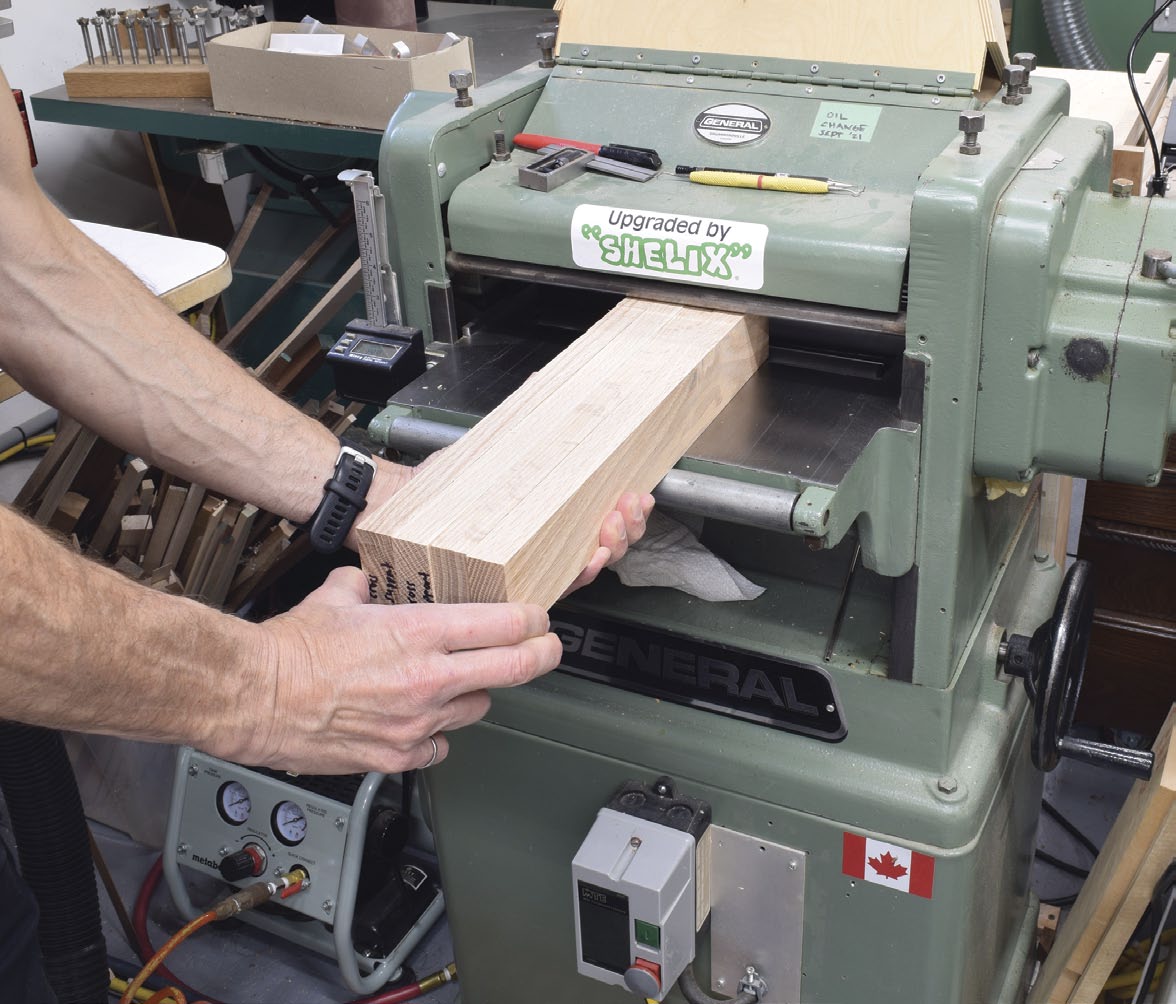
Plane Parallel Faces
After jointing all parts flat on one face, they’re run through the planer to make the opposite face parallel. Bedrosian aims to leave each piece about 1/8" thicker than needed in case they warp. Bedrosian previously marked the end of each part so he can keep track of them as they’re milled.
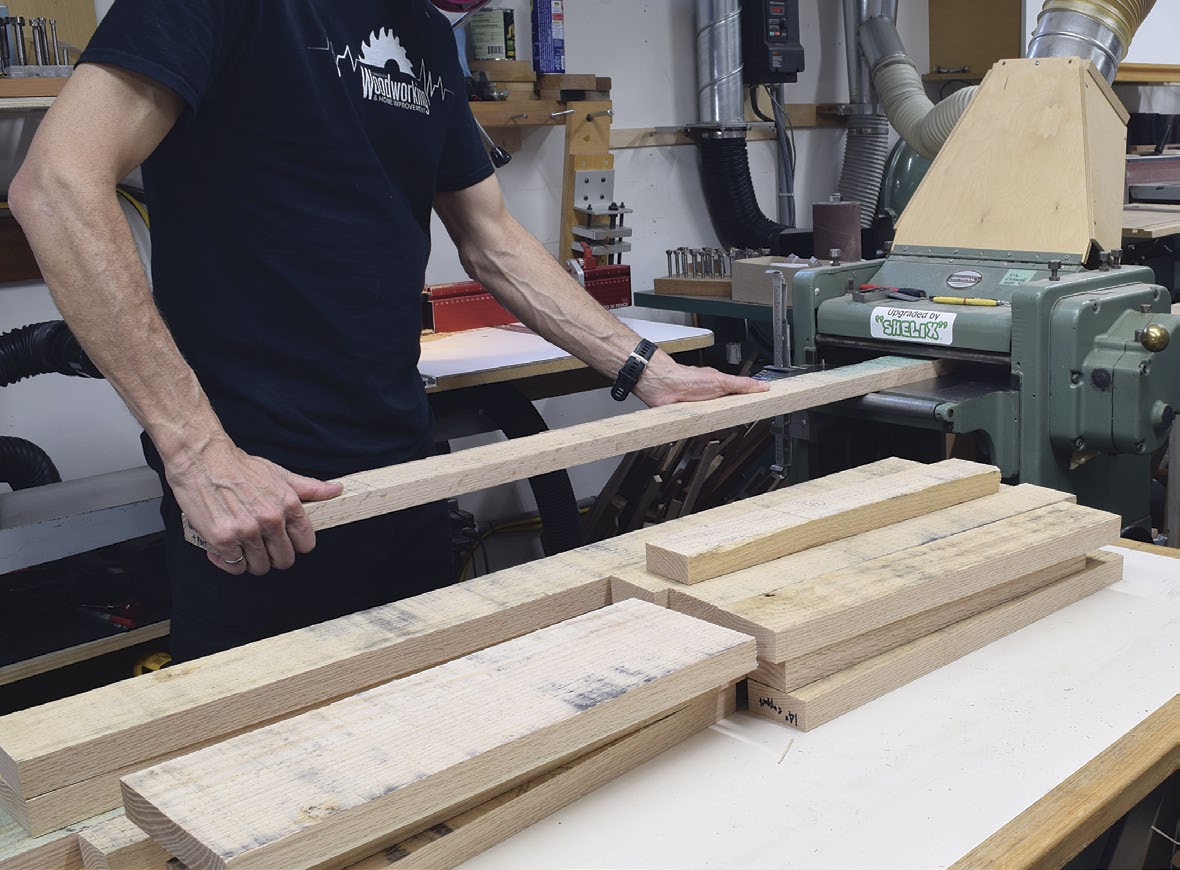
Let the Parts Move
The boards may not be flat after jointing and planing. Even if they are, the boards may still warp as the moisture content equalizes. To account for this, Bedrosian either stickers the boards or he turns them on edge and lets them sit for a few days or longer for parts that won’t be used immediately. A second pass of jointing and planing will flatten the parts so joinery can be cut.
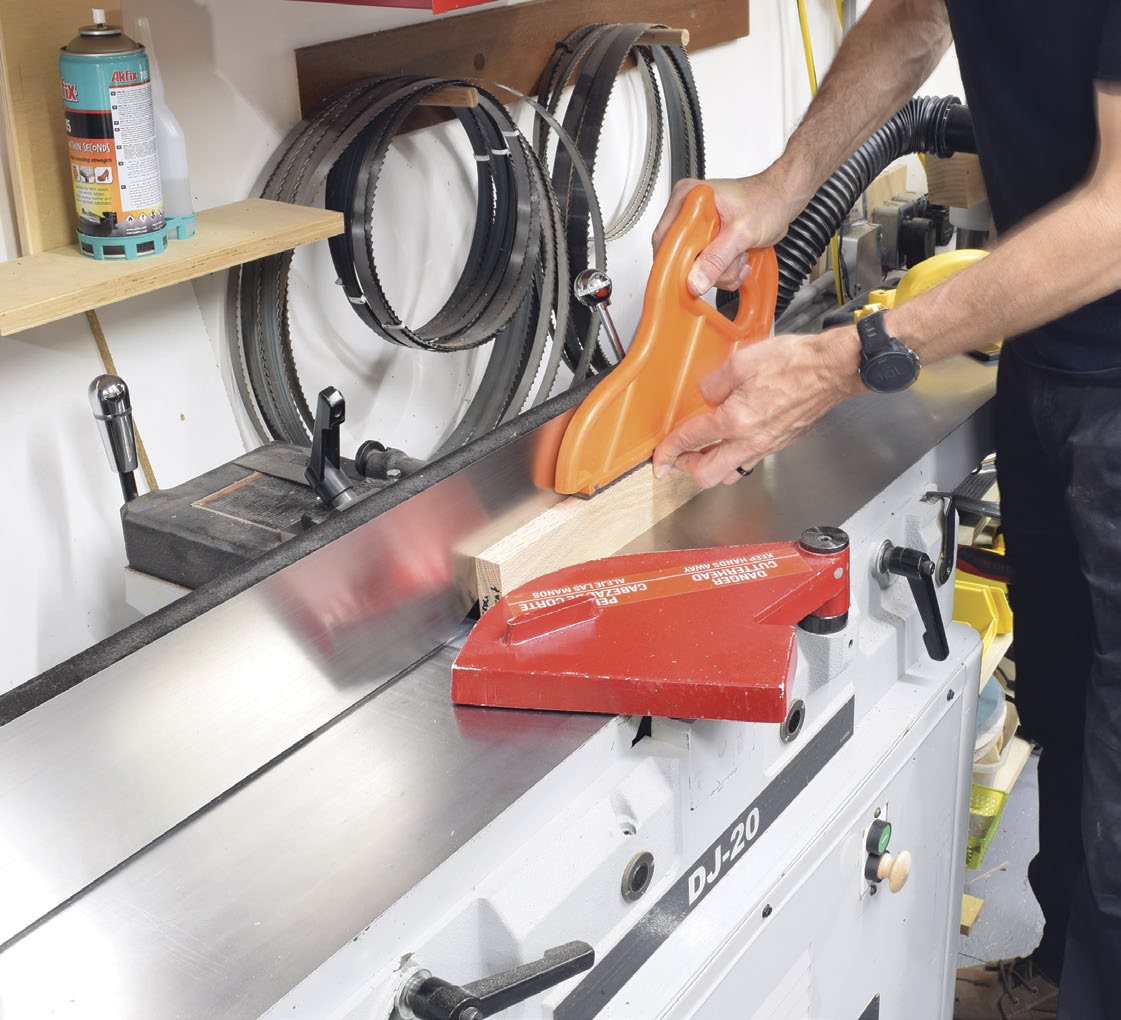
Joint an Edge Square
Bedrosian waits to plane a square edge until both faces have been surfaced. This allows him to run the part in either direction to minimize tear-out.
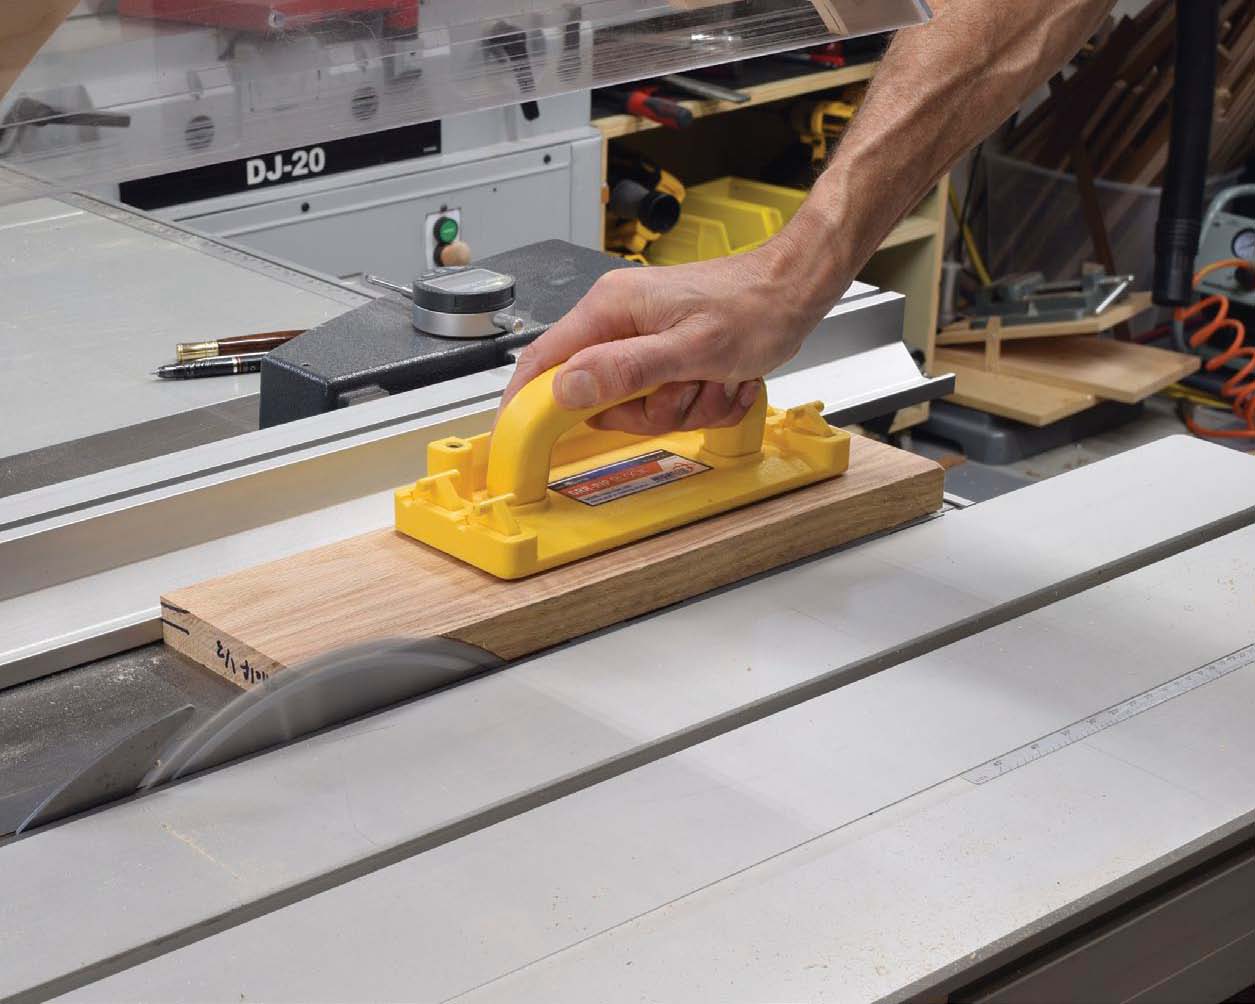
Rip Wider Parts at the Table Saw
The table saw can be used to rip parts that are too thin or too wide for the planer. If you’re ripping narrower workpieces from stock that is much wider, a splitter will help prevent pinching on the outfeed end of the blade. Also, retracting the rip fence so it doesn’t extend past the end of the blade will prevent binding and possible kickback if the workpiece warps as it’s cut. If in doubt, it’s always safer to rip at the bandsaw and then clean up the edge at the jointer or with a handplane.
Plane Narrow Parts Together
Bedrosian groups narrow parts together and planes them all at once so they’re all the same width. He squeezes them
tightly as they enter and exit the planer so they don’t shift.
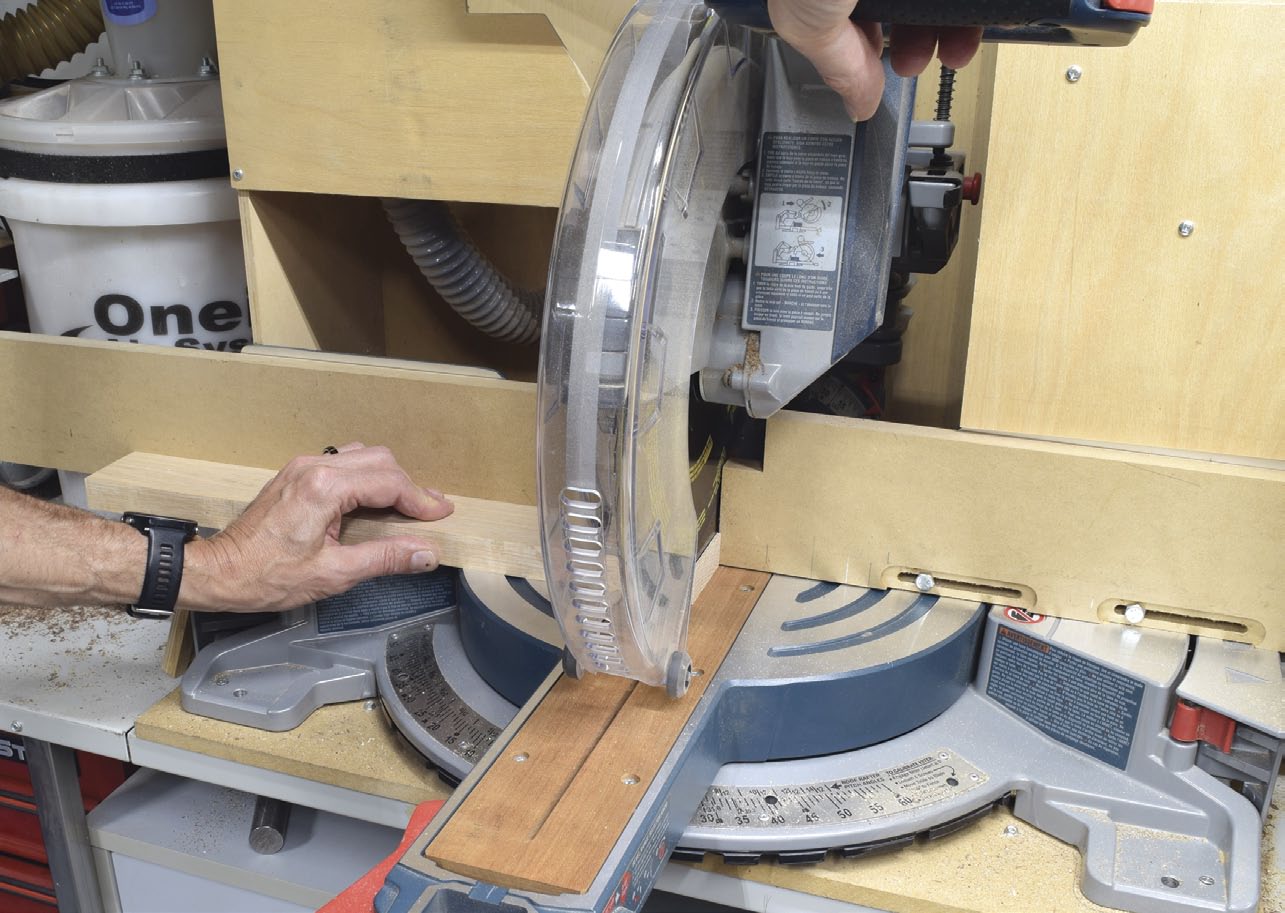
Crosscut to Final Length
The last step is to square up one end of each piece and then cut it to length. Bedrosian typically does this using his sliding table saw, but a chop saw or crosscut sled on a cabinet saw works just as well.
Part layout is an important first step
I buy rough lumber and always get more than I need for a project. This allows me to orient the various parts to give me the best grain, even if it means I end up with more waste. Before beginning the layout, I inspect the ends of the boards for cracks and checks. These may extend further in than is visible, so I typically cut off the end of the board an inch at a time until the offcut cannot be easily broken.
I now start the layout for the various parts, leaving them oversize in length by several inches to account for jointer snipe. I also leave them oversize in width to account for crook or twist that may develop as the parts are milled. I typically leave about 1/8″ to 1/4″ of extra width for every 18″ of length of the part, more if possible. It’s easier to rip a board that’s too wide than to glue two pieces together. The challenge comes when I don’t have quite enough board width to allow this much waste. Depending on factors like the species, how much other boards are twisting and warping, how long the workpiece is and whether I have the ability to make the workpiece a bit narrower or not means I might not leave quite that much extra width on some pieces.
Shorter parts can be combined into longer pieces to avoid waste due to snipe and to make them safer to run through the jointer and planer. They’ll be crosscut to final length at the end of the milling process. It’s possible to combine narrow parts into wider pieces, but they will not always remain straight when they’re ripped to width later. I typically rip a test piece to see how it behaves, so I can estimate how much extra width is needed to joint the piece flat later.
Paying attention to the grain can make a significant difference in the finished look of a piece. For example, if I’m doing a frame and panel, I use straight grain for the rails and stiles and typically use cathedral grain for panels. Curved parts look best if the grain follows the curve. Sometimes the grain doesn’t run parallel to the edge of the board, in which case the part can be laid out at an angle to get the best look. It’s not uncommon for me to try different layouts several times before I’m satisfied with the look of all the parts.
Cut to rough length and width
Long pieces of rough wood are heavy and hard to manage, so I prefer to cut them to length with either a jigsaw or a handheld circular saw. This also reduces the possibility of binding if the boards are twisted and you attempt to cut them at the table saw or chop saw. Depending on your layout, you may only be cutting partway across a board, which is easily done with a jigsaw.
Using a bandsaw is the safest way to rip the parts to width since there’s no risk of kickback. This is especially true if the board is cupped or twisted and won’t sit flat on the table. I typically reference off the bandsaw fence, but I’ll make a freehand cut if the edge isn’t straight or my layout line isn’t parallel to the edge of the board. Depending on how straight I am with the cut, I may make a pass or two at the jointer before I use the fence to cut the opposite edge. The parts are oversize in width so it’s okay if the cut isn’t perfectly straight.
As the boards are cut, tensions are released. This may cause them to twist, bow or cup. This usually isn’t a problem for shorter boards, but longer boards may end up too thin after jointing and planing. It may be possible to rip the piece in half or thirds before machining to maintain the desired thickness. They’ll be glued together later in the same orientation after they’re milled. If this won’t work, I scrap the piece or use it for shorter parts. It’s better to be conservative than to end up with an unusable part.
Before moving on to jointing and planing the faces which will remove any identification marks, there’s one final step. To help me keep track of each part, I transfer any markings to the ends of each board.
Joint one face flat and plane the opposite face parallel
With all the parts rough cut, it’s time to flatten one face at the jointer and then machine the other face flat and parallel to the first face at the planer. Rough lumber will likely have some amount of cup, twist or bow. If a board twists more than about 1/8″ on the jointer table, I use a trick I first learned from my friend Ramon Valdez, a furniture maker in New Mexico. I place a small wooden wedge under the high corner of the trailing edge of the board. This allows me to split the twist in half so I can get the maximum thickness. For bowed boards, place the bowed side up so both ends are resting on the infeed table, which keeps it from rocking. Use a wedge as needed, if the board is also twisted. For thinner parts, be careful not to apply too much downward pressure on the infeed side or the bow will spring back after jointing.
I set my jointer for a relatively light cut (about 1/16″), so it typically takes multiple passes to get a flat face. I don’t have to worry about grain direction for most boards, since I have a spiral cutterhead. If you’re using a straight knife jointer, read the grain and take light passes to minimize tear-out. If chipping is occurring, rotating the board end-for-end will often fix the problem. If you’re milling a difficult species like sapele, which has reversing and interlocking grain, this can be a challenge.
After jointing, run each part through the planer to make the opposite face parallel. I typically remove 1/16″ of wood or less with each pass until I get a flat surface, though that also depends on the density of the species, the width of the board and how sharp your planer blades are. My goal is to remove all the milling marks without getting down to the finished thickness.
I then turn the parts on edge with an inch or more between them and let them acclimate for a day or two. Some parts will warp as internal tensions are released during the milling process and they may continue to move as the moisture content equalizes with the surrounding air. Leaving extra material lets me follow up with a second pass at the jointer and planer to make them flat again and to get them to their finished thickness. If I’m not going to be using the parts for a week or more, I’ll delay the final thicknessing until I’m ready to use them.
If the boards are considerably thicker than the finished thickness, I make multiple passes at the planer or use the bandsaw to remove excess wood. Either way, it’s best to remove about the same amount of material from both faces. This helps to balance out the tension in the board, which lessens the chance of warping. Stop before getting to the final thickness and let the parts acclimate on edge for a day or two as described above.
Joint one edge square and machine to finished width
With both faces flat and parallel, it’s time to joint one of the edges. I typically pick the edge that’s the straightest, but if the wood looks nicer near the opposite edge, I’ll start there. Some woodworkers start with the edge that has a slight hollow in the centre, so the board doesn’t rock while it’s being jointed. Be sure your fence is square to the outfeed table and take light passes. If you get tear-out, turn the board around and run it in the opposite direction. Check to be sure the entire edge has been surfaced before moving on.
You can use your table saw or bandsaw and planer to take the parts to their finished width. For narrow parts (between 1/2″ and 3″) and I rip them 1/16″ over width at the bandsaw and then use the planer to take them to the final width. If I have multiple parts that are the same width, I’ll group them together and run them through the planer all at once to ensure they’re identical.
Wider parts get ripped at the table saw with a sharp rip blade. This leaves a reasonable surface which, if needed, can be cleaned up with a hand plane or a very light pass at the jointer.
Cut to finished length
The final step is to crosscut the pieces to their finished length. I do this at my sliding table saw using a stop to ensure each piece is the correct length. A crosscut sled on a cabinet saw or a chop saw can also be used. Make a test cut to ensure your setup is cutting square. If needed, use a backer board to prevent blowout of the wood fibres.

David Bedrosian - david.g.bedrosian@gmail.com
David designs and builds woodworking projects for family and friends in his basement shop. His portfolio of work is diverse, ranging from projects as small as turned Christmas ornaments to furniture as large as a 7-ft.-dia. dining table.